2013 MERCEDES-BENZ G-CLASS SUV instrument cluster
[x] Cancel search: instrument clusterPage 260 of 364
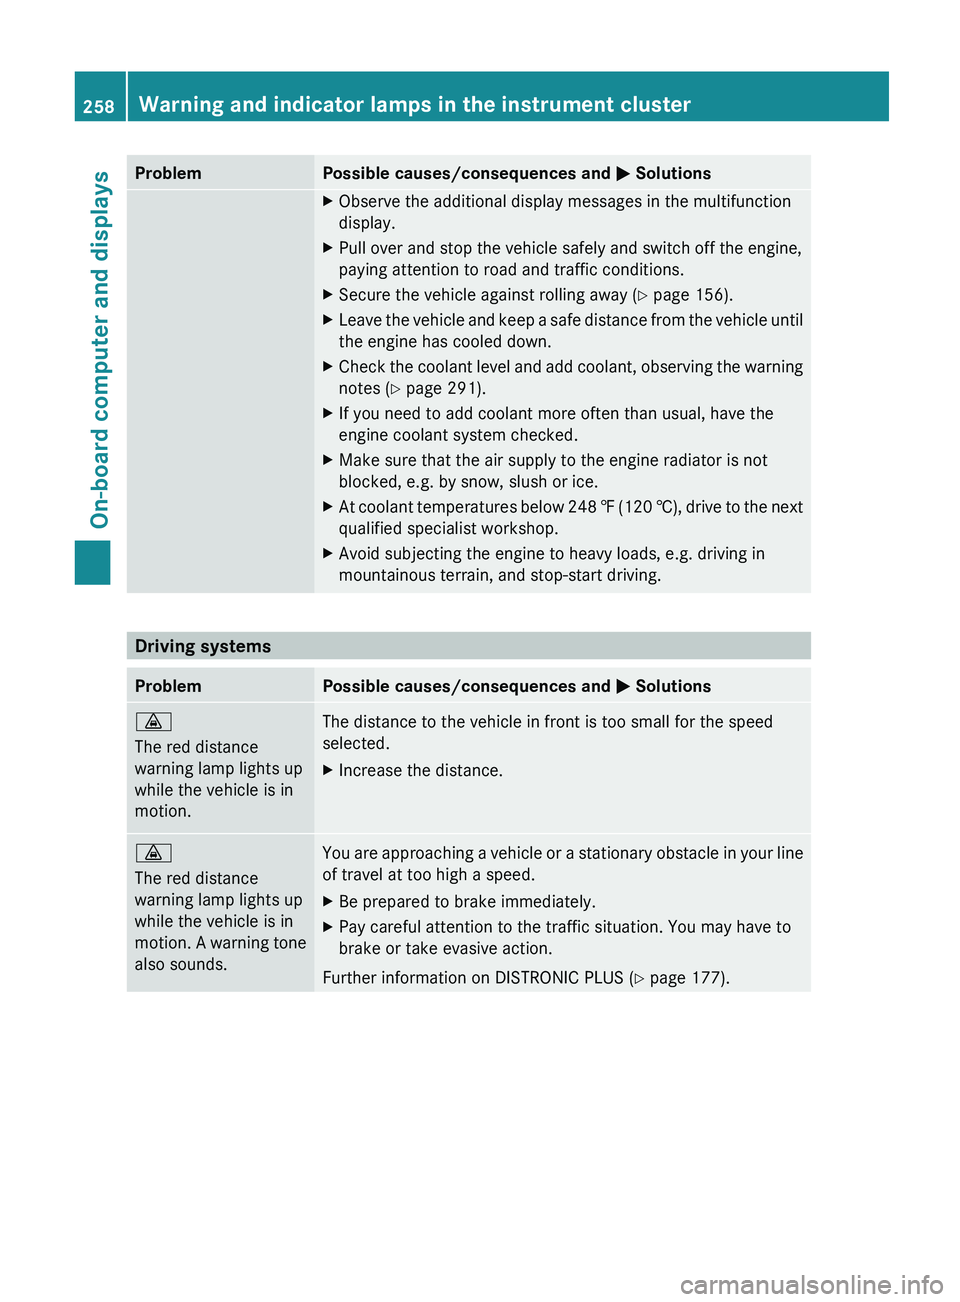
Problem Possible causes/consequences and
0050 SolutionsX
Observe the additional display messages in the multifunction
display.
X Pull over and stop the vehicle safely and switch off the engine,
paying attention to road and traffic conditions.
X Secure the vehicle against rolling away ( Y page 156).
X Leave the vehicle and keep a safe distance from the vehicle until
the engine has cooled down.
X Check the coolant level and add coolant, observing the warning
notes (Y page 291).
X If you need to add coolant more often than usual, have the
engine coolant system checked.
X Make sure that the air supply to the engine radiator is not
blocked, e.g. by snow, slush or ice.
X At coolant temperatures below 248 ‡ (120 †),
drive to the next
qualified specialist workshop.
X Avoid subjecting the engine to heavy loads, e.g. driving in
mountainous terrain, and stop-start driving. Driving systems
Problem Possible causes/consequences and
0050 Solutions00BA
The red distance
warning lamp lights up
while the vehicle is in
motion.
The distance to the vehicle in front is too small for the speed
selected.
X
Increase the distance. 00BA
The red distance
warning lamp lights up
while the vehicle is in
motion. A warning
tone
also sounds. You are approaching a vehicle or a stationary obstacle in your line
of travel at too high a speed.
X
Be prepared to brake immediately.
X Pay careful attention to the traffic situation. You may have to
brake or take evasive action.
Further information on DISTRONIC PLUS ( Y page 177).258
Warning and indicator lamps in the instrument clusterOn-board computer and displays
Page 261 of 364
Tires
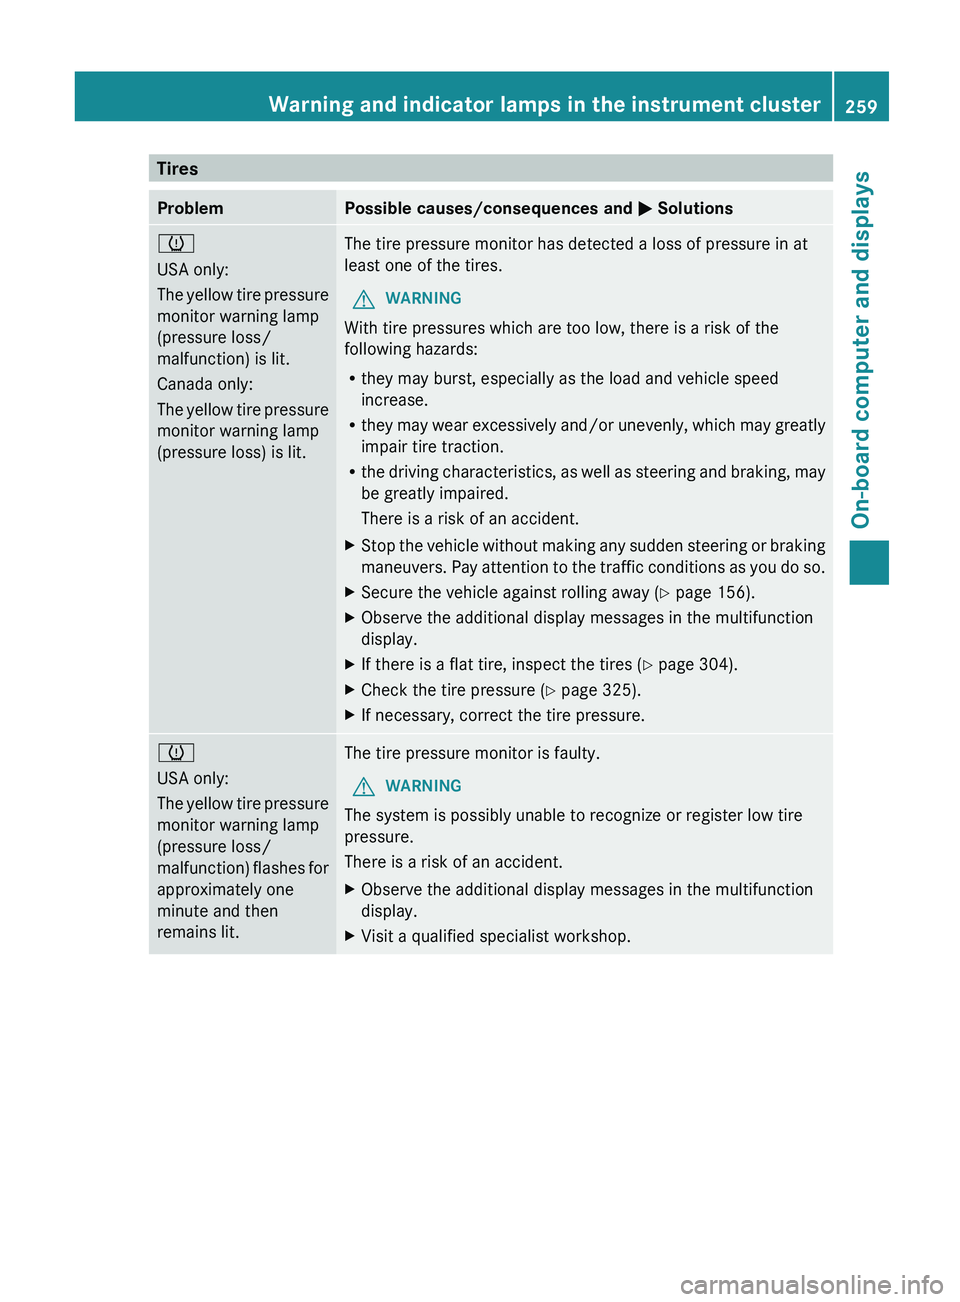
Problem Possible causes/consequences and
0050 Solutions0077
USA only:
The yellow tire
pressure
monitor warning lamp
(pressure loss/
malfunction) is lit.
Canada only:
The
yellow tire pressure
monitor warning lamp
(pressure loss) is lit. The tire pressure monitor has detected a loss of pressure in at
least one of the tires.
G WARNING
With tire pressures which are too low, there is a risk of the
following hazards:
R they may burst, especially as the load and vehicle speed
increase.
R they may wear
excessively
and/or unevenly, which may greatly
impair tire traction.
R the driving characteristics, as well as steering and braking, may
be greatly impaired.
There is a risk of an accident.
X Stop the vehicle without making any sudden steering or braking
maneuvers. Pay attention to
the traffic conditions as you do so.
X Secure the vehicle against rolling away ( Y page 156).
X Observe the additional display messages in the multifunction
display.
X If there is a flat tire, inspect the tires ( Y page 304).
X Check the tire pressure (Y page 325).
X If necessary, correct the tire pressure. 0077
USA only:
The yellow tire
pressure
monitor warning lamp
(pressure loss/
malfunction)
flashes for
approximately one
minute and then
remains lit. The tire pressure monitor is faulty.
G WARNING
The system is possibly unable to recognize or register low tire
pressure.
There is a risk of an accident.
X Observe the additional display messages in the multifunction
display.
X Visit a qualified specialist workshop. Warning and indicator lamps in the instrument cluster
259
On-board computer and displays Z
Page 294 of 364
X
Park the vehicle on a level surface.
Only check the coolant level when the
vehicle is on a
level surface and the engine
has cooled down.
X Turn the SmartKey to position
2 (Y page 139) in the ignition lock.
X Check the coolant temperature display in
the instrument cluster.
The coolant temperature must be below
158 ‡ (70 †).
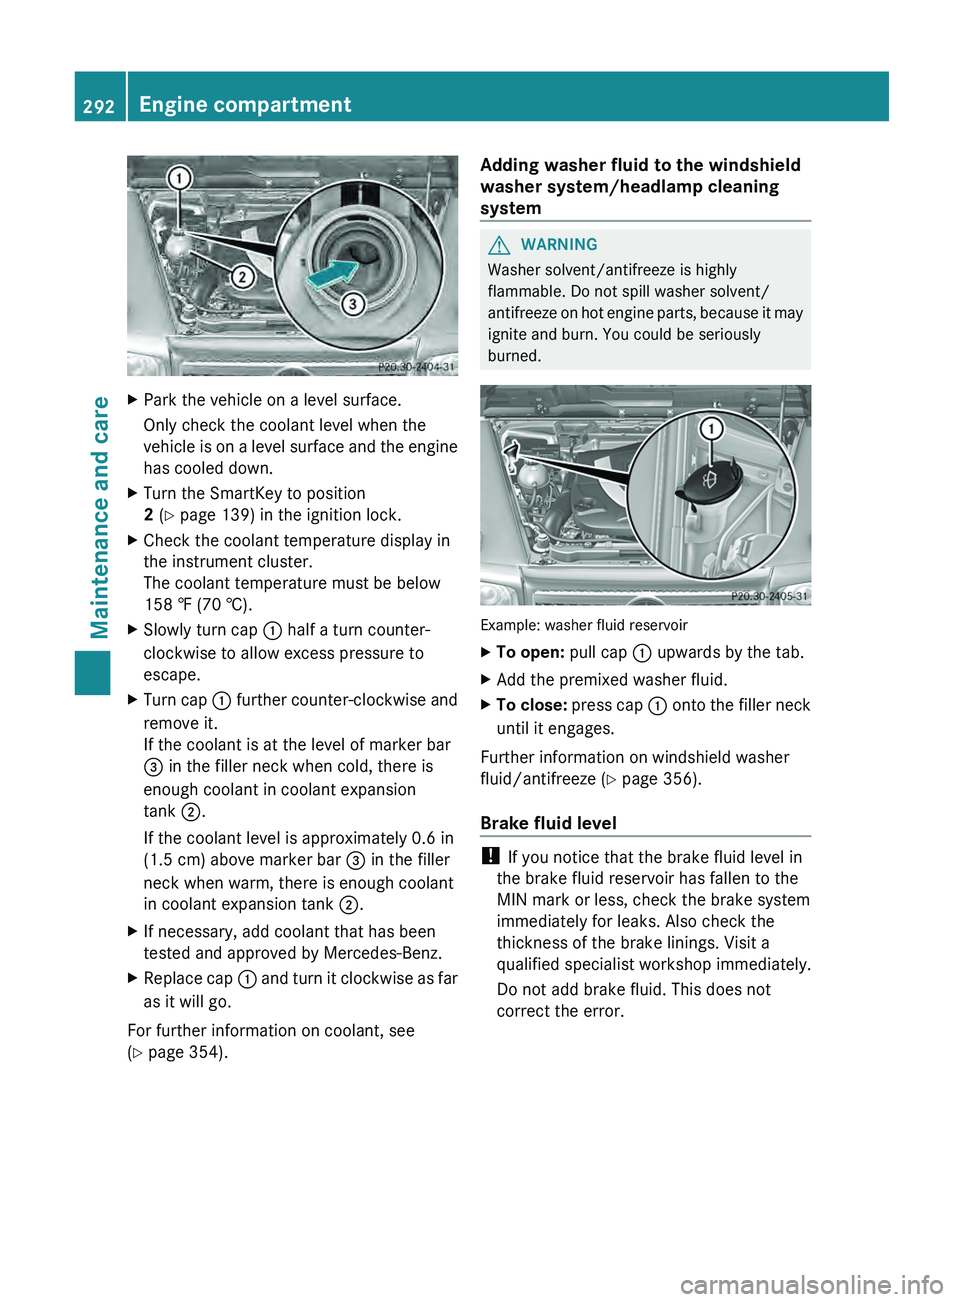
X Slowly turn cap 0043 half a turn counter-
clockwise to allow excess pressure to
escape.
X Turn cap 0043
further counter-clockwise and
remove it.
If the coolant is at the level of marker bar
0087
in the filler neck when cold, there is
enough coolant in coolant expansion
tank 0044.
If the coolant level is approximately 0.6 in
(1.5 cm) above marker bar 0087 in the filler
neck when warm, there is enough coolant
in coolant expansion tank 0044.
X If necessary, add coolant that has been
tested and approved by Mercedes-Benz.
X Replace cap 0043 and turn
it
clockwise as far
as it will go.
For further information on coolant, see
(Y page 354). Adding washer fluid to the windshield
washer system/headlamp cleaning
system G
WARNING
Washer solvent/antifreeze is highly
flammable. Do not spill washer solvent/
antifreeze on hot engine
parts, because it may
ignite and burn. You could be seriously
burned. Example: washer fluid reservoir
X
To open: pull cap 0043 upwards by the tab.
X Add the premixed washer fluid.
X To close: press cap
0043 onto
the filler neck
until it engages.
Further information on windshield washer
fluid/antifreeze ( Y page 356).
Brake fluid level !
If you notice that the brake fluid level in
the brake fluid reservoir has fallen to the
MIN mark or less, check the brake system
immediately for leaks. Also check the
thickness of the brake linings. Visit a
qualified specialist workshop immediately.
Do not add brake fluid. This does not
correct the error. 292
Engine compartment
Maintenance and care
Page 308 of 364
over the battery. Keep children away from
batteries. Wash battery
acid
immediately with
water and seek medical attention.
! Have the battery checked regularly at a
qualified specialist workshop.
Observe the service intervals in the
Maintenance Booklet or contact a qualified
specialist workshop for more information.
! You should have all work involving the
battery carried out at a qualified specialist
workshop. In the exceptional case that it is
necessary for you to disconnect the battery
yourself, make sure that:
R you switch off the engine and remove the
SmartKey. Check that all the indicator
lamps in the instrument cluster are off.
Otherwise, electronic components, such
as the alternator, may be damaged.
R you first remove the negative terminal
clamp and then the positive terminal
clamp. Never swap the terminal clamps.
Otherwise, the vehicle's electronic
system may be damaged.
R on vehicles with automatic transmission,
the transmission is locked in position P
after disconnecting the battery. The
vehicle is secured against rolling away.
You can then no longer move the vehicle.
The battery and the cover of the positive
terminal clamp must be installed securely
during operation. H
Environmental note Batteries contain dangerous
substances. It is against the
law to dispose of them with
the household rubbish. They
must be collected
separately
and recycled to protect the
environment. Dispose of batteries in an
environmentally friendly
manner. Take discharged
batteries to a qualified
specialist workshop or a special collection point for
used batteries.
In order for the battery to achieve the
maximum possible service life,
it must always
be sufficiently charged.
Comply with safety precautions and take
protective measures when handling
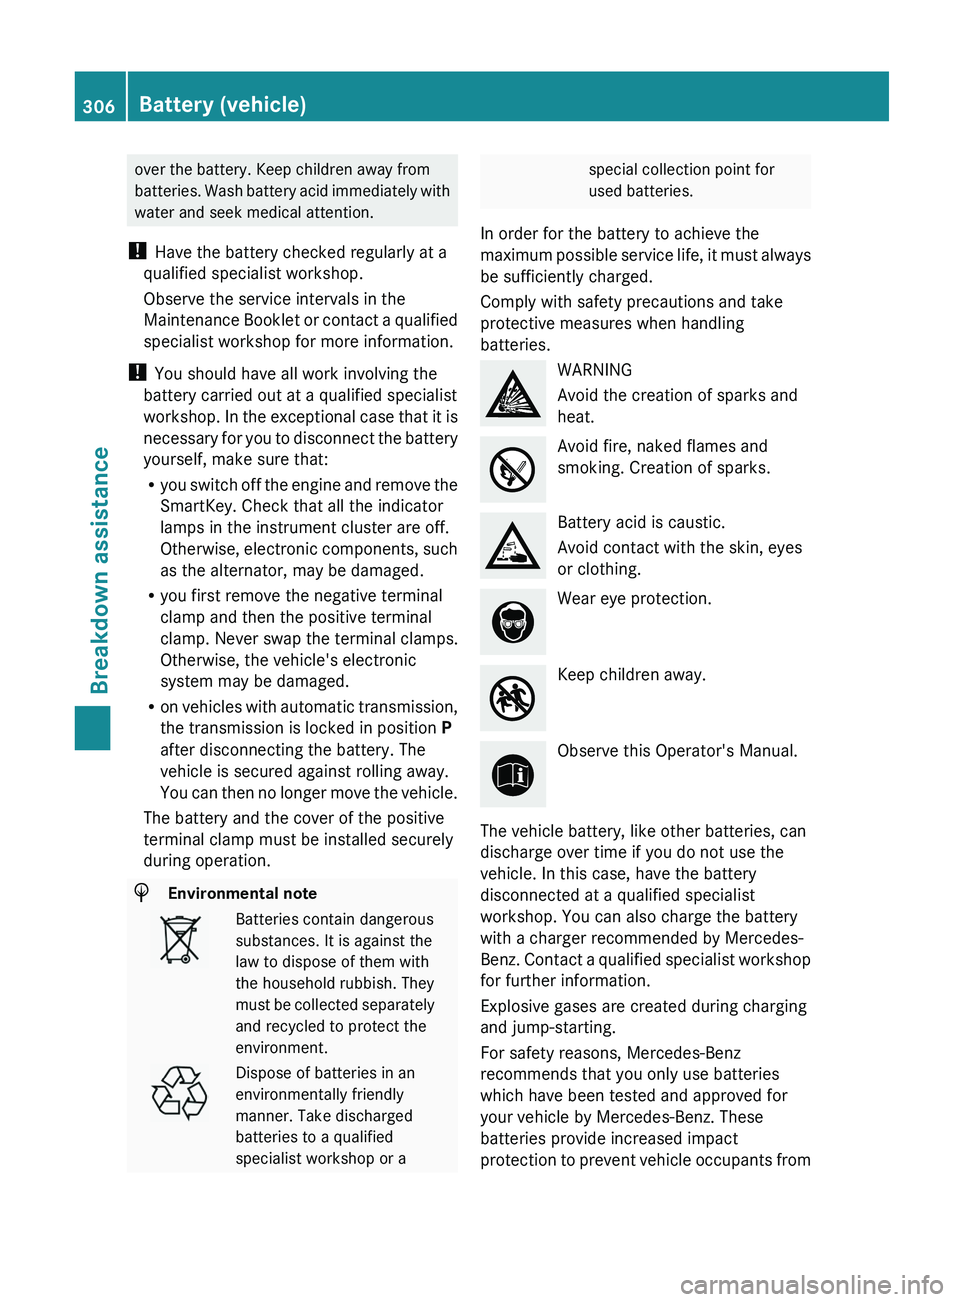
batteries. WARNING
Avoid the creation of sparks and
heat.
Avoid fire, naked flames and
smoking. Creation of sparks.
Battery acid is caustic.
Avoid contact with the skin, eyes
or clothing.
Wear eye protection.
Keep children away.
Observe this Operator's Manual.
The vehicle battery, like other batteries, can
discharge over time if you do not use the
vehicle. In this case, have the battery
disconnected at a qualified specialist
workshop. You can also charge the battery
with a charger recommended by Mercedes-
Benz. Contact a qualified
specialist workshop
for further information.
Explosive gases are created during charging
and jump-starting.
For safety reasons, Mercedes-Benz
recommends that you only use batteries
which have been tested and approved for
your vehicle by Mercedes-Benz. These
batteries provide increased impact
protection to prevent vehicle occupants from 306
Battery (vehicle)
Breakdown assistance
Page 315 of 364
Towing in the event of malfunctions
General notes !
If you are removing the propeller shaft,
use M10 nuts as spacers on the M8 bolts
and secure them with M8 nuts.
New self-locking nuts must be used when
the propeller shafts are refitted.
X Observe the safety notes as you do so
(Y page 310).
i Consult an authorized Mercedes-Benz
Center.
Engine damage, gear damage or
electrical malfunctions X
Move the selector lever to
position N(Y page 145).
X Shift the transfer case to
neutral (Y page 200).
In the event of damage to the transfer
case Have the propeller shafts between the axles
and the transfer case removed.
In the event
of
damage to the front axleHave the propeller shaft between the rear
axle and the transfer case removed.
Have the vehicle towed with the front axle
raised.
In the event of damage to the rear axle
Have the propeller shaft between the front
axle and the transfer case removed.
Have the vehicle towed with the rear axle
raised and with wheel rollers under the front
axle. Fuses
Important safety notes
G
WARNING
Only use fuses that have been approved for
Mercedes-Benz vehicles and that have the
correct fuse rating for the systems
concerned. Do not attempt
to repair or bridge
faulty fuses. Using fuses that have not been
approved or attempting to repair or bridge
faulty fuses could cause the fuse to be
overloaded and result in a fire. Have the cause
traced and rectified at a qualified specialist
workshop.
! Only use fuses that have been approved
for Mercedes-Benz vehicles and which
have the correct fuse rating for the system
concerned. Otherwise, components or
systems could be damaged.
The fuses in your vehicle serve to close down
faulty circuits. If a fuse blows, all the
components on the circuit and their functions
stop operating.
Blown fuses must be replaced with fuses of
the same rating, which you can recognize by
the color and value. The fuse ratings are listed
in the fuse allocation chart.
i If a fuse has blown, contact a breakdown
service or an authorized Mercedes-Benz
Center.
If a newly inserted fuse also blows, have the
cause traced and rectified at a qualified
specialist workshop, e.g. an authorized
Mercedes-Benz Center. Before changing a fuse
X Park the vehicle and apply the parking
brake.
X Switch off all electrical consumers.
X Remove the SmartKey from the ignition
lock.
All indicator lamps in
the instrument cluster
must be off. Fuses
313
Breakdown assistance Z
Page 328 of 364

malfunction indicator is combined with the
low tire pressure telltale. When the system
detects a malfunction, the warning lamp will
flash for approximately a minute and then
remain continuously illuminated. This
sequence will be repeated every time the
vehicle is started as long as the malfunction
exists.
When the malfunction
indicator
is illuminated,
the system may not be able to detect or signal
low tire pressure as intended. TPMS
malfunctions may occur for a variety of
reasons, including the installation of
incompatible replacement or alternate tires
or wheels on the vehicle that prevent the
TPMS from functioning properly. Always
check the TPMS malfunction telltale after
replacing one or more tires or wheels on your
vehicle to ensure that the replacement or
alternate tires and wheels allow the TPMS to
continue to function properly.
It is the driver's responsibility to set the tire
pressure to the recommended cold tire
pressure suitable for the operating situation
(Y page 322). Note that the correct tire
pressure for the current operating situation
must first be taught-in to the tire pressure
monitor. If there is a substantial loss of
pressure, the warning threshold for the
warning message is aligned to the reference
values taught-in. Restart the tire pressure
monitor after adjusting to the cold tire
pressure ( Y page 327). The current
pressures are saved as new reference values.
As a result, a warning message will appear if
the tire pressure drops significantly.
The tire pressure monitor does not warn you
of an incorrectly set tire pressure. Observe
the notes on the recommended tire pressure
(Y page 322).
The tire pressure monitor is not able to warn
you of a sudden loss of pressure, e.g. if the
tire is penetrated by a foreign object. In the
event of a sudden loss of pressure, bring the
vehicle to a halt by braking carefully. Avoid
abrupt steering maneuvers. If a tire pressure monitor system is installed,
the vehicle's wheels have sensors installed
that monitor the
tire
pressures in all four tires.
The tire pressure monitor warns you if the
pressure drops in one or more of the tires. The
tire pressure monitor only functions if the
correct wheel electronics units are installed
on each wheel.
The tire pressure monitor has a yellow
warning lamp in the instrument cluster for
indicating pressure loss/malfunctions (USA)
or pressure loss (Canada). Whether the
warning lamp flashes or lights up indicates
whether a tire pressure is too low or the tire
pressure monitor is malfunctioning:
R if the warning lamp is lit continuously, the
tire pressure on one or more tires is
significantly too low. The tire pressure
monitor is not malfunctioning.
R USA only: if the warning lamp flashes for
around a minute and then remains lit
constantly, the tire pressure monitor is
malfunctioning.
Information on tire pressures is displayed in
the multifunction display. After a few minutes
of driving, the current tire pressure of each
tire is shown in the multifunction display.
USA only: if there is a malfunction with the
tire pressure monitor it can take more than
ten minutes until the malfunction is shown by
the tire pressure warning lamp flashing for
approximately one minute and then lighting
up continuously. When the malfunction has
been rectified, the tire pressure warning lamp
goes out after a few minutes of driving.
The tire pressure values indicated by the on-
board computer may differ from those
measured at a gas station with a pressure
gauge. The tire pressures shown by the on-
board computer refer to those measured at
sea level. At high altitudes, the tire pressure
values indicated by a pressure gauge are
higher than those shown by the on-board
computer. In this case, do not reduce the tire
pressures. 326
Tire pressure
Wheels and tires
Page 329 of 364

The operation of the tire pressure monitor can
be affected by interference from radio
transmitting equipment (e.g. radio
headphones, two-way radios) that may be
being operated in or near the vehicle.
i
USA only:
This device complies with part 15 of the
FCC Rules. Operation is subject to the
following two conditions:
1. This device may not cause interference,
and
2. this device
must accept any interference
received, including interference that may
cause undesired operation of the device.
Any unauthorized modification to this
device could void the user's authority to
operate the equipment.
i Canada only:
This device complies with RSS-210 of
Industry Canada. Operation is subject to
the following two conditions:
1. This device may not cause interference,
and
2. this device must accept any interference
received, including interference that may
cause undesired operation.
Any unauthorized modification to this
device could void the user's authority to
operate the equipment.
Checking tire pressure electronically X
Make sure that the SmartKey is in
position 2 (Y page 139) in
the ignition lock.
X Press the 0059 or 0065 button on the
steering wheel to select the Serv. menu.
X Press the 0063 or 0064 button to select
Tire Pressure.
X Press button 0076.
The current tire pressure
for each wheel will
be displayed in the multifunction display.
If the vehicle has been parked for over
20 minutes, the message Tire pressure will be displayed after driving a
few minutes appears.
After a teach-in period, the tire pressure
monitor automatically recognizes
new
wheels
or new sensors. As long as a clear allocation
of the tire pressure values to the individual
wheels is not possible, the Tire Pressure
Monitor Active display message is shown
instead of the tire pressure display. The tire
pressures are already being monitored.
i If a spare wheel is mounted, the system
may continue to show the tire pressure of
the wheel that has been removed for a few
minutes. If this occurs, note that the value
displayed for the position where the spare
wheel is mounted is not the same as the
spare wheel's current tire pressure.
Tire pressure monitor warning
messages If the tire pressure monitor detects a
significant pressure loss
on
one or more tires,
a warning message is shown in the
multifunction display. A warning tone also
sounds and the tire pressure warning lamp
lights up in the instrument cluster.
Each tire that is affected by a significant loss
of pressure is highlighted in the pressure
display.
X If the Correct Tire PressureCorrect
Tire Pressure message appears in the
multifunction display, check the tire
pressure on all four
wheels and correct it if
necessary.
i If the wheel positions on the vehicle are
interchanged, the tire pressures may be
displayed for the wrong positions for a
short time. This is rectified after a few
minutes of driving, and the tire pressures
are displayed for the correct positions.
Restarting the tire pressure monitor When you restart the tire pressure monitor,
all existing warning
messages
are deleted and
the warning lamps go out. The monitor uses Tire pressure
327
Wheels and tires Z
Page 350 of 364
Useful information
i This Operator's Manual describes all
models and all standard and optional
equipment of your vehicle available at the
time of publication of the Operator's
Manual. Country-specific differences are
possible. Please note that
your vehicle may
not be equipped with all features
described. This also applies to safety-
related systems and functions.
i Read the information on qualified
specialist workshops: ( Y page 23).Genuine Mercedes-Benz parts
G
WARNING
Driving safety may be impaired if non-
approved parts, tires and wheels or safety-
relevant accessories are used.
This could lead to malfunctions in safety-
relevant systems, e.g. the
brake system. This
could cause you to lose control of your vehicle
and cause an accident.
For this reason, Mercedes-Benz recommends
that you use genuine Mercedes-Benz parts or
parts of equal quality. Only use tires, wheels
and accessories that have been specifically
approved for your vehicle. H
Environmental note
Daimler AG also supplies reconditioned major
assemblies and parts which are of the same
quality as new parts.
They are covered by the
same Limited Warranty entitlements as new
parts.
! The use of non-approved parts could
impair the vehicle's safety. For this reason,
Mercedes-Benz recommends genuine
Mercedes-Benz parts and approved
conversion parts and accessories for your
vehicle model. !
Air bags and Emergency Tensioning
Devices, as well as control units and
sensors for these restraint
systems, may be
installed in the following areas of your
vehicle:
R doors
R door pillars
R door sills
R seats
R cockpit
R instrument cluster
R center console
Do not install accessories such as audio
systems in these areas. Do not carry out
repairs or welding. You could impair the
operating efficiency of the restraint
systems.
Have aftermarket accessories installed at
a qualified specialist workshop.
Genuine Mercedes-Benz parts are subject to
strict quality control. Each part has been
specially developed, manufactured or
selected for Mercedes-Benz vehicles and
fine-tuned for them. Only genuine Mercedes-
Benz parts should therefore be used.
More than 300,000 different genuine parts
are available for Mercedes-Benz models.
All Mercedes-Benz Centers maintain a supply
of genuine Mercedes-Benz parts for
necessary service and repair work. In
addition, strategically located parts delivery
centers provide quick and reliable parts
service.
Always specify the vehicle identification
number (VIN) ( Y page 349) and the engine
number (Y page 350) when ordering genuine
Mercedes-Benz parts. Warranty
Your vehicle is covered
under the terms of the
warranties printed in the Service and
Warranty Information booklet. 348
Warranty
Technical data