2013 MERCEDES-BENZ G-CLASS SUV ESP
[x] Cancel search: ESPPage 138 of 364
Setting the rear-compartment air
vents
X
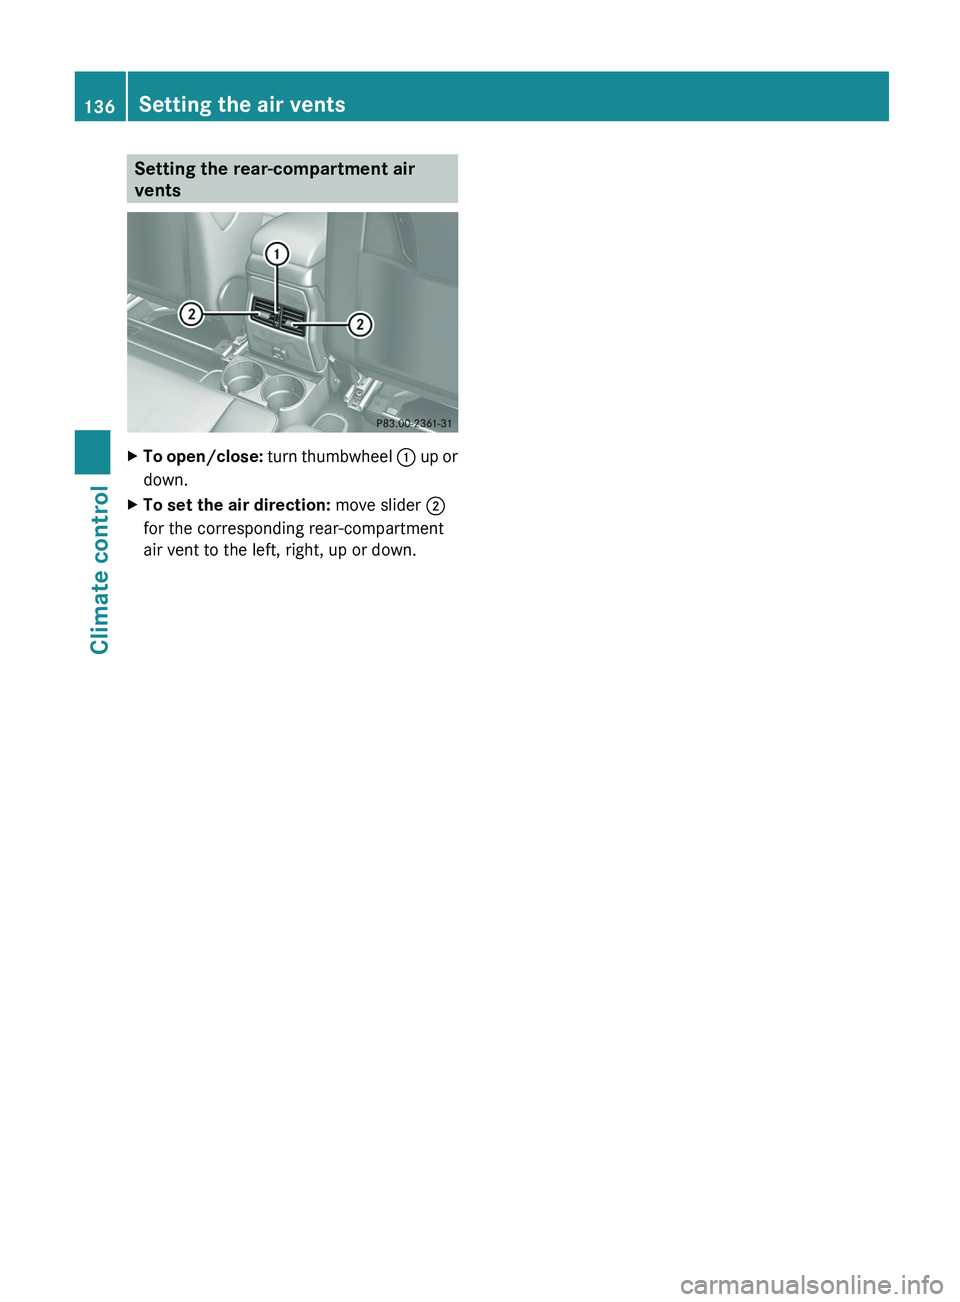
To open/close: turn thumbwheel 0043 up or
down.
X To set the air direction: move slider 0044
for the corresponding rear-compartment
air vent to the left, right, up or down. 136
Setting the air vents
Climate control
Page 140 of 364
Useful information
i This Operator's Manual describes all
models and all standard and optional
equipment of your vehicle available at the
time of publication of the Operator's
Manual. Country-specific differences are
possible. Please note that
your vehicle may
not be equipped with all features
described. This also applies to safety-
related systems and functions.
i Read the information on qualified
specialist workshops: ( Y page 23).Breaking-in notes
Important safety notes
New and replaced brake pads and discs only
reach their optimum braking effect after
several hundred kilometers of driving.
Compensate for this by
applying greater force
to the brake pedal. The first 1,000 miles (1,500 km)
The more you look
after the engine when it is
new, the more satisfied you will be with its
performance in the future.
R You should therefore drive at varying
vehicle and engine speeds for the first
1,000 miles (1,500 km).
R Avoid heavy loads, e.g. driving at full
throttle, during this period.
R Change gear in good time, before the
tachometer needle is 00C3 of the way to the
red area of the tachometer.
R Do not manually shift to a lower gear to
brake the vehicle.
R If possible, do not depress the accelerator
pedal past the point of resistance
(kickdown).
R Only select shift ranges 3, 2 or 1 when
driving slowly, e.g. in mountainous terrain. After 1,000 miles (1,500 km), you can
increase the engine
speed
gradually and bring
the vehicle up to full speed.
Additional breaking-in notes for AMG
vehicles:
R Do not drive faster than 85 mph
(140 km/h for the first 1,000 miles
(1,500 km)
R Only allow the engine to reach a maximum
engine speed of 4,500 rpm briefly.
R Change gear in good time.
R Avoid driving off-road before the
differential oil change at 2,000 miles
(3,000 km).
R Ideally, drive for the first
1,000 miles(1,500 km) in drive program C.
i You should also observe these breaking-
in notes if the engine or parts of the drive
train on your vehicle have been replaced.
i Always observe the respective speed
limits. AMG vehicles with rear axle locking
differential
To improve the protection of the differential,
change the oil after a break-in distance of
2,000 miles (3,000 km). This oil change will
lengthen the service life of the differential.
Have the oil change
carried out at a qualified
specialist workshop. Mercedes-Benz
recommends that you use an authorized
Mercedes-Benz Center for this purpose. Driving
Important safety notes
G
WARNING
Objects in the driver's footwell can restrict the
pedal travel or obstruct a depressed pedal.
The operating and road safety of the vehicle
is jeopardized. There is a risk of an accident. 138
Driving
Driving and parking
Page 143 of 364
!
If a warning tone sounds and the
Release Park. Brake message appears
in the multifunction display, the parking
brake is still applied. Release the parking
brake.
X Depress the brake pedal and keep it
depressed.
X Shift the automatic transmission to
position D or R.
i Before driving off, wait until the gear
change is fully completed.
X Release the parking brake ( Y page 157).
X Release the brake pedal.
X Carefully depress the accelerator pedal.
i It is only possible to shift the automatic
transmission from position P to a different
position if you depress the brake pedal.
Only then is the selector lever lock
released.
i The vehicle locks centrally
once you have
pulled away. The locking knobs in the doors
drop down.
You can open the doors from the inside at
any time.
You can also deactivate the automatic
locking feature (Y page 220).
i Upshifts take place at higher engine
speeds after a cold start. This helps the
catalytic converter to reach its operating
temperature more quickly.
Hill start assist G
WARNING
After a short time, hill start assist will no
longer brake your vehicle and it could roll
away. There is a
risk of an accident and injury.
Therefore, quickly move your foot from the
brake pedal to the accelerator pedal. Never
leave the vehicle when it is held by hill start
assist.
Hill start assist helps you when pulling away
forwards or in reverse on an uphill gradient. It holds the vehicle for a short time after you
have
removed your foot
from the brake pedal.
This gives you enough time to move your foot
from the brake pedal to the accelerator pedal
and to depress it before the vehicle begins to
roll.
X Take your foot off the brake pedal.
i Once you have taken your foot off the
brake pedal, the vehicle is held for around
one second.
X Pull away.
Hill start assist will not function if:
R you are pulling away on a level road or on
a downhill gradient.
R the transmission is in position N.
R the parking brake is applied.
R ESP ®
is malfunctioning. ECO start/stop function (AMG
vehicles)
Important safety notes G
WARNING
If the engine is switched off automatically and
you exit the vehicle, the engine is restarted
automatically. The vehicle may
begin moving.
There is a risk of accident and injury.
If you wish to exit the vehicle, always turn off
the ignition and secure the vehicle against
rolling away.
General notes The ECO start/stop function is only available
for the G 63 AMG.
The ECO start/stop function switches the
engine off automatically when the vehicle
stops moving.
The engine starts automatically when the
driver wants to pull away again. The ECO
start/stop function thereby helps you to
reduce the fuel consumption and emissions
of your vehicle. Driving
141
Driving and parking Z
Page 146 of 364
Problems with the engine
Problem Possible causes/consequences and
0050 SolutionsThe engine does not
start.
The starter
motor
can be heard. R
There is a malfunction in the engine electronics.
R There is a malfunction in the fuel supply.
X Turn the SmartKey back to position 0
in the
ignition lock before
attempting to start the engine again.
X Try to start the engine again (Y page 140). Avoid excessively
long and frequent attempts to start the engine, as this
(Y page 139) will drain the battery.
If the engine does not start after several attempts:
X Consult a qualified specialist workshop. The engine does not
start. The starter
motor
can be heard. The
yellow reserve fuel
warning lamp is lit and
the needle of the fuel
gauge
display shows 0. The fuel tank is empty.
X
Refuel the vehicle. The engine does not
start. You cannot hear
the starter motor. The on-board voltage is too low because the battery is too weak
or discharged.
X
Jump-start the vehicle (Y page 308).
If the engine does not start despite attempts to jump-start it:
X Consult a qualified specialist workshop. The starter motor was exposed to a thermal load that was too high.
X
Allow the starter motor to cool down for approximately two
minutes.
X Try to start the engine again.
If the engine still does not start:
X Consult a qualified specialist workshop. The engine is not
running smoothly and
is misfiring. There is a malfunction in the engine electronics or in a mechanical
component of the engine management system.
X
Only depress the accelerator pedal slightly.
Otherwise, non-combusted fuel may get into the catalytic
converter and damage it.
X Have the cause rectified immediately at a qualified specialist
workshop.144
DrivingDriving and parking
Page 150 of 364
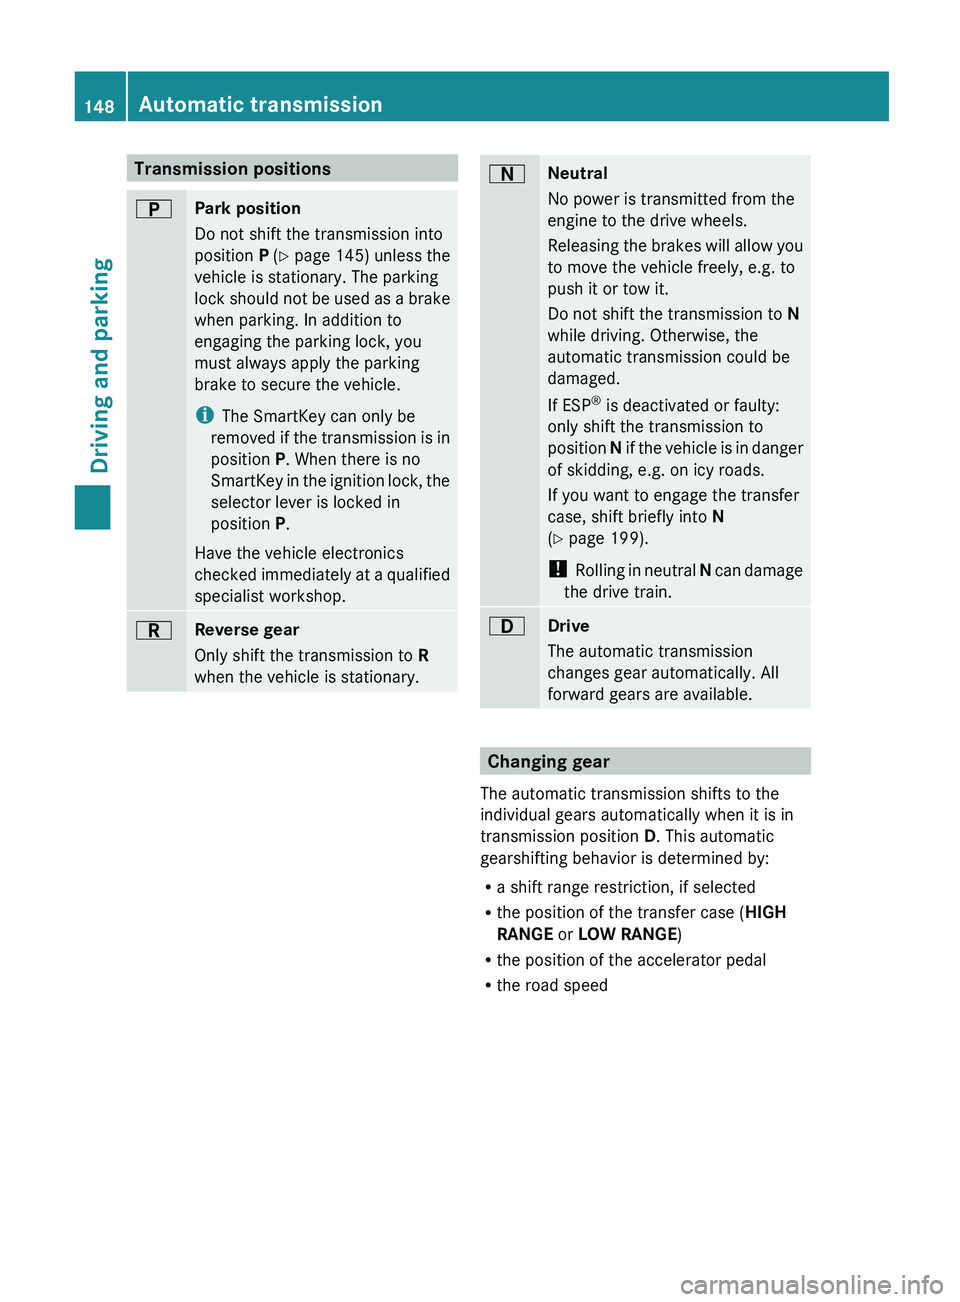
Transmission positions
0045
Park position
Do not shift the transmission into
position
P (Y page 145) unless the
vehicle is stationary. The parking
lock should not
be used as a brake
when parking. In addition to
engaging the parking lock, you
must always apply the parking
brake to secure the vehicle.
i The SmartKey can only be
removed if the transmission is in
position P. When there is no
SmartKey in the ignition lock, the
selector lever is locked in
position P.
Have the vehicle electronics
checked immediately at a qualified
specialist workshop. 0046
Reverse gear
Only shift the transmission to
R
when the vehicle is stationary. 0044
Neutral
No power is transmitted from the
engine to the drive wheels.
Releasing the brakes
will
allow you
to move the vehicle freely, e.g. to
push it or tow it.
Do not shift the transmission to N
while driving. Otherwise, the
automatic transmission could be
damaged.
If ESP ®
is deactivated or faulty:
only shift the transmission to
position N if the vehicle is in danger
of skidding, e.g. on icy roads.
If you want to engage the transfer
case, shift briefly into N
(Y page 199).
! Rolling in neutral N can damage
the drive train. 003A
Drive
The automatic transmission
changes gear automatically. All
forward gears are available.
Changing gear
The automatic transmission shifts to the
individual gears automatically when it is in
transmission position D. This automatic
gearshifting behavior is determined by:
R a shift range restriction, if selected
R the position of the transfer case ( HIGH
RANGE or LOW RANGE)
R the position of the accelerator pedal
R the road speed148
Automatic transmission
Driving and parking
Page 153 of 364
Restricting the shift range
X
Pull the left-hand steering wheel paddle
shifter (Y page 150).
The automatic transmission shifts down
one gear and restricts
the shift range to the
relevant gear.
i If the engine exceeds the maximum
engine speed when shifting down, the
automatic transmission protects against
engine damage by not shifting down.
i If the maximum engine
speed for the shift
range is reached and you continue to
accelerate, the automatic transmission
shifts up in order to prevent the engine
from overrevving, even if the shift range is
restricted.
Derestricting the shift range X
Pull the right-hand steering wheel paddle
shifter (Y page 150).
The automatic transmission shifts up one
gear and restricts the shift range to the
relevant gear.
Clearing the shift range restriction X
Pull and hold the right-hand steering wheel
paddle shifter ( Y
page 150) until D is shown
again in the multifunction display.
The automatic transmission shifts from the
current shift range directly to D.
Selecting the ideal shift range X
Pull the left-hand steering wheel paddle
shifter ( Y page
150) and hold it in position.
The automatic transmission shifts to the
gear which allows optimum acceleration
and deceleration. To do this, the automatic
transmission shifts down one or more
gears.
i The automatic transmission cannot shift
down beyond second gear. To shift to first
gear, you have to pull the left steering
wheel paddle shifter. Manual drive program
Introduction In drive program M, you can change gear
manually using the steering wheel paddle
shifters. For this,
the
transmission must be in
position D. The gear currently selected and
engaged is shown in the multifunction
display.
Manual drive program M differs from drive
programs E and S with regard to spontaneity,
responsiveness and smoothness of gear
changes.
Switching on the manual drive program X
Press the program selector button
(Y page 149) repeatedly
until M appears in
the multifunction display.
Upshifting (except AMG vehicles) X
Pull the right-hand paddle ( Y page 150).
The automatic transmission shifts
up to the
next gear.
Shifting up (AMG vehicles) !
In manual drive program M
, the automatic
transmission does not shift up
automatically even when the engine
limiting speed for the current gear is
reached. When the engine limiting speed is
reached, the fuel supply is cut to prevent
the engine from overrevving. Always make
sure that the engine speed does not reach
the red area of the tachometer. There is
otherwise a risk of engine damage.
X Pull the right-hand paddle ( Y page 150).
The automatic transmission shifts
up to the
next gear.
Before the engine speed reaches the red area,
an upshift indicator will be shown in the
multifunction display.
X If the color in the speedometer
multifunction display changes to red and Automatic transmission
151
Driving and parking Z
Page 163 of 364
!
As the ESP ®
system operates
automatically, the engine and the ignition
must be switched off (the SmartKey must
be in position 0 or 1 in the ignition lock) if
the parking brake is tested on a brake
dynamometer (for a maximum of ten
seconds).
Braking applications triggered
automatically by ESP ®
may otherwise
seriously damage the brake system.
Mercedes-Benz recommends that you only
have brake pads/linings installed on your
vehicle which have been approved for
Mercedes-Benz vehicles or
which
correspond
to an equivalent quality standard. Brake
pads/linings which have not been approved
for Mercedes-Benz vehicles or which are not
of an equivalent quality could affect your
vehicle's operating safety.
Mercedes-Benz recommends that you only
use brake fluid that has been specially
approved for your vehicle by Mercedes-Benz,
or which corresponds to an equivalent quality
standard. Brake fluid which has not been
approved for Mercedes-Benz vehicles or
which is not of an equivalent quality could
affect your vehicle's operating safety.
All checks and maintenance work on the
brake system must be carried out at a
qualified specialist workshop.
Have brake pads installed and brake fluid
replaced at a qualified specialist workshop.
If your brake system is subject only to
moderate loads, you should test the
functionality of your brakes at regular
intervals by pressing firmly on the brake pedal
at high speeds. This improves the grip of the
brake pads.
You can find a description of Brake Assist
(BAS) on ( Y page 61).
High-performance brake system for
AMG vehicles The high-performance brake system is only
installed on the
G
63 AMG and the G 65 AMG. The high-performance brake system is
designed for heavy loads. This may lead to
noise when braking. This will depend on:
R
Speed
R Braking force
R Environmental conditions, such as
temperature and humidity
The wear of individual components of the
brake system, such as
the brake pads/linings
or brake discs, depends on the individual
driving style and operating conditions.
For this reason, it is impossible to state a
mileage that will be valid under all
circumstances. An aggressive driving style
will lead to high wear. You can obtain further
information about this from your authorized
Mercedes-Benz Center.
New and replaced brake pads and discs only
reach their optimum braking effect after
several hundred kilometers of driving.
Compensate for this by applying greater force
to the brake pedal. Keep this in mind, and
adapt your driving and braking accordingly
during this break-in period.
Excessive heavy braking results in
correspondingly high brake wear. Observe
the brake system warning lamp in the
instrument cluster and note any brake status
messages in the multifunction display. For
high-performance driving in particular, it is
important to maintain and have the brake
system checked regularly.
Parking brake G
WARNING
If you must brake the vehicle with the parking
brake, the braking distance is considerably
longer and the wheels
could lock. There is an
increased danger of skidding and accidents.
Only use the parking brake to brake the
vehicle when the service brake is faulty. Do
not apply the parking brake too firmly. If the
wheels lock, release the parking brake until
the wheels begin turning again. Driving tips
161
Driving and parking Z
Page 166 of 364
Indicated temperatures just above the
freezing point do
not
guarantee that the road
surface is free of ice. The road may still be icy,
especially in wooded areas or on bridges. G
WARNING
If you activate the LOW off-road gear while
driving on a slippery
road surface, the wheels
may lose traction:
R if you remove your foot from the
accelerator pedal when driving
R if off road ABS intervenes when braking
If the wheels lose traction. the vehicle can no
longer be steered. There is an increased
danger of skidding and accidents.
Never activate the LOW off-road gear while
driving on a slippery road surface.
Drive particularly carefully on slippery road
surfaces. Avoid sudden acceleration, steering
and braking maneuvers. Do not use cruise
control.
If the vehicle threatens to skid or cannot be
stopped when moving at low speed:
X Shift the transmission to position N.
X Try to bring the vehicle under control using
corrective steering.
i For more information on driving with
snow chains, see ( Y page 321).Off-road driving
Important safety notes G
WARNING
Do not load items on the basic carrier bars. It
may cause instability
during
some maneuvers
which could result in an accident.
Drive slowly in unknown terrain. This will
make it easier to recognize unexpected
obstacles and avoid damage to the vehicle.
To help avoid the vehicle rolling over, never
turn it around on steep inclines. If the vehicle cannot complete the attempted climb, back it
down in reverse gear.
Do not drive along the side of a slope. The
vehicle might otherwise
rollover.
If in doing so
the vehicle begins to show a tendency to roll,
immediately steer into a line of gravity
(straight up or downhill).
Never let the vehicle roll backwards in idle.
You may lose control of the vehicle if you use
only the service brake. For information on
driving downhill, see "Driving downhill".
When driving off-road, sand, mud and water,
possibly mixed with oil, for example, could get
into the brakes. This could result in a reduced
braking effect or in total brake failure and also
in increased wear and tear. The braking
characteristics change depending on the
material ingressing the brakes. Clean the
brakes after driving off-road. If you detect a
reduced braking effect or grinding noises,
have the brake system checked in a qualified
specialist workshop as soon as possible.
Adapt your driving style to the different
braking characteristics.
Driving off-road increases the likelihood of
damage to the vehicle, which, in turn, can lead
to failure of the mechanical assembly or
systems. Adapt your driving style to suit the
terrain conditions. Drive carefully. Have
damage to the vehicle rectified immediately
at a qualified specialist workshop.
General notes H
Environmental note
Protection of the environment is of primary
importance. Treat nature with respect.
Observe all prohibiting signs.
Read this section carefully
before driving your
vehicle off-road. Practice by driving over more
gentle off-road terrain first.
Familiarize yourself with the characteristics
of your vehicle and the gear shift operation
before driving through difficult terrain. 164
Driving tips
Driving and parking