2013 MAZDA MODEL 2 height
[x] Cancel search: heightPage 16 of 356

Black plate (16,1)
CAUTION
When returning a rear-reclined
seatback to its upright position,
make sure you hold onto the
seatback with your other hand while
operating the lever. If the seatback is
not supported, it will flip forward
suddenly and could cause injury.
qHeight Adjustment (Driver's Seat)
To adjust the seat height, move the lever
up or down.
DownUp
Rear Seat
WARNING
Do not stack cargo higher than the
seatbacks or place articles on the rear
package tray:
Stacking luggage or other cargo
higher than the seatbacks, and
placing articles on the rear package
tray is dangerous. During sudden
braking or a collision, objects can fly
around and become projectiles that
may hit and injure passengers.
Make sure luggage and cargo are
secured before driving: Not securing cargo while driving is
dangerous as it could move or be
crushed during sudden braking or a
collision and cause injury.
Make sure the adjustable components
of a seat are locked in place: Adjustable seats that are not securely
locked are dangerous. In a sudden
stop or collision, the seat or seatback
could move, causing injury.
Do not drive with the seatback
unlocked: All of the seatbacks play an
important role in your protection in a
vehicle. Leaving the seatback
unlocked is dangerous as it can allow
passengers to be ejected or thrown
around and baggage to strike
occupants in a sudden stop or
collision, resulting in severe injury.
After returning the seatback at any
time, even when there are no other
passengers, rock the seatback to
make sure it is locked in place.
2-4
Essential Safety Equipment
Seats
Mazda2_8CL7-EA-12H_Edition3 Page16
Friday, January 11 2013 9:48 AM
Form No.8CL7-EA-12H
Page 20 of 356

Black plate (20,1)
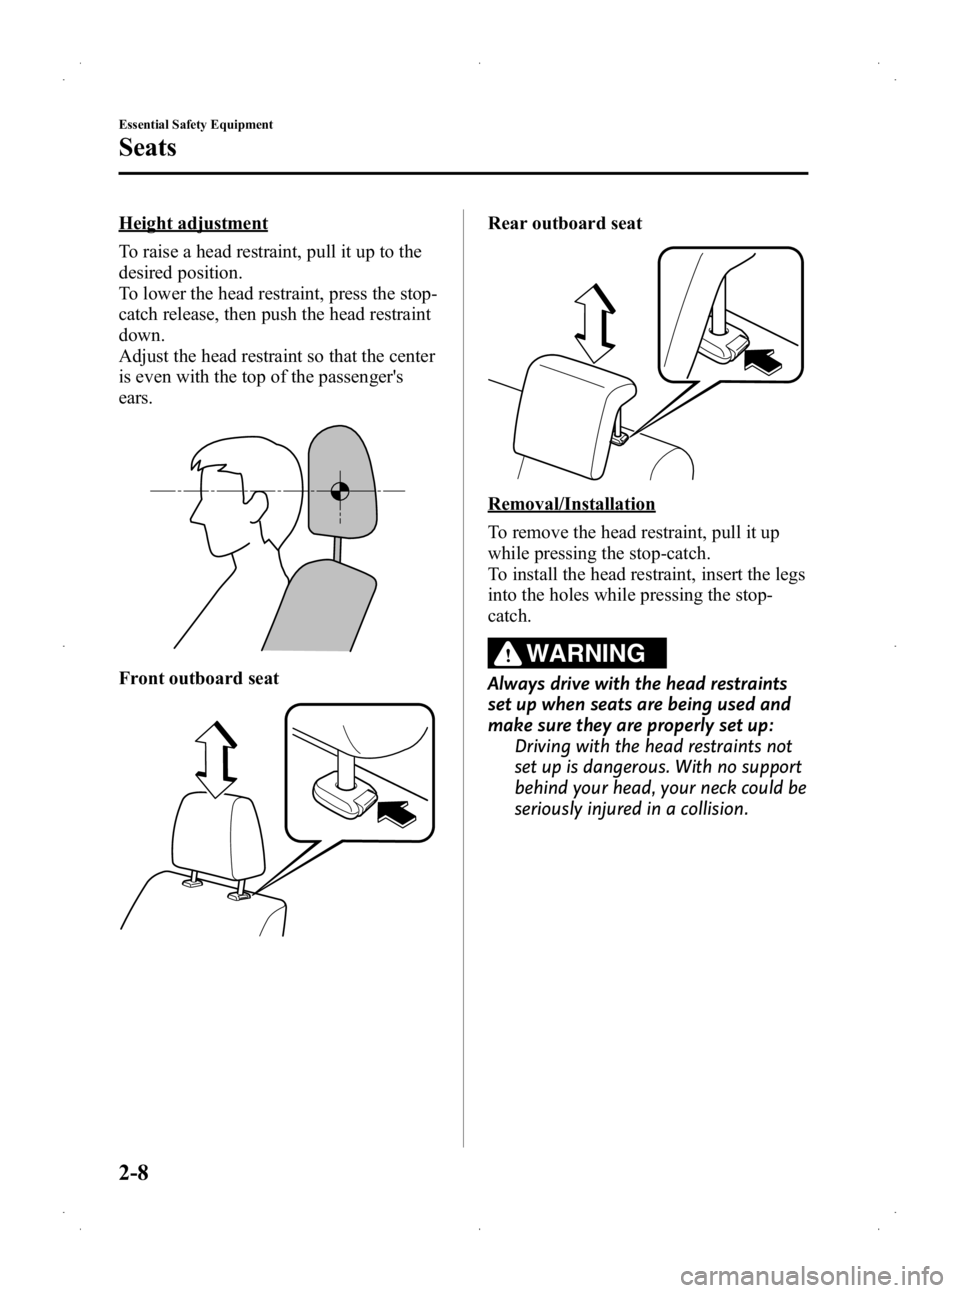
Height adjustment
To raise a head restraint, pull it up to the
desired position.
To lower the head restraint, press the stop-
catch release, then push the head restraint
down.
Adjust the head restraint so that the center
is even with the top of the passenger's
ears.
Front outboard seat
Rear outboard seat
Removal/Installation
To remove the head restraint, pull it up
while pressing the stop-catch.
To install the head restraint, insert the legs
into the holes while pressing the stop-
catch.
WARNING
Always drive with the head restraints
set up when seats are being used and
make sure they are properly set up:Driving with the head restraints not
set up is dangerous. With no support
behind your head, your neck could be
seriously injured in a collision.
2-8
Essential Safety Equipment
Seats
Mazda2_8CL7-EA-12H_Edition3 Page20
Friday, January 11 2013 9:48 AM
Form No.8CL7-EA-12H
Page 26 of 356

Black plate (26,1)
qUnfastening the Seat Belt
Depress the button on the seat belt buckle.
If the belt does not fully retract, pull it out
and check for kinks or twists. Then make
sure it remains untwisted as it retracts.
Button
NOTE
If a belt does not fully retract, inspect it for
kinks and twists. If it is still not retracting
properly, have it inspected at an Authorized
Mazda Dealer.
qShoulder Belt Adjuster
Adjust the height of the shoulder belt if
the seat belt touches your neck, or if it
crosses your arm instead of your shoulder.
To raise the shoulder belt adjuster, push
the adjuster up. To lower the shoulder belt
adjuster, pull the adjuster and slide it
down. Make sure the adjuster is locked.
To raise To lower
WARNING
Positioning the Shoulder Portion of the
Seat Belt:
Improper positioning of the shoulder
portion of the seat belt is dangerous.
Always make sure the shoulder
portion of the seat belt is positioned
across your shoulder and near your
neck, but never under your arm, on
your neck, or on your upper arm.
2-14
Essential Safety Equipment
Seat Belt Systems
Mazda2_8CL7-EA-12H_Edition3 Page26
Friday, January 11 2013 9:48 AM
Form No.8CL7-EA-12H
Page 52 of 356

Black plate (52,1)
Do not modify the suspension:Modifying the vehicle suspension is dangerous. If the vehicle's height or the
suspension is modified, the vehicle will be unable to accurately detect a collision
resulting in incorrect or unexpected air bag deployment and the possibility of serious
injuries.
Do not modify the supplemental restraint system: Modifying the components or wiring of the supplemental restraint system is
dangerous. You could accidentally activate it or make it inoperable. Do not make
any modifications to the supplemental restraint system. This includes installing trim,
badges, or anything else over the air bag modules. It also includes installing extra
electrical equipment on or near system components or wiring. An Authorized Mazda
Dealer can provide the special care needed in the removal and installation of front
seats. It is important to protect the air bag wiring and connections to assure that the
bags do not accidentally deploy, the driver seat slide position sensor and front
passenger seat weight sensors are not damaged and that the seats retain an
undamaged air bag connection.
NOTE
lWhen an air bag deploys, a loud inflation noise can be heard and some smoke will be released.
Neither is likely to cause injury, however, the texture of the air bags may cause light skin injuries
on body parts not covered with clothing through friction.
lShould you sell your Mazda, we urge you to tell the new owner of its air bag systems and that
familiarization with all instructions about them, from the Owner's Manual, is important.
2-40
Essential Safety Equipment
SRS Air Bags
Mazda2_8CL7-EA-12H_Edition3 Page52
Friday, January 11 2013 9:48 AM
Form No.8CL7-EA-12H
Page 88 of 356

Black plate (88,1)
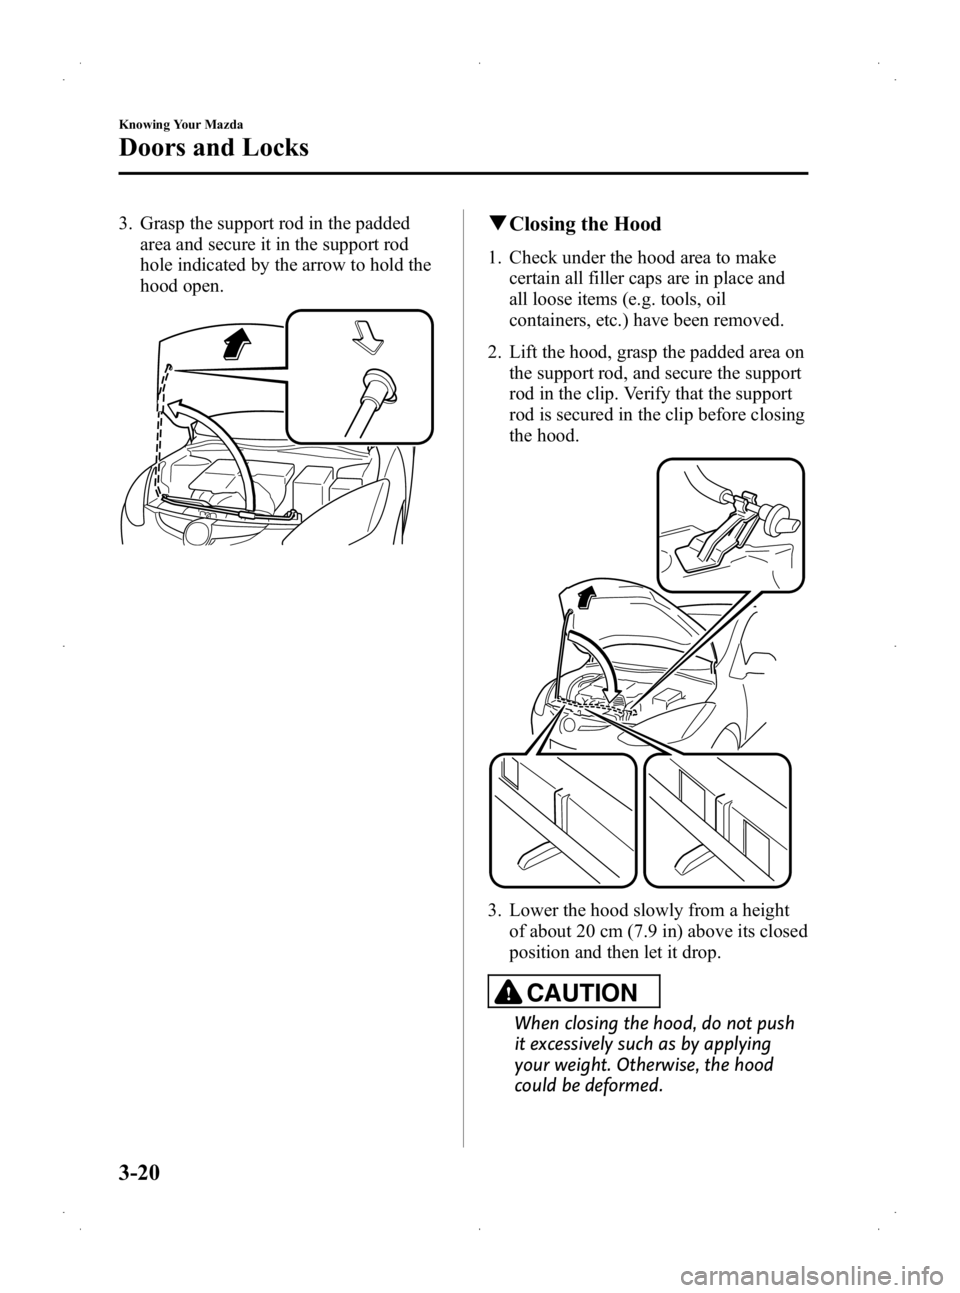
3. Grasp the support rod in the paddedarea and secure it in the support rod
hole indicated by the arrow to hold the
hood open.qClosing the Hood
1. Check under the hood area to make
certain all filler caps are in place and
all loose items (e.g. tools, oil
containers, etc.) have been removed.
2. Lift the hood, grasp the padded area on the support rod, and secure the support
rod in the clip. Verify that the support
rod is secured in the clip before closing
the hood.
3. Lower the hood slowly from a heightof about 20 cm (7.9 in) above its closed
position and then let it drop.
CAUTION
When closing the hood, do not push
it excessively such as by applying
your weight. Otherwise, the hood
could be deformed.
3-20
Knowing Your Mazda
Doors and Locks
Mazda2_8CL7-EA-12H_Edition3 Page88
Friday, January 11 2013 9:49 AM
Form No.8CL7-EA-12H
Page 275 of 356

Black plate (275,1)
qReplacing a Wheel
WARNING
Always use wheels of the correct size
on your vehicle:
Using a wrong-sized wheel is
dangerous. Braking and handling
could be affected, leading to loss of
control and an accident.
CAUTION
ØA wrong-sized wheel may
adversely affect:
ØTire fit
ØWheel and bearing life
ØGround clearance
ØSnow-chain clearance
ØSpeedometer calibration
ØHeadlight aim
ØBumper height
ØTire Pressure Monitoring
System
Ø (With Tire Pressure Monitoring
System)
ØWhen replacing/repairing the
tires or wheels or both, have the
work done by an Authorized
Mazda Dealer, or the tire
pressure sensors may be
damaged.
ØThe wheels equipped on your
Mazda are specially designed
for installation of the tire
pressure sensors. Do not use
non-genuine wheels, otherwise
it may not be possible to install
the tire pressure sensors.
NOTE
Be sure to install the tire pressure sensors
whenever tires or wheels are replaced. Refer to
Tires and Wheels on page 5-27.
When replacing a wheel, make sure the
new one is the same as the original factory
wheel in diameter, rim width, and offset
(inset/outset).
Proper tire balancing provides the best
riding comfort and helps reduce tread
wear. Out-of-balance tires can cause
vibration and uneven wear, such as
cupping and flat spots.
Maintenance and Care
Owner Maintenance
8-31
Mazda2_8CL7-EA-12H_Edition3 Page275
Friday, January 11 2013 9:50 AM
Form No.8CL7-EA-12H
Page 320 of 356

Black plate (320,1)
Tire Labeling
Federal law requires tire manufacturers to place standardized information on the sidewall of
all tires. This information identifies and describes the fundamental characteristics of the tire
and also provides a tire identification number for safety standard certification and in case of
a recall.
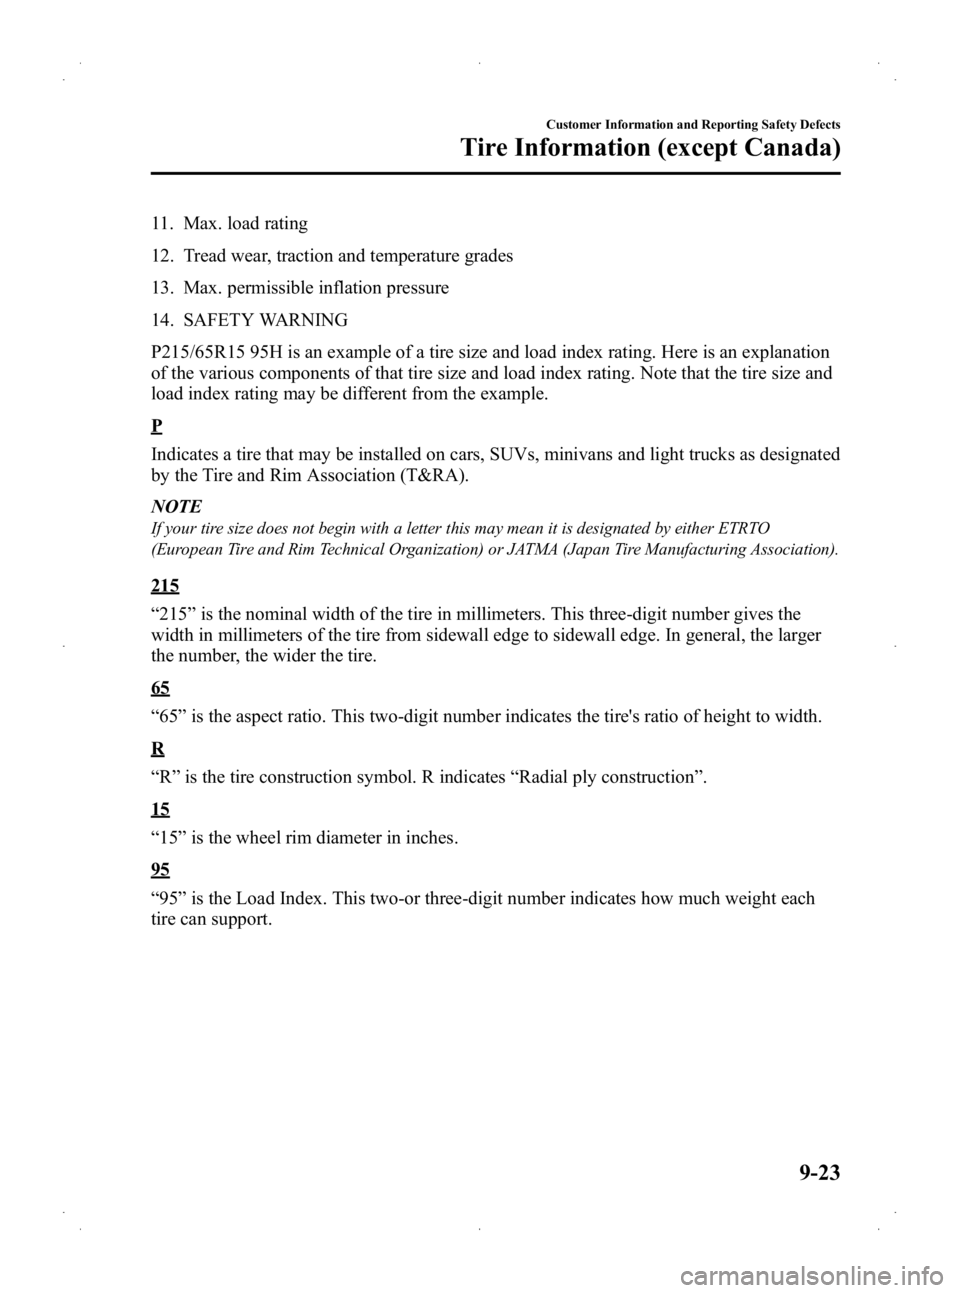
qInformation on Passenger Vehicle Tires
Please refer to the sample below.
1. TIN: U.S. DOT tire identification number
2. Passenger car tire
3. Nominal width of tire in millimeters
4. Ratio of height to width (aspect ratio)
5. Radial
6. Run-flat tire
7. Rim diameter code
8. Load index & speed symbol
9. Severe snow conditions
10. Tire ply composition and materials used
9-22
Customer Information and Reporting Safety Defects
Tire Information (except Canada)
Mazda2_8CL7-EA-12H_Edition3 Page320
Friday, January 11 2013 9:50 AM
Form No.8CL7-EA-12H
Page 321 of 356

Black plate (321,1)
11. Max. load rating
12. Tread wear, traction and temperature grades
13. Max. permissible inflation pressure
14. SAFETY WARNING
P215/65R15 95H is an example of a tire size and load index rating. Here is an explanation
of the various components of that tire size and load index rating. Note that the tire size and
load index rating may be different from the example.
P
Indicates a tire that may be installed on cars, SUVs, minivans and light trucks as designated
by the Tire and Rim Association (T&RA).
NOTE
If your tire size does not begin with a letter this may mean it is designated by either ETRTO
(European Tire and Rim Technical Organization) or JATMA (Japan Tire Manufacturing Association).
215
“215 ”is the nominal width of the tire in millimeters. This three-digit number gives the
width in millimeters of the tire from sidewall edge to sidewall edge. In general, the larger
the number, the wider the tire.
65
“ 65 ”is the aspect ratio. This two-digit number indicates the tire's ratio of height to width.
R
“R” is the tire construction symbol. R indicates “Radial ply construction ”.
15
“15 ”is the wheel rim diameter in inches.
95
“95 ”is the Load Index. This two-or three-digit number indicates how much weight each
tire can support.
Customer Information and Reporting Safety Defects
Tire Information (except Canada)
9-23
Mazda2_8CL7-EA-12H_Edition3 Page321
Friday, January 11 2013 9:50 AM
Form No.8CL7-EA-12H