Page 83 of 110

83
ES350_QG_OM33A11U_(U)
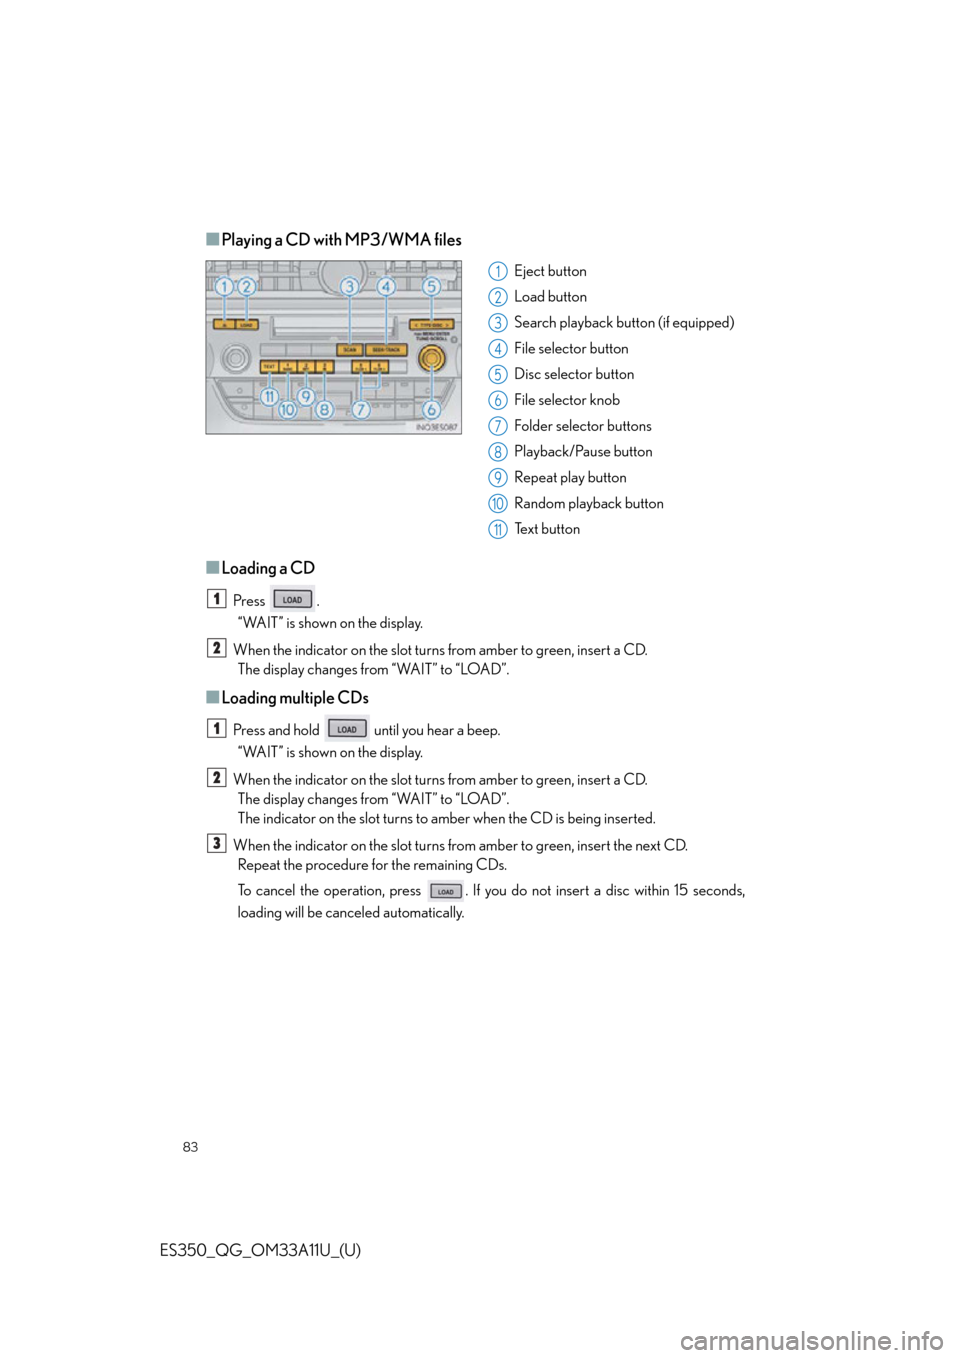
■Playing a CD with MP3/WMA files
Eject button
Load button
Search playback button (if equipped)
File selector button
Disc selector button
File selector knob
Folder selector buttons
Playback/Pause button
Repeat play button
Random playback button
Te x t b u t t o n
■Loading a CD
Press .“WAIT” is shown on the display.
When the indicator on the slot turns from amber to green, insert a CD. The display changes from “WAIT” to “LOAD”.
■Loading multiple CDs
Press and hold until you hear a beep.
“WAIT” is shown on the display.
When the indicator on the slot turns from amber to green, insert a CD. The display changes from “WAIT” to “LOAD”.
The indicator on the slot turns to amber when the CD is being inserted.
When the indicator on the slot turns from amber to green, insert the next CD. Repeat the procedure for the remaining CDs.
To cancel the operation, press . If you do not insert a disc within 15 seconds,
loading will be canceled automatically.
1
2
3
4
5
6
7
8
9
10
11
1
2
1
2
3
Page 85 of 110

85
ES350_QG_OM33A11U_(U)
Air Conditioning System (without
navigation system or Lexus Display Audio)
■Using the automatic mode
Press the automatic mode button to turn on the airflow and the driver’s side temperature
control buttons to adjust the temperature.
■Adjusting the temperature
In dual mode, driver and passenger side temperature settings can be adjusted separately.
Press the passenger’s side temperature control buttons to adjust the temperature for the
passenger side.
To cancel the dual mode, press the DUAL mode button.
Driver’s side temperature display
Airflow display
Fan speed display
Outside temperature
Passenger’s side temperature display
Air outlet selector
Cooling and dehumidification function
on/off button
DUAL mode button
Passenger’s side temperature control
button Micro dust and pollen filter on/off but-
ton
Outside air or recirculated mode but-
ton
Off button
Driver’s side temperature control but-
ton
Automatic mode button
Fan speed control button
Windshield defogger button1
2
3
4
5
6
7
8
9
10
11
12
13
14
15
16
Page 89 of 110
89
ES350_QG_OM33A11U_(U)
Garage Door Opener
The garage door opener (HomeLink® Universal Transceiver) is manufactured under
license from HomeLink
®.
■ Programming the HomeLink®
The HomeLink® compatible transceiver in your ve hicle has 3 buttons which can be pro-
grammed to operate 3 different devices. Refer to the programming method below
appropriate for the device.
Indicator light
Buttons
The garage door opener can be programmed to operate garage doors, gates, entry
doors, door locks, home lighting system s, security systems, and other devices.
1
2
Page 90 of 110
90
ES350_QG_OM33A11U_(U)
■Programming HomeLink®
Hold your hand-held transmitter 1 to 3
in. (25 to 75 mm) of the HomeLink
®
buttons.
Press and hold down the desired
HomeLink
® button.
For U.S.A. owners: While pressing the HomeLink
® but-
ton, press and hold down the button
on the hand-held transmitter until the
indicator light changes from a slow to
a rapid flash.
For Canadian owners: While pressing the HomeLink
® but-
ton, repeatedly press and release
(cycle) the button on the hand-held
transmitter every 2 seconds until the
indicator light changes from a slow to
a rapid flash.
If your garage door is of the rolling code
type: Press the training button on the motor-
head unit in your garage.
Press and hold the vehicle’s pro-
grammed HomeLink
® button for 2
seconds and release it. Repeat this step
once again. If the door does not open, press and
release the same button once again.
1
2
3
4
5
Page 96 of 110
96
ES350_QG_OM33A11U_(U)
Door Locks
■Door lock switch
Locks all the doors
Unlocks all the doors
■Inside lock button
Locks the door
Unlocks the door
The front doors can be opened by pull-
ing the inside handle even if the lock
buttons are in the lock position.
The vehicle can be locked and unlocked using the entry function, wireless remote control
or door lock switches.
For details the entry function or wireless remote control ( P.1 3 , 1 4 )
1
2
1
2