Page 18 of 410

18
1. BASIC FUNCTION
CT200h_Navi_OM76113E_(EE)
13.12.06 15:15
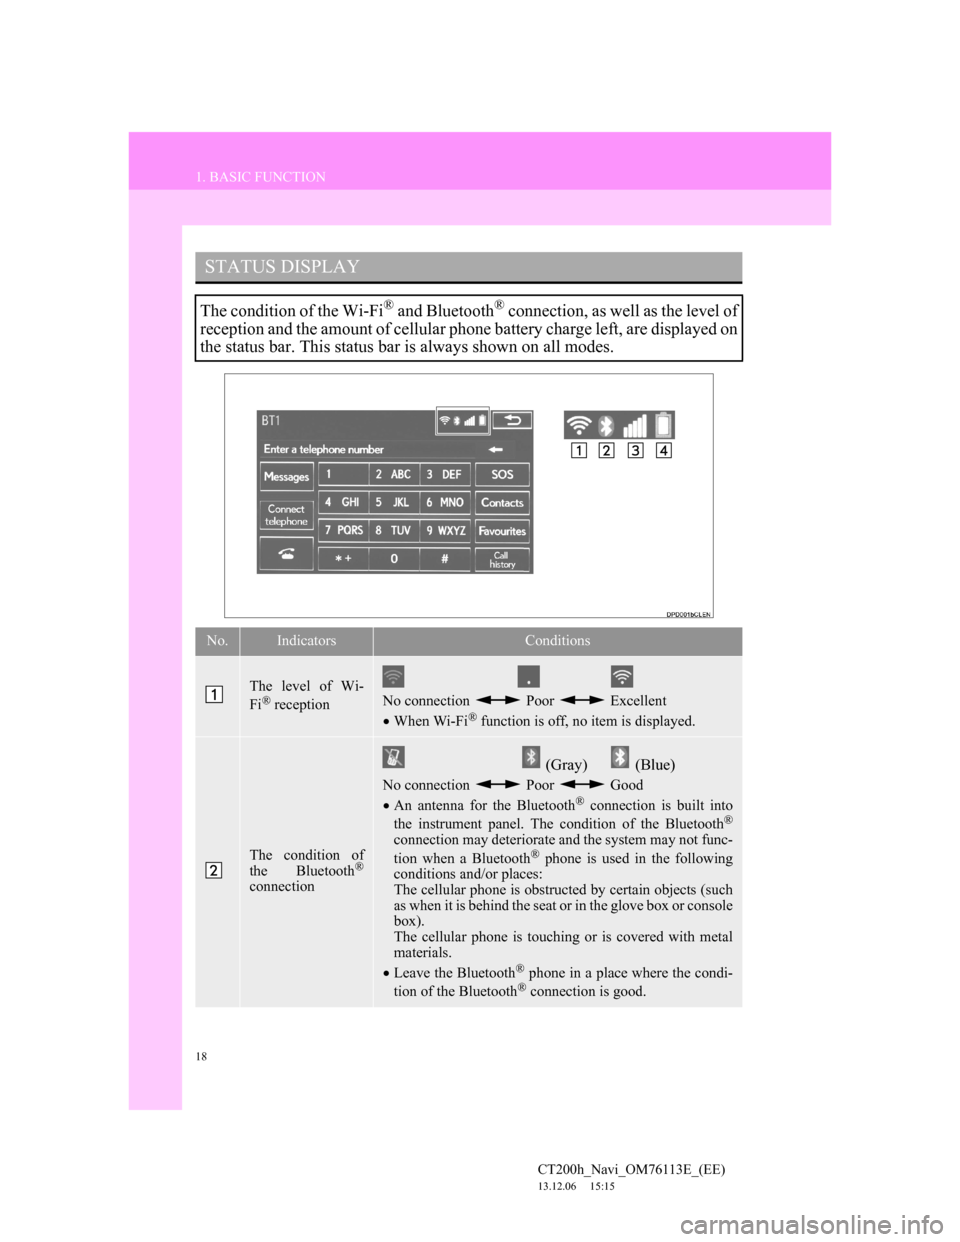
STATUS DISPLAY
The condition of the Wi-Fi® and Bluetooth® connection, as well as the level of
reception and the amount of cellular phone battery charge left, are displayed on
the status bar. This status bar is always shown on all modes.
No.IndicatorsConditions
The level of Wi-
Fi® receptionNo connection Poor Excellent
When Wi-Fi® function is off, no item is displayed.
The condition of
the Bluetooth®
connection
(Gray) (Blue)
No connection Poor Good
An antenna for the Bluetooth® connection is built into
the instrument panel. The condition of the Bluetooth®
connection may deteriorate and the system may not func-
tion when a Bluetooth® phone is used in the following
conditions and/or places:
The cellular phone is obstructed by certain objects (such
as when it is behind the seat or in the glove box or console
box).
The cellular phone is touching or is covered with metal
materials.
Leave the Bluetooth
® phone in a place where the condi-
tion of the Bluetooth® connection is good.
Page 48 of 410

48
1. BASIC INFORMATION BEFORE OPERATION
CT200h_Navi_OM76113E_(EE)
13.12.06 15:16
1Select “Day mode”.
In the following conditions, the dis-
play’s condition is not changed to night
mode even if headlight switch is turned
on:
• The instrument panel light control dial
is turned fully to the upper.
• The vehicle is in a bright area, such as
outside in direct sunlight.
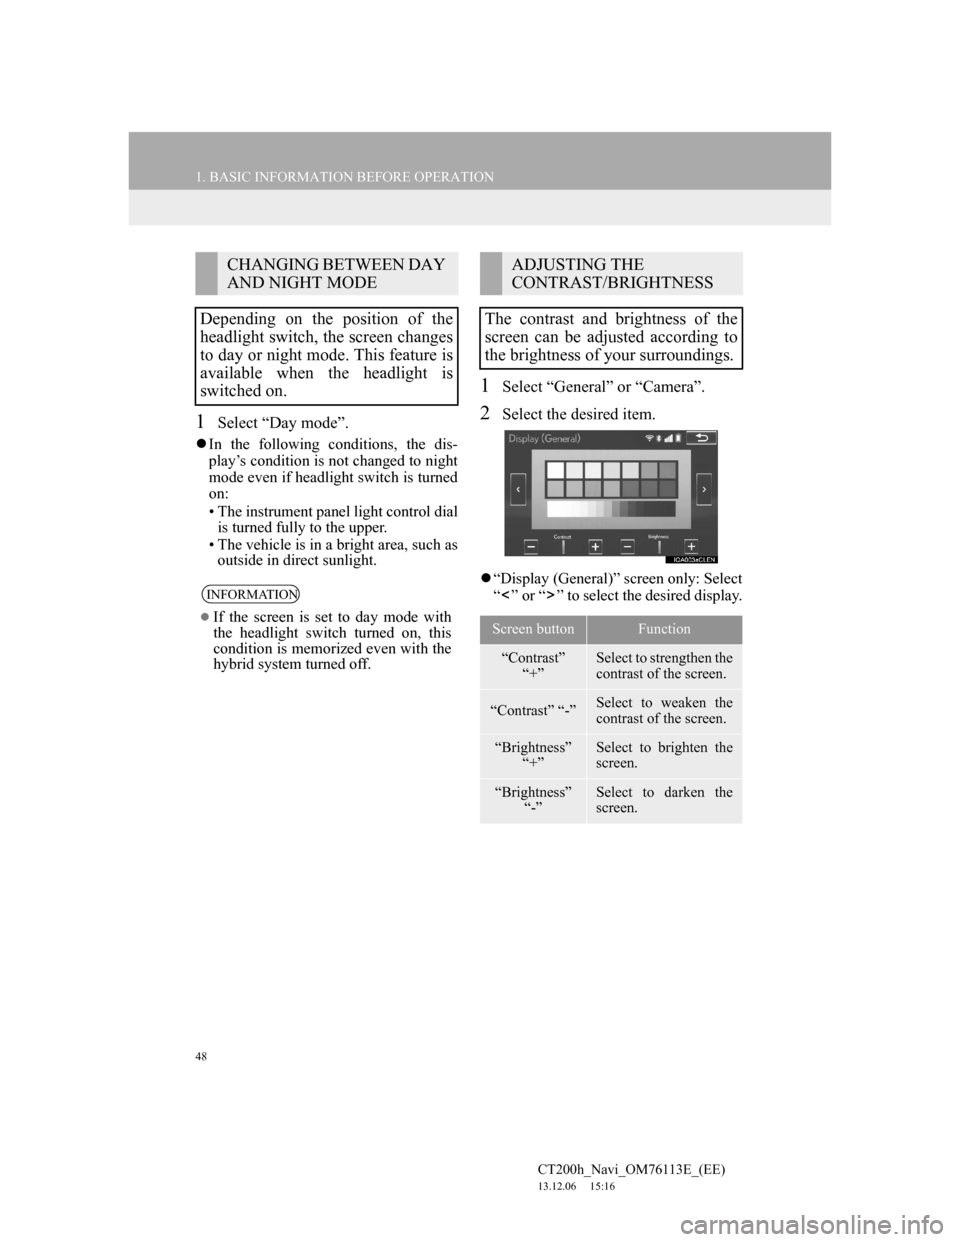
1Select “General” or “Camera”.
2Select the desired item.
“Display (General)” screen only: Select
“ ” or “ ” to select the desired display.
CHANGING BETWEEN DAY
AND NIGHT MODE
Depending on the position of the
headlight switch, the screen changes
to day or night mode. This feature is
available when the headlight is
switched on.
INFORMATION
If the screen is set to day mode with
the headlight switch turned on, this
condition is memorized even with the
hybrid system turned off.
ADJUSTING THE
CONTRAST/BRIGHTNESS
The contrast and brightness of the
screen can be adjusted according to
the brightness of your surroundings.
Screen buttonFunction
“Contrast”
“+”Select to strengthen the
contrast of the screen.
“Contrast” “-”Select to weaken the
contrast of the screen.
“Brightness”
“+”Select to brighten the
screen.
“Brightness”
“-”Select to darken the
screen.
Page 184 of 410

184
CT200h_Navi_OM76113E_(EE)
13.12.06 15:16
6. TIPS FOR THE NAVIGATION SYSTEM
1. GPS (GLOBAL POSITIONING SYSTEM)
The Global Positioning System (GPS)
developed and operated by the U.S. De-
partment of Defense provides an accu-
rate current position, normally using 4
or more satellites, and in some case 3
satellites. The GPS system has a certain
level of inaccuracy. While the naviga-
tion system compensates for this most
of the time, occasional positioning er-
rors of up to 100 yd. (100 m) can and
should be expected. Generally, position
errors will be corrected within a few
seconds.When the vehicle is receiving signals
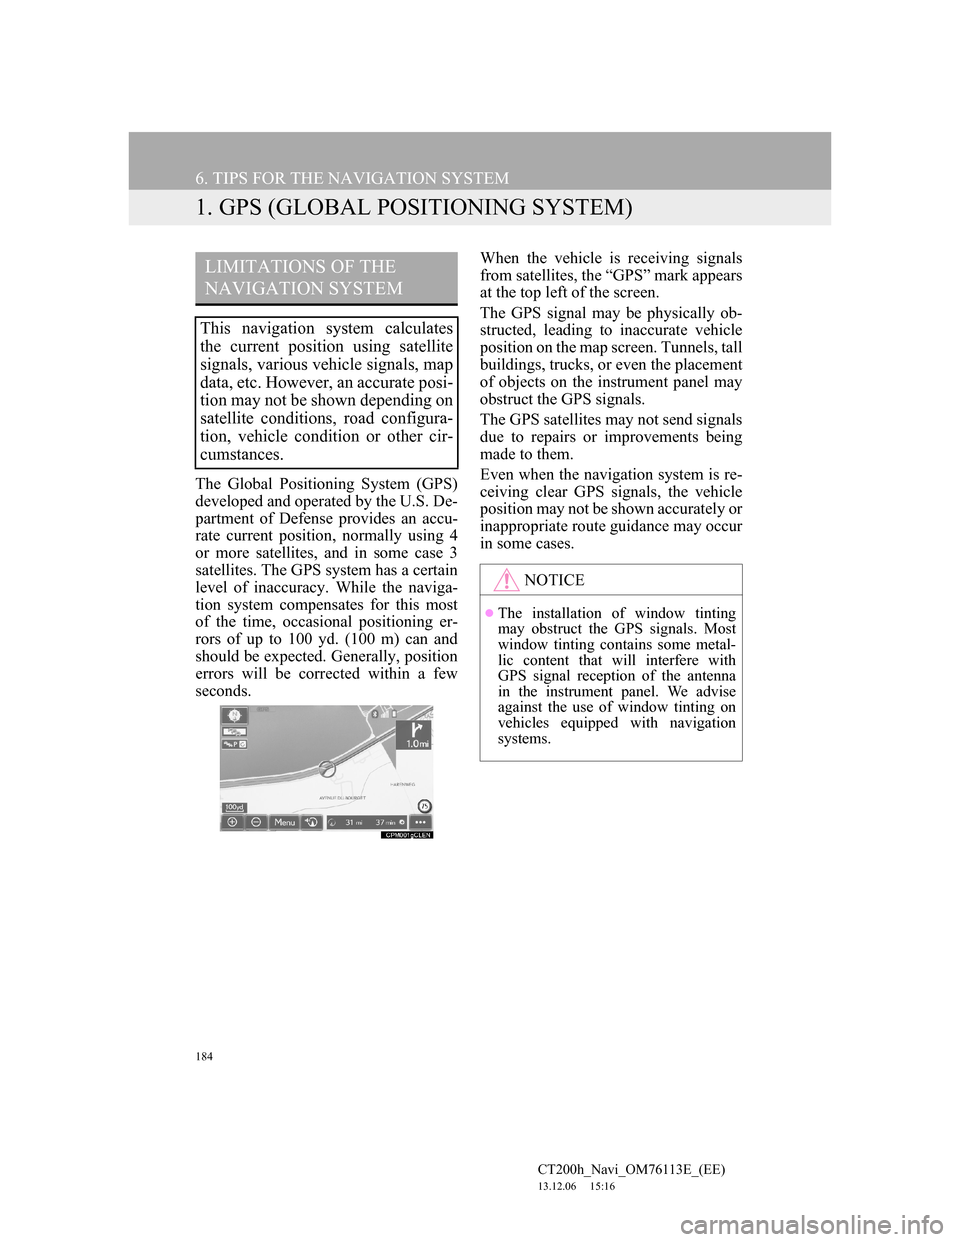
from satellites, the “GPS” mark appears
at the top left of the screen.
The GPS signal may be physically ob-
structed, leading to inaccurate vehicle
position on the map screen. Tunnels, tall
buildings, trucks, or even the placement
of objects on the instrument panel may
obstruct the GPS signals.
The GPS satellites may not send signals
due to repairs or improvements being
made to them.
Even when the navigation system is re-
ceiving clear GPS signals, the vehicle
position may not be shown accurately or
inappropriate route guidance may occur
in some cases.
LIMITATIONS OF THE
NAVIGATION SYSTEM
This navigation system calculates
the current position using satellite
signals, various vehicle signals, map
data, etc. However, an accurate posi-
tion may not be shown depending on
satellite conditions, road configura-
tion, vehicle condition or other cir-
cumstances.
NOTICE
The installation of window tinting
may obstruct the GPS signals. Most
window tinting contains some metal-
lic content that will interfere with
GPS signal reception of the antenna
in the instrument panel. We advise
against the use of window tinting on
vehicles equipped with navigation
systems.
Page 192 of 410
192
CT200h_Navi_OM76113E_(EE)
13.12.06 15:16
1. BASIC OPERATION
1. QUICK REFERENCE
CONTROL SCREEN Operations such as selecting a preset station and adjusting the sound balance
are carried out on the screen.
Using the instrument panel
Press the “RADIO” or “MEDIA” button to display the audio/visual screen.
Using the Remote Touch
Press the “MENU” button on the Remote Touch, then select “Audio” to display
the audio/visual screen.
Page 195 of 410
195
1. BASIC OPERATION
4
AUDIO/VISUAL SYSTEM
CT200h_Navi_OM76113E_(EE)
13.12.06 15:16
Using the instrument panel
1Each time the “RADIO” or “ME-
DIA” button is pressed, the audio
control mode changes.
“RADIO” button: To display the radio
operation screen.
“MEDIA” button: To display the exter-
nal media operation screen.
Using the Remote Touch
1Press the “MENU” button on the
Remote Touch.
2Select “Audio”.
3Select “Source”.
4Select the desired source.
SELECTING AN AUDIO
SOURCE
INFORMATION
Dimmed screen buttons cannot be
operated.
Page 202 of 410
202
CT200h_Navi_OM76113E_(EE)
13.12.06 15:16
2. RADIO OPERATION
1. AM/FM/DAB* RADIO
CONTROL SCREEN
OVERVIEW
The radio operation screen can be reached by the following methods:
Using the instrument panel
Press the “RADIO” button to display the audio control screen.
Using the Remote Touch
Press the “MENU” button on the Remote Touch, then select “Audio” to display
the audio control screen.
*: If equipped
Page 209 of 410
209
CT200h_Navi_OM76113E_(EE)
13.12.06 15:16
4
AUDIO/VISUAL SYSTEM
3. MEDIA OPERATION
1. CD
CONTROL SCREEN
OVERVIEW
The CD operation screen can be reached by the following methods:
Inserting a disc (P.196)
Using the instrument panel
Press the “MEDIA” button to display the audio control screen.
Using the Remote Touch
Press the “MENU” button on the Remote Touch, then select “Audio” to display
the audio control screen.
Audio CD
MP3/WMA/AAC disc
Page 215 of 410

215
3. MEDIA OPERATION
CT200h_Navi_OM76113E_(EE)
13.12.06 15:16
4
AUDIO/VISUAL SYSTEM
2. DVD
For safety reasons, the DVD video discs can only be viewed when the follow-
ing conditions are met:
(a) The vehicle is completely stopped.
(b) The power switch is in ACCESSORY or ON mode.
(c) The parking brake is applied.
While driving in DVD video mode, only the DVD’s audio can be heard.
The playback condition of some DVD discs may be determined by the DVD
software producer. This DVD player plays a disc as the software producer in-
tended. As such, some functions may not work properly. Be sure to read the
instruction manual that comes with the individual DVD disc. (P.265)
OVERVIEW
The DVD operation screen can be reached by the following methods:
Inserting a disc (P.196)
Using the instrument panel
Press the “MEDIA” button to display the audio control screen.
Using the Remote Touch
Press the “MENU” button on the Remote Touch, then select “Audio” to display
the audio control screen.