Page 145 of 336

When displayed, static grid lines will
illustrate the width of the vehicle
while a dashed center-line will indi-
cate the center of the vehicle to assistwith parking or aligning to a hitch/
receiver. The static grid lines will
show separate zones that will help
indicate the distance to the rear of thevehicle. The following table shows the
approximate distances for each zone:Zone
Distance to the rear of the vehicle
Red 0 - 30 cm
Yellow 30 cm - 1 m
Green 1 m or greaterWARNING!
Drivers must be careful when back-
ing up even when using the
ParkView® Rear Back Up Camera.
Always check carefully behind your
vehicle, and be sure to check for
pedestrians, animals, other ve-
hicles, obstructions, or blind spots
before backing up. You are respon-
sible for the safety of your sur-
roundings and must continue to
pay attention while backing up.
Failure to do so can result in serious
injury or death.
CAUTION!
To avoid vehicle damage,
ParkView® should only be used
as a parking aid. The ParkView®
camera is unable to view every
obstacle or object in your drive
path.
To avoid vehicle damage, the ve-
hicle must be driven slowly when
using ParkView® to be able to stop
in time when an obstacle is seen. It
is recommended that the driver
look frequently over his/her shoul-
der when using ParkView®.
NOTE: If snow, ice, mud, or any
foreign substance builds up on the
camera lens, clean the lens, rinse
with water, and dry with a soft
cloth. Do not cover the lens.
139
Page 146 of 336

TURNING PARKVIEW® ON
OR OFF — WITH TOUCH
SCREEN
Perform the following steps on the
touch screen to turn the Parkview®
Backup Camera ON or OFF:
1. Press the “More” soft-key (where
available).
2. Press the “Settings” soft-key.
3. Press the “Safety & Driving Assis-
tance” soft-key.
4. Press the check box soft key next
to “Parkview® Backup Camera” to
enable/disable.
OVERHEAD CONSOLE
The overhead console contains
courtesy/reading lights and storage
for sunglasses. Power sunroof
switches may also be included, (for
versions/markets, where provided).
Refer to your “Lights” section for
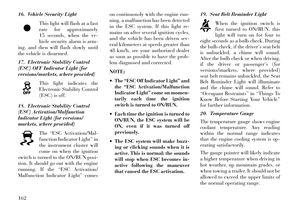
more information.SUNGLASS BIN DOOR
At the front of the console a compart-
ment is provided for the storage of a
pair of sunglasses. The storage com-
partment access is a “push/push” de-
sign. Push the chrome pad on the door
to open. Push the chrome pad on the
door to close.POWER SUNROOF
(for versions/markets,
where provided)
The power sunroof switch is located
between the sun visors on the over-
head console.
WARNING!
Never leave children in a vehicle
with the Remote Keyless Entry
(RKE) transmitter in the passen-
ger compartment. Occupants,
particularly unattended children,
can become entrapped by the
power sunroof while operating
the power sunroof switch. Such
entrapment may result in serious
injury or death.
(Continued)
Overhead ConsoleSunglass Bin Door
Power Sunroof Switch
140
Page 147 of 336

WARNING!(Continued)
In a collision, there is a greater risk
of being thrown from a vehicle
with an open sunroof. You could
also be seriously injured or killed.
Always fasten your seat belt prop-
erly and make sure all passengers
are properly secured too.Do not allow small children to
operate the sunroof. Never allow
your fingers, other body parts, or
any object to project through the
sunroof opening. Injury may result.
OPENING SUNROOF —
EXPRESS
Press the switch rearward and release
it within one-half second and the sun-
roof will open automatically from any
position. The sunroof will open fully
and stop automatically. This is called
“Express Open”. During Express
Open operation, any movement of the
sunroof switch will stop the sunroof. OPENING SUNROOF —
MANUAL MODE
To open the sunroof, press and hold
the switch rearward to full open. Any
release of the switch will stop the
movement and the sunroof will re-
main in a partially opened condition
until the switch is pushed and held
rearward again.
CLOSING SUNROOF —
EXPRESS
Press the switch forward and release it
within one-half second and the sun-
roof will close automatically from any
position. The sunroof will close fully
and stop automatically. This is called
“Express Close”. During Express
Close operation, any movement of the
switch will stop the sunroof.
CLOSING SUNROOF —
MANUAL MODE
To close the sunroof, press and hold
the switch in the forward position.
Any release of the switch will stop
the movement and the sunroof will
remain in a partially closed condition
until the switch is pushed and held
forward again.PINCH PROTECT FEATURE
This feature will detect an obstruction
in the opening of the sunroof during
Express Close operation. If an ob-
struction in the path of the sunroof is
detected, the sunroof will automati-
cally retract. Remove the obstruction
if this occurs. Next, press the switch
forward and release to Express Close.
NOTE:
If three consecutive sunroof
close attempts result in Pinch Pro-
tect reversals, the fourth close at-
tempt will be a Manual Close move-
ment with Pinch Protect disabled.
VENTING SUNROOF —
EXPRESS
Press and release the “Vent” button,
and the sunroof will open to the vent
position. This is called “Express
Vent”, and will occur regardless of
sunroof position. During Express Vent
operation, any movement of the
switch will stop the sunroof.
141
Page 148 of 336

SUNSHADE OPERATION
The sunshade can be opened manu-
ally. However, the sunshade will open
automatically as the sunroof opens.
NOTE: The sunshade cannot be
closed if the sunroof is open.
WIND BUFFETING
Wind buffeting can be described as
the perception of pressure on the ears
or a helicopter-type sound in the ears.
Your vehicle may exhibit wind buffet-
ing with the windows down, or the
sunroof (for versions/markets, where
provided) in certain open or partially
open positions. This is a normal oc-
currence and can be minimized. If the
buffeting occurs with the rear win-
dows open, open the front and rear
windows together to minimize the
buffeting. If the buffeting occurs with
the sunroof open, adjust the sunroof
opening to minimize the buffeting or
open any window.
SUNROOF MAINTENANCE
Use only a nonabrasive cleaner and a
soft cloth to clean the glass panel.IGNITION OFF OPERATION
For vehicles not equipped with the
Electronic Vehicle Information Center
(EVIC), the power sunroof switch will
remain active for 45 seconds after the
ignition switch is turned to the LOCK
position. Opening either front door
will cancel this feature.
NOTE:
For vehicles equipped with the
EVIC, the power sunroof switch
will remain active for up to ap-
proximately ten minutes after
the ignition switch is turned to
the LOCK position. Opening ei-
ther front door will cancel this
feature.The Ignition Off time is pro-
grammable using the Uconnect
Touch™ System. Refer to
“Uconnect Touch™ Settings” in
“Understanding Your Instrument
Panel” for further information.
COMMANDVIEW®
SUNROOF WITH
POWER SHADE —
(for versions/markets,
where provided)
The CommandView® sunroof switch
is located to the left between the sun
visors on the overhead console.
The power shade switch is located to
the right between the sun visors on the
overhead console.CommandView® Sunroof And Power
Shade Switches
142
Page 149 of 336

WARNING!
Never leave children in a vehiclewith the Remote Keyless Entry
(RKE) transmitter in the passen-
ger compartment. Occupants,
particularly unattended children,
can become entrapped by the
power sunroof while operating
the power sunroof switch. Such
entrapment may result in serious
injury or death.
In a collision, there is a greater risk
of being thrown from a vehicle
with an open sunroof. You could
also be seriously injured or killed.
Always fasten your seat belt prop-
erly and make sure all passengers
are properly secured too.Do not allow small children to op-
erate the sunroof. Never allow your
fingers, other body parts, or any
object to project through the sun-
roof opening. Injury may result.
OPENING SUNROOF —
EXPRESS
Press the switch rearward and release
it within one-half second and the sun-
roof will open automatically from any
position. The sunroof will open fully
and stop automatically. This is called
“Express Open”. During Express
Open operation, any movement of the
sunroof switch will stop the sunroof.
OPENING SUNROOF —
MANUAL MODE
To open the sunroof, press and hold
the switch rearward to full open. Any
release of the switch will stop the
movement and the sunroof will re-
main in a partially opened condition
until the switch is pushed and held
rearward again.
CLOSING SUNROOF —
EXPRESS
Press the switch forward and release it
within one-half second and the sun-
roof will close automatically from any
position. The sunroof will close fully and stop automatically. This is called
“Express Close”. During Express
Close operation, any movement of the
switch will stop the sunroof.
CLOSING SUNROOF —
MANUAL MODE
To close the sunroof, press and hold
the switch in the forward position.
Any release of the switch will stop the
movement and the sunroof will re-
main in a partially closed condition
until the switch is pushed and held
forward again.
OPENING POWER SHADE
— EXPRESS
Press the shade switch rearward and
release it within one-half second and
the shade will open automatically
from any position. The shade will
open fully and stop automatically.
This is called “Express Open”. During
Express Open operation, any move-
ment of the shade switch will stop the
shade.
143
Page 150 of 336

OPENING POWER
SHADE — MANUAL MODE
To open the shade, press and hold the
switch rearward to full open. Any re-
lease of the switch will stop the move-
ment and the shade will remain in a
partially opened condition until the
switch is pushed and held rearward
again.
CLOSING POWER
SHADE — EXPRESS
Press the switch forward and release it
within one-half second and the shade
will close automatically from any po-
sition. The shade will close fully and
stop automatically. This is called “Ex-
press Close”. During Express Close
operation, any movement of the
switch will stop the shade.
CLOSING POWER
SHADE — MANUAL MODE
To close the shade, press and hold the
switch in the forward position. Any
release of the switch will stop the
movement and the shade will remainin a partially closed condition until
the switch is pushed and held forward
again.
PINCH PROTECT FEATURE
This feature will detect an obstruction
in the opening of the sunroof during
Express Close operation. If an ob-
struction in the path of the sunroof is
detected, the sunroof will automati-
cally retract. Remove the obstruction
if this occurs. Next, press the switch
forward and release to Express Close.
NOTE: If three consecutive sun-
roof close attempts result in Pinch
Protect reversals, the fourth close
attempt will be a Manual Close
movement with Pinch Protect dis-
abled.
WIND BUFFETING
Wind buffeting can be described as
the perception of pressure on the ears
or a helicopter-type sound in the ears.
Your vehicle may exhibit wind buffet-
ing with the windows down, or the
sunroof (for versions/markets, where
provided) in certain open or partially
open positions. This is a normal oc-
currence and can be minimized. If the
buffeting occurs with the rear win-
dows open, open the front and rear
windows together to minimize the
buffeting. If the buffeting occurs with
the sunroof open, adjust the sunroof
opening to minimize the buffeting or
open any window.
SUNROOF MAINTENANCE
Use only a non-abrasive cleaner and a
soft cloth to clean the glass panel.
IGNITION OFF OPERATION
For vehicles not equipped with the
Electronic Vehicle Information Center
(EVIC), the power sunroof switch will
remain active for 45 seconds after the
ignition switch is turned to the LOCK
position. Opening either front door
will cancel this feature.
144
Page 151 of 336

NOTE:
For vehicles equipped with theEVIC, the power sunroof switch
will remain active for up to ap-
proximately ten minutes after
the ignition switch is turned to
the LOCK position. Opening ei-
ther front door will cancel this
feature.
The Ignition Off time is pro- grammable using the Uconnect
Touch™ System. Refer to
“Uconnect Touch™ Settings” in
“Understanding Your Instru-
ment Panel” for further infor-
mation.
SUNROOF FULLY CLOSED
Press the switch forward and release
to ensure that the sunroof is fully
closed. ELECTRICAL POWER
OUTLETS
There are three 12 Volt (13 Amp)
electrical power outlets on this ve-
hicle. The power outlets are protected
by a fuse.
Insert cigar lighter or accessory plug
into the power outlets for use to en-
sure proper operation.
CAUTION!
Do not exceed the maximum
power of 160 Watts (13 Amps) at
12 Volts. If the 160 Watt (13 Amp)
power rating is exceeded, the fuse
protecting the system will need to
be replaced. Power outlets are designed for ac-
cessory plugs only. Do not insert
any other object in the power out-
lets as this will damage the outlet
and blow the fuse. Improper use
of the power outlet can cause
damage not covered by your New
Vehicle Limited Warranty. The front 12 Volt power outlet has
power available only when the igni-
tion is placed in the ACC or RUN
position.
WARNING!
Do not place ashes inside the cubby
bin located on the center console on
vehicle's not equipped with the ash
receiver tray. A fire leading to
bodily injury could result.
Front Power Outlet
145
Page 152 of 336

The center console outlet is powered
directly from the battery (power
available at all times). Items plugged
into this outlet may discharge the
battery and/or prevent the engine
from starting.
There is also a 12 volt power outlet
located on the back of the center con-
sole for rear passengers. This power
outlet has power available only when
the ignition is placed in the ACC or
RUN position.
WARNING!
To avoid serious injury or death:
Only devices designed for use inthis type of outlet should be in-
serted into any 12 Volt outlet.
Do not touch with wet hands.
Close the lid when not in use and while driving the vehicle.
If this outlet is mishandled, it may cause an electric shock and fail-
ure.
CAUTION!
Many accessories that can beplugged in draw power from the
vehicle's battery even when not in
use (i.e., cellular phones, etc.).
Eventually, if plugged in long
enough, the vehicle's battery will
discharge sufficiently to degrade
battery life and/or prevent the
engine from starting.
Accessories that draw higher
power (i.e., coolers, vacuum
cleaners, lights, etc.) will degrade
the battery even more quickly.
Only use these intermittently and
with greater caution.
After the use of high power draw accessories or long periods of the
vehicle not being started (with
accessories still plugged in), the
vehicle must be driven a suffi-
cient length of time to allow the
alternator to recharge the vehi-
cle's battery.
(Continued)
Center Console Power Outlet
Rear Center Console Power Outlet
Power Outlet Fuse Locations
1 — #12 Fuse 20 A Yellow Cigar
Lighter Instrument Panel And Power
Outlet Console Rear
2 — #38 Fuse 20 A Yellow Power
Outlet Inside Arm Rest
146