2013 KIA VENGA fuel cap
[x] Cancel search: fuel capPage 491 of 751
427
Features of your vehicle
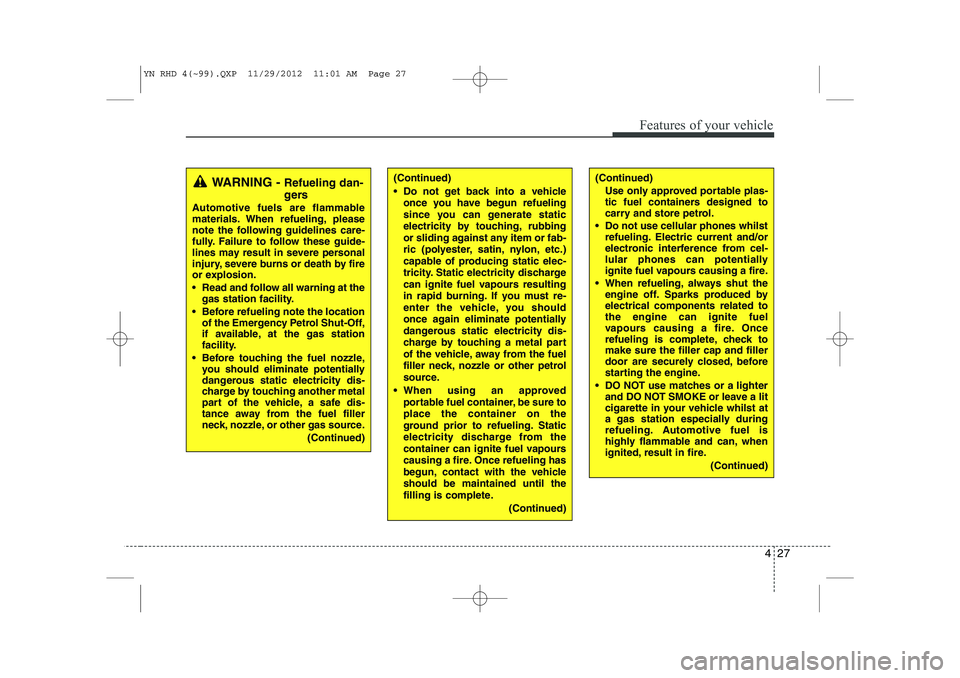
(Continued)Use only approved portable plas-
tic fuel containers designed to
carry and store petrol.
Do not use cellular phones whilst refueling. Electric current and/or
electronic interference from cel-
lular phones can potentially
ignite fuel vapours causing a fire.
When refueling, always shut the engine off. Sparks produced byelectrical components related tothe engine can ignite fuel
vapours causing a fire. Once
refueling is complete, check tomake sure the filler cap and filler
door are securely closed, before
starting the engine.
DO NOT use matches or a lighter and DO NOT SMOKE or leave a lit
cigarette in your vehicle whilst at
a gas station especially during
refueling. Automotive fuel is
highly flammable and can, when
ignited, result in fire.
(Continued)(Continued)
Do not get back into a vehicleonce you have begun refueling
since you can generate static
electricity by touching, rubbing
or sliding against any item or fab-
ric (polyester, satin, nylon, etc.)
capable of producing static elec-
tricity. Static electricity discharge
can ignite fuel vapours resulting
in rapid burning. If you must re-
enter the vehicle, you should
once again eliminate potentially
dangerous static electricity dis-
charge by touching a metal part
of the vehicle, away from the fuel
filler neck, nozzle or other petrol
source.
When using an approved portable fuel container, be sure toplace the container on the
ground prior to refueling. Static
electricity discharge from the
container can ignite fuel vapours
causing a fire. Once refueling has
begun, contact with the vehicleshould be maintained until the
filling is complete.
(Continued)WARNING - Refueling dan-
gers
Automotive fuels are flammable
materials. When refueling, please
note the following guidelines care-
fully. Failure to follow these guide-
lines may result in severe personal
injury, severe burns or death by fire
or explosion.
Read and follow all warning at the gas station facility.
Before refueling note the location of the Emergency Petrol Shut-Off,
if available, at the gas station
facility.
Before touching the fuel nozzle, you should eliminate potentially
dangerous static electricity dis-
charge by touching another metal
part of the vehicle, a safe dis-
tance away from the fuel filler
neck, nozzle, or other gas source.
(Continued)
YN RHD 4(~99).QXP 11/29/2012 11:01 AM Page 27
Page 492 of 751
Features of your vehicle
28
4
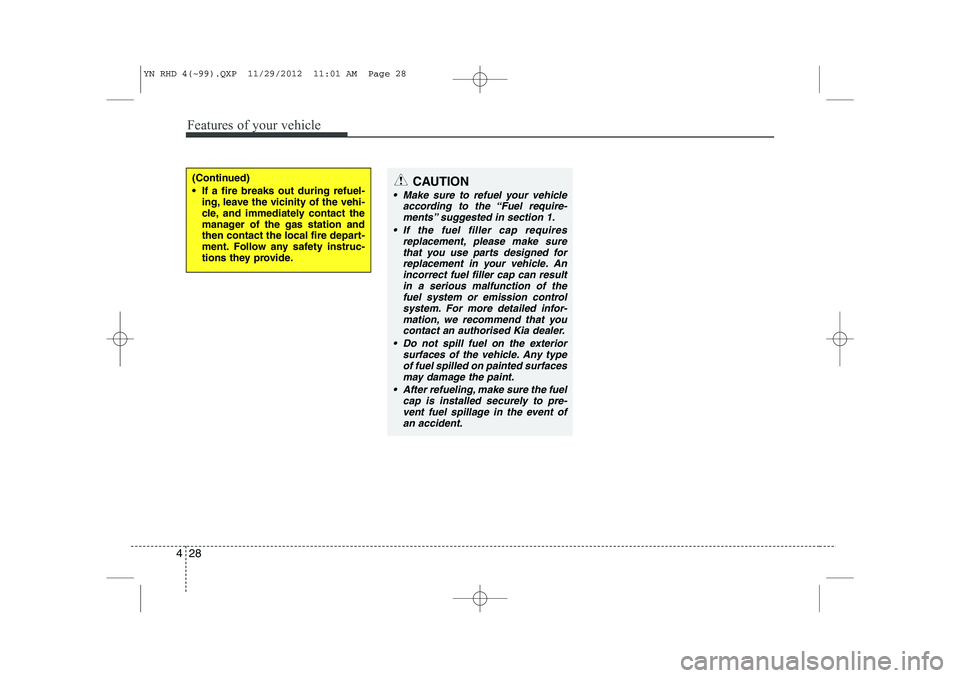
(Continued)
If a fire breaks out during refuel-
ing, leave the vicinity of the vehi-
cle, and immediately contact the
manager of the gas station and
then contact the local fire depart-
ment. Follow any safety instruc-
tions they provide.CAUTION
Make sure to refuel your vehicle
according to the “Fuel require-
ments” suggested in section 1.
If the fuel filler cap requires replacement, please make surethat you use parts designed for
replacement in your vehicle. An incorrect fuel filler cap can resultin a serious malfunction of the fuel system or emission control
system. For more detailed infor- mation, we recommend that youcontact an authorised Kia dealer.
Do not spill fuel on the exterior surfaces of the vehicle. Any typeof fuel spilled on painted surfaces may damage the paint.
After refueling, make sure the fuel cap is installed securely to pre-
vent fuel spillage in the event of an accident.
YN RHD 4(~99).QXP 11/29/2012 11:01 AM Page 28
Page 507 of 751
443
Features of your vehicle
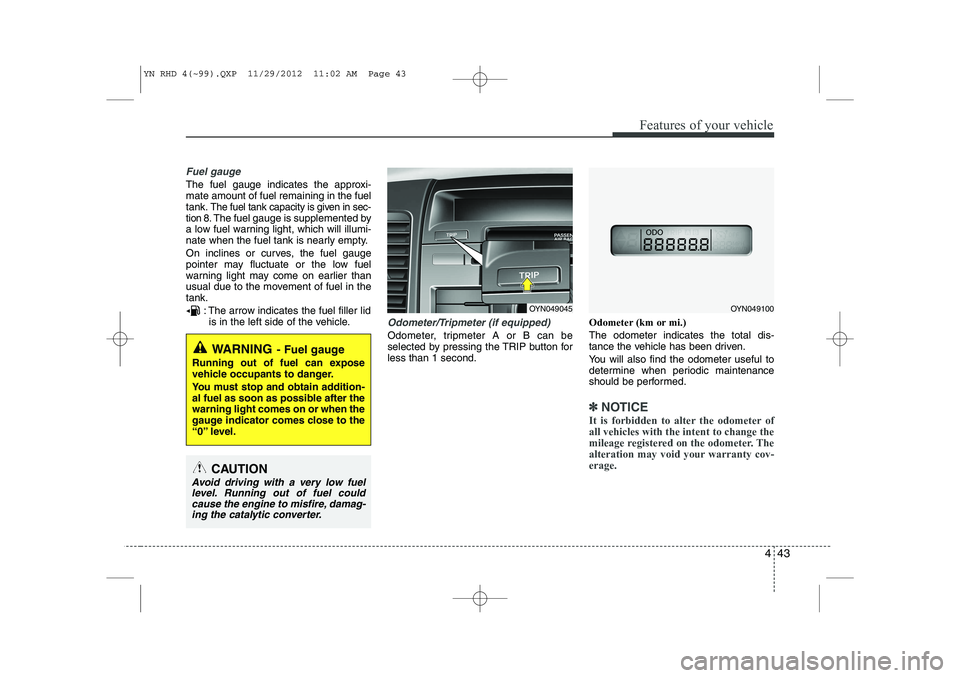
Fuel gauge
The fuel gauge indicates the approxi- mate amount of fuel remaining in the fueltank.
The fuel tank capacity is given in sec-
tion 8.The fuel gauge is supplemented by
a low fuel warning light, which will illumi-
nate when the fuel tank is nearly empty.
On inclines or curves, the fuel gauge
pointer may fluctuate or the low fuel
warning light may come on earlier than
usual due to the movement of fuel in thetank.
: The arrow indicates the fuel filler lidis in the left side of the vehicle.
Odometer/Tripmeter (if equipped)
Odometer, tripmeter A or B can be
selected by pressing the TRIP button forless than 1 second. Odometer (km or mi.) The odometer indicates the total dis-
tance the vehicle has been driven.
You will also find the odometer useful to
determine when periodic maintenance
should be performed.
✽✽
NOTICE
It is forbidden to alter the odometer of all vehicles with the intent to change the
mileage registered on the odometer. The
alteration may void your warranty cov-erage.
WARNING - Fuel gauge
Running out of fuel can expose
vehicle occupants to danger.
You must stop and obtain addition-
al fuel as soon as possible after thewarning light comes on or when the
gauge indicator comes close to the
“0” level.
CAUTION
Avoid driving with a very low fuel level. Running out of fuel could cause the engine to misfire, damag-ing the catalytic converter.
OYN049045OYN049100
YN RHD 4(~99).QXP 11/29/2012 11:02 AM Page 43
Page 623 of 751
This section will guide you in the proper
loading of your vehicle and/or trailer, to
keep your loaded vehicle weight within its
design rating capability, with or without a
trailer. Properly loading your vehicle will
provide maximum return of the vehicle
design performance. Before loading your
vehicle, familiarize yourself with the fol-
lowing terms for determining your vehi-
cle's weight ratings, with or without a
trailer, from the vehicle's specifications
and the certification label: Base curb weight
This is the weight of the vehicle including a full tank of fuel and all standard equip-
ment. It does not include passengers,
cargo, or optional equipment.
Vehicle curb weight
This is the weight of your new vehicle
when you picked it up from your dealer
plus any aftermarket equipment.Cargo weight
This figure includes all weight added to
the Base Curb Weight, including cargoand optional equipment.
GAW (Gross axle weight)
This is the total weight placed on each
axle (front and rear) - including vehicle
curb weight and all payload.
GAWR (Gross axle weight rating)
This is the maximum allowable weight
that can be carried by a single axle (front
or rear). These numbers are shown on
the certification label.
The total load on each axle must never
exceed its GAWR.
GVW (Gross vehicle weight)
This is the Base Curb Weight plus actual
Cargo Weight plus passengers.
GVWR (Gross vehicle weight rating)
This is the maximum allowable weight of
the fully loaded vehicle (including all
options, equipment, passengers and
cargo). The GVWR is shown on the cer-
tification label located on the driver’s (or
front passenger’s) door sill. Overloading
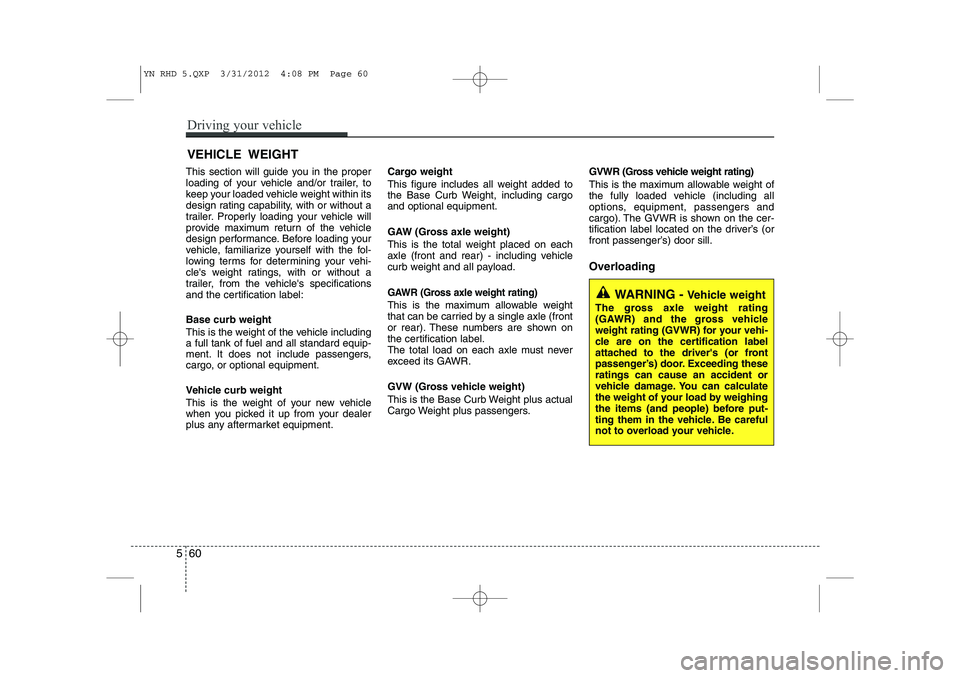
VEHICLE WEIGHTWARNING -
Vehicle weight
The gross axle weight rating
(GAWR) and the gross vehicle
weight rating (GVWR) for your vehi-
cle are on the certification label
attached to the driver's (or front
passenger’s) door. Exceeding theseratings can cause an accident or
vehicle damage. You can calculate
the weight of your load by weighing
the items (and people) before put-
ting them in the vehicle. Be careful
not to overload your vehicle.
560
Driving your vehicle
YN RHD 5.QXP 3/31/2012 4:08 PM Page 60
Page 654 of 751

Maintenance
2
7
ENGINE COMPARTMENT
OYN022003R/OYN072002R-1
■■
Petrol Engine
❈ The actual engine room in the vehicle
may differ from the illustration.
■■ Diesel Engine 1. Engine coolant reservoir
2. Engine oil filler cap
3. Brake fluid reservoir
4. Positive battery terminal
5. Negative battery terminal
6. Fuse box
7. Air cleaner
8. Auto transaxle oil dipstick*
9. Radiator cap
10. Engine oil dipstick
11. Windscreen washer fluid reservoir
12. Fuel filter * if equipped
YN RHD 7.QXP 3/31/2012 4:12 PM Page 2
Page 661 of 751
79
Maintenance
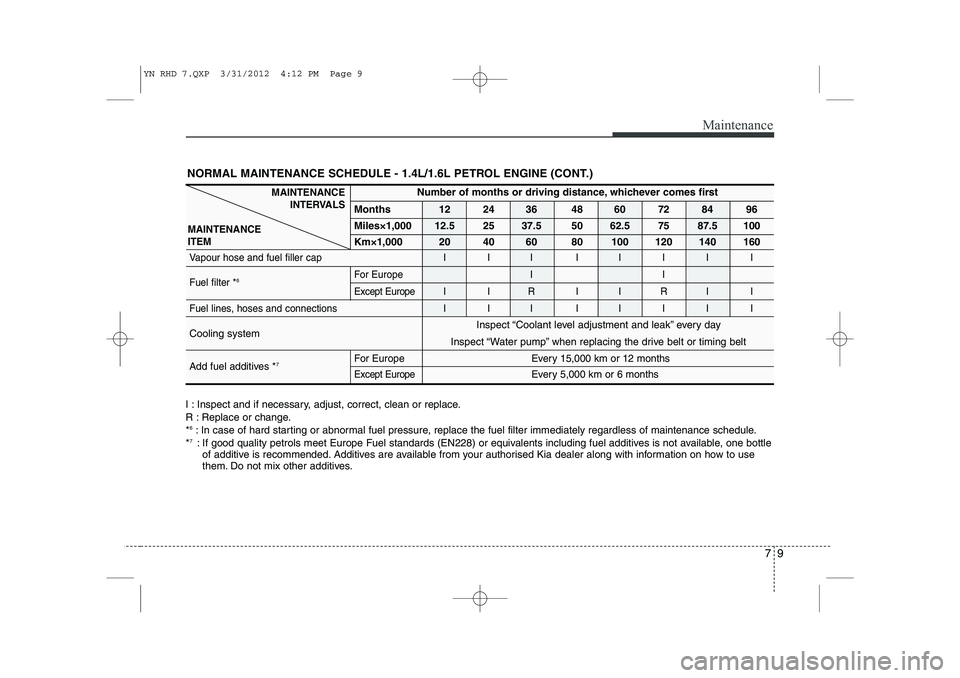
NORMAL MAINTENANCE SCHEDULE - 1.4L/1.6L PETROL ENGINE (CONT.)
I : Inspect and if necessary, adjust, correct, clean or replace.
R : Replace or change.*6
: In case of hard starting or abnormal fuel pressure, replace the fuel filter immediately regardless of maintenance schedule.
* 7
: If good quality petrols meet Europe Fuel standards (EN228) or equivalents including fuel additives is not available, one bottl e
of additive is recommended. Additives are available from your authorised Kia dealer along with information on how to use
them. Do not mix other additives.
Number of months or driving distance, whichever comes first
Months 12 24 36 48 60 72 84 96
Miles×1,000 12.5 25 37.5 50 62.5 75 87.5 100
Km×1,000 20 40 60 80 100 120 140 160
Vapour hose and fuel filler cap I I I I I I I I Fuel filter * 6 For Europe I I
Except Europe I I R I I R I I
Fuel lines, hoses and connections I I I I I I I I
Cooling system
Add fuel additives * 7For Europe Every 15,000 km or 12 monthsExcept EuropeEvery 5,000 km or 6 months
Inspect “Coolant level adjustment and leak” every day
Inspect “Water pump” when replacing the drive belt or timing belt
MAINTENANCE INTERVALS
MAINTENANCE ITEM
YN RHD 7.QXP 3/31/2012 4:12 PM Page 9
Page 667 of 751
715
Maintenance
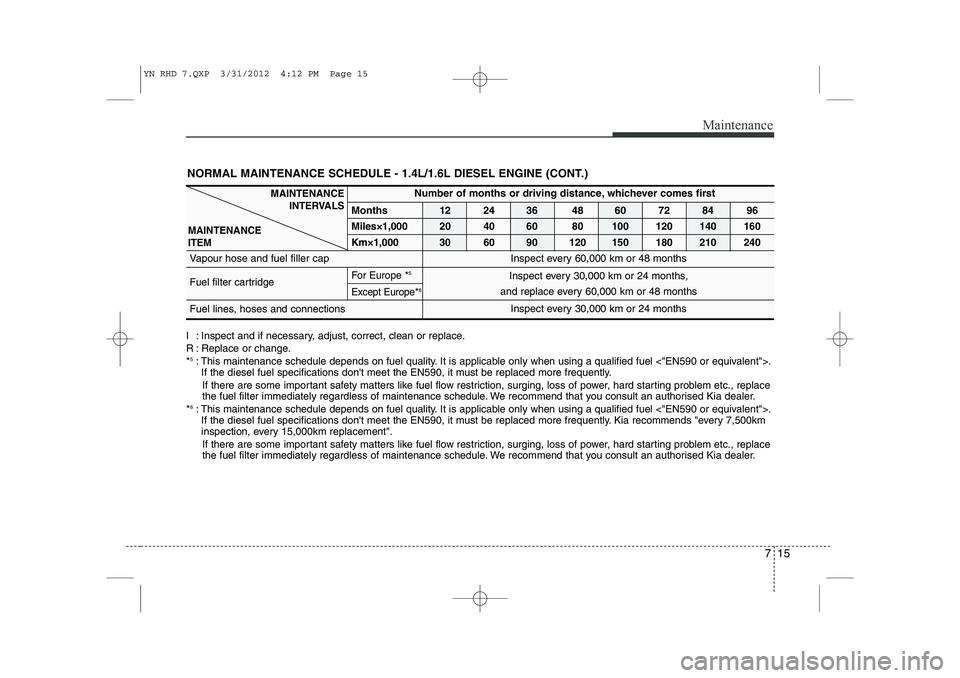
NORMAL MAINTENANCE SCHEDULE - 1.4L/1.6L DIESEL ENGINE (CONT.)
Number of months or driving distance, whichever comes first
Months 12 24 36 48 60 72 84 96
Miles×1,000 20 40 60 80 100 120 140 160
Km×1,000 30 60 90 120 150 180 210 240
Vapour hose and fuel filler cap
Fuel filter cartridge For Europe *
5Except Europe*6
Fuel lines, hoses and connections
I : Inspect and if necessary, adjust, correct, clean or replace.
R : Replace or change.* 5
: This maintenance schedule depends on fuel quality. It is applicable only when using a qualified fuel <"EN590 or equivalent">.
If the diesel fuel specifications don't meet the EN590, it must be replaced more frequently.
If there are some important safety matters like fuel flow restriction, surging, loss of power, hard starting problem etc., repl ace
the fuel filter immediately regardless of maintenance schedule. We recommend that you consult an authorised Kia dealer.
* 6
: This maintenance schedule depends on fuel quality. It is applicable only when using a qualified fuel <"EN590 or equivalent">.
If the diesel fuel specifications don't meet the EN590, it must be replaced more frequently. Kia recommends "every 7,500km
inspection, every 15,000km replacement".
If there are some important safety matters like fuel flow restriction, surging, loss of power, hard starting problem etc., repl ace
the fuel filter immediately regardless of maintenance schedule. We recommend that you consult an authorised Kia dealer.
MAINTENANCE
INTERVALS
MAINTENANCE ITEM
Inspect every 30,000 km or 24 months
Inspect every 30,000 km or 24 months,
and replace every 60,000 km or 48 months
Inspect every 60,000 km or 48 months
YN RHD 7.QXP 3/31/2012 4:12 PM Page 15
Page 673 of 751

721
Maintenance
Timing belt (if equipped)
Inspect all parts related to the timing belt
for damage and deformation. Replace
any damaged parts immediately.
Vapour hose and fuel filler cap
The vapour hose and fuel filler cap
should be inspected at those intervals
specified in the maintenance schedule.
Make sure that a new vapour hose or fuelfiller cap is correctly replaced.Vacuum crankcase ventilation hoses (if equipped)
Inspect the surface of hoses for evidence
of heat and/or mechanical damage. Hard
and brittle rubber, cracking, tears, cuts,
abrasions, and excessive swelling indi-
cate deterioration. Particular attention
should be paid to examine those hose
surfaces nearest to high heat sources,
such as the exhaust manifold. Inspect the hose routing to assure that the hoses do not come in contact with
any heat source, sharp edges or movingcomponent which might cause heat dam-
age or mechanical wear. Inspect all hose
connections, such as clamps and cou-
plings, to make sure they are secure, and
that no leaks are present. Hoses should
be replaced immediately if there is any
evidence of deterioration or damage.Air cleaner filter
We recommend that you use air cleaner
filter for replacement from an authorised
Kia dealer.
Spark plugs (for petrol engine)
Make sure to install new spark plugs of
the correct heat range.
Valve clearance (if equipped)
Inspect for excessive valve noise and/or
engine vibration and adjust if necessary.
We recommend that the system be serv-
iced by an authorised Kia dealer.
YN RHD 7.QXP 3/31/2012 4:12 PM Page 21