2013 KIA VENGA warning light
[x] Cancel search: warning lightPage 633 of 751

What to do in an emergency
10
6
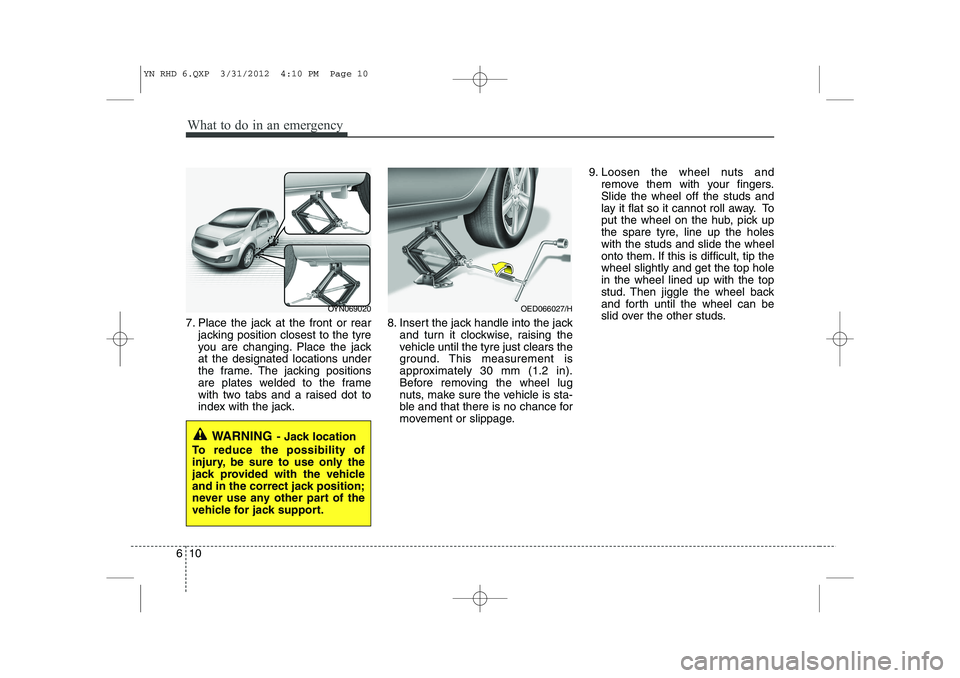
7. Place the jack at the front or rear
jacking position closest to the tyre
you are changing. Place the jackat the designated locations under
the frame. The jacking positions
are plates welded to the frame
with two tabs and a raised dot to
index with the jack. 8. Insert the jack handle into the jack
and turn it clockwise, raising the
vehicle until the tyre just clears the
ground. This measurement is
approximately 30 mm (1.2 in).
Before removing the wheel lug
nuts, make sure the vehicle is sta-
ble and that there is no chance for
movement or slippage. 9. Loosen the wheel nuts and
remove them with your fingers.Slide the wheel off the studs and
lay it flat so it cannot roll away. To
put the wheel on the hub, pick up
the spare tyre, line up the holeswith the studs and slide the wheel
onto them. If this is difficult, tip thewheel slightly and get the top holein the wheel lined up with the top
stud. Then jiggle the wheel back
and forth until the wheel can be
slid over the other studs.
WARNING - Jack location
To reduce the possibility of
injury, be sure to use only the
jack provided with the vehicle
and in the correct jack position;
never use any other part of the
vehicle for jack support.
OYN069020OED066027/H
YN RHD 6.QXP 3/31/2012 4:10 PM Page 10
Page 644 of 751

621
What to do in an emergency
✽✽NOTICE
If the TPMS, Low Tyre Pressure and Position indicators do not illuminate
for 3 seconds when the ignition switch
is turned to the ON position or engine
is running, or if they remain illumi-
nated after coming on for approxi-
mately 3 seconds, we recommend that
you contact an authorised Kia dealer.Low tyre pressure tell- tale
Low tyre pressure posi- tion telltale
When the tyre pressure monitoring
system warning indicators are illumi-
nated, one or more of your tyres is
significantly under-inflated. The lowtyre pressure position telltale lightwill indicate which tyre is significant-
ly under-inflated by illuminating thecorresponding position light.
If either telltale illuminates, immedi-
ately reduce your speed, avoid hard
cornering and anticipate increased
stopping distances. You should stop
and check your tyres as soon as pos-
sible. Inflate the tyres to the proper
pressure as indicated on the vehi-
cle’s placard or tyre inflation pres-
sure label located on the driver’s side
centre pillar outer panel. If you can-
not reach a service station or if the
tyre cannot hold the newly added air,
replace the low pressure tyre with
the spare tyre. Then the TPMS malfunction indicator
may turn on and the Low Tyre
Pressure and Position telltales will
remain on after restarting and about
20 minutes of continuous driving
before you have the low pressuretyre repaired and replaced on the
vehicle.
CAUTION
In winter or cold weather, the
low tyre pressure telltale may beilluminated if the tyre pressurewas adjusted to the recom- mended tyre inflation pressurein warm weather. It does notmean your TPMS is malfunction- ing because the decreased tem-perature leads to a proportionallowering of tyre pressure.
When you drive your vehiclefrom a warm area to a cold area or from a cold area to a warmarea, or the outside temperatureis greatly higher or lower, you should check the tyre inflationpressure and adjust the tyres tothe recommended tyre inflation pressure.
YN RHD 6.QXP 3/31/2012 4:10 PM Page 21
Page 647 of 751

What to do in an emergency
24
6
You may not be able identify a low
tyre by simply looking at it. Alwaysuse a good quality tyre pressuregauge to measure the tyre's inflation
pressure. Please note that a tyre that
is hot (from being driven) will have ahigher pressure measurement than atyre that is cold (from sitting station-
ary for at least 3 hours and driven
less than 1 mile (1.6 km) during that
3 hour period).
Allow the tyre to cool before measur-
ing the inflation pressure. Always be
sure the tyre is cold before inflating
to the recommended pressure.
A cold tyre means the vehicle has
been sitting for 3 hours and driven forless than 1 mile (1.6 km) in that 3
hour period.
CAUTION
We recommend to use the Tyre
Mobility Kit approved by Kia ifyour vehicle is equipped with a Tyre Pressure MonitoringSystem. The liquid sealant candamage the tyre pressure sen- sors.
WARNING - Protecting
TPMS
Tampering with, modifying, or
disabling the Tyre PressureMonitoring System (TPMS)
components may interfere withthe system's ability to warn the
driver of low tyre pressure con-
ditions and/or TPMS malfunc-
tions. Tampering with, modify-
ing, or disabling the TyrePressure Monitoring System
(TPMS) components may void
the warranty for that portion of
the vehicle.WARNING - TPMS
The TPMS cannot alert you to severe and sudden tyre dam-
age caused by external fac-
tors such as nails or roaddebris.
If you feel any vehicle instabil- ity, immediately take your foot
off the accelerator, apply the
brakes gradually and with
light force, and slowly move to
a safe position off the road.
YN RHD 6.QXP 3/31/2012 4:10 PM Page 24
Page 657 of 751

75
Maintenance
OWNER MAINTENANCE
The following lists are vehicle checks and
inspections that should be performed atthe frequencies indicated to help ensure
safe, dependable operation of your vehi-
cle. If you have any question, we recom-
mend that you consult an authorised Kia
dealer.
These Owner Maintenance Checks are
generally not covered by warranties and
you may be charged for labour, parts and
lubricants used. Owner maintenance schedule
When you stop for fuel:
• Check the engine oil level.
Check the coolant level in coolant
reservoir.
Check the windscreen washer fluid level.
Look for low or under-inflated tyres.
Whilst operating your vehicle:
Note any changes in the sound of the exhaust or any smell of exhaust fumes
in the vehicle.
Check for vibrations in the steering wheel. Notice any increased steering
effort or looseness in the steering
wheel, or change in its straight-aheadposition.
Notice if your vehicle constantly turns slightly or “pulls” to one side when trav-
elling on smooth, level road.
When stopping, listen and check for unusual sounds, pulling to one side,
increased brake pedal travel or “hard-
to-push” brake pedal.
If any slipping or changes in the oper- ation of your transaxle occurs, check
the transaxle fluid level.
Check automatic transaxle P (Park) function.
Check the parking brake.
Check for fluid leaks under your vehicle (water dripping from the air condition-
ing system during or after use is nor-mal).
WARNING
Be careful when checking your
engine coolant level when the
engine is hot. Scalding hot coolant
and steam may blow out under
pressure. This could cause burns
or other serious injury.
YN RHD 7.QXP 3/31/2012 4:12 PM Page 5
Page 658 of 751

Maintenance
6
7
At least monthly:
Check the coolant level in the engine
coolant reservoir.
Check the operation of all exterior lights, including the stoplights, turn sig-
nals and hazard warning flashers.
Check the inflation pressures of all tyres including the spare.
At least twice a year
(i.e., every Spring and Fall):
Check the radiator, heater and air con- ditioning hoses for leaks or damage.
Check the windscreen washer spray and wiper operation. Clean wiper
blades with clean cloth dampened with
washer fluid.
Check the headlight alignment.
Check the muffler, exhaust pipes, shields and clamps.
Check the lap/shoulder belts for wear and function.
Check for worn tyres and loose wheel lug nuts.
At least once a year:
Clean the body and door drain holes.
Lubricate the door hinges and checks,and bonnet hinges.
Lubricate the door and bonnet locks and latches.
Lubricate the door rubber weather- strips.
Check the air conditioning system.
Inspect and lubricate automatic transaxle linkage and controls.
Clean the battery and terminals.
Check the brake/clutch fluid level.
YN RHD 7.QXP 3/31/2012 4:12 PM Page 6
Page 684 of 751

Maintenance
32
7
FUEL FILTER (FOR DIESEL)
Draining water from the fuel filter
The fuel filter for diesel engine plays an
important role of separating water from
fuel and accumulating the water in itsbottom.
If water accumulates in the fuel filter, the
warning light comes on when the ignition
switch is in the ON position. If this warning light illuminates,
we recommend that you con-
tact an authorised Kia dealer.
Extracting air from the fuel filter
If you drove until you have no fuel left or
if you replaced the fuel filter, be sure to
extract air in the fuel system as it makes
you difficult to start the engine.
1. Press the priming pump (1) severaltimes.
2. Open the air extracting hall after removing the bolt (2) using a screw-
driver to extract air.
✽✽ NOTICE
Repeat the procedure above until all the
air is out. ✽
✽
NOTICE
Page 691 of 751

739
Maintenance
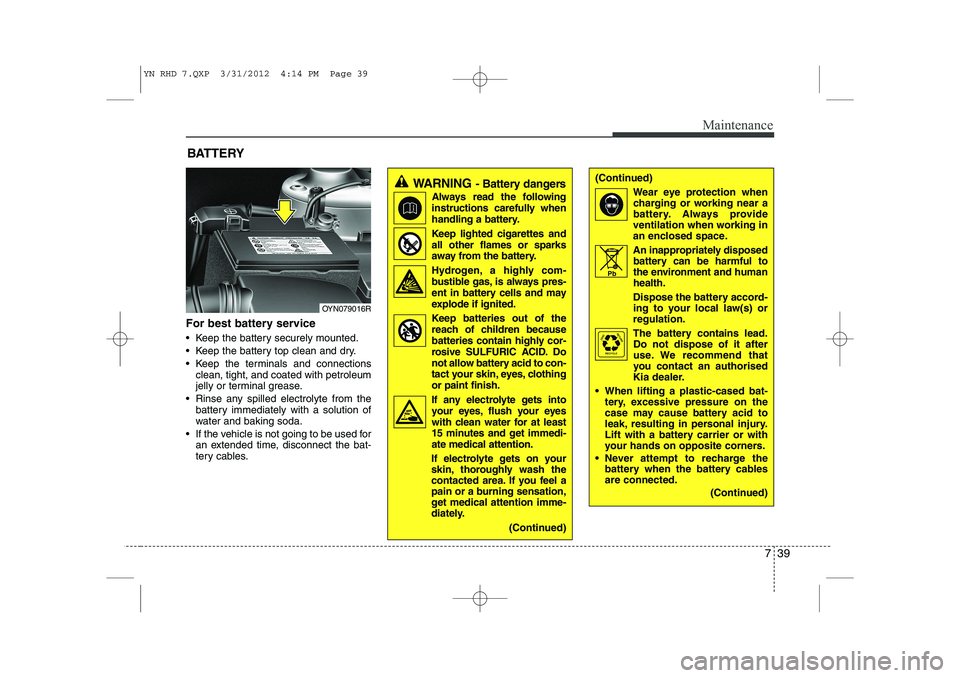
For best battery service
Keep the battery securely mounted.
Keep the battery top clean and dry.
Keep the terminals and connectionsclean, tight, and coated with petroleum
jelly or terminal grease.
Rinse any spilled electrolyte from the battery immediately with a solution of
water and baking soda.
If the vehicle is not going to be used for an extended time, disconnect the bat-
tery cables.
WARNING - Battery dangers
Always read the following
instructions carefully when
handling a battery.
Keep lighted cigarettes and all other flames or sparks
away from the battery.
Hydrogen, a highly com- bustible gas, is always pres-
ent in battery cells and may
explode if ignited.
Keep batteries out of the reach of children because
batteries contain highly cor-
rosive SULFURIC ACID. Do
not allow battery acid to con-
tact your skin, eyes, clothingor paint finish.
If any electrolyte gets into your eyes, flush your eyes
with clean water for at least
15 minutes and get immedi-ate medical attention.
If electrolyte gets on your
skin, thoroughly wash the
contacted area. If you feel a
pain or a burning sensation,
get medical attention imme-
diately.
(Continued)(Continued)Wear eye protection whencharging or working near a
battery. Always provide
ventilation when working in
an enclosed space.
An inappropriately disposed battery can be harmful to
the environment and humanhealth.
Dispose the battery accord- ing to your local law(s) or
regulation.
The battery contains lead.
Do not dispose of it after
use. We recommend that
you contact an authorised
Kia dealer.
When lifting a plastic-cased bat- tery, excessive pressure on the
case may cause battery acid to
leak, resulting in personal injury.
Lift with a battery carrier or with
your hands on opposite corners.
Never attempt to recharge the battery when the battery cables are connected.
(Continued)
BATTERY
OYN079016R Pb
YN RHD 7.QXP 3/31/2012 4:14 PM Page 39
Page 692 of 751

Maintenance
40
7
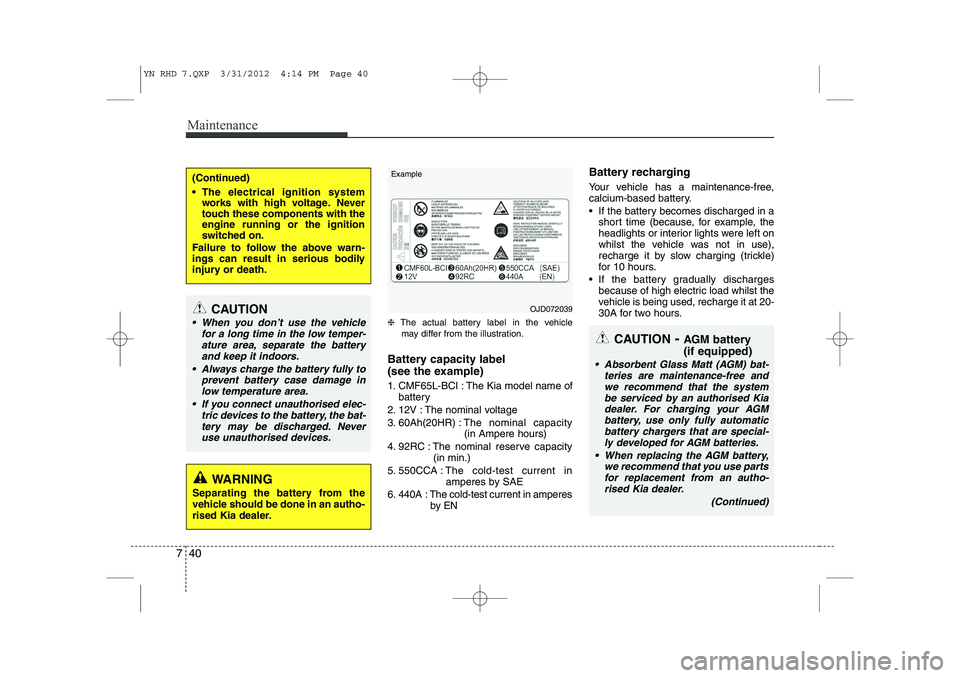
❈ The actual battery label in the vehicle
may differ from the illustration.
Battery capacity label
(see the example)
1. CMF65L-BCI : The Kia model name of battery
2. 12V : The nominal voltage
3. 60Ah(20HR) : The nominal capacity
(in Ampere hours)
4. 92RC : The nominal reserve capacity (in min.)
5. 550CCA : The cold-test current in
amperes by SAE
6. 440A : The cold-test current in amperes by EN Battery recharging
Your vehicle has a maintenance-free,
calcium-based battery.
If the battery becomes discharged in a
short time (because, for example, the
headlights or interior lights were left on
whilst the vehicle was not in use),
recharge it by slow charging (trickle)
for 10 hours.
If the battery gradually discharges because of high electric load whilst the
vehicle is being used, recharge it at 20-
30A for two hours.
(Continued)
The electrical ignition systemworks with high voltage. Never
touch these components with theengine running or the ignition
switched on.
Failure to follow the above warn-
ings can result in serious bodily
injury or death.
CAUTION
When you don’t use the vehicle for a long time in the low temper-ature area, separate the battery
and keep it indoors.
Always charge the battery fully to prevent battery case damage inlow temperature area.
If you connect unauthorised elec- tric devices to the battery, the bat-tery may be discharged. Never use unauthorised devices.
WARNING
Separating the battery from the
vehicle should be done in an autho-
rised Kia dealer.
OJD072039
Example
CAUTION
- AGM battery (if equipped)
Absorbent Glass Matt (AGM) bat-
teries are maintenance-free andwe recommend that the systembe serviced by an authorised Kia dealer. For charging your AGM
battery, use only fully automaticbattery chargers that are special- ly developed for AGM batteries.
When replacing the AGM battery, we recommend that you use parts
for replacement from an autho-rised Kia dealer.
(Continued)
YN RHD 7.QXP 3/31/2012 4:14 PM Page 40