2013 KIA VENGA tires
[x] Cancel search: tiresPage 252 of 751

Driving your vehicle
48
5
More weather conditions of winter result
in greater wear and other problems. To
minimize winter driving problem, you
should follow these suggestions: Snowy or icy conditions
To drive your vehicle in deep snow, it may
be necessary to use snow tires or to
install tire chains on your tires. If snow
tires are needed, it is necessary to select
tires equivalent in size and type of the
original equipment tires. Failure to do so
may adversely affect the safety and han-
dling of your car. Furthermore, speeding,
rapid acceleration, sudden brake appli-
cations, and sharp turns are potentially
very hazardous practices.
During deceleration, use engine braking
to the fullest extent. Sudden brake appli-
cations on snowy or icy roads may cause
skids to occur. You need to keep suffi-
cient distance between the vehicle in
operation in front and your vehicle. Also,
apply the brake gently. It should be notedthat installing tire chains on the tire will
provide a greater driving force, but will
not prevent side skids.
✽✽
NOTICE
Tire chains are not legal in all countries.
Check the country laws before fitting
tire chains.
Snow tires
If you mount snow tires on your vehicle,
make sure they are radial tires of the
same size and load range as the original
tires. Mount snow tires on all four wheels
to balance your vehicle’s handling in all
weather conditions. Keep in mind that the
traction provided by snow tires on dry
roads may not be as high as your vehi-
cle's original equipment tires. You should
drive cautiously even when the roads are
clear. Check with the tire dealer for max-
imum speed recommendations.
Do not install studded tires without first checking local, state and municipal regu- lations for possible restrictions againsttheir use.
WINTER DRIVING
WARNING - Snow tire size
Snow tires should be equivalent in
size and type to the vehicle's stan-
dard tires. Otherwise, the safety
and handling of your vehicle may
be adversely affected.
1JBB3305
YN ENG 5.QXP 4/16/2012 10:04 AM Page 48
Page 253 of 751

549
Driving your vehicle
Tire chains
Since the sidewalls of radial tires are
thinner, they can be damaged by mount-
ing some types of snow chains on them.
Therefore, the use of snow tires is rec-
ommended instead of snow chains. Do
not mount tire chains on vehicles
equipped with aluminum wheels; snow
chains may cause damage to the wheels.
If snow chains must be used, use wire-
type chains with a thickness of less than
15 mm (0.59 in). Damage to your vehicle
caused by improper snow chain use is
not covered by your vehicle manufactur-
ers warranty.
Install tire chains only on the front tires.Chain installation
When installing chains, follow the manu-
facturer's instructions and mount them as
tightly as you can. Drive slowly with
chains installed. If you hear the chains
contacting the body or chassis, stop and
tighten them. If they still make contact,
slow down until it stops. Remove the
chains as soon as you begin driving on
cleared roads.
CAUTION
Make sure the snow chains are
the correct size and type for your
tires. Incorrect snow chains can cause damage to the vehicle bodyand suspension and may not becovered by your vehicle manufac-
turer warranty. Also, the snowchain connecting hooks may be damaged from contacting vehicle
components causing the snow chains to come loose from the tire. Make sure the snow chainsare SAE class “S” certified.
Always check chain installation for proper mounting after drivingapproximately 0.5 to 1 km (0.3 to 0.6 miles) to ensure safe mount-
ing. Retighten or remount thechains if they are loose.
WARNING
- Mounting chains
When mounting snow chains, park
the vehicle on level ground away
from traffic. Turn on the vehicle
Hazard Warning flashers and place
a triangular emergency warning
device behind the vehicle if avail-
able. Always place the vehicle in P
(Park), apply the parking brake and
turn off the engine before installing
snow chains.OED050200
YN ENG 5.QXP 4/16/2012 10:04 AM Page 49
Page 258 of 751
Driving your vehicle
54
5
Safety chains
You should always attach chains
between your vehicle and your trailer.
Cross the safety chains under the tongue
of the trailer so that the tongue will not
drop to the road if it becomes separatedfrom the hitch.
Instructions about safety chains may be
provided by the hitch manufacturer or by
the trailer manufacturer. Follow the man-
ufacturer’s recommendation for attaching
safety chains. Always leave just enough
slack so you can turn with your trailer.
And, never allow safety chains drag on
the ground. Trailer brakes
If your trailer is equipped with a braking
system, make sure it conforms to your
country’s regulations and that it is prop-
erly installed and operating correctly.
If your trailer weighs more than the max-
imum trailer weight without trailer brakes
loaded, then it needs its own brakes and
they must be adequate. Be sure to read
and follow the instructions for the trailer
brakes so you’ll be able to install, adjust
and maintain them properly.
Don’t tap into your vehicle's brake sys-
tem. Driving with a trailer
Towing a trailer requires a certain
amount of experience. Before setting out
for the open road, you must get to know
your trailer. Acquaint yourself with the
feel of handling and braking with the
added weight of the trailer. And always
keep in mind that the vehicle you are
driving is now a good deal longer and not
nearly so responsive as your vehicle is
by itself.
Before you start, check the trailer hitch
and platform, safety chains, electrical
connector(s), lights, tires and mirror
adjustment. If the trailer has electric
brakes, start your vehicle and trailer mov-
ing and then apply the trailer brake con-
troller by hand to be sure the brakes are
working. This lets you check your electri-
cal connection at the same time.
During your trip, check occasionally to be
sure that the load is secure, and that the
lights and trailer brakes are still working.
WARNING
- Trailer brakes
Do not use a trailer with its own
brakes unless you are absolutely
certain that you have properly set
up the brake system. This is not a
task for amateurs. Use an experi-
enced, competent trailer shop for
this work.
YN ENG 5.QXP 4/16/2012 10:04 AM Page 54
Page 271 of 751
67
What to do in an emergency
IF YOU HAVE A FLAT TIRE (WITH SPARE TIRE, IF EQUIPPED)
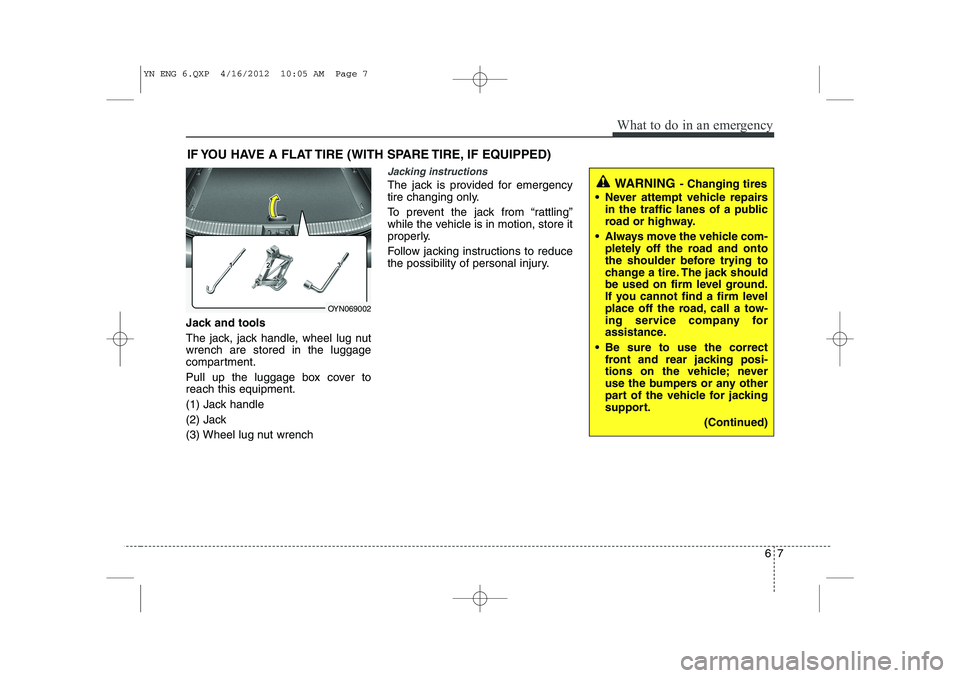
Jack and tools
The jack, jack handle, wheel lug nut wrench are stored in the luggage
compartment.
Pull up the luggage box cover to reach this equipment.
(1) Jack handle
(2) Jack
(3) Wheel lug nut wrench
Jacking instructions
The jack is provided for emergency
tire changing only.
To prevent the jack from “rattling”
while the vehicle is in motion, store it
properly.
Follow jacking instructions to reduce
the possibility of personal injury.WARNING - Changing tires
Never attempt vehicle repairs in the traffic lanes of a public
road or highway.
Always move the vehicle com- pletely off the road and onto
the shoulder before trying to
change a tire. The jack should
be used on firm level ground.
If you cannot find a firm level
place off the road, call a tow-
ing service company for
assistance.
Be sure to use the correct front and rear jacking posi-
tions on the vehicle; never
use the bumpers or any other
part of the vehicle for jacking
support.
(Continued)
OYN069002
YN ENG 6.QXP 4/16/2012 10:05 AM Page 7
Page 272 of 751
What to do in an emergency
8
6
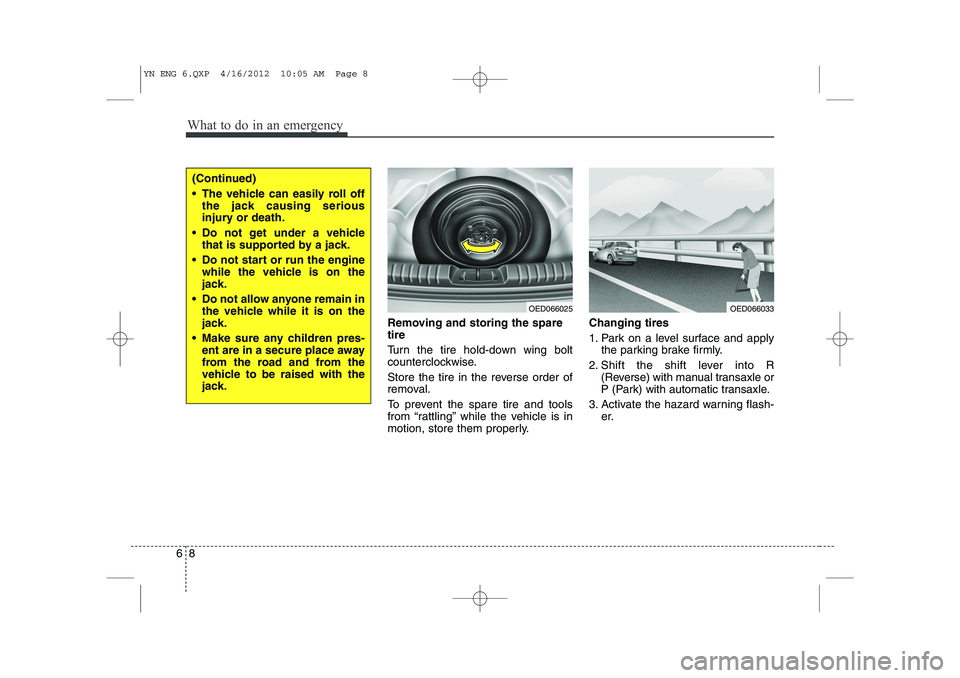
Removing and storing the spare tire
Turn the tire hold-down wing bolt
counterclockwise.
Store the tire in the reverse order of
removal.
To prevent the spare tire and tools
from “rattling” while the vehicle is in
motion, store them properly. Changing tires
1. Park on a level surface and apply
the parking brake firmly.
2. Shift the shift lever into R (Reverse) with manual transaxle or
P (Park) with automatic transaxle.
3. Activate the hazard warning flash- er.
(Continued)
The vehicle can easily roll offthe jack causing serious
injury or death.
Do not get under a vehicle that is supported by a jack.
Do not start or run the engine while the vehicle is on the
jack.
Do not allow anyone remain in the vehicle while it is on the
jack.
Make sure any children pres- ent are in a secure place away
from the road and from the
vehicle to be raised with the
jack.
OED066025OED066033
YN ENG 6.QXP 4/16/2012 10:05 AM Page 8
Page 276 of 751
What to do in an emergency
12
6
If you have a tire gauge, remove the
valve cap and check the air pressure.
If the pressure is lower than recom-
mended, drive slowly to the nearest
service station and inflate to the cor-
rect pressure. If it is too high, adjust
it until it is correct. Always reinstall
the valve cap after checking or
adjusting tire pressure. If the cap is
not replaced, air may leak from the
tire. If you lose a valve cap, buyanother and install it as soon as pos-
sible.
After you have changed wheels,
always secure the flat tire in its place
and return the jack and tools to their
proper storage locations. To prevent the jack, jack handle,
wheel lug nut wrench and spare tire
from rattling while the vehicle is in
motion, store them properly.CAUTION
Your vehicle has metric threads
on the wheel studs and nuts.Make certain during wheel removal that the same nuts thatwere removed are reinstalled -or, if replaced, that nuts with metric threads and the samechamfer configuration are used.Installation of a non-metric thread nut on a metric stud orvice-versa will not secure thewheel to the hub properly andwill damage the stud so that it must be replaced.
Note that most lug nuts do nothave metric threads. Be sure touse extreme care in checking for thread style before installingaftermarket lug nuts or wheels.If in doubt, we recommend thatyou consult an authorized Kia dealer.
WARNING - Wheel studs
If the studs are damaged, they
may lose their ability to retain
the wheel. This could lead to theloss of the wheel and a collisionresulting in serious injuries.
WARNING - Inadequate
spare tire pressure
Check the inflation pressures
as soon as possible after
installing the spare tire. Adjust
it to the specified pressure, if
necessary. Refer to “Tires and
wheels” in section 8.
YN ENG 6.QXP 4/16/2012 10:06 AM Page 12
Page 278 of 751
What to do in an emergency
14
6
Do not take this vehicle through an
automatic car wash while the com- pact spare tire is installed.
Do not use tire chains on the com- pact spare tire. Because of the
smaller size, a tire chain will not fit
properly. This could damage the
vehicle and result in loss of thechain.
The compact spare tire should not be installed on the front axle if the
vehicle must be driven in snow or
on ice.
Do not use the compact spare tire on any other vehicle because thistire has been designed especially
for your vehicle.
The compact spare tire’s tread life is shorter than a regular tire.
Inspect your compact spare tire
regularly and replace worn com-
pact spare tires with the same sizeand design, mounted on the samewheel. The compact spare tire should not
be used on any other wheels, nor
should standard tires, snow tires,
wheel covers or trim rings be used
with the compact spare wheel. Ifsuch use is attempted, damage tothese items or other car compo-
nents may occur.
Do not use more than one compact spare tire at a time.
Do not tow a trailer while the com- pact spare tire is installed.
YN ENG 6.QXP 4/16/2012 10:06 AM Page 14
Page 279 of 751
615
What to do in an emergency
IF YOU HAVE A FLAT TIRE (WITH TIRE MOBILITY KIT, IF EQUIPPED)
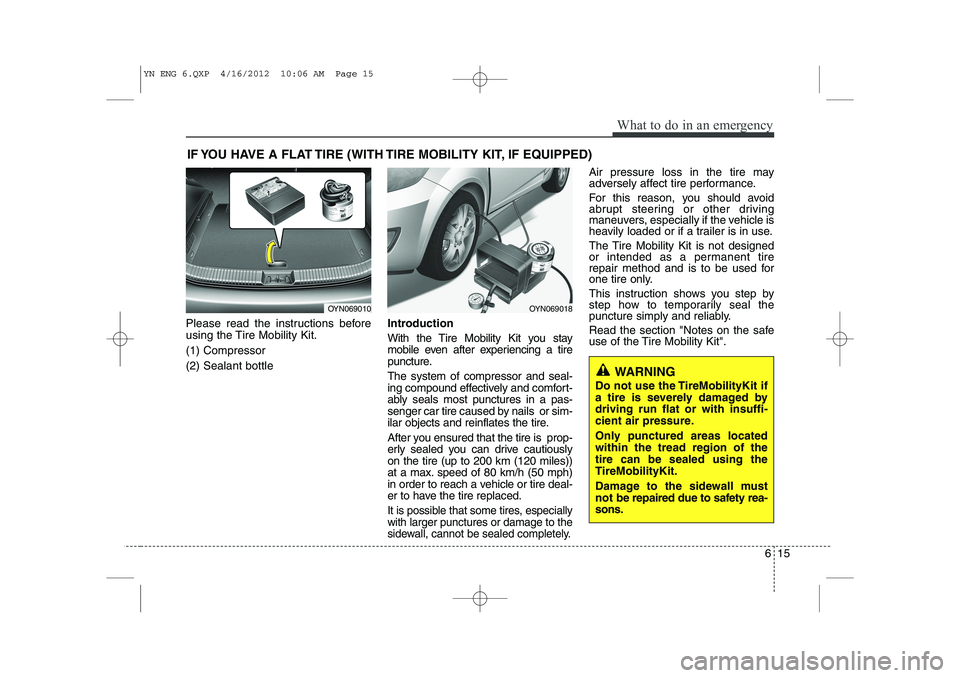
Please read the instructions before
using the Tire Mobility Kit. (1) Compressor(2) Sealant bottle Introduction
With the Tire Mobility Kit you stay
mobile even after experiencing a tire
puncture. The system of compressor and seal-
ing compound effectively and comfort-
ably seals most punctures in a pas-
senger car tire caused by nails or sim-
ilar objects and reinflates the tire.
After you ensured that the tire is prop-
erly sealed you can drive cautiouslyon the tire (up to 200 km (120 miles))
at a max. speed of 80 km/h (50 mph)
in order to reach a vehicle or tire deal-
er to have the tire replaced.
It is possible that some tires, especiallywith larger punctures or damage to the
sidewall, cannot be sealed completely.
Air pressure loss in the tire may
adversely affect tire performance.
For this reason, you should avoid
abrupt steering or other driving
maneuvers, especially if the vehicle is
heavily loaded or if a trailer is in use.
The Tire Mobility Kit is not designed
or intended as a permanent tire
repair method and is to be used for
one tire only.
This instruction shows you step by
step how to temporarily seal the
puncture simply and reliably.
Read the section "Notes on the safe
use of the Tire Mobility Kit".
OYN069010OYN069018
WARNING
Do not use the TireMobilityKit if
a tire is severely damaged bydriving run flat or with insuffi-
cient air pressure.
Only punctured areas located within the tread region of thetire can be sealed using theTireMobilityKit.
Damage to the sidewall must
not be repaired due to safety rea-
sons.
YN ENG 6.QXP 4/16/2012 10:06 AM Page 15