2013 KIA Sportage audio
[x] Cancel search: audioPage 227 of 387
4137
Features of your vehicle
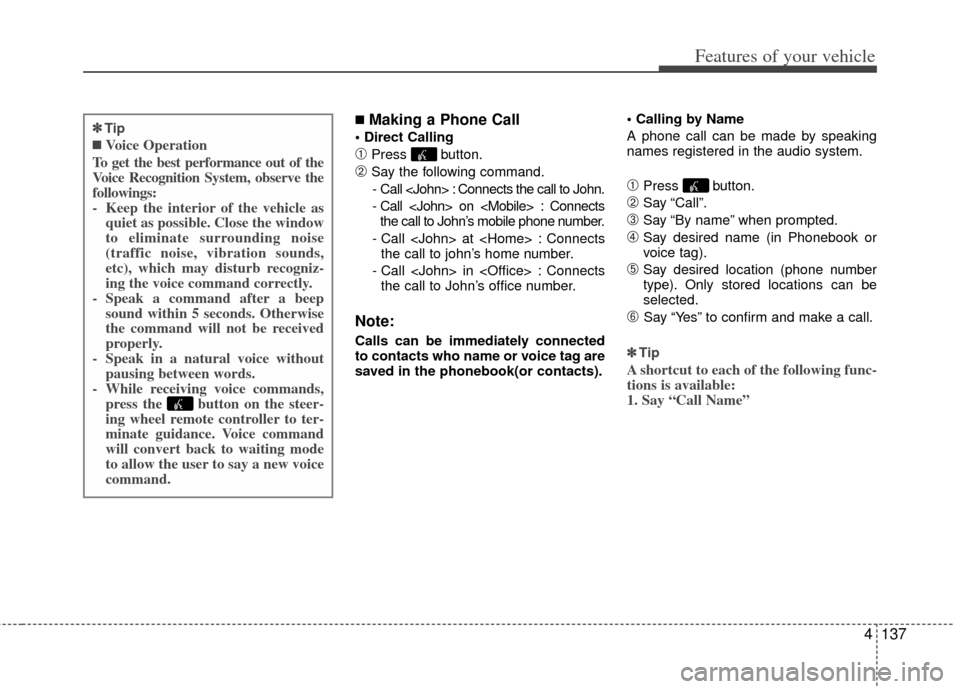
■Making a Phone Call
➀Press button.
\bSay the following command.- Call
- Call
- Call
- Call
Note:
Calls can be immediately connected
to contacts who name or voice tag are
saved in the phonebook(or contacts).
A phone call can be made by speaking
names registered in the audio system.
➀Press button.
\bSay “Call”.
➂Say “By name” when prompted.
➃Say desired name (in Phonebook or
voice tag).
➄Say desired location (phone number
type). Only stored locations can be
selected.
\f Say “Yes” to confirm and make a call.
✽ ✽ Tip
A shortcut to each of the following func-
tions is available:
1. Say “Call Name”
✽
✽Tip
■Voice Operation
To get the best performance out of the
Voice Recognition System, observe the
followings:
- Keep the interior of the vehicle as quiet as possible. Close the window
to eliminate surrounding noise
(traffic noise, vibration sounds,
etc), which may disturb recogniz-
ing the voice command correctly.
- Speak a command after a beep sound within 5 seconds. Otherwise
the command will not be received
properly.
- Speak in a natural voice without pausing between words.
- While receiving voice commands, press the button on the steer-
ing wheel remote controller to ter-
minate guidance. Voice command
will convert back to waiting mode
to allow the user to say a new voice
command.
Page 229 of 387
4139
Features of your vehicle
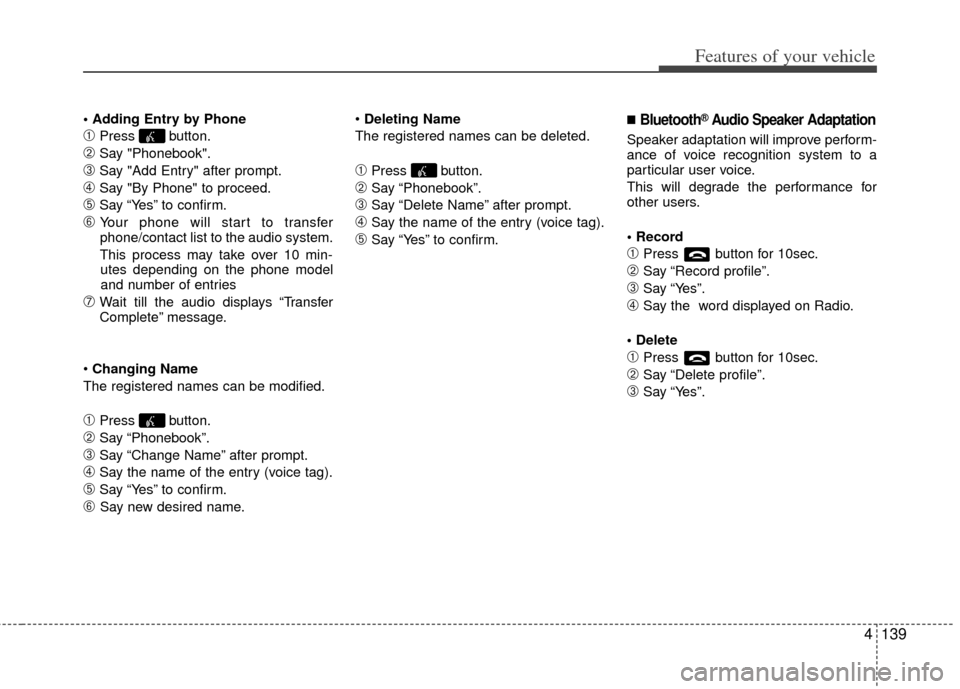
➀Press button.
\bSay "Phonebook".
➂Say "Add Entry" after prompt.
➃Say "By Phone" to proceed.
➄Say “Yes” to confirm.
\f Your phone will start to transfer
phone/contact list to the audio system.
This process may take over 10 min- utes depending on the phone model
and number of entries
➆Wait till the audio displays “Transfer
Complete” message.
Changing Name
The registered names can be modified.
➀Press button.
\bSay “Phonebook”.
➂Say “Change Name” after prompt.
➃Say the name of the entry (voice tag).
➄Say “Yes” to confirm.
\f Say new desired name.
Deleting Name
The registered names can be deleted.
➀Press button.
\bSay “Phonebook”.
➂Say “Delete Name” after prompt.
➃Say the name of the entry (voice tag).
➄Say “Yes” to confirm.
■Bluetooth®Audio Speaker Adaptation
Speaker adaptation will improve perform-
ance of voice recognition system to a
particular user voice.
This will degrade the performance for
other users.
➀Press button for 10sec.
\bSay “Record profile”.
➂Say “Yes”.
➃Say the word displayed on Radio.
➀Press button for 10sec.
\bSay “Delete profile”.
➂Say “Yes”.
Page 230 of 387
Features of your vehicle
140
4
NOTE:
If you need more information about
Kia’s Bluetooth®wireless technology.
Contact kia website “www.kia.com”
(OWNERS>General Info>BLUETOOTH
wireless technology).
CAUTION IN USING
BLUETOOTH®CELLULAR
PHONE
Do not use a cellular phone or
perform Bluetooth®settings (e.g.
pairing a phone) while driving.
Some Bluetooth
®-enabled phones
may not be recognized by the system or fully compatible withthe system.
Before using Bluetooth
®related
features of the audio system, refer your phone’s User’s Manual for phone-side Bluetooth
®opera-
tions.
The phone must be paired to the audio system to use Bluetooth®
related features.
You will not be able to use the hands-free feature when yourphone (in the car) is outside ofthe cellular service area (e.g. in atunnel, in a underground, in amountainous area, etc.).
If the cellular phone signal is poor or the vehicles interior noise istoo loud, it may be difficult to hearthe other person’s voice during a call.
(Continued)
(continued) Do not place the phone near or inside metallic objects, otherwise
communications with Bluetooth
®
system or cellular service sta-tions can be disturbed.
While a phone is connected through Bluetooth
®your phone
may discharge quicker than usual for additional Bluetooth
®-related
operations.
Some cellular phones or other devices may cause interferencenoise or malfunction to audiosystem. In this case, store thedevice in a different location mayresolve the situation.
Page 235 of 387
Driving your vehicle
45
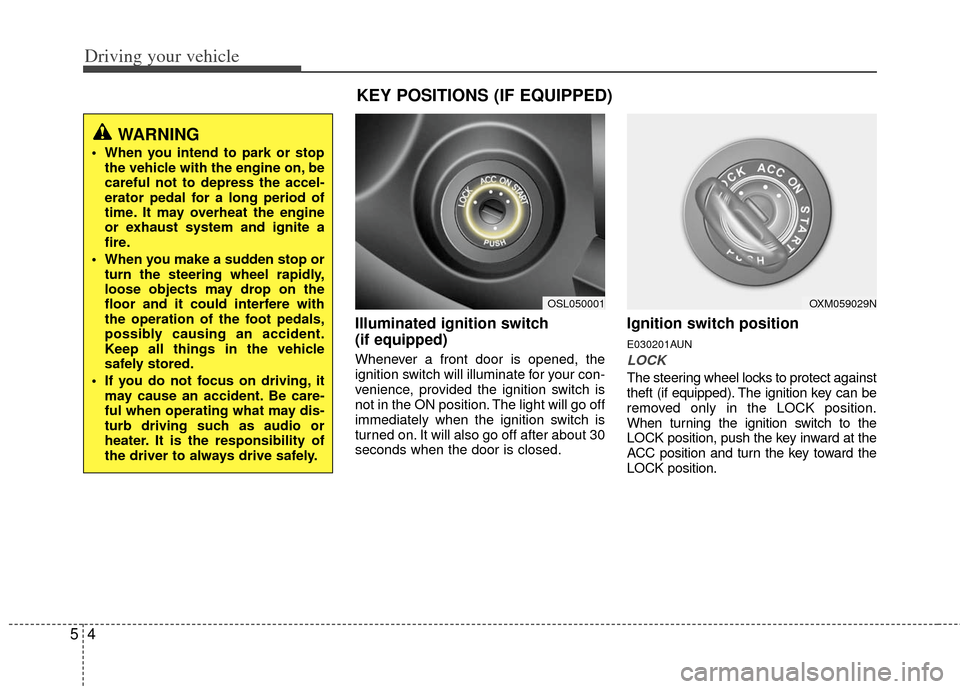
Illuminated ignition switch
(if equipped)
Whenever a front door is opened, the
ignition switch will illuminate for your con-
venience, provided the ignition switch is
not in the ON position. The light will go off
immediately when the ignition switch is
turned on. It will also go off after about 30
seconds when the door is closed.
Ignition switch position
E030201AUN
LOCK
The steering wheel locks to protect against
theft (if equipped). The ignition key can be
removed only in the LOCK position.
When turning the ignition switch to the
LOCK position, push the key inward at the
ACC position and turn the key toward the
LOCK position.
OXM059029NOSL050001
WARNING
When you intend to park or stopthe vehicle with the engine on, be
careful not to depress the accel-
erator pedal for a long period of
time. It may overheat the engine
or exhaust system and ignite a
fire.
When you make a sudden stop or turn the steering wheel rapidly,
loose objects may drop on the
floor and it could interfere with
the operation of the foot pedals,
possibly causing an accident.
Keep all things in the vehicle
safely stored.
If you do not focus on driving, it may cause an accident. Be care-
ful when operating what may dis-
turb driving such as audio or
heater. It is the responsibility of
the driver to always drive safely.
KEY POSITIONS (IF EQUIPPED)
Page 348 of 387
Maintenance
30
7
G190300AAM
Reset items
Items should be reset after the battery
has been discharged or the battery has
been disconnected.
Auto up/down window (See section 4)
Sunroof (See section 4)
Trip computer (See section 4)
Climate control system
(See section 4)
Clock (See section 4)
Audio (See section 4)
WARNING
Before performing maintenance or recharging the battery, turn off
all accessories and stop the
engine.
The negative battery cable must be removed first and installed
last when the battery is discon-
nected.
Page 364 of 387
Maintenance
46
7
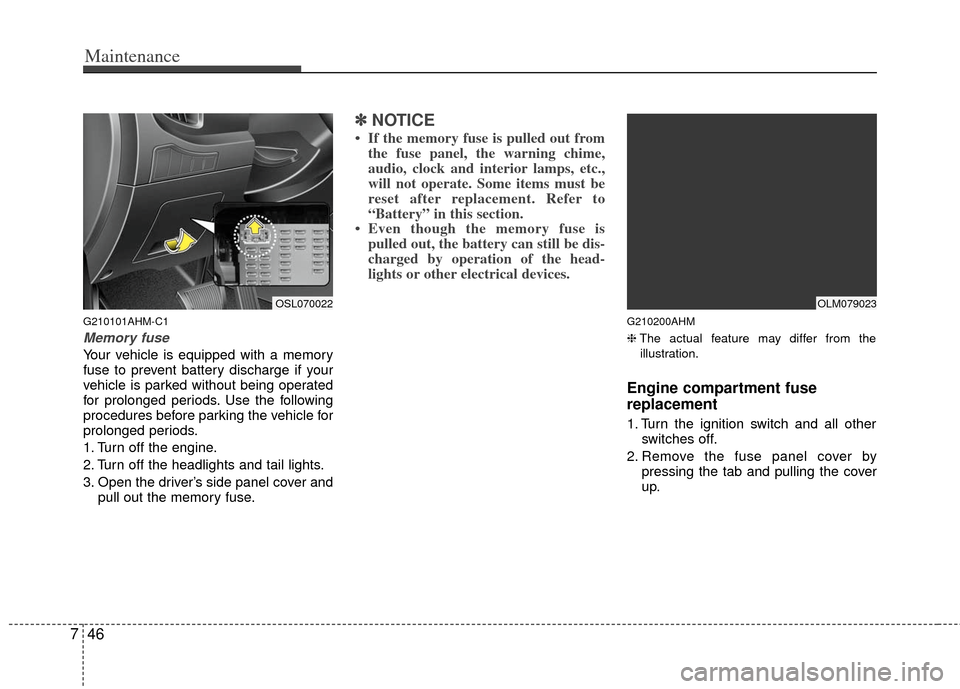
G210101AHM-C1
Memory fuse
Your vehicle is equipped with a memory
fuse to prevent battery discharge if your
vehicle is parked without being operated
for prolonged periods. Use the following
procedures before parking the vehicle for
prolonged periods.
1. Turn off the engine.
2. Turn off the headlights and tail lights.
3. Open the driver’s side panel cover and
pull out the memory fuse.
✽ ✽NOTICE
• If the memory fuse is pulled out from
the fuse panel, the warning chime,
audio, clock and interior lamps, etc.,
will not operate. Some items must be
reset after replacement. Refer to
“Battery” in this section.
• Even though the memory fuse is pulled out, the battery can still be dis-
charged by operation of the head-
lights or other electrical devices.
G210200AHM
❈ The actual feature may differ from the
illustration.
Engine compartment fuse
replacement
1. Turn the ignition switch and all other switches off.
2. Remove the fuse panel cover by pressing the tab and pulling the cover
up.
OSL070022OLM079023
Page 367 of 387
749
Maintenance
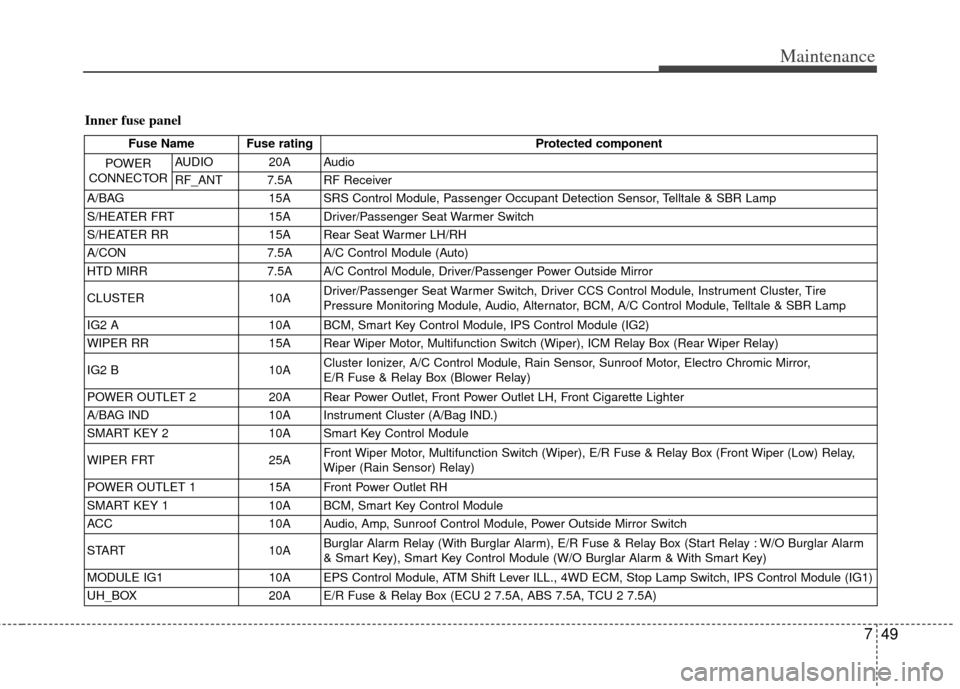
Inner fuse panel
Fuse Name Fuse ratingProtected component
POWER
CONNECTOR
AUDIO 20A Audio
RF_ANT 7.5A RF Receiver
A/BAG 15A SRS Control Module, Passenger Occupant Detection Sensor, Telltale & SBR Lamp
S/HEATER FRT 15A Driver/Passenger Seat Warmer Switch
S/HEATER RR 15A Rear Seat Warmer LH/RH
A/CON 7.5A A/C Control Module (Auto)
HTD MIRR 7.5A A/C Control Module, Driver/Passenger Power Outside Mirror
CLUSTER 10A Driver/Passenger Seat Warmer Switch, Driver CCS Control Module, Instrument Cluster, Tire
Pressure Monitoring Module, Audio, Alternator, BCM, A/C Control Module, Telltale & SBR Lamp
IG2 A 10A BCM, Smart Key Control Module, IPS Control Module (IG2)
WIPER RR 15A Rear Wiper Motor, Multifunction Switch (Wiper), ICM Relay Box (Rear Wiper Relay)
IG2 B 10A Cluster Ionizer, A/C Control Module, Rain Sensor, Sunroof Motor, Electro Chromic Mirror,
E/R Fuse & Relay Box (Blower Relay)
POWER OUTLET 2 20A Rear Power Outlet, Front Power Outlet LH, Front Cigarette Lighter
A/BAG IND 10A Instrument Cluster (A/Bag IND.)
SMART KEY 2 10A Smart Key Control Module
WIPER FRT 25A Front Wiper Motor, Multifunction Switch (Wiper), E/R Fuse & Relay Box (Front Wiper (Low) Relay,
Wiper (Rain Sensor) Relay)
POWER OUTLET 1 15A Front Power Outlet RH
SMART KEY 1 10A BCM, Smart Key Control Module
ACC 10A Audio, Amp, Sunroof Control Module, Power Outside Mirror Switch
START 10A Burglar Alarm Relay (With Burglar Alarm), E/R Fuse & Relay Box (Start Relay : W/O Burglar Alarm
& Smart Key), Smart Key Control Module (W/O Burglar Alarm & With Smart Key)
MODULE IG1 10A EPS Control Module, ATM Shift Lever ILL., 4WD ECM, Stop Lamp Switch, IPS Control Module (IG1)
UH_BOX 20A E/R Fuse & Relay Box (ECU 2 7.5A, ABS 7.5A, TCU 2 7.5A)
Page 369 of 387
751
Maintenance
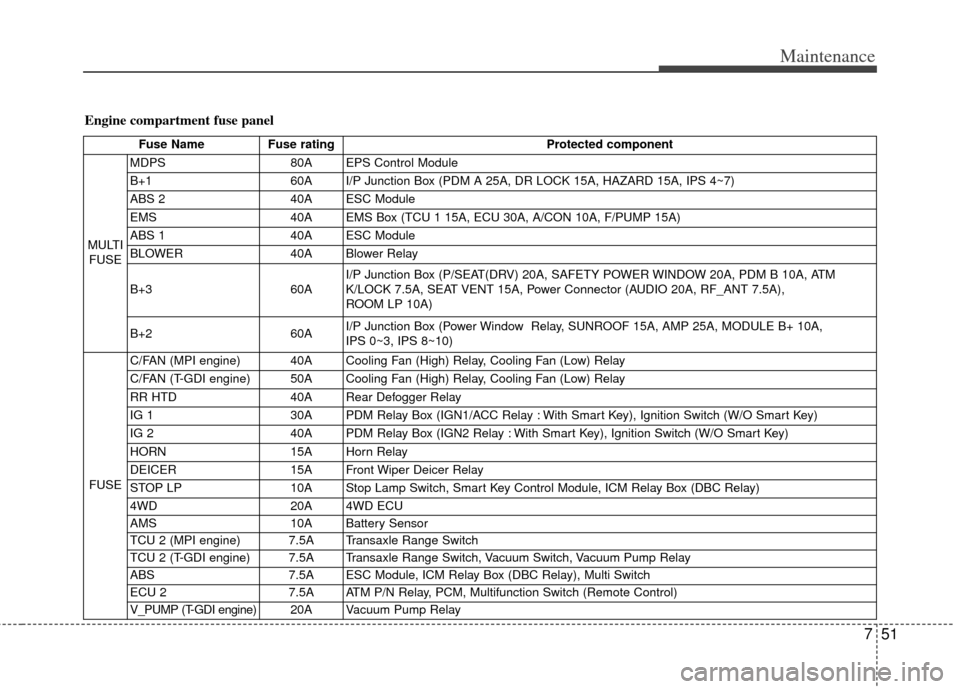
Engine compartment fuse panel
Fuse NameFuse rating Protected component
MULTI FUSE MDPS
80A EPS Control Module
B+1 60A I/P Junction Box (PDM A 25A, DR LOCK 15A, HAZARD 15A, IPS 4~7)
ABS 2 40A ESC Module
EMS 40A EMS Box (TCU 1 15A, ECU 30A, A/CON 10A, F/PUMP 15A)
ABS 1 40A ESC Module
BLOWER 40A Blower Relay
B+3 60AI/P Junction Box (P/SEAT(DRV) 20A, SAFETY POWER WINDOW 20A, PDM B 10A, ATM
K/LOCK 7.5A, SEAT VENT 15A, Power Connector (AUDIO 20A, RF_ANT 7.5A),
ROOM LP 10A)
B+2 60AI/P Junction Box (Power Window Relay, SUNROOF 15A, AMP 25A, MODULE B+ 10A,
IPS 0~3, IPS 8~10)
FUSE C/FAN (MPI engine) 40A Cooling Fan (High) Relay, Cooling Fan (Low) Relay
C/FAN (T-GDI engine) 50A Cooling Fan (High) Relay, Cooling Fan (Low) Relay
RR HTD
40A Rear Defogger Relay
IG 1 30A PDM Relay Box (IGN1/ACC Relay : With Smart Key), Ignition Switch (W/O Smart Key)
IG 2 40A PDM Relay Box (IGN2 Relay : With Smart Key), Ignition Switch (W/O Smart Key)
HORN 15A Horn Relay
DEICER 15A Front Wiper Deicer Relay
STOP LP 10A Stop Lamp Switch, Smart Key Control Module, ICM Relay Box (DBC Relay)
4WD 20A 4WD ECU
AMS 10A Battery Sensor
TCU 2 (MPI engine) 7.5A Transaxle Range Switch
TCU 2 (T-GDI engine) 7.5A Transaxle Range Switch, Vacuum Switch, Vacuum Pump Relay
ABS 7.5A ESC Module, ICM Relay Box (DBC Relay), Multi Switch
ECU 2 7.5A ATM P/N Relay, PCM, Multifunction Switch (Remote Control)
V_PUMP (T-GDI engine) 20A V acuum Pump Relay