2013 KIA Sportage warning lights
[x] Cancel search: warning lightsPage 125 of 387
435
Features of your vehicle
D130300AUN
Tilt steering/
Telescope steering (if equipped)
Tilt steering allows you to adjust the
steering wheel before you drive.
You can also raise the steering wheel to
give your legs more room when you exit
and enter the vehicle (if equipped).
The steering wheel should be positioned
so that it is comfortable for you to drive,
while permitting you to see the instru-
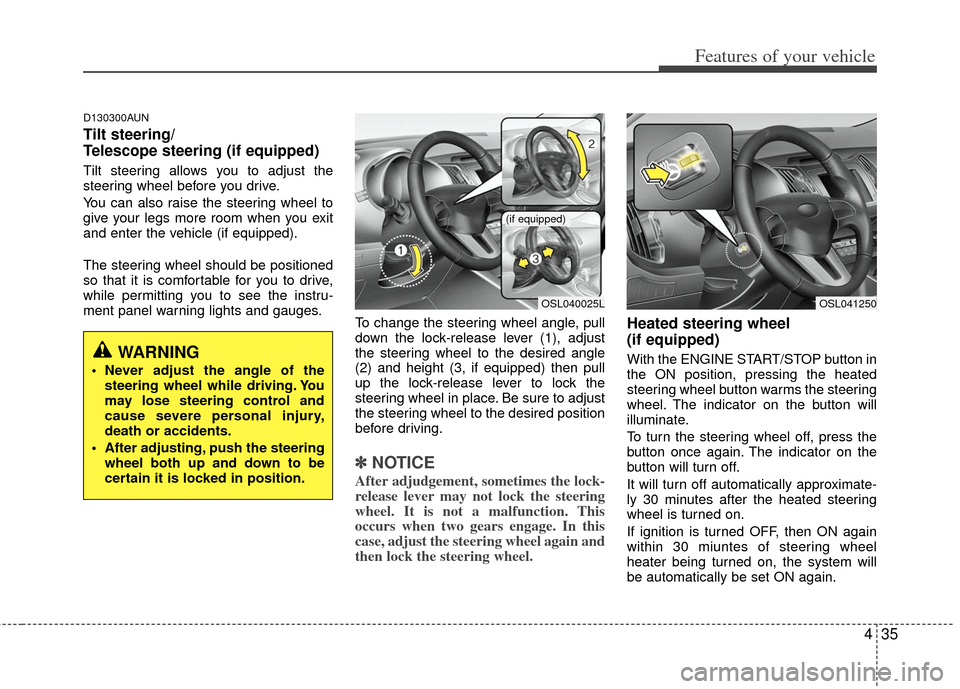
ment panel warning lights and gauges.To change the steering wheel angle, pull
down the lock-release lever (1), adjust
the steering wheel to the desired angle
(2) and height (3, if equipped) then pull
up the lock-release lever to lock the
steering wheel in place. Be sure to adjust
the steering wheel to the desired position
before driving.
✽ ✽NOTICE
After adjudgement, sometimes the lock-
release lever may not lock the steering
wheel. It is not a malfunction. This
occurs when two gears engage. In this
case, adjust the steering wheel again and
then lock the steering wheel.
Heated steering wheel
(if equipped)
With the ENGINE START/STOP button in
the ON position, pressing the heated
steering wheel button warms the steering
wheel. The indicator on the button will
illuminate.
To turn the steering wheel off, press the
button once again. The indicator on the
button will turn off.
It will turn off automatically approximate-
ly 30 minutes after the heated steering
wheel is turned on.
If ignition is turned OFF, then ON again
within 30 miuntes of steering wheel
heater being turned on, the system will
be automatically be set ON again.WARNING
Never adjust the angle of the
steering wheel while driving. You
may lose steering control and
cause severe personal injury,
death or accidents.
After adjusting, push the steering wheel both up and down to be
certain it is locked in position.
OSL040025L
(if equipped)
OSL041250
Page 127 of 387
437
Features of your vehicle
D140100AHM
Inside rearview mirror
Adjust the rearview mirror so that the
center view through the rear window is
seen. Make this adjustment before you
start driving.
D140101AHM
Day/night rearview mirror (if equipped)
Make this adjustment before you start
driving and while the day/night lever is in
the day position.
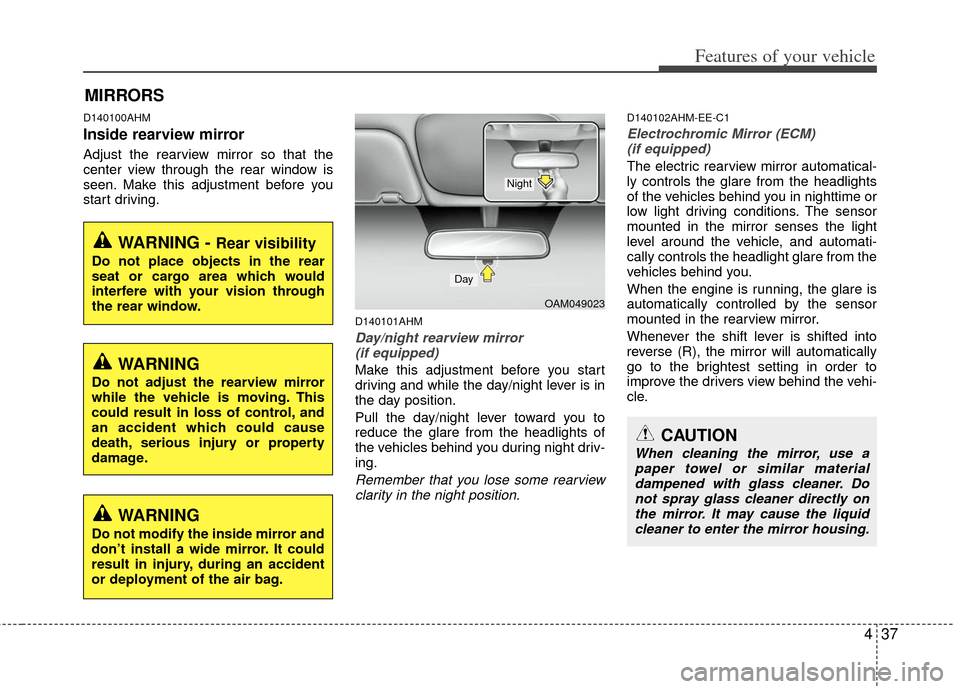
Pull the day/night lever toward you to
reduce the glare from the headlights of
the vehicles behind you during night driv-
ing.
Remember that you lose some rearviewclarity in the night position.
D140102AHM-EE-C1
Electrochromic Mirror (ECM) (if equipped)
The electric rearview mirror automatical-
ly controls the glare from the headlights
of the vehicles behind you in nighttime or
low light driving conditions. The sensor
mounted in the mirror senses the light
level around the vehicle, and automati-
cally controls the headlight glare from the
vehicles behind you.
When the engine is running, the glare is
automatically controlled by the sensor
mounted in the rearview mirror.
Whenever the shift lever is shifted into
reverse (R), the mirror will automatically
go to the brightest setting in order to
improve the drivers view behind the vehi-
cle.
MIRRORS
WARNING - Rear visibility
Do not place objects in the rear
seat or cargo area which would
interfere with your vision through
the rear window.
CAUTION
When cleaning the mirror, use apaper towel or similar materialdampened with glass cleaner. Donot spray glass cleaner directly on the mirror. It may cause the liquidcleaner to enter the mirror housing.
WARNING
Do not adjust the rearview mirror
while the vehicle is moving. This
could result in loss of control, and
an accident which could cause
death, serious injury or property
damage.
WARNING
Do not modify the inside mirror and
don’t install a wide mirror. It could
result in injury, during an accident
or deployment of the air bag.
OAM049023
Day
Night
Page 135 of 387
445
Features of your vehicle
INSTRUMENT CLUSTER
D150000AAM-EU
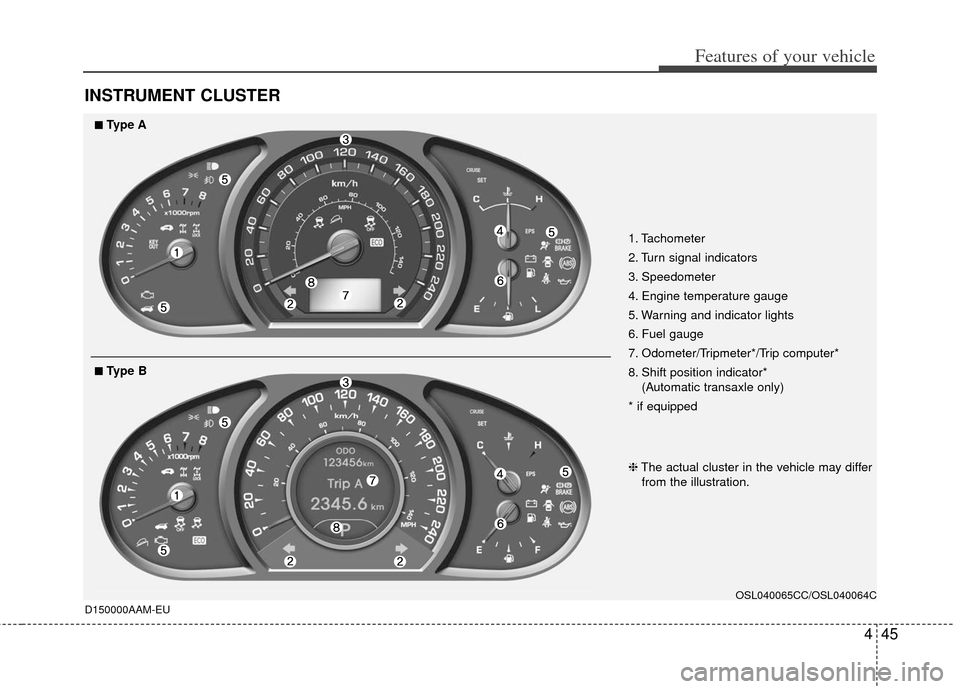
1. Tachometer
2. Turn signal indicators
3. Speedometer
4. Engine temperature gauge
5. Warning and indicator lights
6. Fuel gauge
7. Odometer/Tripmeter*/Trip computer*
8. Shift position indicator*(Automatic transaxle only)
* if equipped
OSL040065CC/OSL040064C
❈ The actual cluster in the vehicle may differ
from the illustration.
■
■Type A
■
■Type B
Page 142 of 387
Features of your vehicle
52
4
Outside thermometer (if equipped)
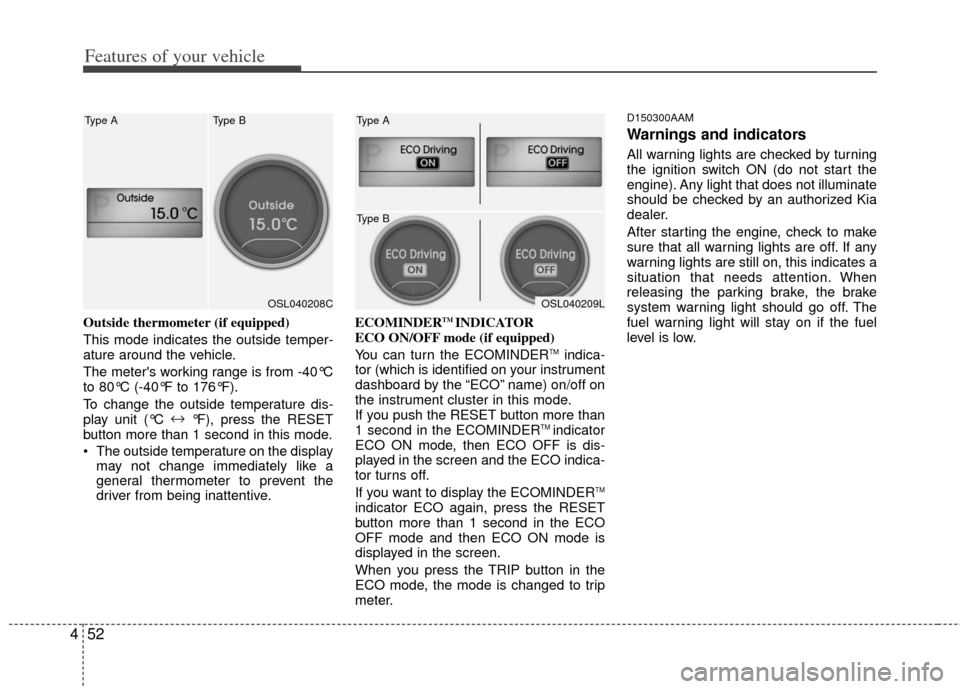
This mode indicates the outside temper-
ature around the vehicle.
The meter's working range is from -40°C
to 80°C (-40°F to 176°F).
To change the outside temperature dis-
play unit (°C ↔
°F), press the RESET
button more than 1 second in this mode.
The outside temperature on the display may not change immediately like a
general thermometer to prevent the
driver from being inattentive. ECOMINDERTM INDICATOR
ECO ON/OFF mode (if equipped)
You can turn the ECOMINDER
TMindica-
tor (which is identified on your instrument
dashboard by the “ECO” name) on/off on
the instrument cluster in this mode.
If you push the RESET button more than
1 second in the ECOMINDER
TM indicator
ECO ON mode, then ECO OFF is dis-
played in the screen and the ECO indica-
tor turns off.
If you want to display the ECOMINDER
TM
indicator ECO again, press the RESET
button more than 1 second in the ECO
OFF mode and then ECO ON mode is
displayed in the screen.
When you press the TRIP button in the
ECO mode, the mode is changed to trip
meter.
D150300AAM
Warnings and indicators
All warning lights are checked by turning
the ignition switch ON (do not start the
engine). Any light that does not illuminate
should be checked by an authorized Kia
dealer.
After starting the engine, check to make
sure that all warning lights are off. If any
warning lights are still on, this indicates a
situation that needs attention. When
releasing the parking brake, the brake
system warning light should go off. The
fuel warning light will stay on if the fuel
level is low.
OSL040208C
Type A Type BOSL040209L
Type A
Type B
Page 144 of 387
Features of your vehicle
54
4
D150303AHM-U1
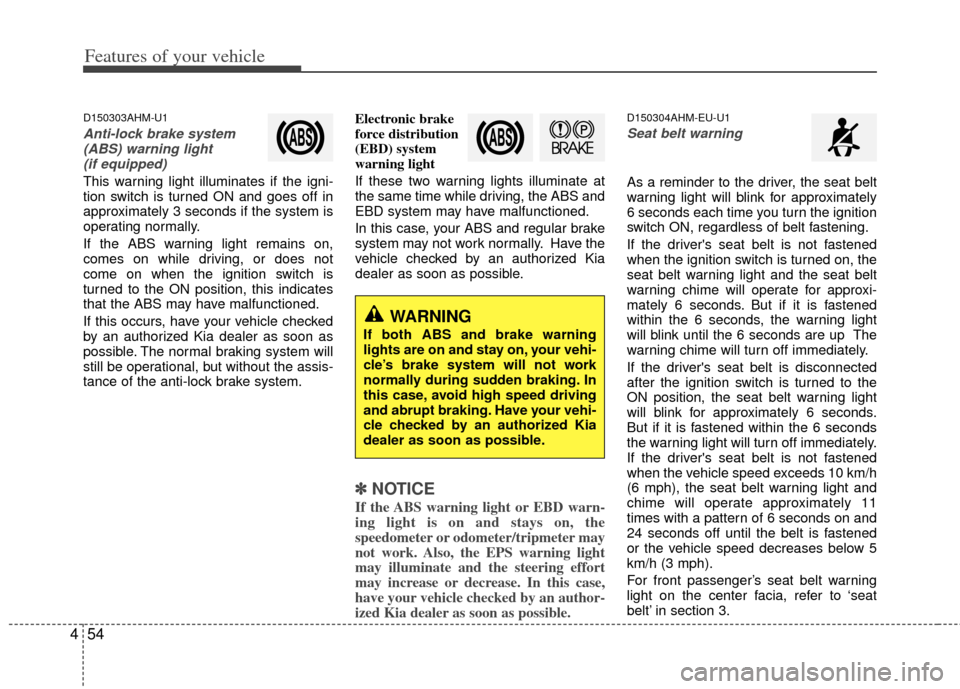
Anti-lock brake system
(ABS) warning light (if equipped)
This warning light illuminates if the igni-
tion switch is turned ON and goes off in
approximately 3 seconds if the system is
operating normally.
If the ABS warning light remains on,
comes on while driving, or does not
come on when the ignition switch is
turned to the ON position, this indicates
that the ABS may have malfunctioned.
If this occurs, have your vehicle checked
by an authorized Kia dealer as soon as
possible. The normal braking system will
still be operational, but without the assis-
tance of the anti-lock brake system. Electronic brake
force distribution
(EBD) system
warning light
If these two warning lights illuminate at
the same time while driving, the ABS and
EBD system may have malfunctioned.
In this case, your ABS and regular brake
system may not work normally. Have the
vehicle checked by an authorized Kia
dealer as soon as possible.
✽ ✽
NOTICE
If the ABS warning light or EBD warn-
ing light is on and stays on, the
speedometer or odometer/tripmeter may
not work. Also, the EPS warning light
may illuminate and the steering effort
may increase or decrease. In this case,
have your vehicle checked by an author-
ized Kia dealer as soon as possible.
D150304AHM-EU-U1
Seat belt warning
As a reminder to the driver, the seat belt
warning light will blink for approximately
6 seconds each time you turn the ignition
switch ON, regardless of belt fastening.
If the driver's seat belt is not fastened
when the ignition switch is turned on, the
seat belt warning light and the seat belt
warning chime will operate for approxi-
mately 6 seconds. But if it is fastened
within the 6 seconds, the warning light
will blink until the 6 seconds are up The
warning chime will turn off immediately.
If the driver's seat belt is disconnected
after the ignition switch is turned to the
ON position, the seat belt warning light
will blink for approximately 6 seconds.
But if it is fastened within the 6 seconds
the warning light will turn off immediately.
If the driver's seat belt is not fastened
when the vehicle speed exceeds 10 km/h
(6 mph), the seat belt warning light and
chime will operate approximately 11
times with a pattern of 6 seconds on and
24 seconds off until the belt is fastened
or the vehicle speed decreases below 5
km/h (3 mph).
For front passenger’s seat belt warning
light on the center facia, refer to ‘seat
belt’ in section 3.
WARNING
If both ABS and brake warning
lights are on and stay on, your vehi-
cle’s brake system will not work
normally during sudden braking. In
this case, avoid high speed driving
and abrupt braking. Have your vehi-
cle checked by an authorized Kia
dealer as soon as possible.
Page 145 of 387
455
Features of your vehicle
D150305AHM
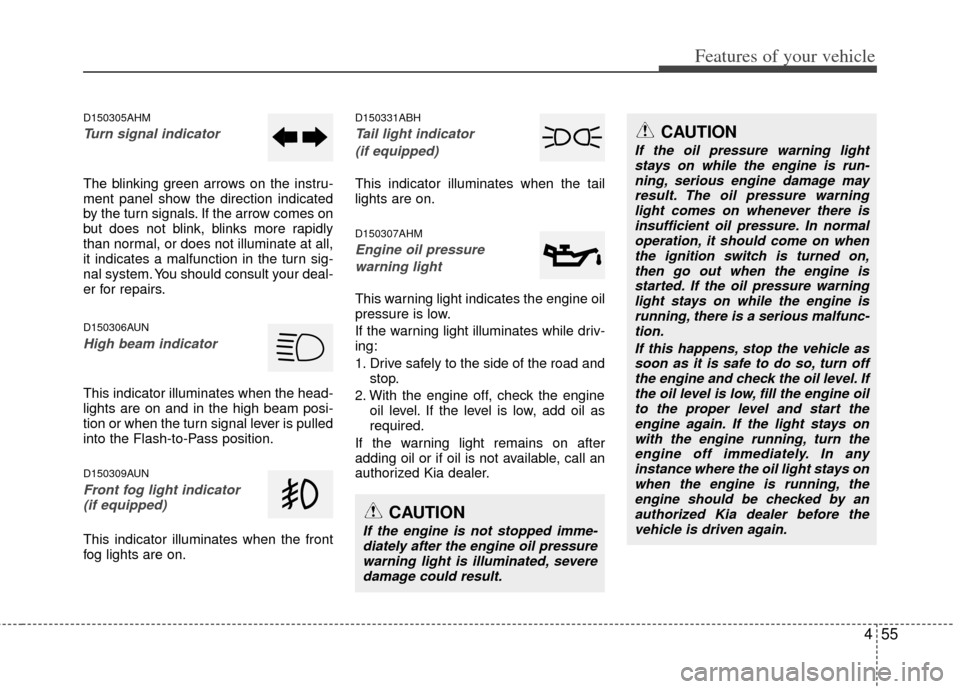
Turn signal indicator
The blinking green arrows on the instru-
ment panel show the direction indicated
by the turn signals. If the arrow comes on
but does not blink, blinks more rapidly
than normal, or does not illuminate at all,
it indicates a malfunction in the turn sig-
nal system. You should consult your deal-
er for repairs.
D150306AUN
High beam indicator
This indicator illuminates when the head-
lights are on and in the high beam posi-
tion or when the turn signal lever is pulled
into the Flash-to-Pass position.
D150309AUN
Front fog light indicator (if equipped)
This indicator illuminates when the front
fog lights are on.
D150331ABH
Tail light indicator
(if equipped)
This indicator illuminates when the tail
lights are on.
D150307AHM
Engine oil pressure warning light
This warning light indicates the engine oil
pressure is low.
If the warning light illuminates while driv-
ing:
1. Drive safely to the side of the road and stop.
2. With the engine off, check the engine oil level. If the level is low, add oil as
required.
If the warning light remains on after
adding oil or if oil is not available, call an
authorized Kia dealer.
CAUTION
If the engine is not stopped imme- diately after the engine oil pressurewarning light is illuminated, severedamage could result.
CAUTION
If the oil pressure warning lightstays on while the engine is run-ning, serious engine damage may result. The oil pressure warninglight comes on whenever there isinsufficient oil pressure. In normal operation, it should come on whenthe ignition switch is turned on, then go out when the engine isstarted. If the oil pressure warning light stays on while the engine isrunning, there is a serious malfunc-tion.
If this happens, stop the vehicle assoon as it is safe to do so, turn offthe engine and check the oil level. If the oil level is low, fill the engine oilto the proper level and start the engine again. If the light stays onwith the engine running, turn theengine off immediately. In any instance where the oil light stays onwhen the engine is running, theengine should be checked by an authorized Kia dealer before thevehicle is driven again.
Page 156 of 387
Features of your vehicle
66
4
D330000AHM-EE
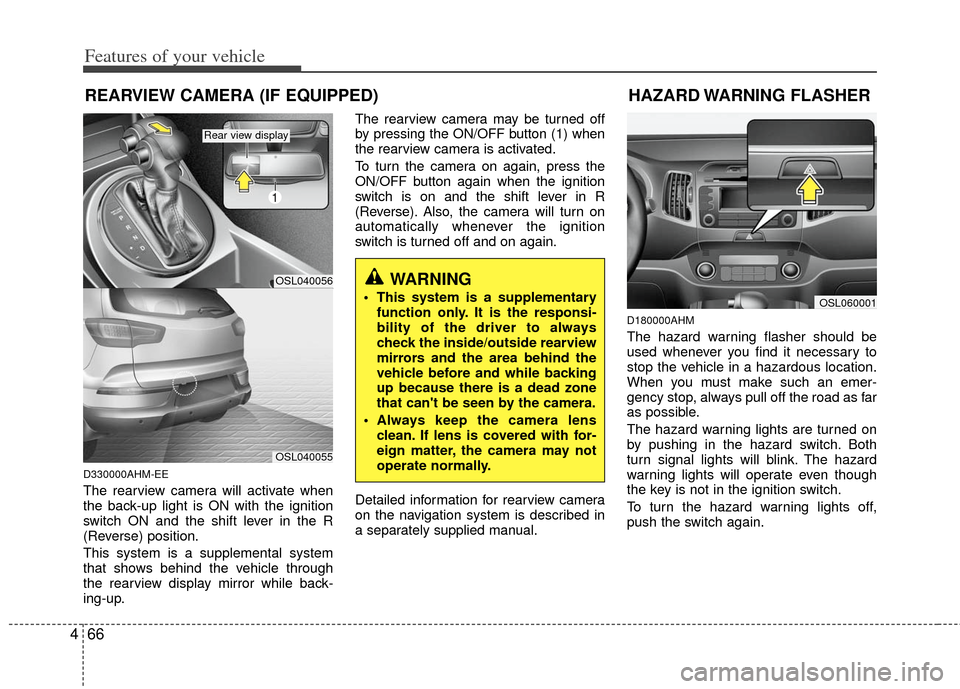
The rearview camera will activate when
the back-up light is ON with the ignition
switch ON and the shift lever in the R
(Reverse) position.
This system is a supplemental system
that shows behind the vehicle through
the rearview display mirror while back-
ing-up. The rearview camera may be turned off
by pressing the ON/OFF button (1) when
the rearview camera is activated.
To turn the camera on again, press the
ON/OFF button again when the ignition
switch is on and the shift lever in R
(Reverse). Also, the camera will turn on
automatically whenever the ignition
switch is turned off and on again.
Detailed information for rearview camera
on the navigation system is described in
a separately supplied manual.
D180000AHM
The hazard warning flasher should be
used whenever you find it necessary to
stop the vehicle in a hazardous location.
When you must make such an emer-
gency stop, always pull off the road as far
as possible.
The hazard warning lights are turned on
by pushing in the hazard switch. Both
turn signal lights will blink. The hazard
warning lights will operate even though
the key is not in the ignition switch.
To turn the hazard warning lights off,
push the switch again.
WARNING
This system is a supplementary
function only. It is the responsi-
bility of the driver to always
check the inside/outside rearview
mirrors and the area behind the
vehicle before and while backing
up because there is a dead zone
that can't be seen by the camera.
Always keep the camera lens clean. If lens is covered with for-
eign matter, the camera may not
operate normally.
REARVIEW CAMERA (IF EQUIPPED)
OSL060001
HAZARD WARNING FLASHER
OSL040056
1
OSL040055
Rear view display
Page 159 of 387
469
Features of your vehicle
Auto light position (if equipped)
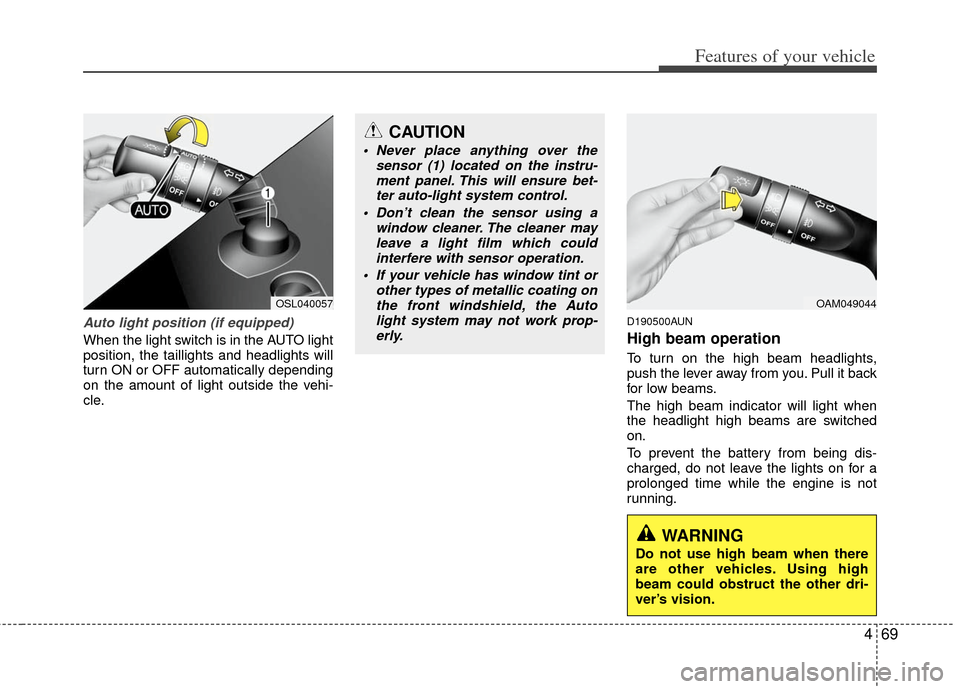
When the light switch is in the AUTO light
position, the taillights and headlights will
turn ON or OFF automatically depending
on the amount of light outside the vehi-
cle.
D190500AUN
High beam operation
To turn on the high beam headlights,
push the lever away from you. Pull it back
for low beams.
The high beam indicator will light when
the headlight high beams are switched
on.
To prevent the battery from being dis-
charged, do not leave the lights on for a
prolonged time while the engine is not
running.
CAUTION
Never place anything over thesensor (1) located on the instru-ment panel. This will ensure bet-ter auto-light system control.
Don’t clean the sensor using a window cleaner. The cleaner mayleave a light film which could interfere with sensor operation.
If your vehicle has window tint or other types of metallic coating onthe front windshield, the Autolight system may not work prop-erly.
OAM049044OSL040057
WARNING
Do not use high beam when there
are other vehicles. Using high
beam could obstruct the other dri-
ver’s vision.