Page 96 of 393

417
Features of your vehicle
Operating door locks from
inside the vehicle
With the door lock button
To unlock a door, push the doorlock button (1) to the “Unlock” posi-
tion. The red mark (2) on the button
will be visible.
To lock a door, push the door lock button (1) to the “Lock” position. If
the door is locked properly, the red
mark (2) on the door lock button
will not be visible.
To open a door, pull the door han- dle (3) outward. If the inner door handle of the dri-
ver’s or front passenger’s door is
pulled when the door lock button is
in the lock position, the button will
unlock and the door will open.
Front doors cannot be locked if the ignition key is in the ignition switch
and any front door is opened. If a power door lock ever fails to func-
tion while you are in the vehicle, try
one or more of the following tech-
niques to exit:
Operate the door unlock feature
repeatedly (both electronic and
manual) while simultaneously
pulling on the door handle.
Operate the other door locks and handles, front and rear.
Lower a front window and use the key to unlock the door from out-
side.
Move to the cargo area and open the tailgate.
OAM049005
Lock Unlock
Page 99 of 393

Features of your vehicle
20
4
Opening the tailgate
The tailgate is locked or unlocked
when all doors are locked or
unlocked with the key or central
door lock switch.
If unlocked, the tailgate can be opened by pressing the handle
switch and then pulling the handle
up. The tailgate swings upward. Make
sure no objects or people are near
the rear of the vehicle when opening
the tailgate.
Closing the tailgate
To close the tailgate, lower and push
down the tailgate firmly. Make sure
that the tailgate is securely latched.
Make sure your hands, feet and
other parts of your body are safely
out of the way before closing the tail-
gate.
TAILGATE
OAM049009
CAUTION - Tailgate lift
cylinders
Make certain that you close the
tailgate before driving yourvehicle. Possible damage mayoccur to the tailgate lift cylin-ders and attached hardware ifthe tailgate is not closed prior todriving.
WARNING - Exhaust fumes
Driving with the tailgate open is
not advisable. Dangerous
exhaust fumes can enter the
passenger compartment.
If you must drive with the tail-
gate opened, keep the air vents
and all windows open so that
additional outside air can enter.
CAUTION - Closing tailgate
Make sure nothing is near the
tailgate latch and striker whileclosing the tailgate. It may dam-age the tailgate's latch.
Page 101 of 393
Features of your vehicle
22
4
(1) Driver’s door power window
switch
(2) Front passenger’s door power window switch
(3) Rear door (left) power window switch
(4) Rear door (right) power window switch
(5) Window opening and closing
(6) Automatic power window down (Driver’s window)
(7) Power window lock switch
WINDOWS
OAM042011N
Page 102 of 393

423
Features of your vehicle
Power windows
The ignition switch must be in the ON
position for power windows to oper-
ate.
Each door has a power window
switch that controls the door's win-
dow. The driver has a power window
lock button which can block the oper-
ation of passenger windows. The
power windows can be operated for
approximately 30 seconds after the
ignition key is removed or turned to
the ACC or LOCK position. However,
if the front doors are opened, the
power windows cannot be operated
even within the 30 second period.
In cold and wet climates, power win-
dows may not work properly due to
freezing conditions.
✽ ✽NOTICE
While driving with the rear windows
down or with the sunroof (if
equipped) in an open (or partially
open) position, your vehicle may
demonstrate a wind buffeting or
pulsation noise. This noise is a nor-
mal occurrence and can be reduced
or eliminated by taking the follow-
ing actions. If the noise occurs with
one or both of the rear windows
down, partially lower both front
windows approximately one inch. If
you experience the noise with the
sunroof open, slightly reduce the
size of the sunroof opening.
Window opening and closing
The driver’s door has a master power
window switch that controls all the
windows in the vehicle.
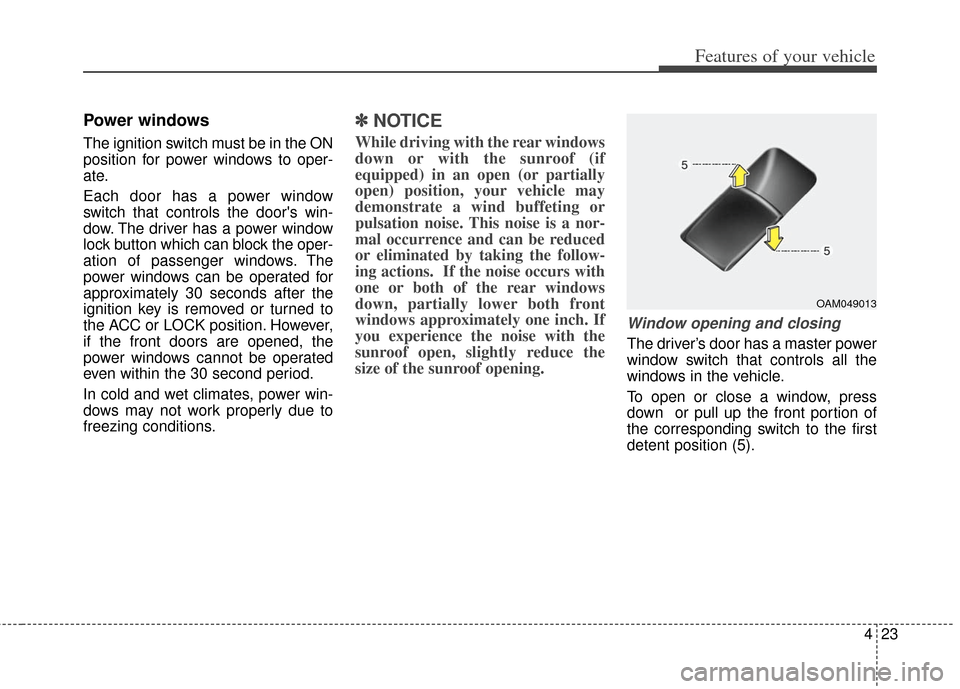
To open or close a window, press
down or pull up the front portion of
the corresponding switch to the first
detent position (5).
OAM049013
Page 103 of 393

Features of your vehicle
24
4
Auto down window
(Driver’s window)
Pressing the power window switch
momentarily to the second detent
position (6) completely lowers the
driver’s window even when the
switch is released. To stop the win-
dow at the desired position while the
window is in operation, momentarily
pull the switch in the direction oppo-
site of the window’s movement.
Power window lock button
The driver can disable the power window switches on the passenger
doors by pressing the power win-
dow lock button located on the dri-
ver’s door to the LOCK position
(pressed).
When the power window lock button is in the LOCK position
(pressed), the driver’s master
control cannot operate the pas-
senger door power windows. Always double check to make sure
all arms, hands, head and other
obstructions are safely out of the way
before closing a window.
OAM049014OAM042012
CAUTION - Opening/
Closing
window
To prevent possible damage to
the power window system, donot open or close two windowsor more at the same time. Thiswill also ensure the longevity ofthe fuse.
WARNING - Power windows
Do not allow children to play
with the power windows. Keep
the driver’s door power window
lock button in the LOCK posi-
tion (pressed).
Page 115 of 393

Features of your vehicle
36
4
Inside rearview mirror
Adjust the rearview mirror so that the
center view through the rear window
is seen. Make this adjustment before
you start driving.
Do not place objects in the rear seat
or cargo area which would interfere
with your vision through the rear win-
dow.
Day/night rearview mirror
(if equipped)
Make this adjustment before you
start driving and while the day/night
lever is in the day position.
Pull the day/night lever toward you to
reduce the glare from the headlights
of the vehicles behind you during
night driving.
Remember that you lose somerearview clarity in the night position. Electric chromic mirror (ECM)
(if equipped)
The electric rearview mirror automat-
ically controls the glare from the
headlights of the vehicles behind you
in nighttime or low light driving condi-
tions. The sensor mounted in the mir-
ror senses the light level around the
vehicle, and automatically controls
the headlight glare from the vehicles
behind you.
When the engine is running, the
glare is automatically controlled by
the sensor mounted in the rearview
mirror.
Whenever the shift lever is shifted
into reverse (R), the mirror will auto-
matically go to the brightest setting in
order to improve the drivers view
behind the vehicle.
MIRRORS
OAM049023
Day
Night
WARNING - Mirror adjustment
Do not adjust the rearview mir-
ror while the vehicle is moving.
This could result in loss of con-
trol.
CAUTION - Cleaning mirror
When cleaning the mirror, use a
paper towel or similar materialdampened with glass cleaner.Do not spray glass cleanerdirectly on the mirror. It maycause the liquid cleaner to enterthe mirror housing.
Page 146 of 393

467
Features of your vehicle
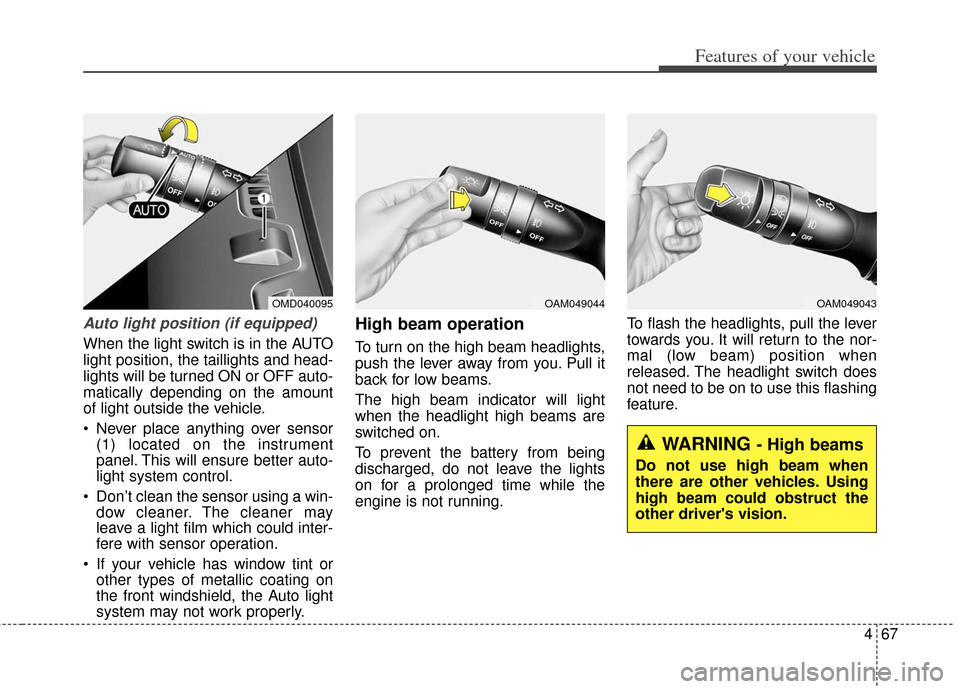
Auto light position (if equipped)
When the light switch is in the AUTO
light position, the taillights and head-
lights will be turned ON or OFF auto-
matically depending on the amount
of light outside the vehicle.
Never place anything over sensor(1) located on the instrument
panel. This will ensure better auto-
light system control.
Don’t clean the sensor using a win- dow cleaner. The cleaner may
leave a light film which could inter-
fere with sensor operation.
If your vehicle has window tint or other types of metallic coating on
the front windshield, the Auto light
system may not work properly.
High beam operation
To turn on the high beam headlights,
push the lever away from you. Pull it
back for low beams.
The high beam indicator will light
when the headlight high beams are
switched on.
To prevent the battery from being
discharged, do not leave the lights
on for a prolonged time while the
engine is not running. To flash the headlights, pull the lever
towards you. It will return to the nor-
mal (low beam) position when
released. The headlight switch does
not need to be on to use this flashing
feature.
OMD040095OAM049044OAM049043
WARNING - High beams
Do not use high beam when
there are other vehicles. Using
high beam could obstruct the
other driver's vision.
Page 148 of 393
469
Features of your vehicle
A : Wiper speed control· MIST – Single wipe
· OFF – Off
· INT – Intermittent wipe
· LO – Low wiper speed
· HI – High wiper speed
B : Intermittent wipe time adjust- ment
C : Wash with brief wipes (front)
D : Rear wiper/washer control · ON – Continuous wipe
· INT – Intermittent wipe (if equipped)
· OFF – Off
E : Wash with brief wipes (rear)
WIPERS AND WASHERS
Windshield wiper/washer Rear window wiper/washer (if equipped)
OAM049100N/OAM049048N