2013 KIA Sedona lock
[x] Cancel search: lockPage 216 of 370

3199
Features of your vehicle
7. TUNE & AUDIO Control Knob
Rotate the knob clockwise or counter
clock wise to increase or decrease from
current frequency.
(AM 10 kHz, FM 200 kHz)
Pressing the button changes the BASS,
MIDDLE, TREBLE, FADER and BAL-
ANCE TUNE mode. The mode selected
is shown on the display. After selecting
each mode, rotate the Audio control knob
clockwise or counterclockwise.
Press this button while holding [SETUP]
button to activate / inactivate the item to.
Select SETUP item using left and right
function of the Tune button.
• BASS Control
To increase the BASS, rotate the knob
clockwise, while to decrease the BASS,
rotate the knob counterclockwise.
To increase the MIDDLE, rotate the knob
clockwise, while to decrease the MID-
DLE, rotate the knob counterclockwise. Control
To increase the TREBLE, rotate the knob
clockwise, while to decrease the TRE-
BLE, rotate the knob counterclockwise.
Turn the control knob clockwise to
emphasize rear speaker sound (front
speaker sound will be attenuated). When
the control knob is turned counterclock-
wise, front speaker sound will be empha-
sized (rear speaker sound will be attenu-
ated).
Rotate the knob clockwise to emphasize
right speaker sound (left speaker sound
will be attenuated). When the control
knob is turned counter clockwise, left
speaker sound will be emphasized (right
speaker sound will be attenuated).
8. PRESET Buttons
onds to play the station saved in each
button.
seconds or longer to save the current
station to the respective button with a
beep.
Page 219 of 370

Features of your vehicle
202
3
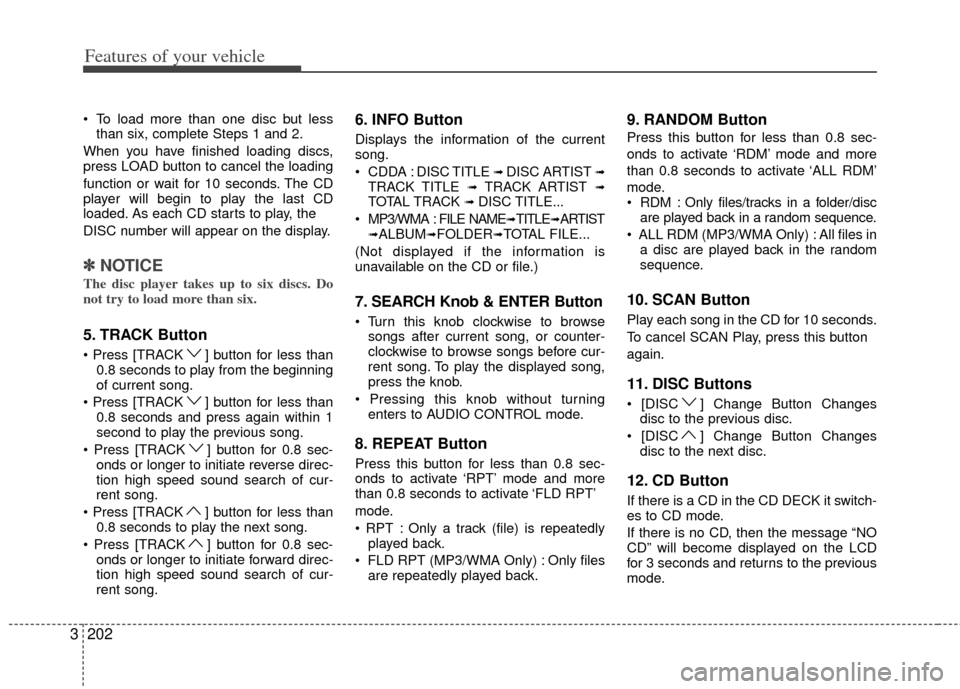
To load more than one disc but less
than six, complete Steps 1 and 2.
When you have finished loading discs,
press LOAD button to cancel the loading
function or wait for 10 seconds. The CD
player will begin to play the last CD
loaded. As each CD starts to play, the
DISC number will appear on the display.
✽ ✽ NOTICE
The disc player takes up to six discs. Do
not try to load more than six.
5. TRACK Button
] button for less than
0.8 seconds to play from the beginning
of current song.
] button for less than 0.8 seconds and press again within 1
second to play the previous song.
] button for 0.8 sec- onds or longer to initiate reverse direc-
tion high speed sound search of cur-
rent song.
] button for less than 0.8 seconds to play the next song.
] button for 0.8 sec- onds or longer to initiate forward direc-
tion high speed sound search of cur-
rent song.
6. INFO Button
Displays the information of the current
song.
CDDA : DISC TITLE
➟ DISC ARTIST ➟TRACK TITLE ➟ TRACK ARTIST ➟TOTAL TRACK ➟ DISC TITLE...
MP3/WMA : FILE NAME
➟TITLE➟ARTIST➟ALBUM➟FOLDER➟TOTAL FILE...
(Not displayed if the information is
unavailable on the CD or file.)
7. SEARCH Knob & ENTER Button
songs after current song, or counter-
clockwise to browse songs before cur-
rent song. To play the displayed song,
press the knob.
enters to AUDIO CONTROL mode.
8. REPEAT Button
Press this button for less than 0.8 sec-
onds to activate ‘RPT’ mode and more
than 0.8 seconds to activate ‘FLD RPT’
mode.
Only a track (file) is repeatedlyplayed back.
Only files are repeatedly played back.
9. RANDOM Button
Press this button for less than 0.8 sec-
onds to activate ‘RDM’ mode and more
than 0.8 seconds to activate ‘ALL RDM’
mode.
Only files/tracks in a folder/disc are played back in a random sequence.
All files in a disc are played back in the random
sequence.
10. SCAN Button
Play each song in the CD for 10 seconds.
To cancel SCAN Play, press this button
again.
11. DISC Buttons
] Change Button Changesdisc to the previous disc.
] Change Button Changes disc to the next disc.
12. CD Button
If there is a CD in the CD DECK it switch-
es to CD mode.
If there is no CD, then the message “NO
CD” will become displayed on the LCD
for 3 seconds and returns to the previous
mode.
Page 224 of 370

3207
Features of your vehicle
Using USB device
Using a USB that is connected to the
multiple terminal inside the console on
the right hand side of the driver’s seat.
When USB is connected, the ‘USB’ icon
will be displayed on the top right corner
of the display screen.
1. AUX/USB Button
If the auxiliary device is connected, it
switches to AUX or USB mode to play the
sound from the auxiliary player.
If there is no auxiliary device, then the
message “No Media” will become dis-
played on the LCD for 3 seconds and
returns to previous mode.
2. TRACK Button
Press the [TRACK ] button for lessthan 0.8 seconds to play from the
beginning of the current song.
Press the button for less than 0.8 sec-
onds and press it again within 1 sec-
ond to move to and play the previous
song.
Press the button for 0.8 seconds or
longer to play the song in reverse
direction in fast speed.
Press the [TRACK ] button for less
than 0.8 seconds to move to the next song. Press the button for 0.8 seconds
or longer to play the song in forward
direction in fast speed.
3. INFO Button
Displays the information of the file current-
ly played in the order of FILE NAME➟TITLE➟ARTIST➟ALBUM➟FOLDER➟TO
TAL FILE➟PLAY SCREEN➟FILE NAME
… (Displays no information if the file has
no song information.)
4. FOLDER Button
Press [FOLDER ] button to move to
child folder of the current folder and
display the first song in the folder.
Press TUNE/ ENTER knob to move to
the folder displayed. It will play the first
song in the folder.
Press [FOLDER ] button to move to parent folder display the first song in
the folder.
Press TUNE/ENTER knob to move to
the folder displayed.
5. SEARCH Knob & ENTER Button
songs after current song, or counter
clockwise to browse songs before cur- rent song. To play the displayed song,
press the knob.
enters to AUDIO CONTROL mode.
6. RANDOM Button
Press this button for less than 0.8 sec-
onds to play songs randomly in current
folder.
Press this button for 0.8 seconds or longer to play songs randomly in entire
USB device.
To cancel RANDOM play, press this button again.
7. REPEAT Button
onds to repeat current song.
longer to repeat all songs in current
folder.
again.
8. SCAN Button
Plays each song in the USB device for
10 seconds.
To cancel SCAN Play, press this button
again.
Page 227 of 370

Features of your vehicle
210
3
Using iPod
Using an iPod when the exclusive cable
is connected to the multiple terminal
inside the console on the right hand side
of the driver’s seat. When the iPod is con-
nected, the ‘iPod’ icon will be displayed
on the top right corner of the display
screen.
1. iPod Button
If iPod is connected, it switches to the
iPod mode from the previous mode to
play the song files stored in the iPod.
If there is no iPod connected, then it dis-
plays the message “No Media” for 3 sec-
onds and returns to the previous mode.
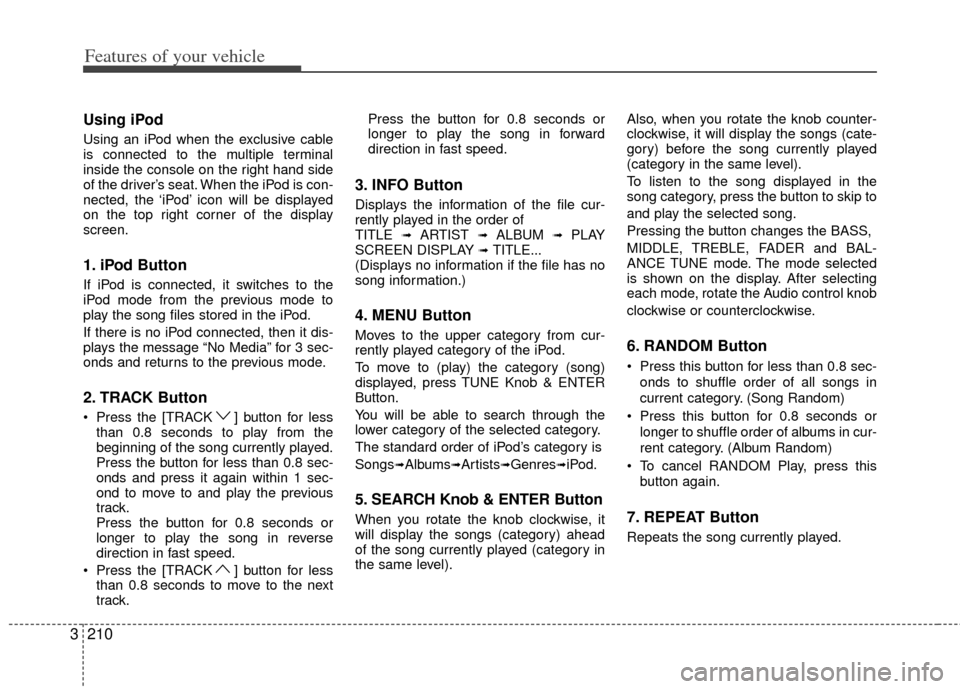
2. TRACK Button
Press the [TRACK ] button for less
than 0.8 seconds to play from the
beginning of the song currently played.
Press the button for less than 0.8 sec-
onds and press it again within 1 sec-
ond to move to and play the previous
track.
Press the button for 0.8 seconds or
longer to play the song in reverse
direction in fast speed.
Press the [TRACK ] button for less than 0.8 seconds to move to the next
track. Press the button for 0.8 seconds or
longer to play the song in forward
direction in fast speed.
3. INFO Button
Displays the information of the file cur-
rently played in the order of
TITLE
➟ ARTIST ➟ ALBUM ➟ PLAY
SCREEN DISPLAY ➟ TITLE...
(Displays no information if the file has no
song information.)
4. MENU Button
Moves to the upper category from cur-
rently played category of the iPod.
To move to (play) the category (song)
displayed, press TUNE Knob & ENTER
Button.
You will be able to search through the
lower category of the selected category.
The standard order of iPod’s category is
Songs
➟Albums➟Artists➟Genres➟iPod.
5. SEARCH Knob & ENTER Button
When you rotate the knob clockwise, it
will display the songs (category) ahead
of the song currently played (category in
the same level). Also, when you rotate the knob counter-
clockwise, it will display the songs (cate-
gory) before the song currently played
(category in the same level).
To listen to the song displayed in the
song category, press the button to skip to
and play the selected song.
Pressing the button changes the BASS,
MIDDLE, TREBLE, FADER and BAL-
ANCE TUNE mode. The mode selected
is shown on the display. After selecting
each mode, rotate the Audio control knob
clockwise or counterclockwise.
6. RANDOM Button
Press this button for less than 0.8 sec-
onds to shuffle order of all songs in
current category. (Song Random)
Press this button for 0.8 seconds or longer to shuffle order of albums in cur-
rent category. (Album Random)
To cancel RANDOM Play, press this button again.
7. REPEAT Button
Repeats the song currently played.
Page 230 of 370

3213
Features of your vehicle
Using SIRIUS Satellite Radio
Your Kia vehicle is equipped with a 3
month complimentary period of SIRIUS
Satellite Radio so you have access to over
130 channels of music, information, and
entertainment programming.
Activation
In order to extend or reactivate your sub-
scription to SIRIUS Satellite Radio, you
will need to contact SIRIUS Customer
Care at 1-888-539-7474. Have your 12
digit SID (Sirius Identification Number)/ESN
(Electronic Serial Number) ready. To
retrieve the SID/ESN, turn on the radio,
press the [SAT] button and tune to chan-
nel zero. Please note that the vehicle will
need to be turned on, in Sirius mode, and
have an unobstructed view of the sky in
order for the radio to receive the activa-
tion signal.
1. SAT Button (SIRIUS Satellite Radio)
Press the [SAT] button to switch to SIR-
IUS Satellite Radio. It cycles through the
different bands as noted below.
SAT1
➟ SAT2 ➟ SAT3 ➟ SAT1...
2. SEEK Button
Press [ SEEK ] button for less
than 0.8 seconds to select previous or
next channel.
Press [ SEEK ] button for 0.8 seconds or longer to continuously
move to previous or next channel.
If "CATEGORY" Icon is displayed at the top of the screen, channel up/down
is done through the channels within
current category.
3. PRESET Buttons
Press [1]~[6] buttons less than 0.8 sec-onds to play the channel saved in each
button.
Press [1]~[6] buttons for 0.8 seconds or longer to save current channel to the
respective button with a beep.
4. SCAN Button
When the [SCAN] button is pressed, itautomatically scans the radio stations
upwards.
The SCAN feature steps through every channel, starting from the initial chan-
nel, for ten seconds.
Press the [SCAN] button again to stop the scan feature and to listen to the
currently selected channel.
If "CATEGORY" Icon is displayed at the top of the screen, channel chang-
ing is done through the channels with-
in current category.
5. TUNE knob & ENTER button
Rotate clockwise to increase the chan-nel number or to scroll down the cate-
gory list.
Rotate counterclockwise to decrease the channel number or to scroll up the
category list.
Press this to make selection of chan- nels or items.
Page 245 of 370

Features of your vehicle
228
3
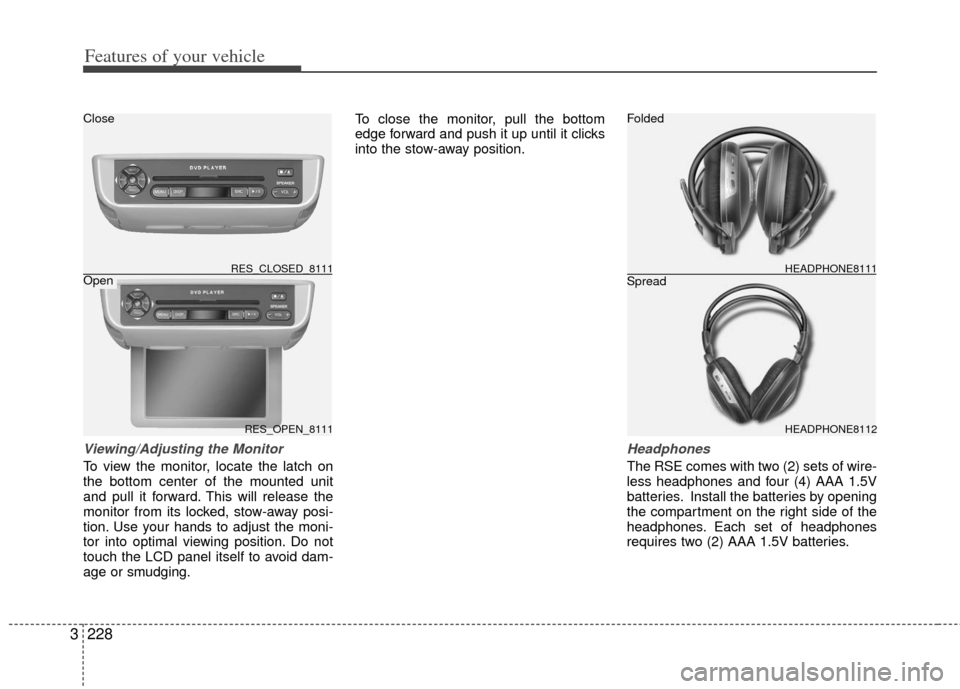
Viewing/Adjusting the Monitor
To view the monitor, locate the latch on
the bottom center of the mounted unit
and pull it forward. This will release the
monitor from its locked, stow-away posi-
tion. Use your hands to adjust the moni-
tor into optimal viewing position. Do not
touch the LCD panel itself to avoid dam-
age or smudging. To close the monitor, pull the bottom
edge forward and push it up until it clicks
into the stow-away position.
Headphones
The RSE comes with two (2) sets of wire-
less headphones and four (4) AAA 1.5V
batteries. Install the batteries by opening
the compartment on the right side of the
headphones. Each set of headphones
requires two (2) AAA 1.5V batteries.
RES_OPEN_8111
RES_CLOSED_8111HEADPHONE8112 HEADPHONE8111
Folded
Spread
Close
Open
Page 262 of 370

3245
Features of your vehicle
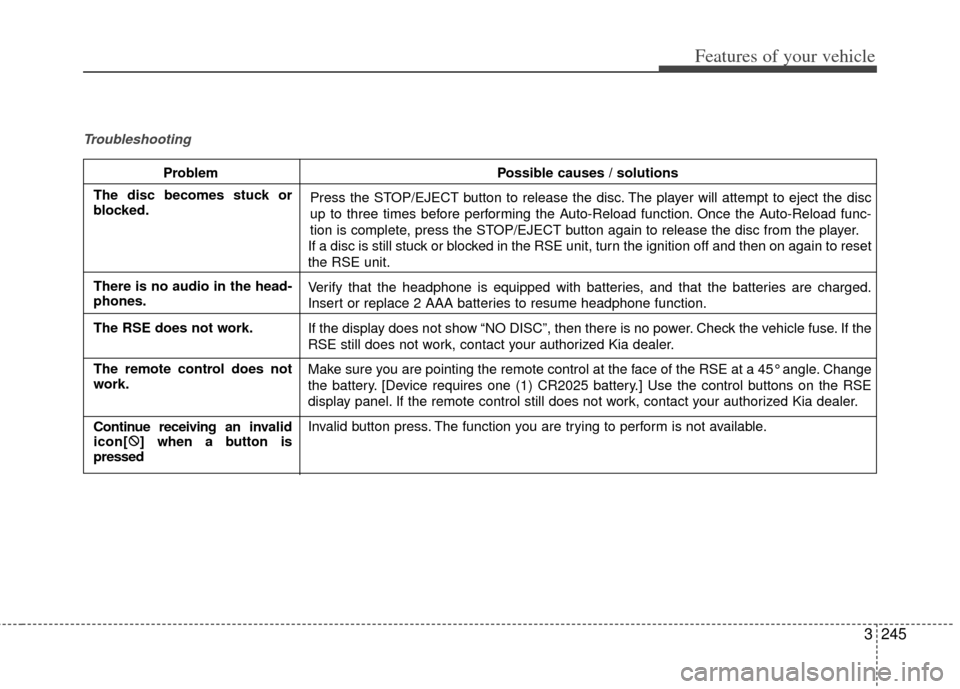
Troubleshooting
ProblemPossible causes / solutions
Press the STOP/EJECT button to release the disc. The player will attempt to eject the disc
up to three times before performing the Auto-Reload function. Once the Auto-Reload func-
tion is complete, press the STOP/EJECT button again to release the disc from the player.
If a disc is still stuck or blocked in the RSE unit, turn the ignition off and then on again to reset
the RSE unit.
Verify that the headphone is equipped with batteries, and that the batteries are charged.
Insert or replace 2 AAA batteries to resume headphone function.
If the display does not show “NO DISC”, then there is no power. Check the vehicle fuse. If the
RSE still does not work, contact your authorized Kia dealer.
Make sure you are pointing the remote control at the face of the RSE at a 45° angle. Change
the battery. [Device requires one (1) CR2025 battery.] Use the control buttons on the RSE
display panel. If the remote control still does not work, contact your authorized Kia dealer.
Invalid button press. The function you are trying to perform is not available.
The disc becomes stuck or
blocked.
There is no audio in the head-
phones.
The RSE does not work.
The remote control does not
work.
Continue receiving an inv alid
icon[ �:
] when a button is
pressed
Page 264 of 370

Driving your vehicle
24
Before entering vehicle:
• Be sure that all windows, outside mir-ror(s), and outside lights are clean.
Check the condition of the tires.
Check under the vehicle for any sign of leaks.
Be sure there are no obstacles behind you if you intend to back up.
Necessary inspections
Fluid levels, such as engine oil, engine
coolant, brake fluid, and washer fluid
should be checked on a regular basis,
with the exact interval depending on the
fluid. Further details are provided in
Section 6, Maintenance.
Before starting
Close and lock all doors.
Position the seat so that all controls areeasily reached.
Adjust the inside and outside rearview mirrors.
Be sure that all lights work.
Check all gauges.
Check the operation of warning lights when the ignition switch is turned to
the ON position.
Release the parking brake and make sure the brake warning light goes out.
For safe operation, be sure you are famil-
iar with your vehicle and its equipment.
BEFORE DRIVING
(Continued)
You are much more likely to have a
serious accident if you drink or take
drugs and drive.
If you are drinking or taking drugs,
don’t drive. Do not ride with a driv-
er who has been drinking or taking
drugs. Choose a designated driver
or call a cab.
WARNING- Driving under
the influence of alcohol or
drugs
Drinking and driving is dangerous.
Drunk driving is the number one
contributor to the highway death
toll each year. Even a small amount
of alcohol will affect your reflexes,
perceptions and judgement. Driving
while under the influence of drugs
is as dangerous or more dangerous
than driving drunk.
(Continued)
WARNING
Driving while distracted can result
in a loss of vehicle control, that may
lead to an accident, severe person-
al injury, and death. The driver’s
primary responsibility is in the safe
and legal operation of a vehicle, and
use of any handheld devices, other
equipment, or vehicle systems
which take the driver’s eyes, atten-
tion and focus away from the safe
operation of a vehicle or which are
not permissible by law should
never be used during operation of
the vehicle.
WARNING
When you make a sudden stop orturn the steering wheel rapidly,
loose objects may drop on the
floor and it could interfere with
the operation of the foot pedals,
possibly causing an accident.
Keep all things in the vehicle
safely stored.
If you do not focus on driving, it may cause an accident. Be care-
ful when operating what may dis-
turb driving such as audio or
heater. It is the responsibility of
the driver to always drive safely.