2013 KIA Rondo lock
[x] Cancel search: lockPage 28 of 338

311
Safety features of your vehicle
Rear seat adjustment
C010301AUN
Forward and backward (if equipped)
To move the seat forward or backward:
1. Pull up the seat slide adjustment leverunder the front edge of the seat cush-
ion and hold it.
2. Slide the seat to the position you desire.
3. Release the lever and make sure the seat is locked in place.
Adjust the seat before driving, and make
sure the seat is locked securely by trying
to move forward and backward without
using the lever. If the seat moves, it is not
locked properly.
C010302AUN
Seatback angle (if equipped)
To recline the seatback:
1. Pull up the seatback recline lever located on the outside of the seat at
the rear or on the top of the rear seat-
back. 2. Carefully lean back on the seat and
adjust the seatback of the seat to the
position you desire.
3. Release the lever and make sure the seatback is locked in place. (The lever
MUST return to its original position for
the seatback to lock.)
C010303BUN
Headrest
The rear seat(s) is equipped with head-
rests in all the seating positions for the
occupant's safety and comfort.
The headrest not only provides comfort
for passengers, but also helps to protect
the head and neck in the event of a colli-
sion.
OUN026046L
■7-seater (2nd row seat)
OUN026047
OUN026047L
■7-seater (2nd row seat)
■5-seater
OHM038049N
Page 29 of 338

Safety features of your vehicle
12
3
Adjusting the height up and down
To raise the headrest, pull it up to the
desired position (1). To lower the head-
rest, push and hold the release button (2)
on the headrest support and lower the
headrest to the desired position (3). Removal and installation
To remove the headrest, raise it as far as
it can go then press the release button
(1) while pulling upward (2).
To reinstall the headrest, put the head-
rest poles (3) into the holes while press-
ing the release button (1). Then adjust it
to the appropriate height.
WARNING
For maximum effectiveness in
case of an accident, the headrest
should be adjusted so the middle
of the headrest is at the same
height as the center of gravity of
an occupant's head. Generally,
the center of gravity of most peo-
ple's head is similar with the
height of the top of their eyes.
Also adjust the headrest as close
to your head as possible. For this
reason, the use of a cushion that
holds the body away from the
seatback is not recommended.
Do not operate the vehicle with the headrests removed as severe
injury to an occupant may occur
in the event of an accident.
Headrests may provide protec-
tion against severe neck injuries
when properly adjusted.
OUN026043OUN028044
WARNING
Make sure the headrest locks in
position after adjusting it to proper-
ly protects the occupants.
Page 30 of 338

313
Safety features of your vehicle
C010306AUN
Walk-in seat (if equipped)
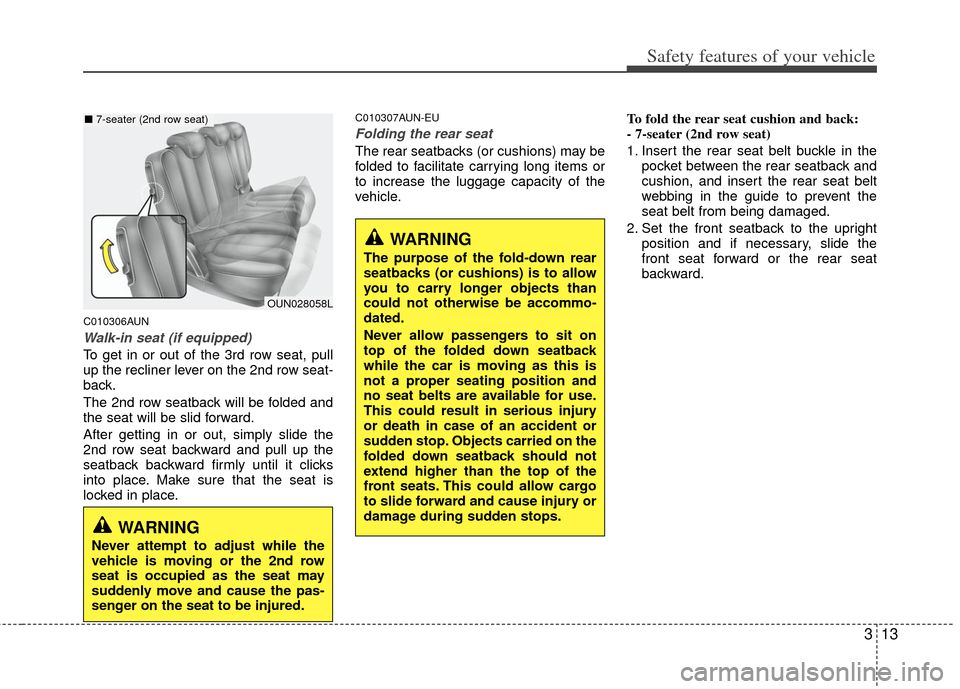
To get in or out of the 3rd row seat, pull
up the recliner lever on the 2nd row seat-
back.
The 2nd row seatback will be folded and
the seat will be slid forward.
After getting in or out, simply slide the
2nd row seat backward and pull up the
seatback backward firmly until it clicks
into place. Make sure that the seat is
locked in place.
C010307AUN-EU
Folding the rear seat
The rear seatbacks (or cushions) may be
folded to facilitate carrying long items or
to increase the luggage capacity of the
vehicle.To fold the rear seat cushion and back:
- 7-seater (2nd row seat)
1. Insert the rear seat belt buckle in the
pocket between the rear seatback and
cushion, and insert the rear seat belt
webbing in the guide to prevent the
seat belt from being damaged.
2. Set the front seatback to the upright position and if necessary, slide the
front seat forward or the rear seat
backward.
OUN028058L
■7-seater (2nd row seat)
WARNING
Never attempt to adjust while the
vehicle is moving or the 2nd row
seat is occupied as the seat may
suddenly move and cause the pas-
senger on the seat to be injured.
WARNING
The purpose of the fold-down rear
seatbacks (or cushions) is to allow
you to carry longer objects than
could not otherwise be accommo-
dated.
Never allow passengers to sit on
top of the folded down seatback
while the car is moving as this is
not a proper seating position and
no seat belts are available for use.
This could result in serious injury
or death in case of an accident or
sudden stop. Objects carried on the
folded down seatback should not
extend higher than the top of the
front seats. This could allow cargo
to slide forward and cause injury or
damage during sudden stops.
Page 31 of 338

Safety features of your vehicle
14
3
3. Pull the cushion folding strap (1) and
lift the rear portion of the seat cushion.
Stand the rear seat cushion vertically. 4. Remove the headrest from the rear
seatback
5. Pull up the rear seatback recline lever (2) and fold the rear seatback forward
and down firmly.
6. Stow the headrest by inserting the headrest poles into the holes on the
bottom of the seat cushion. 7. To use the rear seat, lift and push the
seatback backward by pulling up the
seatback recline lever (2). Pull the
seatback firmly until it clicks into place.
Make sure the seatback is locked in
place. Replace the headrest on the
seatback and adjust it to the desired
position.
OUN026054L
OUN026055L
OUN026052
OUN026053L
OUN026056L
Page 32 of 338

315
Safety features of your vehicle
8. Return the seat cushion to the originalposition by pushing down the seat
cushion and inserting the hook (3) into
the holder (4). Make sure the seat
cushion is locked in place.
9. Return the rear seat belt to the proper position. To fold down the rear seatback:
- 7-seater (3rd row seat)
- 5-seater
1. Insert the rear seat belt buckle in the
pocket between the rear seatback and
cushion (if equipped), and insert the
rear seat belt webbing in the guide to
prevent the seat belt from being dam-
aged.
2. Set the front (or 2nd row) seatback to the upright position and if necessary,
slide the front (or 2nd row) seat for-
ward.
3. Lower the rear headrests to the lowest position.
4. Pull on the seatback folding lever (orstrap) (1), then fold the seat toward the
front of the vehicle. When you return
the seatback to its upright position,
always be sure it has locked into posi-
tion by pushing on the top of the seat-
back.
OUN026056
OUN026057
OUN029048L-1
OUN029048L
OUN026048E
■ 7-seater (3rd row seat)
■5-seater
Page 33 of 338

Safety features of your vehicle
16
3
5. To use the rear seat, lift and pull the
seatback backward by pulling on the
folding lever (or strap) (1). Pull the
seatback firmly until it clicks into place.
Make sure the seatback is locked in
place.
6. Return the rear seat belt to the proper position.
WARNING
When you return the rear seatback
to its upright position after being
folded down:
Be careful not to damage the seat
belt webbing or buckle. Do not
allow the seat belt webbing or
buckle to get caught or pinched in
the rear seat. Ensure that the seat-
back is completely locked into its
upright position by pushing on the
top of the seatback. Otherwise, in
an accident or sudden stop, the
seat could fold down and allow
cargo to enter the passenger com-
partment, which could result in
serious injury or death.
WARNING - 3rd row seat (if equipped)
The headrest on the 3rd row seat
should be adjusted so the middle of
the headrest is at the same height
as the top of the occupant's eyes.
If the tailgate is pushed down when
the passenger's head is not against
a properly adjusted headrest, the
tailgate may hit the occupant's
head, which could cause injury.
OUN026140
OUN029050L-1
OUN029050L
OUN026050E
■ 7-seater (3rd row seat)
■ 5-seater
Page 37 of 338

Safety features of your vehicle
20
3
C020102BUN-EU
Seat belt - Driver's 3-point system
with emergency locking retractor
To fasten your seat belt:
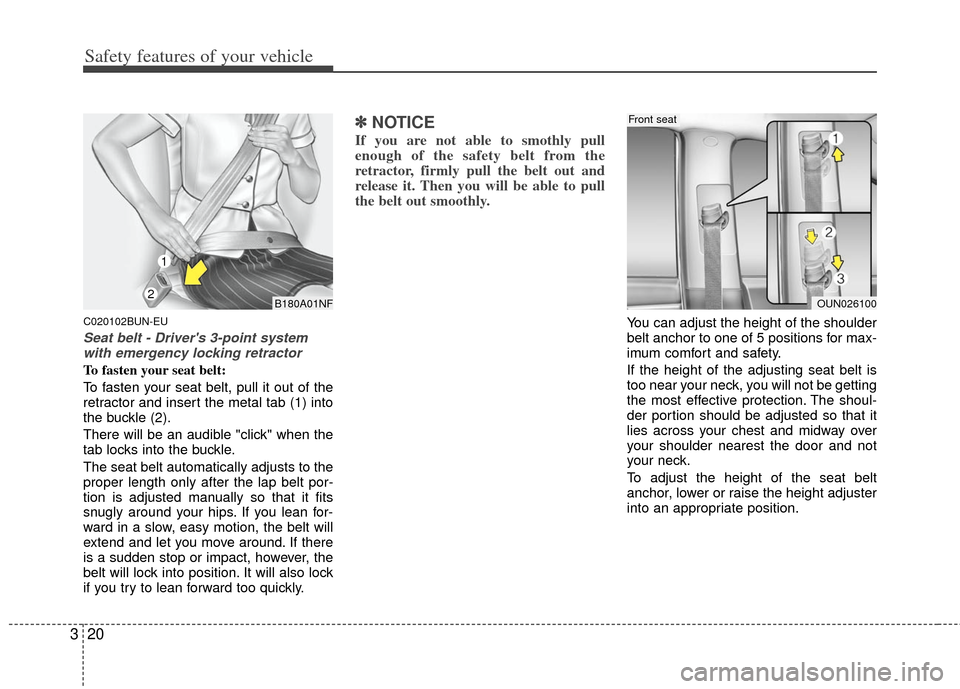
To fasten your seat belt, pull it out of the
retractor and insert the metal tab (1) into
the buckle (2).
There will be an audible "click" when the
tab locks into the buckle.
The seat belt automatically adjusts to the
proper length only after the lap belt por-
tion is adjusted manually so that it fits
snugly around your hips. If you lean for-
ward in a slow, easy motion, the belt will
extend and let you move around. If there
is a sudden stop or impact, however, the
belt will lock into position. It will also lock
if you try to lean forward too quickly.
✽ ✽ NOTICE
If you are not able to smothly pull
enough of the safety belt from the
retractor, firmly pull the belt out and
release it. Then you will be able to pull
the belt out smoothly.
You can adjust the height of the shoulder
belt anchor to one of 5 positions for max-
imum comfort and safety.
If the height of the adjusting seat belt is
too near your neck, you will not be getting
the most effective protection. The shoul-
der portion should be adjusted so that it
lies across your chest and midway over
your shoulder nearest the door and not
your neck.
To adjust the height of the seat belt
anchor, lower or raise the height adjuster
into an appropriate position.
B180A01NF
1
2OUN026100
Front seat
Page 38 of 338

321
Safety features of your vehicle
To raise the height adjuster, pull it up (1).
To lower it, push it down (3) while press-
ing the height adjuster button (2).
Release the button to lock the anchor
into position. Try sliding the height
adjuster to make sure that it has locked
into position.C020106AUN
Seat belts - Front passenger and rearseat 3-point system with combination locking retractor
To fasten your seat belt:
Combination retractor type seat belts are
installed in the rear seat positions to help
accommodate the installation of child
restraint systems. Although a combina-
tion retractor is also installed in the front
passenger seat position, it is strongly
recommended that children always be
seated in the rear seat. NEVER place
any infant restraint system in the front
seat of the vehicle.
This type of seat belt combines the fea-
tures of both an emergency locking
retractor seat belt and an automatic lock-
ing retractor seat belt. To fasten your seat
belt, pull it out of the retractor and insert
the metal tab into the buckle. There will
be an audible "click" when the tab locks
into the buckle. When not securing a
child restraint, the seat belt operates in
the same way as the driver's seat belt
(Emergency Locking Retractor Type). It
automatically adjusts to the proper length
only after the lap belt portion of the seat
belt is adjusted manually so that it fits
snugly around your hips.
WARNING
Verify the shoulder belt anchor is locked into position at the appro-
priate height. Never position the
shoulder belt across your neck or
face. Improperly positioned seat
belts can cause serious injuries
in an accident.
Failure to replace seat belts after an accident could leave you with
damaged seat belts that will not
provide protection in the event of
another collision leading to per-
sonal injury or death. Replace
your seat belts after being in an
accident as soon as possible.
WARNING
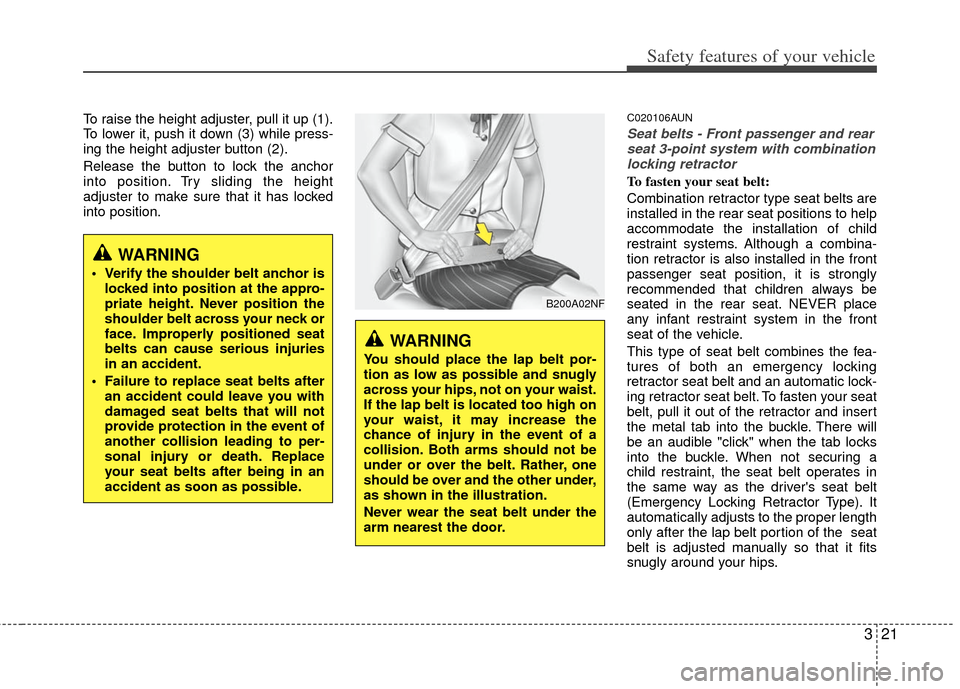
You should place the lap belt por-
tion as low as possible and snugly
across your hips, not on your waist.
If the lap belt is located too high on
your waist, it may increase the
chance of injury in the event of a
collision. Both arms should not be
under or over the belt. Rather, one
should be over and the other under,
as shown in the illustration.
Never wear the seat belt under the
arm nearest the door.
B200A02NF