2013 KIA CEED sensor
[x] Cancel search: sensorPage 984 of 1168

559
Driving your vehicle
This system detects the lane with the
sensor at the front windscreen and warns
you when your vehicle leaves the lane.To operate the LDWS, press the switch
with the ignition in the ON position. The
indicator illuminates on the cluster. To
cancel the LDWS, press the switchagain.
LANE DEPARTURE WARNING SYSTEM (LDWS) (IF EQUIPPED)
WARNING
The LDWS does not make the vehi- cle change lanes. It is the driver's
responsibility to always check the
road conditions.
Do not turn the steering wheel sud- denly, when the LDWS warns you
that your vehicle is leaving the lane.
If the sensor can not detect the lane or if the vehicle speed does not
exceed 60km/h, the LDWS won't
warn you even though the vehicle
leaves the lane.
If your vehicle has window tint or other types of coating on the front
windscreen, the LDWS may not
work properly.
Do not let water or any kind of liq- uid come in contact with the LDWS
sensor.
Do not remove the LDWS parts and do not affect the sensor by a strongimpact.
Do not put objects that reflect light on the dash board.
Always check road conditions because you may not hear the
warning chime because of audio
and external conditions.
OJD052030R
OJD052029
OJD042178
OJD052028
JD RHD 5.QXP 7/21/2012 1:15 PM Page 59
Page 985 of 1168
Driving your vehicle
60
5
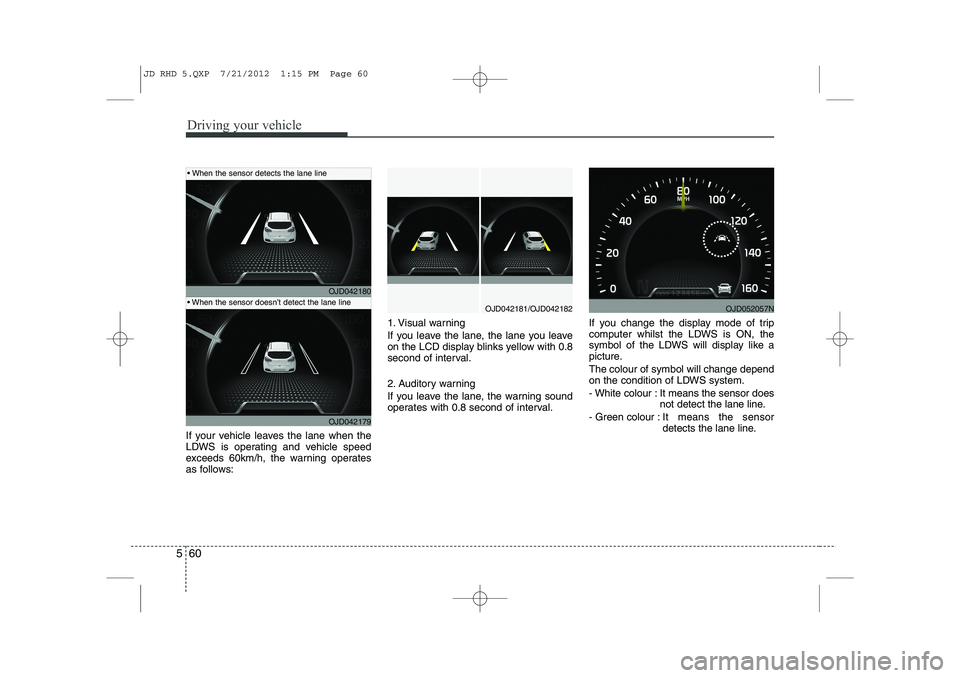
If your vehicle leaves the lane when the
LDWS is operating and vehicle speed
exceeds 60km/h, the warning operates
as follows: 1. Visual warning
If you leave the lane, the lane you leave
on the LCD display blinks yellow with 0.8
second of interval.
2. Auditory warning
If you leave the lane, the warning sound
operates with 0.8 second of interval.
If you change the display mode of trip
computer whilst the LDWS is ON, the
symbol of the LDWS will display like a
picture. The colour of symbol will change depend
on the condition of LDWS system.
- White colour : It means the sensor does
not detect the lane line.
- Green colour : It means the sensor
detects the lane line.
OJD042180
OJD042179
OJD042181/OJD042182
When the sensor detects the lane line
When the sensor doesn’t detect the lane lineOJD052057N
JD RHD 5.QXP 7/21/2012 1:15 PM Page 60
Page 986 of 1168

561
Driving your vehicle
Warning indicator
If the LDWS FAIL warning indicator
comes on (yellow indicator), the LDWS is
not working properly. We recommend
that the system be checked by an autho-
rised Kia dealer.The LDWS does not operate when:
The driver turns on the turn signal to
change lane.
But, when the hazard warning flasher
is operating, the LDWS operates nor-
mally.
Driving on the lane line.
✽✽ NOTICE
To change lane, operate the turn signal switch, then change the lane.
The LDWS may not warn you even
if the vehicle leaves the lane, or
may warn you even if the vehicle
does not leave the lane when:
The lane is not visible due to snow, rain, stain, a puddle or many other things.
The brightness of the outside changes suddenly.
Not turning on the headlight even at night or in the tunnel.
Difficult to distinguish the colour of the lane from the road.
Driving on a steep grade or a curve. Light reflects from the water on the
road.
The lens or windscreen is stained with foreign matter.
The sensor can not detect the lane because of fog, heavy rain or heavy
snow.
The surrounding temperature of the inside rear view mirror is high due to a
direct ray of light.
The lane is very wide or narrow.
The lane line is damaged or indistinct.
The shadow is on the lane line by a median strip.
There is a mark similar to a lane line.
There is a boundary structure.
The distance from vehicle ahead is very short or the vehicle ahead hides
the lane line.
The vehicle shakes heavily.
The lane number increases or decreas- es or the lane lines are crossing com-
plicatedly.
Putting something on the dashboard.
Driving with the sun in front of you.
Driving in areas under construction.
The lane line is more than two in either side (Left/Right).
OJD052056N
JD RHD 5.QXP 7/21/2012 1:15 PM Page 61
Page 1011 of 1168
What to do in an emergency
6
6
Jump starting procedure ✽✽
NOTICE
If the battery is discharged, the engine can be started using a battery of anoth-
er vehicle and two jumper cables. Only
use jumper cables with fully insulatedclamp handles.
To prevent personal injury or damage to
both vehicles, adhere strictly to the fol-
lowing procedure.
1. Make sure the booster battery is 12- volt and that its negative terminal is
grounded.
2. If the booster battery is in another vehicle, do not allow the vehicles totouch.
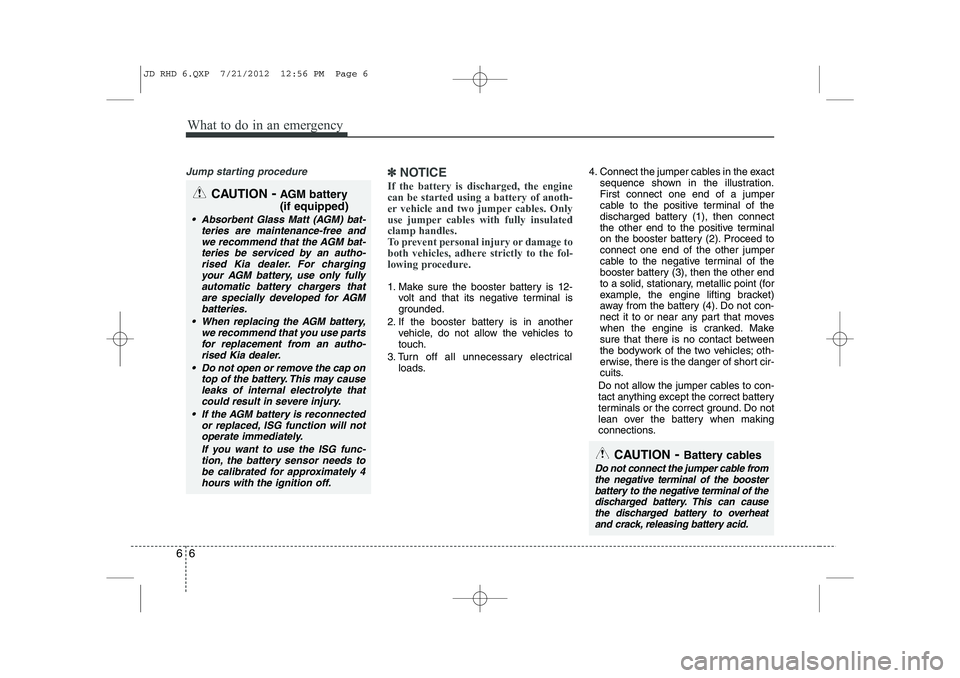
3. Turn off all unnecessary electrical loads. 4. Connect the jumper cables in the exact
sequence shown in the illustration.First connect one end of a jumper
cable to the positive terminal of the
discharged battery (1), then connect
the other end to the positive terminal
on the booster battery (2). Proceed toconnect one end of the other jumper
cable to the negative terminal of the
booster battery (3), then the other end
to a solid, stationary, metallic point (for
example, the engine lifting bracket)
away from the battery (4). Do not con-
nect it to or near any part that moves
when the engine is cranked. Make
sure that there is no contact between
the bodywork of the two vehicles; oth-
erwise, there is the danger of short cir-
cuits.
Do not allow the jumper cables to con-
tact anything except the correct battery
terminals or the correct ground. Do not
lean over the battery when making
connections.
CAUTION - Battery cables
Do not connect the jumper cable from
the negative terminal of the booster battery to the negative terminal of thedischarged battery. This can cause
the discharged battery to overheat and crack, releasing battery acid.
CAUTION -AGM battery (if equipped)
Absorbent Glass Matt (AGM) bat-
teries are maintenance-free andwe recommend that the AGM bat-
teries be serviced by an autho-rised Kia dealer. For chargingyour AGM battery, use only fully
automatic battery chargers thatare specially developed for AGMbatteries.
When replacing the AGM battery, we recommend that you use parts
for replacement from an autho- rised Kia dealer.
Do not open or remove the cap on top of the battery. This may cause
leaks of internal electrolyte that could result in severe injury.
If the AGM battery is reconnected or replaced, ISG function will notoperate immediately.
If you want to use the ISG func-tion, the battery sensor needs to be calibrated for approximately 4hours with the ignition off.
JD RHD 6.QXP 7/21/2012 12:56 PM Page 6
Page 1027 of 1168
What to do in an emergency
22
6
Technical Data
System voltage: DC 12 V
Working voltage: DC 10 - 15 V
Amperage rating: max. 15 A
Suitable for use at temperatures:
-30 ~ +70°C (-22 ~ +158°F)
Max. working pressure: 6 bar (87 psi)
Size (for 15´´, 16´´ wheel)
Compressor: 170 x 150 x 60 mm (6.7 x 5.9 x 2.4 in.)
Sealant bottle: 85 x 77 ø mm (3.3 x 3.0 ø in.)
Compressor weight: 0.8 kg (1.8 lbs)
Sealant volume: 200 ml (12.2 cu. in.)
Size (for 17´´ wheel)
Compressor: 168 x 150 x 68 mm (6.6 x 5.9 x 2.7 in.)
Sealant bottle: 104 x ø 85 mm (4.1 x ø 3.3 in.)
Compressor weight: 1.05 kg (2.31 lbs)
Sealant volume: 300 ml (18.3 cu. in.) ❈
Sealing compound and spare
parts can be obtained and
replaced at an authorised vehicle
or tyre dealer. Empty sealing com-
pound bottles may be disposed of
at home. Liquid residue from thesealing compound should be dis-
posed of by your vehicle or tyredealer or in accordance with local
waste disposal regulations.CAUTION - TPMS (if equipped )
When using Tyre Mobility Kit,
the tyre sealant can damage thetyre pressure sensor. After using the Tyre Mobility Kit, werecommend that the tyre pres-sure sensor be checked by an authorised Kia dealer.
JD RHD 6.QXP 7/21/2012 12:57 PM Page 22
Page 1029 of 1168
What to do in an emergency
24
6
TPMS malfunctions may occur for a
variety of reasons, including theinstallation of replacement or alter-
nate tyres or wheels on the vehicle
that prevent the TPMS from function-
ing properly. Always check theTPMS malfunction telltale afterreplacing one or more tyres or
wheels on your vehicle to ensure that
the replacement or alternate tyres
and wheels allow the TPMS to con-
tinue to function properly.
✽✽
NOTICE
If any of the below happens, we rec- ommend that the system be checked
by an authorised Kia dealer.
1.The low tyre pressure telltale/ TPMS malfunction indicator do
not illuminate for 3 seconds whenthe ignition switch is turned to theON position.
2. The TPMS malfunction indicator remains illuminated after blinking
for approximately 1 minute.
3. The Low tyre pressure position telltale remains illuminated.
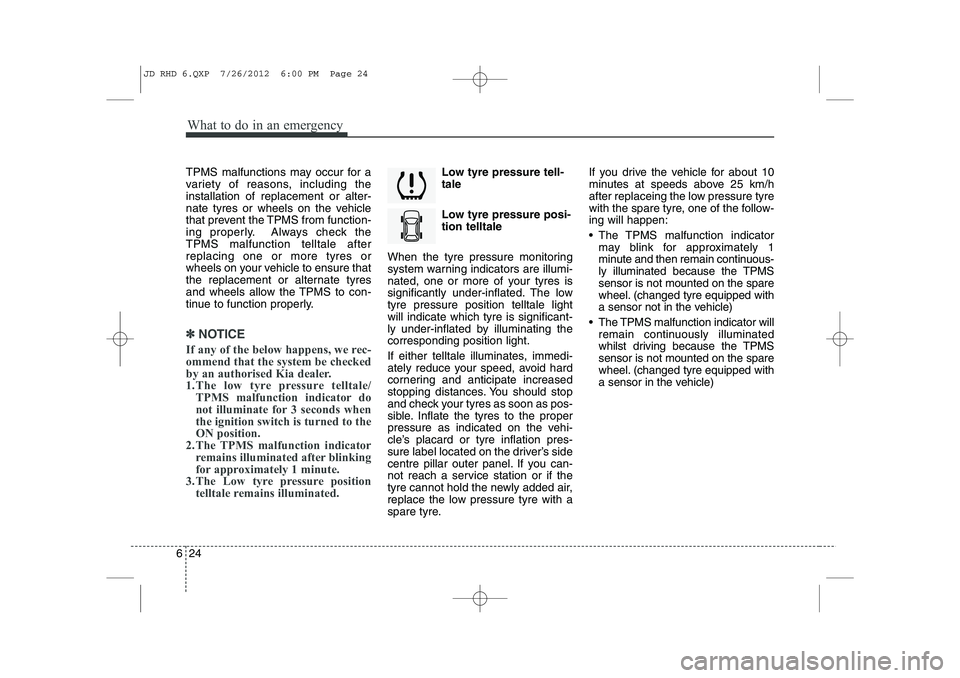
Low tyre pressure tell- tale
Low tyre pressure posi- tion telltale
When the tyre pressure monitoring
system warning indicators are illumi-
nated, one or more of your tyres is
significantly under-inflated. The lowtyre pressure position telltale lightwill indicate which tyre is significant-
ly under-inflated by illuminating thecorresponding position light.
If either telltale illuminates, immedi-
ately reduce your speed, avoid hard
cornering and anticipate increased
stopping distances. You should stop
and check your tyres as soon as pos-
sible. Inflate the tyres to the proper
pressure as indicated on the vehi-
cle’s placard or tyre inflation pres-
sure label located on the driver’s side
centre pillar outer panel. If you can-
not reach a service station or if the
tyre cannot hold the newly added air,
replace the low pressure tyre with a
spare tyre. If you drive the vehicle for about 10
minutes at speeds above 25 km/h
after replaceing the low pressure tyre
with the spare tyre, one of the follow-ing will happen:
The TPMS malfunction indicator
may blink for approximately 1
minute and then remain continuous-
ly illuminated because the TPMSsensor is not mounted on the spare
wheel. (changed tyre equipped with
a sensor not in the vehicle)
The TPMS malfunction indicator will remain continuously illuminated
whilst driving because the TPMSsensor is not mounted on the spare
wheel. (changed tyre equipped with
a sensor in the vehicle)
JD RHD 6.QXP 7/26/2012 6:00 PM Page 24
Page 1031 of 1168
What to do in an emergency
26
6
Changing a tyre with TPMS
If you have a flat tyre, the low Tyre
Pressure and Position telltales will
come on. We recommend that the
system be checked by an authorised
Kia dealer. Each wheel is equipped with a tyre pressure sensor mounted inside the
tyre behind the valve stem. You must
use TPMS specific wheels. It is rec-
ommended that you have your tyres
serviced by an authorised Kia dealer. If you drive the vehicle for about 10
minutes at speeds above 25 km/h
after replaceing the low pressure tyre
with the spare tyre, one of the follow-ing will happen:
The TPMS malfunction indicator
may blink for approximately 1
minute and then remain continuous-
ly illuminated because the TPMSsensor is not mounted on the spare
wheel. (changed tyre equipped with
a sensor not in the vehicle)
The TPMS malfunction indicator will remain continuously illuminated
whilst driving because the TPMSsensor is not mounted on the spare
wheel. (changed tyre equipped with
a sensor in the vehicle)CAUTION
The TPMS malfunction indica-
tor may blink for approximate-ly 1 minute and then remaincontinuously illuminated if thevehicle is moving around elec- tric power supply cables orradios transmitter such as atpolice stations, government and public offices, broadcast-ing stations, military installa-tions, airports, or transmitting towers, etc. This can interferewith normal operation of theTyre Pressure Monitoring System (TPMS).
The TPMS malfunction indica- tor may blink for approximate-ly 1 minute and then remaincontinuously illuminated if snow chains are used or someseparate electronic devicessuch as notebook computer, mobile charger, remote starteror navigation etc., are used inthe vehicle. This can interfere with normal operation of theTyre Pressure MonitoringSystem (TPMS).
CAUTION
We recommend that you use thesealant approved by Kia.
The sealant on the tyre pressuresensor and wheel shall be elem-inated when you replace the tyre with a new one.
JD RHD 6.QXP 7/21/2012 12:57 PM Page 26
Page 1032 of 1168
627
What to do in an emergency
You may not be able identify a low
tyre by simply looking at it. Alwaysuse a good quality tyre pressuregauge to measure the tyre's inflation
pressure. Please note that a tyre that
is hot (from being driven) will have ahigher pressure measurement than atyre that is cold (from sitting station-
ary for at least 3 hours and driven
less than 1 mile (1.6 km) during that
3 hour period).
Allow the tyre to cool before measur-
ing the inflation pressure. Always be
sure the tyre is cold before inflating
to the recommended pressure.
A cold tyre means the vehicle has
been sitting for 3 hours and driven forless than 1 mile (1.6 km) in that 3
hour period.
WARNING - Protecting
TPMS
Tampering with, modifying, or
disabling the Tyre PressureMonitoring System (TPMS)
components may interfere withthe system's ability to warn the
driver of low tyre pressure con-
ditions and/or TPMS malfunc-
tions. Tampering with, modify-
ing, or disabling the TyrePressure Monitoring System
(TPMS) components may void
the warranty for that portion of
the vehicle.WARNING - TPMS
The TPMS cannot alert you to severe and sudden tyre dam-
age caused by external fac-
tors such as nails or roaddebris.
If you feel any vehicle instabil- ity, immediately take your foot
off the accelerator, apply the
brakes gradually and with
light force, and slowly move to
a safe position off the road.
CAUTION
We recommend that you use the
sealant approved by Kia if yourvehicle is equipped with a Tyre Pressure Monitoring System.The liquid sealant can damagethe tyre pressure sensors.
JD RHD 6.QXP 7/21/2012 12:57 PM Page 27