2013 KIA CEED sensor
[x] Cancel search: sensorPage 176 of 1168
497
Features of your vehicle
✽✽NOTICE
1. The warning may not sound sequen- tially depending on the speed and shapes of the objects detected.
2. The parking assist system may mal-
function if the vehicle bumper height
or sensor installation has been modi-
fied. Any non-factory installed equip-
ment or accessories may also interfere
with the sensor performance.
3. Sensor may not recognize objects less
than 30 cm from the sensor, or it may
sense an incorrect distance. Use withcaution.
4. When the sensor is frozen or stained
with snow or water, the sensor may be
inoperative until the stains are
removed using a soft cloth.
5. Do not push, scratch or strike the sen-
sor with any hard objects that could
damage the surface of the sensor.
Sensor damage could occur. ✽✽
NOTICE
This system can only sense objects with- in the range and location of the sensors,
it can not detect objects in other areas
where sensors are not installed. Also,
small or slim objects, or objects locatedbetween sensors may not be detected.
Always visually check in front andbehind the vehicle when driving.
Be sure to inform any drivers in the
vehicle that may be unfamiliar with the
system regarding the systems capabili-ties and limitations.Self-diagnosis
When you shift the gear to the R
(Reverse) position and if one or more of
the below occurs you may have a mal-
function in the rear parking assist sys-tem.
You don't hear an audible warning sound or if the buzzer sounds intermit-
tently.
If this occurs, we recommend that the
system be checked by an authorized Kia
dealer.
WARNING
Your new vehicle warranty does not
cover any accidents or damage to
the vehicle or injuries to its occu-pants related to a parking assist
system. Always drive safely and
cautiously.
WARNING
Pay close attention when the vehi-
cle is driven close to objects on the
road, particularly pedestrians, and
especially children. Be aware that
some objects may not be detected
by the sensors, due to the objects
distance, size or material, all of
which can limit the effectiveness of
the sensor. Always perform a visual
inspection to make sure the vehicle
is clear of all obstructions before
moving the vehicle in any direction.
(blinks)
is displayed. (if equipped)
JD eng 4a(~168).qxp 7/17/2012 10:21 AM Page 97
Page 178 of 1168
499
Features of your vehicle
Operating condition
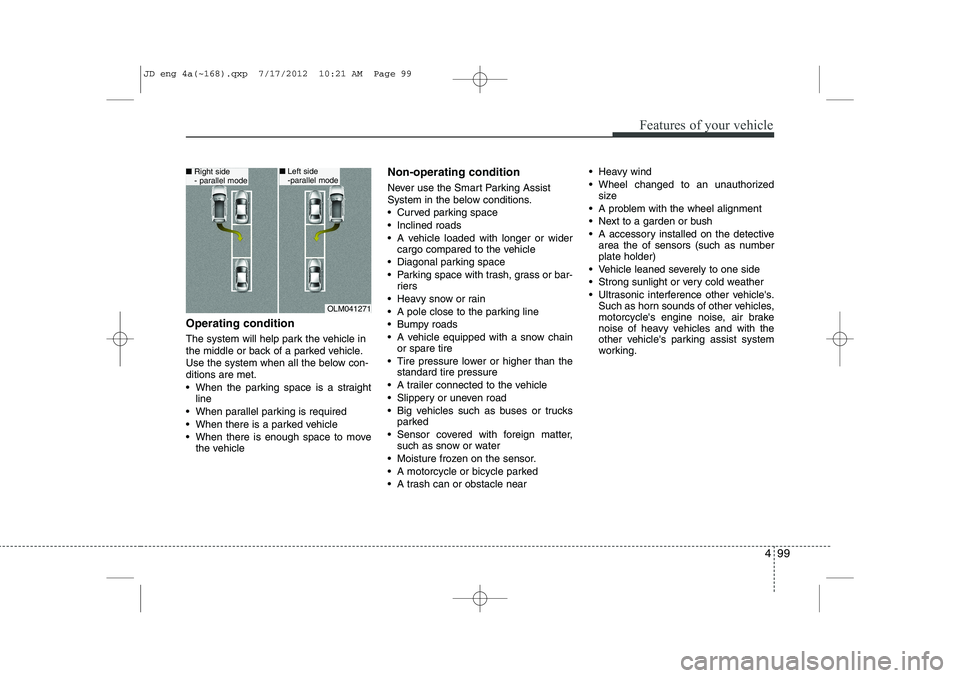
The system will help park the vehicle in
the middle or back of a parked vehicle.
Use the system when all the below con-ditions are met.
When the parking space is a straightline
When parallel parking is required
When there is a parked vehicle
When there is enough space to move the vehicle Non-operating condition
Never use the Smart Parking Assist
System in the below conditions.
Curved parking space
Inclined roads
A vehicle loaded with longer or wider
cargo compared to the vehicle
Diagonal parking space
Parking space with trash, grass or bar- riers
Heavy snow or rain
A pole close to the parking line
Bumpy roads
A vehicle equipped with a snow chain or spare tire
Tire pressure lower or higher than the standard tire pressure
A trailer connected to the vehicle
Slippery or uneven road
Big vehicles such as buses or trucks parked
Sensor covered with foreign matter, such as snow or water
Moisture frozen on the sensor.
A motorcycle or bicycle parked
A trash can or obstacle near Heavy wind
Wheel changed to an unauthorized
size
A problem with the wheel alignment
Next to a garden or bush
A accessory installed on the detective area the of sensors (such as number plate holder)
Vehicle leaned severely to one side
Strong sunlight or very cold weather
Ultrasonic interference other vehicle's. Such as horn sounds of other vehicles,
motorcycle's engine noise, air brake
noise of heavy vehicles and with the
other vehicle's parking assist system
working.
OLM041271
■Right side
- parallel mode■Left side
-parallel mode
JD eng 4a(~168).qxp 7/17/2012 10:21 AM Page 99
Page 179 of 1168
Features of your vehicle
100
4
WARNING
Do not use the Smart Parking
Assist System in the following con-
ditions for unexpected results mayoccur and cause a serious accident.
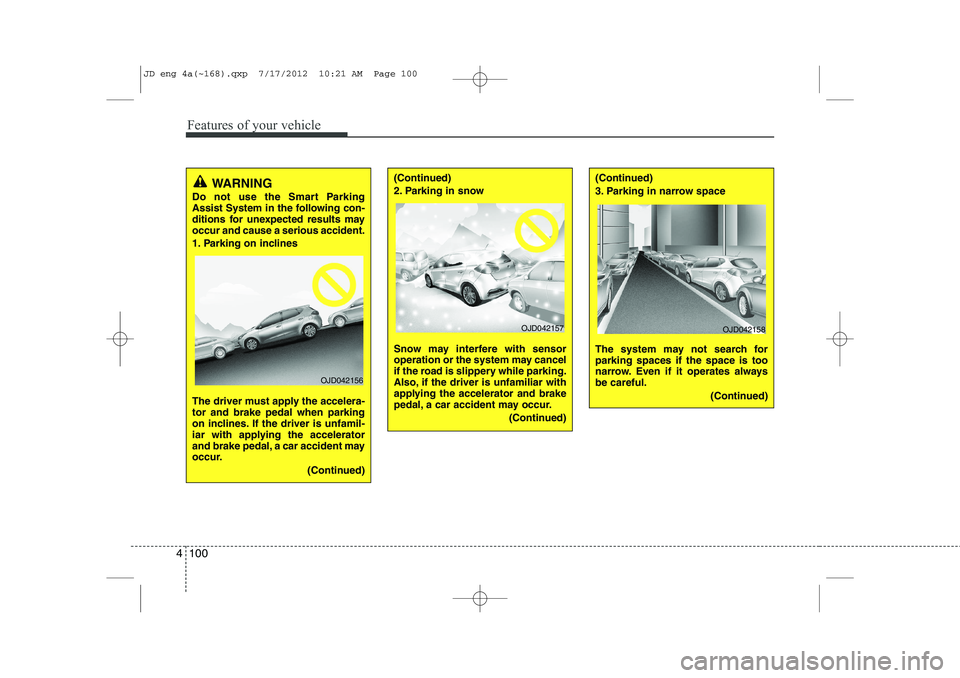
1. Parking on inclines
The driver must apply the accelera- tor and brake pedal when parking
on inclines. If the driver is unfamil-
iar with applying the accelerator
and brake pedal, a car accident may
occur.
(Continued)
OJD042156
(Continued)
2. Parking in snow
Snow may interfere with sensor
operation or the system may cancel
if the road is slippery while parking.
Also, if the driver is unfamiliar with
applying the accelerator and brake
pedal, a car accident may occur.(Continued)(Continued)
3. Parking in narrow space
The system may not search for parking spaces if the space is too
narrow. Even if it operates alwaysbe careful.(Continued)
OJD042157OJD042158
JD eng 4a(~168).qxp 7/17/2012 10:21 AM Page 100
Page 181 of 1168
Features of your vehicle
102
4
How the system works
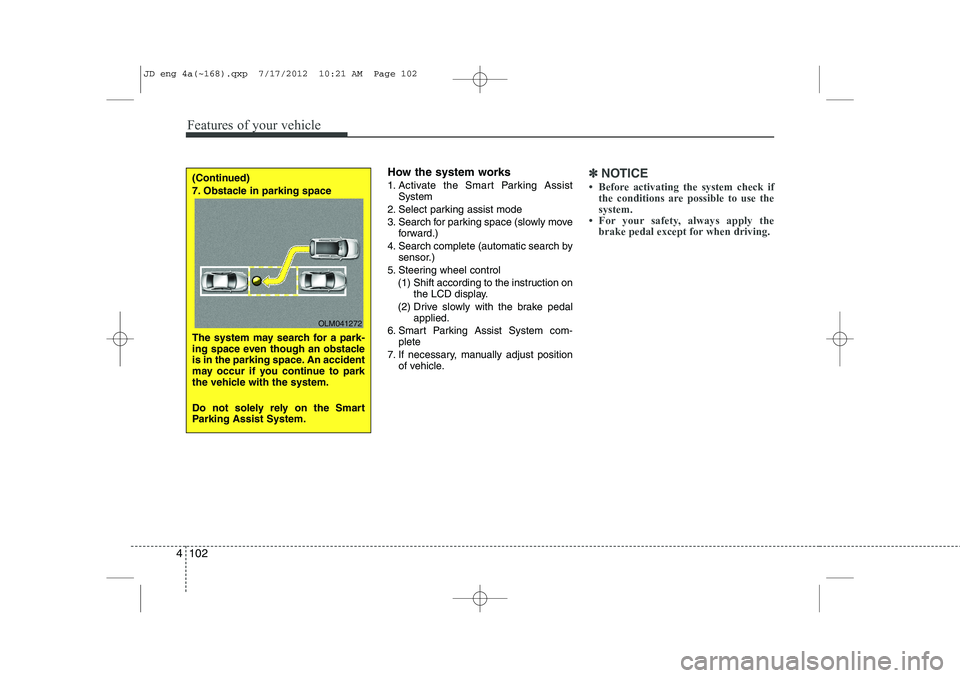
1. Activate the Smart Parking Assist
System
2. Select parking assist mode
3. Search for parking space (slowly move forward.)
4. Search complete (automatic search by sensor.)
5. Steering wheel control
(1) Shift according to the instruction on the LCD display.
(2) Drive slowly with the brake pedal applied.
6. Smart Parking Assist System com- plete
7. If necessary, manually adjust position of vehicle.✽✽ NOTICE
Page 182 of 1168
4 103
Features of your vehicle
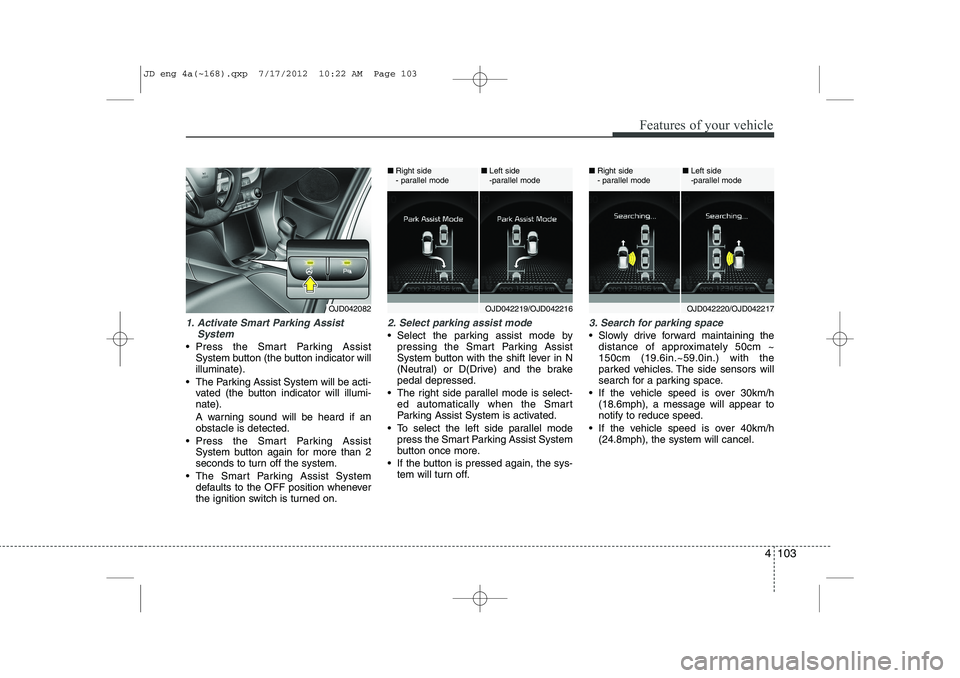
1. Activate Smart Parking AssistSystem
Press the Smart Parking AssistSystem button (the button indicator will illuminate).
The Parking Assist System will be acti- vated (the button indicator will illumi-nate).
A warning sound will be heard if an obstacle is detected.
Press the Smart Parking Assist System button again for more than 2
seconds to turn off the system.
The Smart Parking Assist System defaults to the OFF position whenever
the ignition switch is turned on.
2. Select parking assist mode
Select the parking assist mode bypressing the Smart Parking Assist
System button with the shift lever in N
(Neutral) or D(Drive) and the brakepedal depressed.
The right side parallel mode is select- ed automatically when the Smart
Parking Assist System is activated.
To select the left side parallel mode press the Smart Parking Assist System
button once more.
If the button is pressed again, the sys- tem will turn off.
3. Search for parking space
Slowly drive forward maintaining thedistance of approximately 50cm ~ 150cm (19.6in.~59.0in.) with the
parked vehicles. The side sensors will
search for a parking space.
If the vehicle speed is over 30km/h (18.6mph), a message will appear tonotify to reduce speed.
If the vehicle speed is over 40km/h (24.8mph), the system will cancel.
OJD042082OJD042219/OJD042216
■
Right side
- parallel mode ■
Left side
-parallel modeOJD042220/OJD042217
■
Right side
- parallel mode ■
Left side
-parallel mode
JD eng 4a(~168).qxp 7/17/2012 10:22 AM Page 103
Page 191 of 1168
Features of your vehicle
112
4
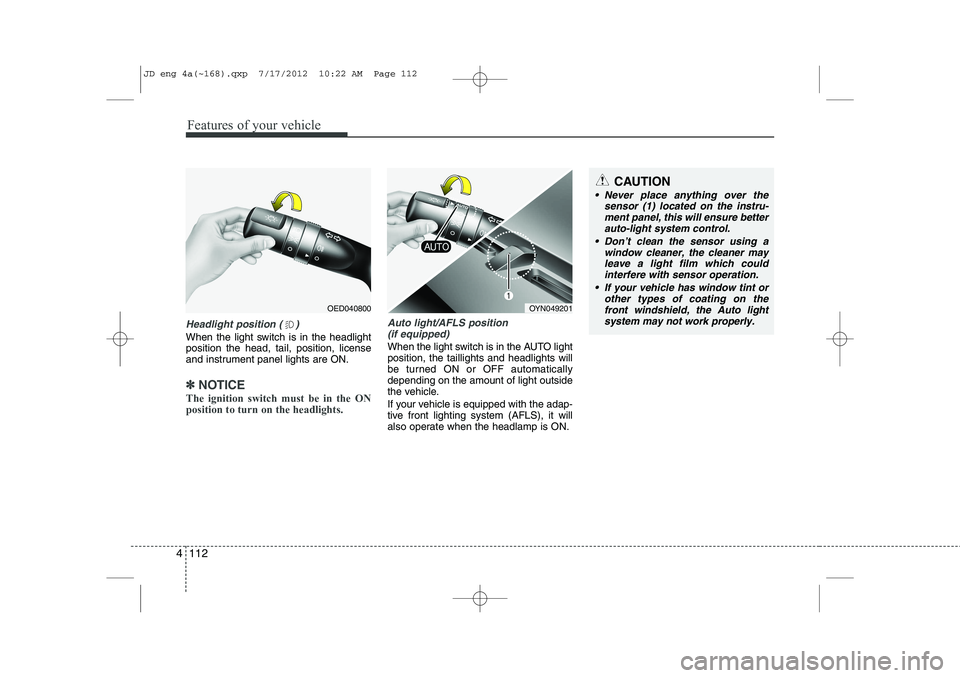
Headlight position ( )
When the light switch is in the headlight position the head, tail, position, license
and instrument panel lights are ON.
✽✽
NOTICE
The ignition switch must be in the ON position to turn on the headlights.
Auto light/AFLS position (if equipped)
When the light switch is in the AUTO light position, the taillights and headlights will
be turned ON or OFF automaticallydepending on the amount of light outside
the vehicle.
If your vehicle is equipped with the adap-
tive front lighting system (AFLS), it will
also operate when the headlamp is ON.
OYN049201
CAUTION
Never place anything over the sensor (1) located on the instru-
ment panel, this will ensure betterauto-light system control.
Don’t clean the sensor using a window cleaner, the cleaner may
leave a light film which couldinterfere with sensor operation.
If your vehicle has window tint or other types of coating on thefront windshield, the Auto light
system may not work properly.
OED040800
JD eng 4a(~168).qxp 7/17/2012 10:22 AM Page 112
Page 198 of 1168

4 119
Features of your vehicle
AUTO (Automatic) control (if equipped)
The rain sensor located on the upper end of the windshield glass senses the
amount of rainfall and controls the wiping
cycle for the proper interval. The more it
rains, the faster the wiper operates. When
the rain stops, the wiper stops. To vary the speed setting, turn the speedcontrol knob (1).
If the wiper switch is set in AUTO mode
when the ignition switch is ON, the wiper
will operate once to perform a self-check
of the system. Set the wiper to off posi-
tion when the wiper is not in use.
CAUTION
When the ignition switch is ON and
the windshield wiper switch isplaced in the AUTO mode, use cau-
tion in the following situations toavoid any injury to the hands orother parts of the body:
Do not touch the upper end of the windshield glass facing the rain
sensor.
Do not wipe the upper end of the windshield glass with a damp orwet cloth.
Do not put pressure on the wind- shield glass.
OEL049900
Rain sensor
CAUTION
When washing the vehicle, set thewiper switch in the off position to
stop the auto wiper operation.
The wiper may operate and be dam-aged if the switch is set in the AUTOmode while washing the vehicle.
Do not remove the sensor coverlocated on the upper end of the pas- senger side windshield glass.Damage to system parts could occur and may not be covered by
your vehicle warranty.
When starting the vehicle in winter,set the wiper switch in the off posi-tion. Otherwise, wipers may operate
and ice may damage the windshieldwiper blades. Always remove all snow and ice and defrost the wind-shield properly prior to operating
the windshield wipers.
JD eng 4a(~168).qxp 7/17/2012 10:23 AM Page 119
Page 229 of 1168

Features of your vehicle
150
4
This indicator illuminates
when the auto defoggingsystem senses the moistureof inside the windshield and
operates.
If more moisture is in the vehicle, higher
steps operate as follow.
Step 1 : Operating the air conditioning
Step 2 : Outside air position
Step 3 : Blowing air flow toward the wind- shield
Step 4 : Increasing air flow toward the windshield
If your vehicle is equipped with the auto
defogging system, it is automatically acti-
vated when the conditions are met.
However, if you would like to cancel the
auto defogging system, press the front
defroster button 4 times within 2 seconds
while pressing the AUTO button. The
indicator will blink 3 times to notify you
that the system is cancelled. To use the
auto defogging system again, follow the
procedures mentioned above.
If the battery has been disconnected or
discharged, it resets to the auto defog-
ging status.✽✽ NOTICE
If the A/C off is manually selected while the auto defogging system is on, the auto
defogging indicator will blink 3 times to
give notice that the A/C off can not beselected.
When the ignition switch is in the ON
position, the clean air function turns on
automatically.
Also, the clean air function turns off auto-
matically, when the ignition switch turnsto the OFF position.
CAUTION
Do not remove the sensor cover located on the upper end of thedriver side windshield glass.Damage to the system parts could occur and may not be covered by
your vehicle warranty.
OJD042129
CLEAN AIR (IF EQUIPPED)
JD eng 4a(~168).qxp 7/17/2012 10:26 AM Page 150