Page 214 of 525

INSTRUMENT CLUSTER DESCRIPTIONS
1. Fuel Gauge/Fuel Door ReminderWhen the ignition switch is in the ON/RUN
position, the pointer will show the level of fuel
remaining in the fuel tank. The fuel pump
symbol points to the side of the vehicle where
the fuel door is located.
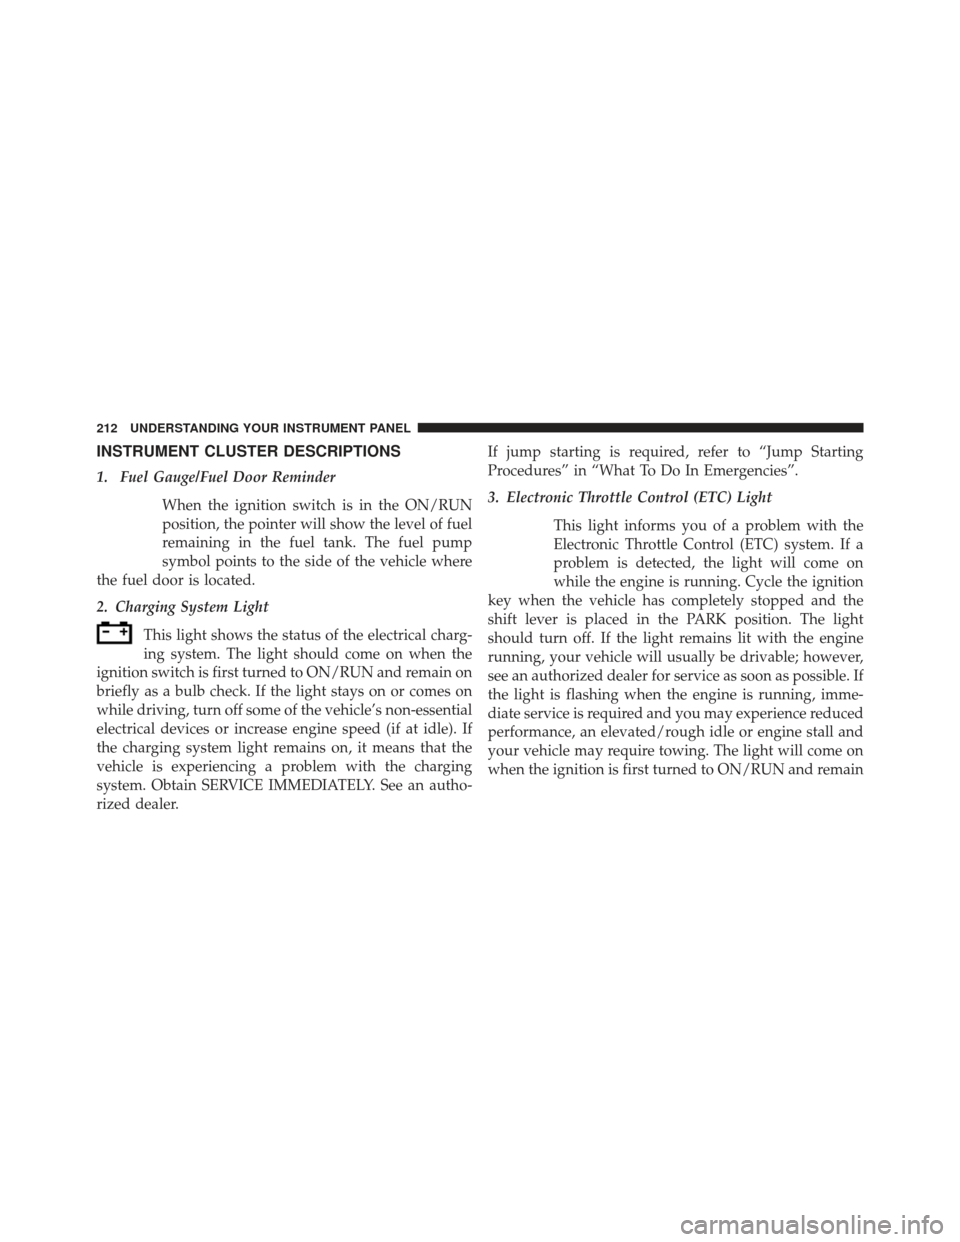
2. Charging System Light
This light shows the status of the electrical charg-
ing system. The light should come on when the
ignition switch is first turned to ON/RUN and remain on
briefly as a bulb check. If the light stays on or comes on
while driving, turn off some of the vehicle’s non-essential
electrical devices or increase engine speed (if at idle). If
the charging system light remains on, it means that the
vehicle is experiencing a problem with the charging
system. Obtain SERVICE IMMEDIATELY. See an autho-
rized dealer. If jump starting is required, refer to “Jump Starting
Procedures” in “What To Do In Emergencies”.
3. Electronic Throttle Control (ETC) Light
This light informs you of a problem with the
Electronic Throttle Control (ETC) system. If a
problem is detected, the light will come on
while the engine is running. Cycle the ignition
key when the vehicle has completely stopped and the
shift lever is placed in the PARK position. The light
should turn off. If the light remains lit with the engine
running, your vehicle will usually be drivable; however,
see an authorized dealer for service as soon as possible. If
the light is flashing when the engine is running, imme-
diate service is required and you may experience reduced
performance, an elevated/rough idle or engine stall and
your vehicle may require towing. The light will come on
when the ignition is first turned to ON/RUN and remain
212 UNDERSTANDING YOUR INSTRUMENT PANEL
Page 317 of 525

WARNING!(Continued)
another vehicle. This type of start can be dangerous if
done improperly, so follow the procedure carefully.
Refer to “Jump Starting” in “What To Do In Emer-
gencies” for further information.
Extreme Cold Weather (Below –20°F Or �29°C)
To ensure reliable starting at these temperatures, use of
an externally powered electric engine block heater (avail-
able from your authorized dealer) is recommended.
If Engine Fails To Start
If the engine fails to start after you have followed the
“Normal Starting” and “Extreme Cold Weather” proce-
dures, it may be flooded. Push the accelerator pedal all
the way to the floor and hold it there. Crank the engine
for no more than 15 seconds. This should clear any excess
fuel in case the engine is flooded. Leave the ignition key in the ON position, release the accelerator pedal and
repeat the “Normal Starting” procedure.
WARNING!
Never pour fuel or other flammable liquid into the
throttle body air inlet opening in an attempt to start
the vehicle. This could result in flash fire causing
serious personal injury.
CAUTION!
To prevent damage to the starter, do not crank the
engine for more than 15 seconds at a time. Wait 10 to
15 seconds before trying again.
After Starting
The idle speed is controlled automatically and it will
decrease as the engine warms up.
5
STARTING AND OPERATING 315
Page 415 of 525
WHAT TO DO IN EMERGENCIES
CONTENTS
�HAZARD WARNING FLASHERS ...........414
� IF YOUR ENGINE OVERHEATS ............414
� JACKING AND TIRE CHANGING ..........415
▫ Jack Location ....................... .416
▫ Spare Tire Stowage ....................417
▫ Preparations For Jacking ................417
▫ Jacking Instructions ...................418
▫ Road Tire Installation ...................424 �
JUMP-STARTING PROCEDURES ............424
▫ Preparations For Jump-Start ..............428
▫ Jump-Starting Procedure ................429
� FREEING A STUCK VEHICLE ..............431
� SHIFT LEVER OVERRIDE ................433
� TOWING A DISABLED VEHICLE ...........434
▫ With Ignition Key .....................435
6
Page 429 of 525

4. Finish tightening the lug nuts. Push down on thewrench while at the end of the handle for increased
leverage. Tighten the lug nuts in a star pattern until
each nut has been tightened twice. The correct tight-
ness of each lug nut is 100 ft/lbs (135 N·m). If in doubt
about the correct tightness, have them checked with a
torque wrench by your authorized dealer or service
station.
5. After 25 miles (40 km) check the lug nut torque with a torque wrench to ensure that all lug nuts are properly
seated against the wheel.
JUMP-STARTING PROCEDURES
If your vehicle has a discharged battery it can be jump-
started using a set of jumper cables and a battery in
another vehicle or by using a portable battery booster
pack. Jump-starting can be dangerous if done improperly
so please follow the procedures in this section carefully. NOTE:
When using a portable battery booster pack
follow the manufacturer ’s operating instructions and
precautions.
CAUTION!
Do not use a portable battery booster pack or any
other booster source with a system voltage greater
than 12 Volts or damage to the battery, starter motor,
alternator or electrical system may occur.
WARNING!
Do not attempt jump-starting if the battery is frozen.
It could rupture or explode and cause personal injury.
6
WHAT TO DO IN EMERGENCIES 427
Page 430 of 525
Preparations For Jump-Start
The battery in your vehicle is located in the front of the
engine compartment below the air intake duct. To access
the battery remove the air intake duct by turning the two
finger screws, located on the radiator support.
Air Intake Finger Screws
Positive Battery Post
428 WHAT TO DO IN EMERGENCIES
Page 431 of 525

WARNING!
•Take care to avoid the radiator cooling fan whenever
the hood is raised. It can start anytime the ignition
switch is ON. You can be injured by moving fan
blades.
• Remove any metal jewelry such as watch bands or
bracelets that might make an inadvertent electrical
contact. You could be seriously injured.
• Batteries contain sulfuric acid that can burn your
skin or eyes and generate hydrogen gas which is
flammable and explosive. Keep open flames or
sparks away from the battery.
1. Set the parking brake, shift the automatic transmission into PARK (manual transmission to NEUTRAL) and
turn the ignition to LOCK.
2. Turn off the heater, radio, and all unnecessary electri- cal accessories. 3. If using another vehicle to jump-start the battery, park
the vehicle within the jumper cables reach, set the
parking brake and make sure the ignition is OFF.
WARNING!
Do not allow vehicles to touch each other as this
could establish a ground connection and personal
injury could result.
Jump-Starting Procedure
WARNING!
Failure to follow this procedure could result in per-
sonal injury or property damage due to battery explo-
sion.
6
WHAT TO DO IN EMERGENCIES 429
Page 432 of 525

CAUTION!
Failure to follow these procedures could result in
damage to the charging system of the booster vehicle
or the discharged vehicle.
NOTE: Remove Air Intake before proceeding with this
Jump-Starting procedure.
1. Connect the positive (+)end of the jumper cable to the
positive (+)post of the discharged vehicle.
2. Connect the opposite end of the positive (+)jumper
cable to the positive (+)post of the booster battery.
3. Connect the negative end (-)of the jumper cable to the
negative (-)post of the booster battery. 4. Connect the opposite end of the negative
(-)jumper
cable to a good engine ground (exposed metal part of
the discharged vehicle’s engine) away from the battery
and the fuel injection system.
WARNING!
Do not connect the cable to the negative post (-) of the
discharged battery. The resulting electrical spark
could cause the battery to explode and could result in
personal injury.
5. Start the engine in the vehicle that has the booster battery, let the engine idle a few minutes, and then
start the engine in the vehicle with the discharged
battery.
430 WHAT TO DO IN EMERGENCIES
Page 433 of 525

Once the engine is started, remove the jumper cables in
the reverse sequence:
6. Disconnect the negative(-)jumper cable from the
engine ground of the vehicle with the discharged
battery.
7. Disconnect the negative end (-)of the jumper cable
from the negative (-)post of the booster battery.
8. Disconnect the opposite end of the positive (+)jumper
cable from the positive (+)post of the booster battery.
9. Disconnect the positive (+)end of the jumper cable
from the positive (+)post of the discharged vehicle.
10. Reinstall the air intake duct.
If frequent jump-starting is required to start your vehicle
you should have the battery and charging system in-
spected at your authorized dealer.CAUTION!
Accessories that can be plugged into the vehicle
power outlets draw power from the vehicle’s battery,
even when not in use (i.e., cellular phones, etc.).
Eventually, if plugged in long enough, the vehicle’s
battery will discharge sufficiently to degrade battery
life and/or prevent the engine from starting.
FREEING A STUCK VEHICLE
If your vehicle becomes stuck in mud, sand or snow, it
can often be moved using a rocking motion. Turn the
steering wheel right and left to clear the area around
the front wheels. Then shift back and forth between
DRIVE and REVERSE (with automatic transmission) or
2nd gear and REVERSE (with manual transmission),
while gently pressing the accelerator. Use the least
amount of accelerator pedal pressure that will maintain6
WHAT TO DO IN EMERGENCIES 431