2013 HYUNDAI TUCSON light
[x] Cancel search: lightPage 93 of 397
413
Features of your vehicle
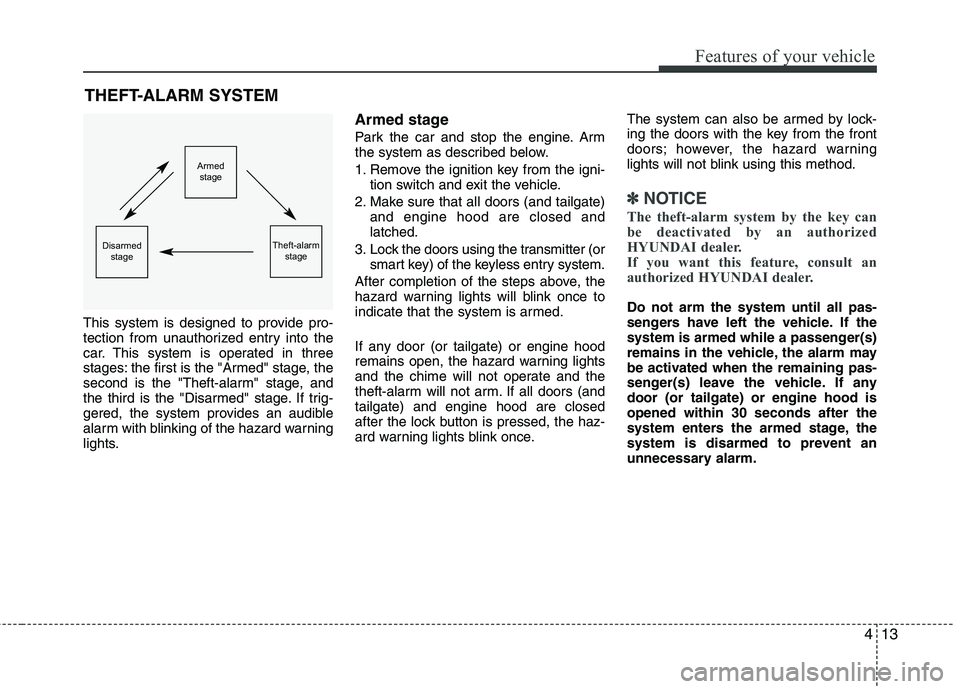
This system is designed to provide pro-
tection from unauthorized entry into the
car. This system is operated in three
stages: the first is the "Armed" stage, the
second is the "Theft-alarm" stage, and
the third is the "Disarmed" stage. If trig-
gered, the system provides an audible
alarm with blinking of the hazard warning
lights.
Armed stage
Park the car and stop the engine. Arm
the system as described below.
1. Remove the ignition key from the igni-tion switch and exit the vehicle.
2. Make sure that all doors (and tailgate) and engine hood are closed and latched.
3. Lock the doors using the transmitter (or smart key) of the keyless entry system.
After completion of the steps above, the
hazard warning lights will blink once to
indicate that the system is armed.
If any door (or tailgate) or engine hood
remains open, the hazard warning lights
and the chime will not operate and the
theft-alarm will not arm. If all doors (andtailgate) and engine hood are closed
after the lock button is pressed, the haz-
ard warning lights blink once. The system can also be armed by lock-
ing the doors with the key from the front
doors; however, the hazard warning
lights will not blink using this method.
✽✽
NOTICE
The theft-alarm system by the key can
be deactivated by an authorized
HYUNDAI dealer.
If you want this feature, consult an
authorized HYUNDAI dealer.
Do not arm the system until all pas-
sengers have left the vehicle. If the
system is armed while a passenger(s)
remains in the vehicle, the alarm may
be activated when the remaining pas-
senger(s) leave the vehicle. If any door (or tailgate) or engine hood isopened within 30 seconds after the
system enters the armed stage, the
system is disarmed to prevent an
unnecessary alarm.
Armed stage
Theft-alarm stageDisarmedstage
THEFT-ALARM SYSTEM
Page 94 of 397
Features of your vehicle
14
4
Theft-alarm stage
The alarm will be activated if any of the
following occurs while the system is
armed.
A front or rear door is opened without
using the ignition key or transmitter (or
smart key).
The tailgate is opened without using the transmitter (or smart key).
The engine hood is opened.
The horn will sound and the hazard
warning lights will blink continuously for
approximately 27 seconds, and repeat
the horn 2 times unless the system is dis-
armed. To turn off the system, unlock the
doors with the ignition key or transmitter
(or smart key).
Disarmed stage
The system will be disarmed when:
Transmitter
- The door unlock button is pressed.
- The engine is started.
- The ignition switch is in the “ON” posi- tion for 30 seconds or more.
Smart key
- The door unlock button is pressed.
- The button of the front outside door ispressed while carrying the smart key.
- The engine is started.
After the doors are unlocked, the hazard
warning lights will blink twice to indicate
that the system is disarmed.
After pressing the unlock button, if any door (or tailgate) is not opened within 30
seconds, the system will be rearmed.
✽✽ NOTICE
Avoid trying to start the engine while the alarm is activated. The vehicle
starting motor is disabled during the
theft-alarm stage.
If the system is not disarmed with the
transmitter (or smart key), insert the
key into the ignition switch, turn the
ignition switch to the ON position and
wait for 30 seconds. Then the system
will be disarmed. (if equipped)
If you lose your keys, consult your authorized HYUNDAI dealer.
CAUTION
Do not change, alter or adjust the
theft-alarm system because it couldcause the theft-alarm system to
malfunction. The system should only be serviced by an authorizedHYUNDAI dealer.
Malfunctions caused by improperalterations, adjustments or modifi-cations to the theft-alarm systemare not covered by your vehicle
manufacturer warranty.
Page 95 of 397
415
Features of your vehicle
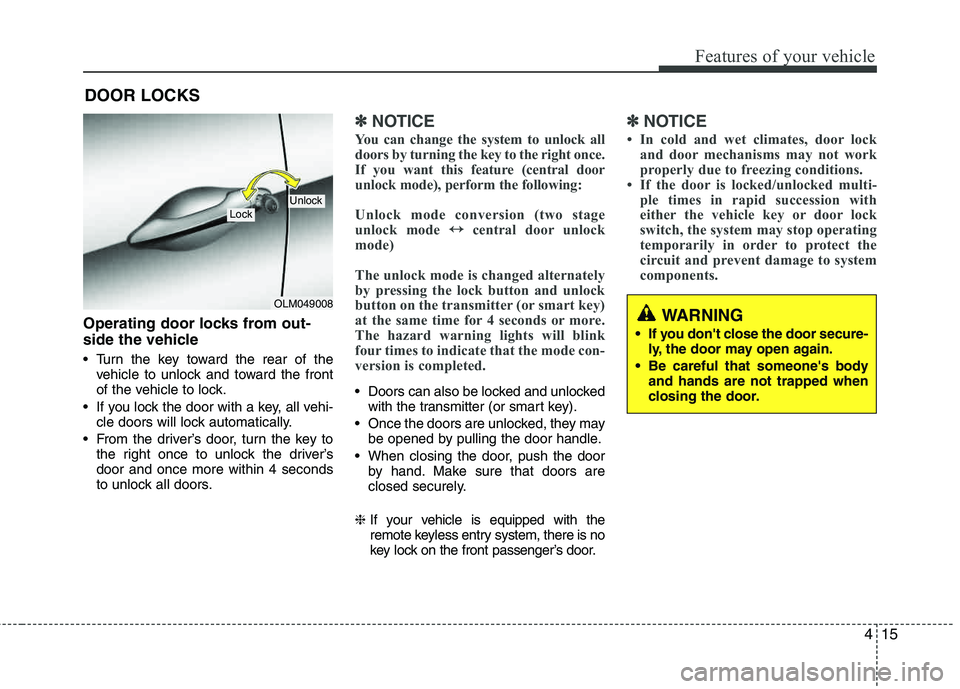
Operating door locks from out-
side the vehicle
Turn the key toward the rear of thevehicle to unlock and toward the front
of the vehicle to lock.
If you lock the door with a key, all vehi- cle doors will lock automatically.
From the driver’s door, turn the key to the right once to unlock the driver’sdoor and once more within 4 seconds
to unlock all doors.
✽✽ NOTICE
You can change the system to unlock all
doors by turning the key to the right once.
If you want this feature (central door
unlock mode), perform the following:
Unlock mode conversion (two stage
unlock mode ↔
↔
central door unlock
mode)
The unlock mode is changed alternately
by pressing the lock button and unlock
button on the transmitter (or smart key)
at the same time for 4 seconds or more.
The hazard warning lights will blink
four times to indicate that the mode con-
version is completed.
Doors can also be locked and unlocked with the transmitter (or smart key).
Once the doors are unlocked, they may be opened by pulling the door handle.
When closing the door, push the door by hand. Make sure that doors are
closed securely.
❈ If your vehicle is equipped with the
remote keyless entry system, there is no
key lock on the front passenger’s door.
✽✽
NOTICE
In cold and wet climates, door lock and door mechanisms may not work
properly due to freezing conditions.
If the door is locked/unlocked multi- ple times in rapid succession with
either the vehicle key or door lock
switch, the system may stop operating
temporarily in order to protect the
circuit and prevent damage to system
components.
DOOR LOCKS
OLM049008
LockUnlock
WARNING
If you don't close the door secure- ly, the door may open again.
Be careful that someone's body and hands are not trapped when
closing the door.
Page 102 of 397
Features of your vehicle
22
4
Power windows
The ignition switch must be in the ON
position for power windows to operate.
Each door has a power window switch
that controls the door's window. The driv-
er has a power window lock switch which
can block the operation of passenger
windows. The power windows can be
operated for approximately 30 seconds
after the ignition key is removed or turned
to the ACC or LOCK position. However, if
the front doors are opened, the power
windows cannot be operated within the
30 second period after the ignition key
removal.
✽✽
NOTICE
While driving with the rear windows
down or with the sunroof (if equipped)
in an open (or partially open) position,
your vehicle may demonstrate a wind
buffeting or pulsation noise. This noise
is a normal occurrence and can be
reduced or eliminated by taking the fol-
lowing actions. If the noise occurs with
one or both of the rear windows down,
partially lower both front windows
approximately one inch. If you experi-
ence the noise with the sunroof open,
slightly reduce the size of the sunroof
opening.
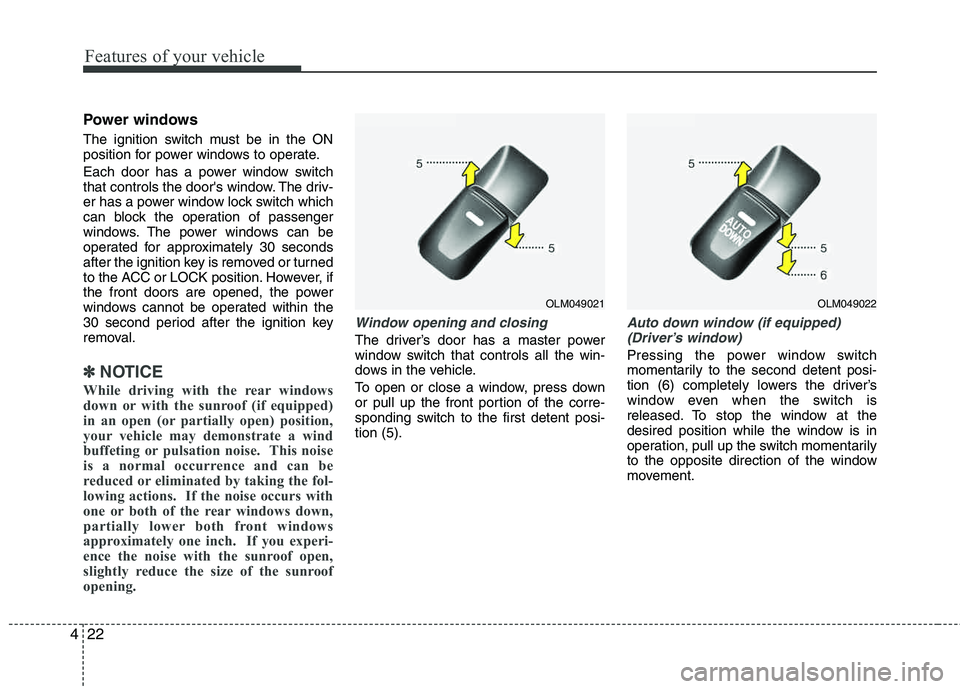
Window opening and closing
The driver’s door has a master power
window switch that controls all the win-
dows in the vehicle.
To open or close a window, press down
or pull up the front portion of the corre-
sponding switch to the first detent posi-tion (5).
Auto down window (if equipped) (Driver’s window)
Pressing the power window switch
momentarily to the second detent posi-
tion (6) completely lowers the driver’s
window even when the switch is
released. To stop the window at the
desired position while the window is in
operation, pull up the switch momentarily
to the opposite direction of the window
movement.
OLM049021OLM049022
Page 105 of 397
425
Features of your vehicle
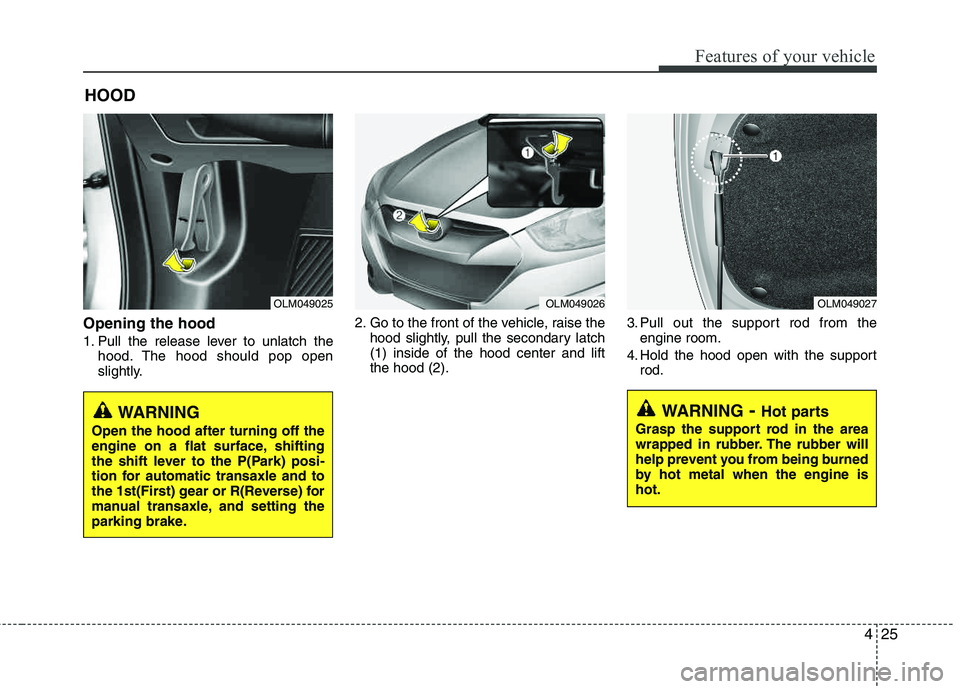
Opening the hood
1. Pull the release lever to unlatch thehood. The hood should pop open
slightly. 2. Go to the front of the vehicle, raise the
hood slightly, pull the secondary latch (1) inside of the hood center and lift the hood (2). 3. Pull out the support rod from the
engine room.
4. Hold the hood open with the support rod.
HOOD
OLM049025OLM049026OLM049027
WARNING
- Hot parts
Grasp the support rod in the area
wrapped in rubber. The rubber will
help prevent you from being burned
by hot metal when the engine is hot.
WARNING
Open the hood after turning off the
engine on a flat surface, shifting
the shift lever to the P(Park) posi-
tion for automatic transaxle and to
the 1st(First) gear or R(Reverse) for
manual transaxle, and setting the
parking brake.
Page 107 of 397

427
Features of your vehicle
Opening the fuel filler door
The fuel filler door must be opened from
inside the vehicle by pulling up the fuel
filler door opener lever.
✽✽NOTICE
If the fuel filler door does not open
because ice has formed around it, tap
lightly or push on the door to break the
ice and release the door. Do not pry on
the door. If necessary, spray around the
door with an approved de-icer fluid (do
not use radiator anti-freeze) or move the
vehicle to a warm place and allow the ice
to melt.
1. Stop the engine.
2. To open the fuel filler door, pull the fuel filler door opener up.
3. Pull the fuel filler door (1) out to fully open.
4. To remove the cap, turn the fuel filler cap (2) counterclockwise.
5. Refuel as needed.
Closing the fuel filler door
1. To install the cap, turn it clockwise until it “clicks” one time. This indicates that the cap is securely tightened.
2. Close the fuel filler door and push it lightly making sure that it is securely closed.
FUEL FILLER DOOR
OSA047022OLM042028N
WARNING - Refueling
If pressurized fuel sprays out, it
can cover your clothes or skin
and thus subject you to the risk
of fire and burns. Always remove
the fuel cap carefully and slowly.
If the cap is venting fuel or if you
hear a hissing sound, wait until
the condition stops before com-
pletely removing the cap.
Do not "top off" after the nozzle automatically shuts off whenrefueling.
Tighten the cap until it clicks one time, otherwise the Check Engine light will illuminate.
Always check that the fuel cap is installed securely to prevent fuel
spillage in the event of an acci- dent.
Page 108 of 397

Features of your vehicle
28
4
(Continued)
Use only approved portable plas-
tic fuel containers designed to
carry and store gasoline.
Do not use cellular phones while refueling. Electric current and/or
electronic interference from cel-
lular phones can potentially
ignite fuel vapors causing a fire.
When refueling, always shut the engine off. Sparks produced byelectrical components related to
the engine can ignite fuel vapors
causing a fire. Once refueling is
complete, check to make sure thefiller cap and filler door are
securely closed, before starting
the engine.
DO NOT use matches or a lighter and DO NOT SMOKE or leave a lit
cigarette in your vehicle while at
a gas station especially during
refueling. Automotive fuel is
highly flammable and can, when
ignited, result in fire.
(Continued)(Continued)
Do not get back into a vehicleonce you have begun refueling
since you can generate static
electricity by touching, rubbing
or sliding against any item or fab-
ric (polyester, satin, nylon, etc.)
capable of producing static elec-
tricity. Static electricity discharge
can ignite fuel vapors resulting in
rapid burning. If you must re-
enter the vehicle, you should
once again eliminate potentially
dangerous static electricity dis-
charge by touching a metal part
of the vehicle, away from the fuel
filler neck, nozzle or other gaso-
line source.
When using an approved portable fuel container, be sure toplace the container on the
ground prior to refueling. Static
electricity discharge from the
container can ignite fuel vapors
causing a fire. Once refueling has
begun, contact with the vehicleshould be maintained until the
filling is complete.
(Continued)WARNING - Refueling dan-
gers
Automotive fuels are flammable
materials. When refueling, please
note the following guidelines care-
fully. Failure to follow these guide-
lines may result in severe personal
injury, severe burns or death by fire
or explosion.
Read and follow all warningsposted at the gas station facility.
Before refueling, note the loca- tion of the Emergency Gasoline
Shut-Off, if available, at the gas
station facility.
Before touching the fuel nozzle, you should eliminate potentially
dangerous static electricity dis-
charge by touching another metal
part of the vehicle, a safe dis-
tance away from the fuel filler
neck, nozzle, or other gas source.
(Continued)
Page 114 of 397

Features of your vehicle
34
4
Electric power steering
The power steering uses a motor to
assist you in steering the vehicle. If the
engine is off or if the power steering sys-
tem becomes inoperative, the vehicle
may still be steered, but it will require
increased steering effort.
The motor driven power steering is con-
trolled by a power steering control unit
which senses the steering wheel torque,
steering wheel position and vehicle
speed to command the motor.
The steering wheel becomes heavier as
the vehicle’s speed increases and
becomes lighter as the vehicle’s speed
decreases for optimum steering control.
Should you notice any change in the
effort required to steer during normal
vehicle operation, have the power steer-
ing checked by an authorized HYUNDAI
dealer.
✽✽
NOTICE
The following symptoms may occur dur-
ing normal vehicle operation:
The EPS warning light does not illu- minate.
The steering wheel becomes heavier after turning the ignition switch on.
This happens as the system performs
the EPS system diagnostics. When the
diagnostics is completed, the steering
wheel will return to its normal condi-
tion.
Click noise may be heard from the EPS relay after the ignition switch is
turned to the ON or LOCK position.
Motor noise may be heard when the vehicle is at a stop or at a low driving
speed.
If the Electric Power Steering System does not operate normally, the warn-
ing light will illuminate on the instru-
ment cluster. The steering wheel may
become difficult to control or operate
abnormally. Take your vehicle to an
authorized HYUNDAI dealer and
have the vehicle checked as soon as
possible.
When you operate the steering wheel in low temperature, abnormal noise
could occur. If temperature rises, the
noise will disappear. This is a normal
condition. Tilt steering/Telescope steering (if equipped)
Tilt steering allows you to adjust the
steering wheel before you drive. You can
also raise the steering wheel to give your
legs more room when you exit and enter
the vehicle (if equipped).
The steering wheel should be positioned
so that it is comfortable for you to drive,
while permitting you to see the instru-
ment panel warning lights and gauges.
STEERING WHEEL
WARNING
Never adjust the angle and height of steering wheel while driving.
You may lose your steering con-
trol and cause severe personal
injury or accidents.
After adjusting, push the steering wheel both up and down to be
certain it is locked in position.