2013 Hyundai Sonata passenger
[x] Cancel search: passengerPage 179 of 410
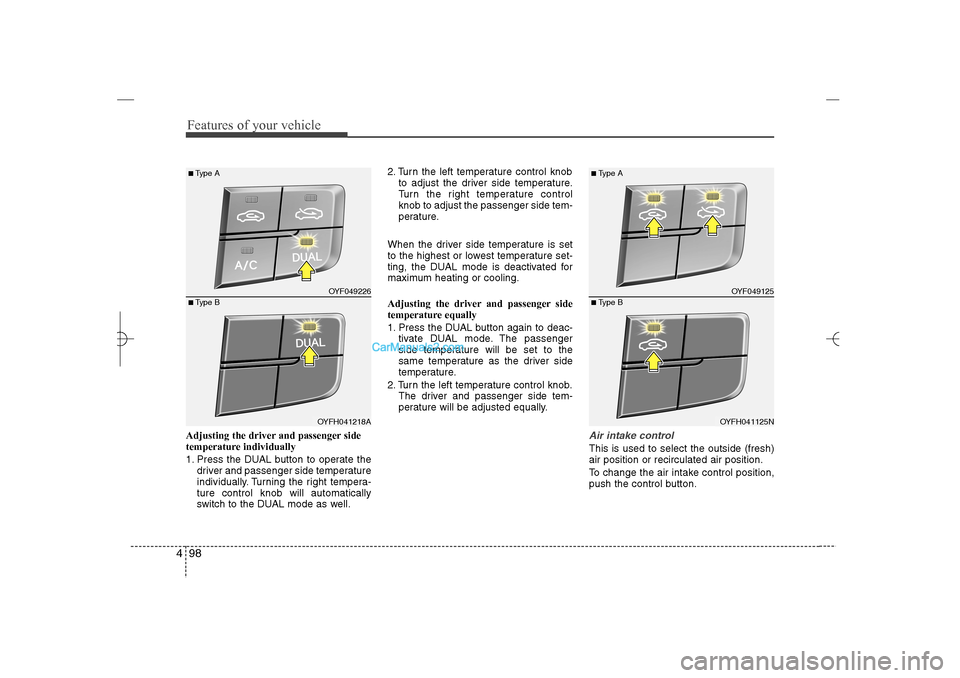
Features of your vehicle98 4Adjusting the driver and passenger side
temperature individually
1. Press the DUAL button to operate the
driver and passenger side temperature
individually. Turning the right tempera-
ture control knob will automatically
switch to the DUAL mode as well.2. Turn the left temperature control knob
to adjust the driver side temperature.
Turn the right temperature control
knob to adjust the passenger side tem-
perature.
When the driver side temperature is set
to the highest or lowest temperature set-
ting, the DUAL mode is deactivated for
maximum heating or cooling.
Adjusting the driver and passenger side
temperature equally
1. Press the DUAL button again to deac-
tivate DUAL mode. The passenger
side temperature will be set to the
same temperature as the driver side
temperature.
2. Turn the left temperature control knob.
The driver and passenger side tem-
perature will be adjusted equally.
Air intake controlThis is used to select the outside (fresh)
air position or recirculated air position.
To change the air intake control position,
push the control button.
OYF049226OYFH041218A
■Type A■Type B
OYF049125
OYFH041125N
■Type A■Type B
YF HMA 4a-111.qxp 1/16/2012 6:34 PM Page 98
Page 180 of 410
499
Features of your vehicle
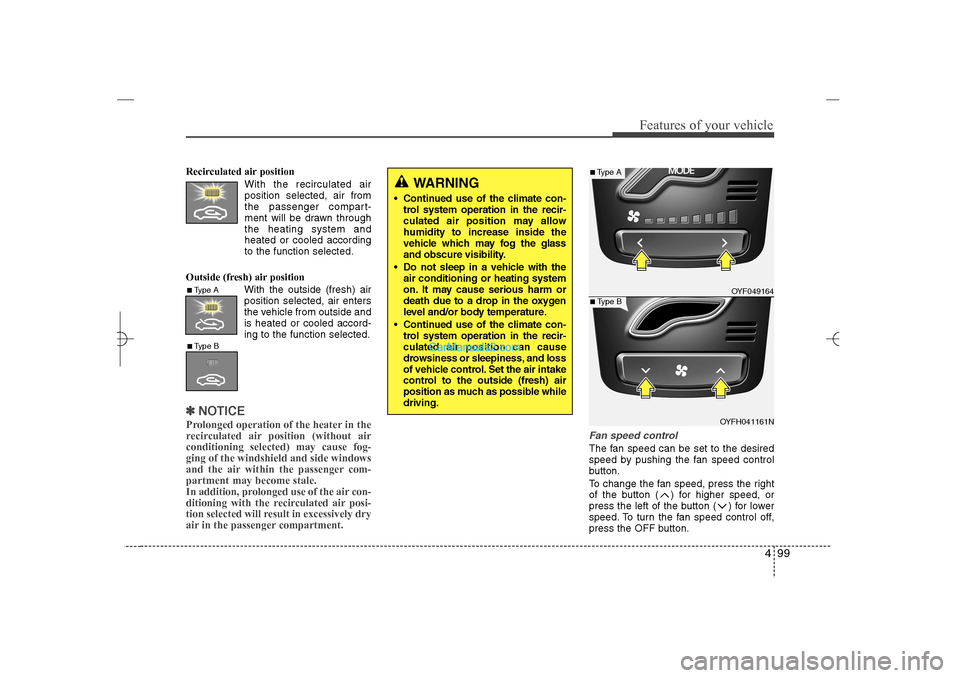
Recirculated air position
With the recirculated air
position selected, air from
the passenger compart-
ment will be drawn through
the heating system and
heated or cooled according
to the function selected.
Outside (fresh) air position
With the outside (fresh) air
position selected, air enters
the vehicle from outside and
is heated or cooled accord-
ing to the function selected.✽ ✽
NOTICEProlonged operation of the heater in the
recirculated air position (without air
conditioning selected) may cause fog-
ging of the windshield and side windows
and the air within the passenger com-
partment may become stale.
In addition, prolonged use of the air con-
ditioning with the recirculated air posi-
tion selected will result in excessively dry
air in the passenger compartment.
Fan speed controlThe fan speed can be set to the desired
speed by pushing the fan speed control
button.
To change the fan speed, press the right
of the button ( ) for higher speed, or
press the left of the button ( ) for lower
speed. To turn the fan speed control off,
press the OFF button.
WARNING
Continued use of the climate con-
trol system operation in the recir-
culated air position may allow
humidity to increase inside the
vehicle which may fog the glass
and obscure visibility.
Do not sleep in a vehicle with the
air conditioning or heating system
on. It may cause serious harm or
death due to a drop in the oxygen
level and/or body temperature.
Continued use of the climate con-
trol system operation in the recir-
culated air position can cause
drowsiness or sleepiness, and loss
of vehicle control. Set the air intake
control to the outside (fresh) air
position as much as possible while
driving.
■Type A■Type B
OYF049164
OYFH041161N
■Type A■Type B
YF HMA 4a-111.qxp 1/16/2012 6:34 PM Page 99
Page 187 of 410
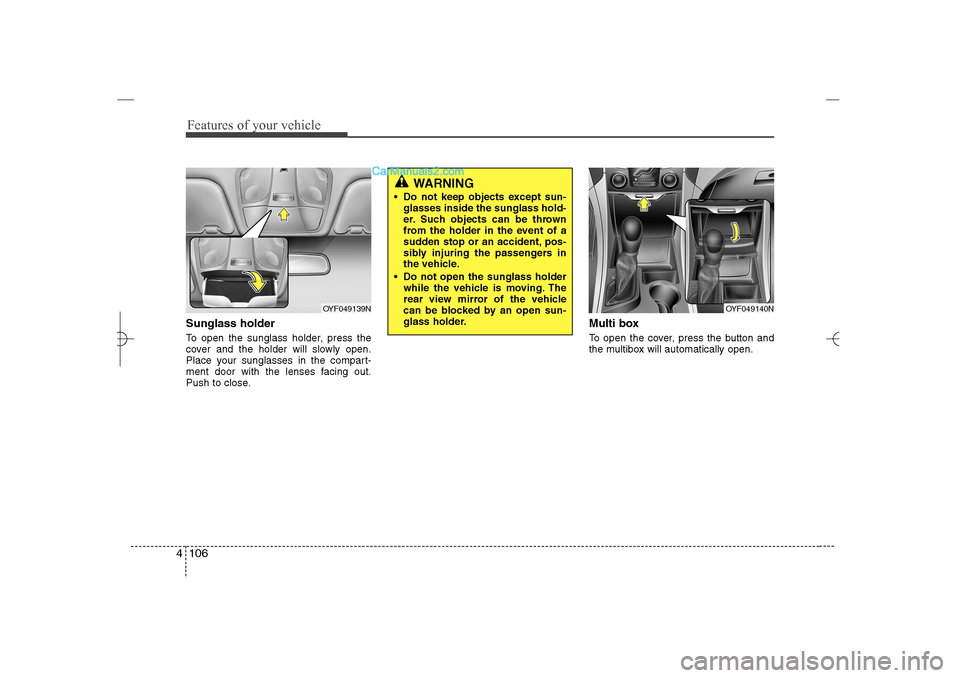
Features of your vehicle106 4Sunglass holder To open the sunglass holder, press the
cover and the holder will slowly open.
Place your sunglasses in the compart-
ment door with the lenses facing out.
Push to close.
Multi boxTo open the cover, press the button and
the multibox will automatically open.
OYF049139N
OYF049140N
WARNING
Do not keep objects except sun-
glasses inside the sunglass hold-
er. Such objects can be thrown
from the holder in the event of a
sudden stop or an accident, pos-
sibly injuring the passengers in
the vehicle.
Do not open the sunglass holder
while the vehicle is moving. The
rear view mirror of the vehicle
can be blocked by an open sun-
glass holder.
YF HMA 4a-111.qxp 1/16/2012 6:35 PM Page 106
Page 245 of 410

53
Driving your vehicle
Before entering vehicle• Be sure that all windows, outside mir-
ror(s), and outside lights are clean.
Check the condition of the tires.
Check under the vehicle for any sign of
leaks.
Be sure there are no obstacles behind
you if you intend to back up.Necessary inspections Fluid levels, such as engine oil, engine
coolant, brake fluid, and washer fluid
should be checked on a regular basis,
with the exact interval depending on the
fluid. Further details are provided in sec-
tion 7, “Maintenance”.
Before starting Close and lock all doors.
Position the seat so that all controls are
easily reached.
Adjust the inside and outside rearview
mirrors.
Be sure that all lights work.
Check all gauges.
Check the operation of warning lights
when the ignition switch is turned to
the ON position.
Release the parking brake and make
sure the brake warning light goes out.
For safe operation, be sure you are famil-
iar with your vehicle and its equipment.
BEFORE DRIVING
WARNING
Driving while distracted can result in
a loss of vehicle control, that may
lead to an accident, severe personal
injury, and death. The driver's pri-
mary responsibility is in the safe and
legal operation of a vehicle, and use
of any handheld devices, other
equipment, or vehicle systems which
take the driver's eyes, attention and
focus away from the safe operation
of a vehicle or which are not permis-
sible by law should never be used
during operation of the vehicle.
CALIFORNIA PROPOSI-
TION 65 WARNING
Engine exhaust and a wide variety
of automobile components and
parts, including components found
in the interior furnishings in a vehi-
cle, contain or emit chemicals
known to the State of California to
cause cancer and birth defects and
reproductive harm. In addition, cer-
tain fluids contained in vehicles
and certain products of component
wear contain or emit chemicals
known to the State of California to
cause cancer and birth defects or
other reproductive harm.
WARNING
All passengers must be properly
belted whenever the vehicle is mov-
ing. Refer to “Seat belts” in section
3 for more information on their
proper use.
YF HMA 5.qxp 1/16/2012 6:22 PM Page 3
Page 289 of 410

547
Driving your vehicle
Towing capacity:We do not recommend using this
vehicle for trailer towing.Cargo capacity:The cargo capacity of your vehicle
will increase or decrease depending
on the weight and the number of
occupants.
Steps For Determining Correct Load
Limit -1. Locate the statement "The com-
bined weight of occupants and
cargo should never exceed XXX
kg or XXX lbs.'' on your vehicle's
placard.
2. Determine the combined weight of
the driver and passengers that will
be riding in your vehicle.
3. Subtract the combined weight of
the driver and passengers from
XXX kg or XXX lbs.
4. The resulting figure equals the
available amount of cargo and lug-
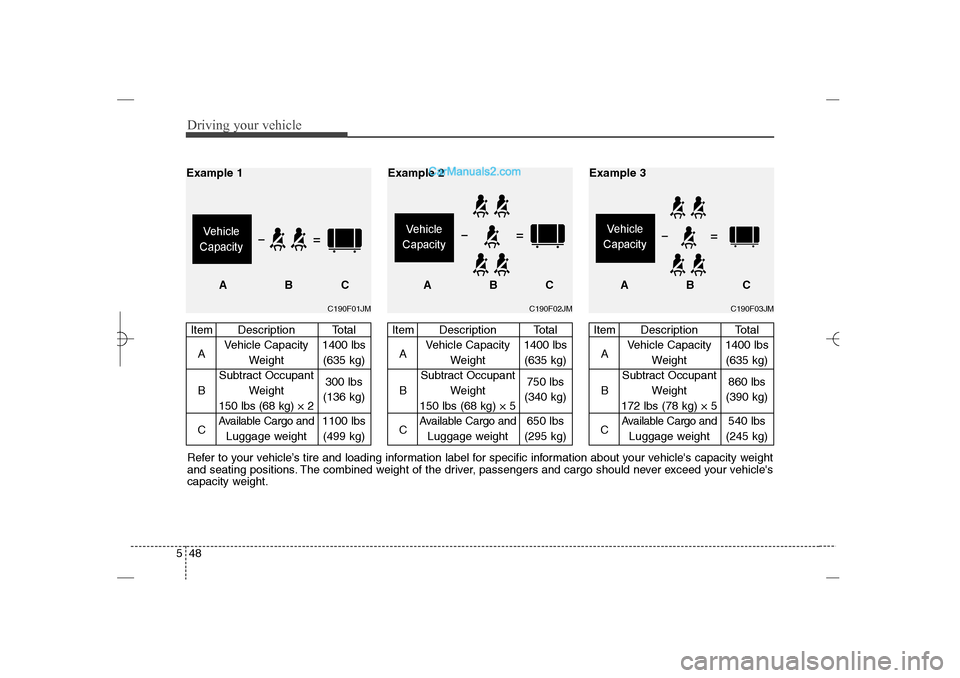
gage load capacity. For example, if
the "XXX" amount equals 1400
lbs. and there will be five 150 lb
passengers in your vehicle, the
amount of available cargo and lug-
gage load capacity is 650 lbs.
(1400-750 (5 x 150) = 650 lbs.)5. Determine the combined weight of
luggage and cargo being loaded
on the vehicle. That weight may
not safely exceed the available
cargo and luggage load capacity
calculated in Step 4.
6. If your vehicle will be towing a trail-
er, load from your trailer will be
transferred to your vehicle. Consult
this manual to determine how this
reduces the available cargo and
luggage load capacity of your
vehicle.
✽ ✽
NOTICEWe do not recommend using this
vehicle for trailer towing.
YF HMA 5.qxp 1/16/2012 6:24 PM Page 47
Page 290 of 410
Driving your vehicle48 5
C190F03JM
Item Description Total
AVehicle Capacity 1400 lbs
Weight (635 kg)
Subtract Occupant
B Weight 860 lbs
172 lbs (78 kg) × 5(390 kg)
C
Available Cargo and
540 lbs
Luggage weight (245 kg)
ABC Example 3
Refer to your vehicle’s tire and loading information label for specific information about your vehicle's capacity weight
and seating positions. The combined weight of the driver, passengers and cargo should never exceed your vehicle's
capacity weight.
C190F01JM
Item Description Total
AVehicle Capacity 1400 lbs
Weight (635 kg)
Subtract Occupant
B Weight 300 lbs
150 lbs (68 kg) × 2(136 kg)
C
Available Cargo and
1100 lbs
Luggage weight (499 kg)
Example 1
ABC
C190F02JM
Item Description Total
AVehicle Capacity 1400 lbs
Weight (635 kg)
Subtract Occupant
B Weight 750 lbs
150 lbs (68 kg) × 5(340 kg)
C
Available Cargo and
650 lbs
Luggage weight (295 kg)
ABC Example 2
YF HMA 5.qxp 1/16/2012 6:24 PM Page 48
Page 291 of 410
549
Driving your vehicle
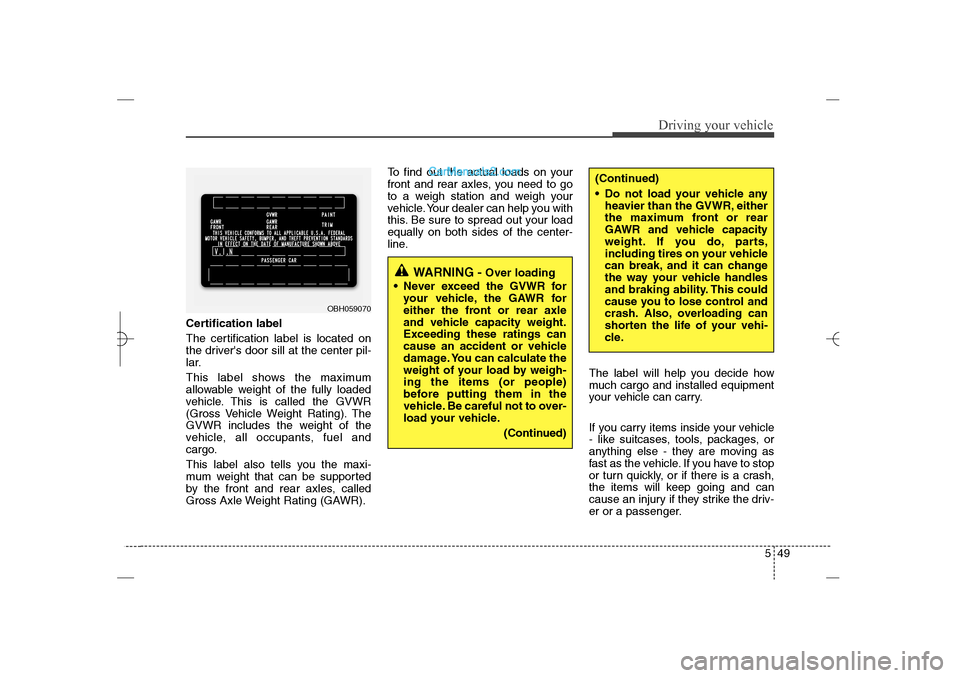
Certification label
The certification label is located on
the driver's door sill at the center pil-
lar.
This label shows the maximum
allowable weight of the fully loaded
vehicle. This is called the GVWR
(Gross Vehicle Weight Rating). The
GVWR includes the weight of the
vehicle, all occupants, fuel and
cargo.
This label also tells you the maxi-
mum weight that can be supported
by the front and rear axles, called
Gross Axle Weight Rating (GAWR).To find out the actual loads on your
front and rear axles, you need to go
to a weigh station and weigh your
vehicle. Your dealer can help you with
this. Be sure to spread out your load
equally on both sides of the center-
line.
The label will help you decide how
much cargo and installed equipment
your vehicle can carry.
If you carry items inside your vehicle
- like suitcases, tools, packages, or
anything else - they are moving as
fast as the vehicle. If you have to stop
or turn quickly, or if there is a crash,
the items will keep going and can
cause an injury if they strike the driv-
er or a passenger.
OBH059070
WARNING -
Over loading
Never exceed the GVWR for
your vehicle, the GAWR for
either the front or rear axle
and vehicle capacity weight.
Exceeding these ratings can
cause an accident or vehicle
damage. You can calculate the
weight of your load by weigh-
ing the items (or people)
before putting them in the
vehicle. Be careful not to over-
load your vehicle.
(Continued)
(Continued)
Do not load your vehicle any
heavier than the GVWR, either
the maximum front or rear
GAWR and vehicle capacity
weight. If you do, parts,
including tires on your vehicle
can break, and it can change
the way your vehicle handles
and braking ability. This could
cause you to lose control and
crash. Also, overloading can
shorten the life of your vehi-
cle.
YF HMA 5.qxp 1/16/2012 6:24 PM Page 49
Page 293 of 410
551
Driving your vehicle
This section will guide you in the proper
loading of your vehicle, to keep your
loaded vehicle weight within its design
rating capability. Properly loading your
vehicle will provide maximum return of
the vehicle design performance. Before
loading your vehicle, familiarize yourself
with the following terms for determining
your vehicle's weight ratings, from the
vehicle's specifications and the certifica-
tion label:
Base curb weight
This is the weight of the vehicle including
a full tank of fuel and all standard equip-
ment. It does not include passengers,
cargo, or optional equipment.
Vehicle curb weight
This is the weight of your new vehicle
when you picked it up from your dealer
plus any aftermarket equipment.Cargo weight
This figure includes all weight added to
the Base Curb Weight, including cargo
and optional equipment.
GAW (Gross axle weight)
This is the total weight placed on each
axle (front and rear) - including vehicle
curb weight and all payload.
GAWR (Gross axle weight rating)This is the maximum allowable weight
that can be carried by a single axle (front
or rear). These numbers are shown on
the certification label.
The total load on each axle must never
exceed its GAWR.
GVW (Gross vehicle weight)
This is the Base Curb Weight plus actual
Cargo Weight plus passengers.GVWR (Gross vehicle weight rating)
This is the maximum allowable weight of
the fully loaded vehicle (including all
options, equipment, passengers and
cargo). The GVWR is shown on the cer-
tification label located on the driver’s
door sill.
VEHICLE WEIGHT
YF HMA 5.qxp 1/16/2012 6:24 PM Page 51