2013 Hyundai Sonata Stop light
[x] Cancel search: Stop lightPage 96 of 410

415
Features of your vehicle
Lock the doors by pressing the lock but-
ton on the smart key.
After completion of the steps above, the
hazard warning lights and chime will
operate once to indicate that the system
is armed.
If any door, trunk lid or engine hood
remains open, the hazard warning lights
and chime won't operate and theft-alarm
will not arm. After this, if all doors, trunk
lid and engine hood are closed, the haz-
ard warning lights blink once.
Using the transmitterPark the vehicle and stop the engine.
Arm the system as described below.
1. Turn off the engine and remove the
ignition key from the ignition switch.
2. Make sure that all doors, the engine
hood and trunk lid are closed and
latched.
3. Lock the doors by pressing the lock
button on the transmitter.
After completion of the steps above, the
hazard warning lights will blink once to
indicate that the system is armed. If the
lock button is pressed once more within 4
seconds, hazard warning lights blink and
the horn sounds once to confirm that the
system is armed.
If any door, trunk lid or engine hood
remains open, the hazard warning lights
(or/and horn) won't operate and theft-
alarm will not arm. After this, if all doors,
trunk lid and engine hood are closed, the
hazard warning lights blink once.
Using the mechanical keyPark the vehicle and stop the engine.
Arm the system as described below.
1. Turn off the engine and remove the key
from the ignition switch(if equipped).
2. Make sure that all doors, the engine
hood and trunk lid are closed and
latched.
3. Lock the doors by inserting the key into
the key hole on the front outside door
handle and turning the key toward the
front of the vehicle.
If any door, trunk lid or engine hood
remains open, the theft-alarm will not
arm.✽ ✽
NOTICEIf you lock or unlock the doors by using
the mechanical key, the hazard warning
light and chime sound won't operate.
YF HMA 4a-111.qxp 1/16/2012 6:28 PM Page 15
Page 106 of 410

425
Features of your vehicle
Power windowsThe ignition switch must be in the ON
position for power windows to operate.
Each door has a power window switch
that controls the door's window. The driv-
er has a power window lock switch which
can block the operation of passenger
windows. The driver’s door has a master
power window switch that controls all the
windows in the vehicle. The power win-
dows can be operated for approximately
30 seconds after the ignition key is
removed or turned to the ACC or LOCK
position. However, if the front doors
open, the power windows cannot be
operated within the 30 second period
after ignition key removal.✽ ✽
NOTICEWhile driving with the rear windows
down or with the sunroof (if equipped) in
an open (or partially open) position, your
vehicle may demonstrate a wind buffet-
ing or pulsation noise. This noise is a
normal occurrence and can be reduced
or eliminated by taking the following
actions. If the noise occurs with one or
both of the rear windows down, partially
lower both front windows approximate-
ly one inch. If you experience the noise
with the sunroof open, slightly reduce the
size of the sunroof opening.
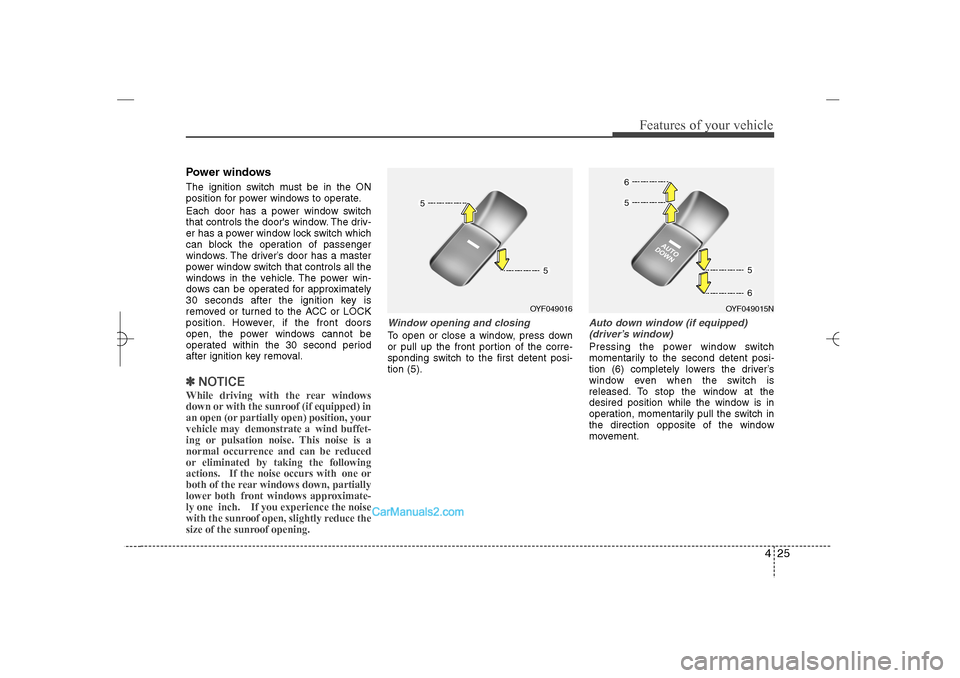
Window opening and closingTo open or close a window, press down
or pull up the front portion of the corre-
sponding switch to the first detent posi-
tion (5).
Auto down window (if equipped)
(driver’s window)Pressing the power window switch
momentarily to the second detent posi-
tion (6) completely lowers the driver’s
window even when the switch is
released. To stop the window at the
desired position while the window is in
operation, momentarily pull the switch in
the direction opposite of the window
movement.
OYF049016
OYF049015N
YF HMA 4a-111.qxp 1/16/2012 6:29 PM Page 25
Page 110 of 410

429
Features of your vehicle
Opening the fuel filler lidThe fuel filler lid must be opened from
inside the vehicle by pushing the fuel
filler lid opener button.✽ ✽
NOTICEIf the fuel filler lid will not open because
ice has formed around it, tap lightly or
push on the lid to break the ice and
release the lid. Do not pry on the lid. If
necessary, spray around the lid with an
approved de-icer fluid (do not use radi-
ator anti-freeze) or move the vehicle to a
warm place and allow the ice to melt.
1. Stop the engine.
2. To open the fuel filler lid, push the fuel
filler lid opener button.
3. Pull the fuel filler lid (1) out to fully
open.
4. To remove the cap, turn the fuel tank
cap (2) counterclockwise.
5. Refuel as needed.
Closing the fuel filler lid1. To install the cap, turn it clockwise until
it “click” one time. This indicates that
the cap is securely tightened.
2. Close the fuel filler lid and push it in
lightly making sure that it is securely
closed.
FUEL FILLER LID
OYF049020
OYF049021
WARNING
- Refueling
If pressurized fuel sprays out, it
can cover your clothes or skin
and thus subject you to the risk
of fire and burns. Always remove
the fuel cap carefully and slowly.
If the cap is venting fuel or if you
hear a hissing sound, wait until
the condition stops before com-
pletely removing the cap.
Do not "top off" after the nozzle
automatically shuts off when
refueling.
Tighten the cap until it clicks one
time, otherwise the Malfunction
Indicator Light will illuminate.
Always check that the fuel cap is
installed securely to prevent fuel
spillage in the event of an acci-
dent.
YF HMA 4a-111.qxp 1/16/2012 6:29 PM Page 29
Page 120 of 410

439
Features of your vehicle
Electric power steering (EPS)The power steering uses a motor to
assist you in steering the vehicle. If the
engine is off or if the power steering sys-
tem becomes inoperative, the vehicle
may still be steered, but it will require
increased steering effort.
The motor driven power steering is con-
trolled by a power steering control unit
which senses the steering wheel torque
and vehicle speed to command the
motor.
The steering becomes heavier as the
vehicle’s speed increases and becomes
lighter as the vehicle’s speed decreases
for optimum steering control.
Should you notice any change in the
effort required to steer during normal
vehicle operation, have the power steer-
ing checked by an authorized HYUNDAI
dealer.
✽ ✽
NOTICEThe following symptoms may occur dur-
ing normal vehicle operation:
• The EPS warning light does not illumi-
nate.
• The steering effort is high immediately
after turning the ignition switch on.
This happens as the system performs
the EPS system diagnostics. When the
diagnostics is completed, the steering
wheel will return to its normal condi-
tion.
• A click noise may be heard from the
EPS relay after the ignition switch is
turned to the ON or LOCK position.
• A motor noise may be heard when the
vehicle is at a stop or at a low driving
speed.
• If the Electric Power Steering System
does not operate normally, the warn-
ing light will illuminate on the instru-
ment cluster. The steering wheel may
become difficult to control or operate
abnormally. Take your vehicle to an
authorized HYUNDAI dealer and
have the vehicle checked as soon as
possible.
• When you operate the steering wheel
in low temperature, abnormal noise
could occur. If temperature rises, the
noise will disappear. This is a normal
condition.
STEERING WHEEL
CAUTION
If the Electric Power Steering
System does not operate normal-
ly, the warning light will illuminate
on the instrument cluster. The
steering wheel may become diffi-
cult to control or operate abnor-
mally. Take your vehicle to an
authorized HYUNDAI dealer and
have the vehicle checked as soon
as possible.
When you operate the steering
wheel in low temperature, abnor-
mal noise could occur. If tempera-
ture rises, the noise will disap-
pear. This is a normal condition.
YF HMA 4a-111.qxp 1/16/2012 6:30 PM Page 39
Page 125 of 410

Features of your vehicle44 4To adjust the Zone setting:
1. Determine the desired Zone Number
based upon your current location on
the Zone Map.
2. Press and hold the button for 6 sec-
onds, the current Zone Number will
appear on the display.
3. Pressing and holding the button
again will cause the numbers to incre-
ment (Note: they will repeat …13, 14,
15, 1, 2, …). Releasing the button
when the desired Zone Number
appears on the display will set the new
Zone.
4. Within about 5 seconds the compass
will start displaying a compass head-
ing again.
There are some conditions that can
cause changes to the vehicle magnets,
such as installing a ski rack or a CB
antenna. Body repair work on the vehicle
can also cause changes to the vehicle's
magnetic field. In these situations, the
compass will need to be re-calibrated to
quickly correct for these changes. To re-
calibrate the compass:1. Press and hold the button for more
than 9 seconds. When the compass
memory is cleared a "C" will appear in
the display.
2. To calibrate the compass, drive the
vehicle in 2 complete circles at less
than 5 mph (8 km/h).
Integrated HomeLink
®Wireless Control
System
The HomeLink
®Wireless Control System
provides a convenient way to replace up
to three hand-held radio-frequency (RF)
transmitters with a single built-in device.
This innovative feature will learn the
radio frequency codes of most current
transmitters to operate devices such as
gate operators, garage door openers,
entry door locks, security systems, even
home lighting. Both standard and rolling
code-equipped transmitters can be pro-
grammed by following the outlined proce-
dures. Additional HomeLink
®information
can be found at: www.homelink.com or
by calling 1-800-355-3515.Retain the original transmitter of the RF
device you are programming for use in
other vehicles as well as for future
HomeLink
®programming. It is also sug-
gested that upon the sale of the vehicle,
the programmed HomeLink
®buttons be
erased for security purposes.
WARNING
Before programming HomeLink
®to
a garage door opener or gate oper-
ator, make sure that people and
objects are out of the way of the
device to prevent potential harm or
damage. Do not use HomeLink®
with any garage door opener that
lacks the safety stop and reverse
features required by U.S. federal
safety standards (this includes any
garage door opener model manu-
factured before April 1, 1982). A
garage door that cannot detect an
object - signaling the door to stop
and reverse - does not meet current
U.S. federal safety standards. Using
a garage door opener without these
features increases the risk of seri-
ous injury or death.
YF HMA 4a-111.qxp 1/16/2012 6:30 PM Page 44
Page 127 of 410

Features of your vehicle46 4✽
✽
NOTICESome devices may require you to replace
this Programming step 3 with proce-
dures noted in the "Gate
Operator/Canadian Programming" sec-
tion. If the HomeLink
®indicator light
does not change to a rapidly blinking
light after performing these steps, con-
tact HomeLink
®at www.homelink.com.
4. Firmly press, hold for 5 seconds and
release the programmed HomeLink
®
button up to two separate times to acti-
vate the door. If the door does not acti-
vate, press and hold the just-trained
HomeLink
®button and observe the
indicator light.
If the indicator light stays on con-
stantly, programming is complete
and your device should activate
when the HomeLink
®
button is
pressed and released.
If the indicator light blinks rapidly for
2 seconds and then turns to
a constant light, continue with
"Programming" steps 5-7 to com-
plete the programming of a rolling
code equipped device (most com-
monly a garage door opener).5. At the garage door opener receiver
(motor-head unit) in the garage, locate
the "leam" or "smart" button. This can
usually be found where the hanging
antenna wire is attached to the motor-
head unit.
6. Firmly press and release the "leam" or
"smart" button. (The name and color of
the button vary by manufacturer).
There are 30 seconds to initiate step
7.
7. Return to the vehicle and firmly press,
hold for 2 seconds
and release the programmed
HomeLink
®
button. Repeat the
"press/hold/release" sequence a sec-
ond time, and, depending on the brand
of the garage door opener (or other
rolling code equipped device), repeat
this sequence a third time to complete
the programming process.
HomeLink
®should now activate your
rolling code equipped device.Gate operator & Canadian program-
ming
During programming, your handheld
transmitter may automatically stop trans-
mitting. Continue to press the Integrated
HomeLink
®Wireless Control System but-
ton (note steps 2 through 3 in the
Programming portion of this document)
while you press and re-press ("cycle")
your handheld transmitter every two sec-
onds until the frequency signal has been
learned. The indicator light will flash
slowly and then rapidly after several sec-
onds upon successful training.
Operating HomeLink
®
To operate, simply press and release the
programmed HomeLink
®
button.
Activation will now occur for the trained
device (i.e. garage door opener, gate
operator, security system, entry door
lock, home/office lighting, etc.). For con-
venience, the hand-held transmitter of
the device may also be used at any time.
YF HMA 4a-111.qxp 1/16/2012 6:30 PM Page 46
Page 130 of 410

449
Features of your vehicle
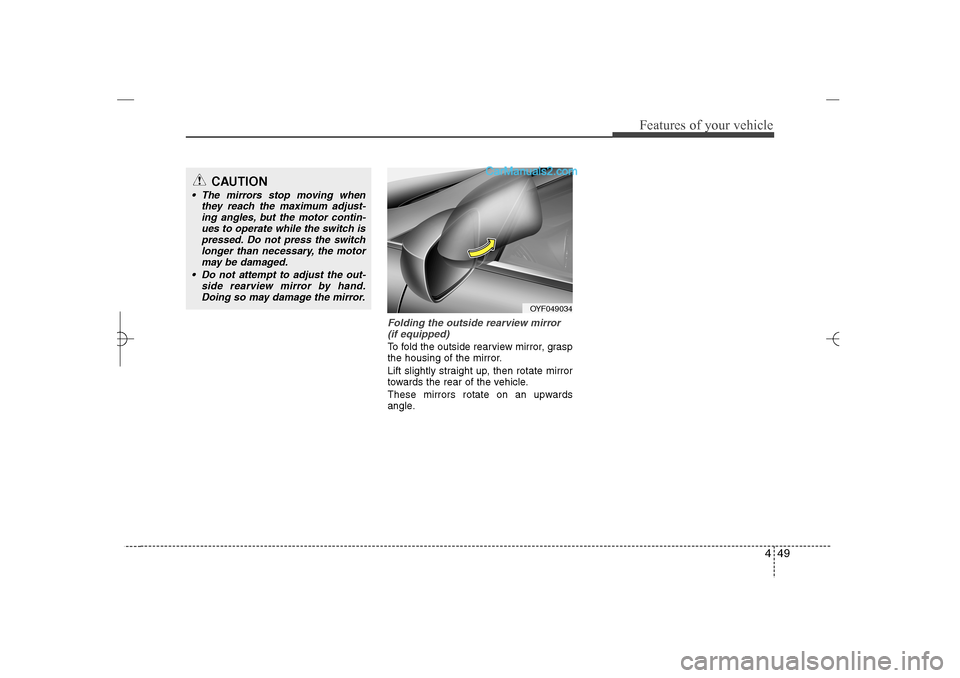
Folding the outside rearview mirror
(if equipped)To fold the outside rearview mirror, grasp
the housing of the mirror.
Lift slightly straight up, then rotate mirror
towards the rear of the vehicle.
These mirrors rotate on an upwards
angle.
CAUTION
The mirrors stop moving when
they reach the maximum adjust-
ing angles, but the motor contin-
ues to operate while the switch is
pressed. Do not press the switch
longer than necessary, the motor
may be damaged.
Do not attempt to adjust the out-
side rearview mirror by hand.
Doing so may damage the mirror.
OYF049034
YF HMA 4a-111.qxp 1/16/2012 6:30 PM Page 49
Page 134 of 410

453
Features of your vehicle
Fuel gaugeThe fuel gauge indicates the approxi-
mate amount of fuel remaining in the fuel
tank.
The fuel tank capacity is given in
section 8.
The fuel gauge is supplement-
ed by a low fuel warning light, which will
illuminate when the fuel tank is near
empty.
On inclines or curves, the fuel gauge
pointer may fluctuate or the low fuel
warning light may come on earlier than
usual due to the movement of fuel in the
tank.
Trip computerThe trip computer is a microcomputer
controlled driver information system that
displays information related to driving on
the LCD screen when the ignition switch
is in the ON position. If the battery is dis-
connected, then all stored driving infor-
mation (except odometer) is reset.
WARNING
- Fuel gauge
Running out of fuel can expose
vehicle occupants to danger.
You must stop and obtain addition-
al fuel as soon as possible after the
warning light comes on or when the
gauge indicator comes close to the
E level.
CAUTION
Avoid driving with a very low fuel
level. Running out of fuel could
cause the engine to misfire, damag-
ing the catalytic converter.
OYF049048
■ Type A
■ Type BOYF049049/OYF049049N
YF HMA 4a-111.qxp 1/16/2012 6:31 PM Page 53