2013 Hyundai Sonata Auto door lock
[x] Cancel search: Auto door lockPage 103 of 410

Features of your vehicle22 4Opening the trunk To open the trunk, press the trunk
unlock button for more than 1 second
on the transmitter (or smart key), press
the button on the trunk handle with the
smart key in your possession, or insert
the master key (or mechanical key of
the smart key) into the lock and turn it
clockwise. To open the trunk from inside the vehi-
cle, press the trunk lid release button.
Once the trunk is opened and then
closed, the trunk is locked automatically.✽ ✽
NOTICEIn cold and wet climates, door locks and
door mechanisms may not work proper-
ly due to freezing conditions.
Closing the trunkTo close the trunk, lower the trunk lid,
then press down on it until it locks. To be
sure the trunk lid is securely fastened,
always check by trying to pull it up again.
TRUNK
OYF049012
CAUTION
Make certain that you close the
trunk before driving your vehicle.
Possible damage may occur to the
trunk lift cylinders and attached
hardware if the trunk is not closed
prior to driving.
WARNING
The trunk swing upward. Make sure
no objects or people are near the
rear of the vehicle when opening
the trunk.
WARNING
The trunk lid should be always kept
completely closed while the vehicle
is in motion. If it is left open or ajar,
poisonous exhaust gases may
enter the vehicle and serious ill-
ness or death may result.
OYF049011NOYF049231N
■Type A■Type B
YF HMA 4a-111.qxp 1/16/2012 6:28 PM Page 22
Page 105 of 410
Features of your vehicle24 4
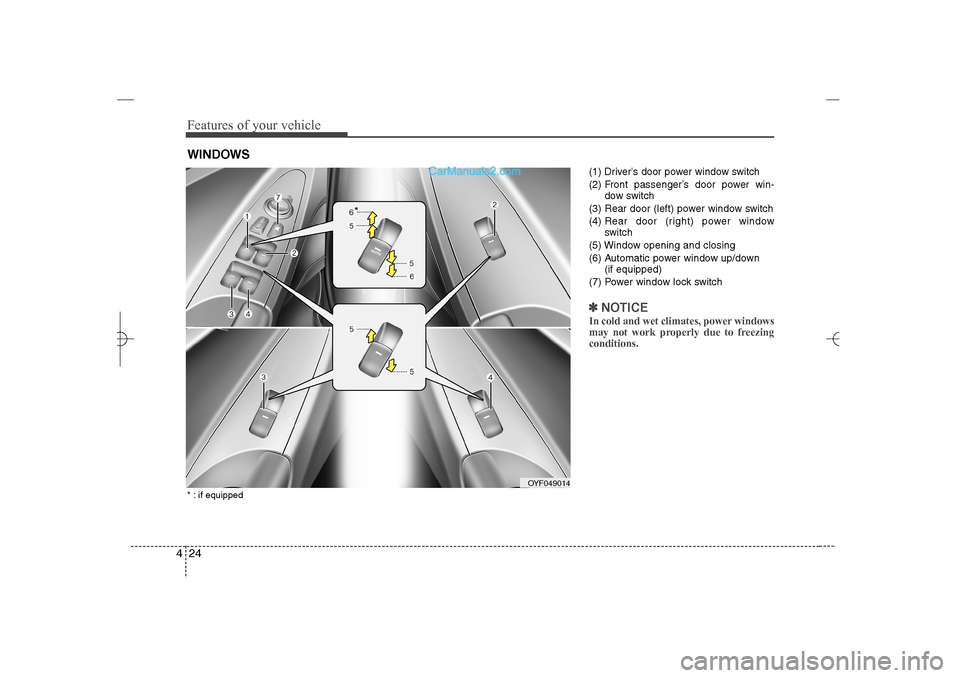
(1) Driver’s door power window switch
(2) Front passenger’s door power win-
dow switch
(3) Rear door (left) power window switch
(4) Rear door (right) power window
switch
(5) Window opening and closing
(6) Automatic power window up/down
(if equipped)
(7) Power window lock switch✽ ✽
NOTICEIn cold and wet climates, power windows
may not work properly due to freezing
conditions.
WINDOWS
OYF049014
*
* : if equipped
YF HMA 4a-111.qxp 1/16/2012 6:29 PM Page 24
Page 106 of 410
425
Features of your vehicle
Power windowsThe ignition switch must be in the ON
position for power windows to operate.
Each door has a power window switch
that controls the door's window. The driv-
er has a power window lock switch which
can block the operation of passenger
windows. The driver’s door has a master
power window switch that controls all the
windows in the vehicle. The power win-
dows can be operated for approximately
30 seconds after the ignition key is
removed or turned to the ACC or LOCK
position. However, if the front doors
open, the power windows cannot be
operated within the 30 second period
after ignition key removal.✽ ✽
NOTICEWhile driving with the rear windows
down or with the sunroof (if equipped) in
an open (or partially open) position, your
vehicle may demonstrate a wind buffet-
ing or pulsation noise. This noise is a
normal occurrence and can be reduced
or eliminated by taking the following
actions. If the noise occurs with one or
both of the rear windows down, partially
lower both front windows approximate-
ly one inch. If you experience the noise
with the sunroof open, slightly reduce the
size of the sunroof opening.
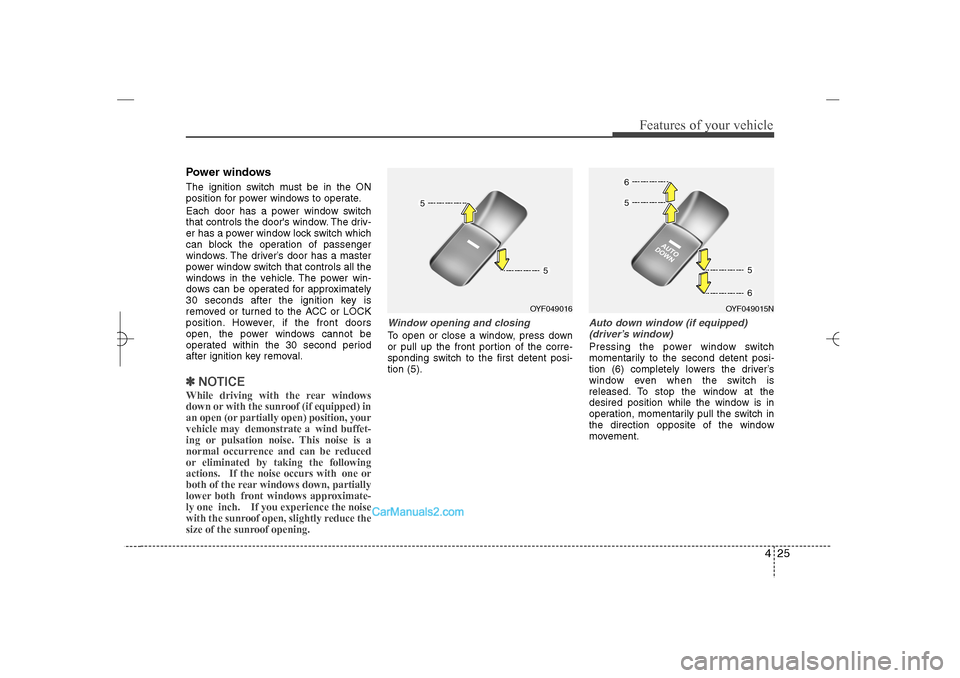
Window opening and closingTo open or close a window, press down
or pull up the front portion of the corre-
sponding switch to the first detent posi-
tion (5).
Auto down window (if equipped)
(driver’s window)Pressing the power window switch
momentarily to the second detent posi-
tion (6) completely lowers the driver’s
window even when the switch is
released. To stop the window at the
desired position while the window is in
operation, momentarily pull the switch in
the direction opposite of the window
movement.
OYF049016
OYF049015N
YF HMA 4a-111.qxp 1/16/2012 6:29 PM Page 25
Page 127 of 410

Features of your vehicle46 4✽
✽
NOTICESome devices may require you to replace
this Programming step 3 with proce-
dures noted in the "Gate
Operator/Canadian Programming" sec-
tion. If the HomeLink
®indicator light
does not change to a rapidly blinking
light after performing these steps, con-
tact HomeLink
®at www.homelink.com.
4. Firmly press, hold for 5 seconds and
release the programmed HomeLink
®
button up to two separate times to acti-
vate the door. If the door does not acti-
vate, press and hold the just-trained
HomeLink
®button and observe the
indicator light.
If the indicator light stays on con-
stantly, programming is complete
and your device should activate
when the HomeLink
®
button is
pressed and released.
If the indicator light blinks rapidly for
2 seconds and then turns to
a constant light, continue with
"Programming" steps 5-7 to com-
plete the programming of a rolling
code equipped device (most com-
monly a garage door opener).5. At the garage door opener receiver
(motor-head unit) in the garage, locate
the "leam" or "smart" button. This can
usually be found where the hanging
antenna wire is attached to the motor-
head unit.
6. Firmly press and release the "leam" or
"smart" button. (The name and color of
the button vary by manufacturer).
There are 30 seconds to initiate step
7.
7. Return to the vehicle and firmly press,
hold for 2 seconds
and release the programmed
HomeLink
®
button. Repeat the
"press/hold/release" sequence a sec-
ond time, and, depending on the brand
of the garage door opener (or other
rolling code equipped device), repeat
this sequence a third time to complete
the programming process.
HomeLink
®should now activate your
rolling code equipped device.Gate operator & Canadian program-
ming
During programming, your handheld
transmitter may automatically stop trans-
mitting. Continue to press the Integrated
HomeLink
®Wireless Control System but-
ton (note steps 2 through 3 in the
Programming portion of this document)
while you press and re-press ("cycle")
your handheld transmitter every two sec-
onds until the frequency signal has been
learned. The indicator light will flash
slowly and then rapidly after several sec-
onds upon successful training.
Operating HomeLink
®
To operate, simply press and release the
programmed HomeLink
®
button.
Activation will now occur for the trained
device (i.e. garage door opener, gate
operator, security system, entry door
lock, home/office lighting, etc.). For con-
venience, the hand-held transmitter of
the device may also be used at any time.
YF HMA 4a-111.qxp 1/16/2012 6:30 PM Page 46
Page 138 of 410

457
Features of your vehicle
✽ ✽
NOTICE• If the vehicle is not on level ground or
the battery power has been interrupt-
ed, the “Distance to empty” function
may not operate correctly.
The trip computer may not register
additional fuel if less than 1.6 gallons (6
liters) of fuel are added to the vehicle.
• The fuel consumption and distance to
empty values may vary significantly
based on driving conditions, driving
habits, and condition of the vehicle.
• The distance to empty value is an esti-
mate of the available driving distance.
This value may differ from the actual
driving distance available.
Vehicle settingWhen the vehicle is at a standstill, press-
ing the TRIP button for more than 2 sec-
onds with the engine start/stop button in
the ON position or engine running, the
LCD screen on the cluster will change to
the vehicle setting mode.
You can change the item by pressing the
TRIP button and choose the item by
pressing the RESET button.
Auto door lockOff- The auto door lock operation will be
canceled.
Speed- All doors will be automatically
locked when the vehicle speed
exceeds 9.3mph (15km/h).
Shift Lever (if equipped)-
All doors will be automatically locked if
the shift lever is shifted from the P(Park)
position to the R(Reverse), N(Neutral) or
D(Drive) position.Auto door unlockOff- The auto door unlock operation will
be canceled.
Key Out- All doors will be automatically
unlocked when the ignition
key is removed from ignition
switch (or smart key is
removed from the smart key
holder).
Door- All doors will be automatically
unlocked if the driver's door is
unlocked inside.
Shift Lever (if equipped)-
All doors will be automatically unlocked if
the shift lever is shifted to the P(Park)
position.
OYF049232N
YF HMA 4a-111.qxp 1/16/2012 6:31 PM Page 57
Page 153 of 410
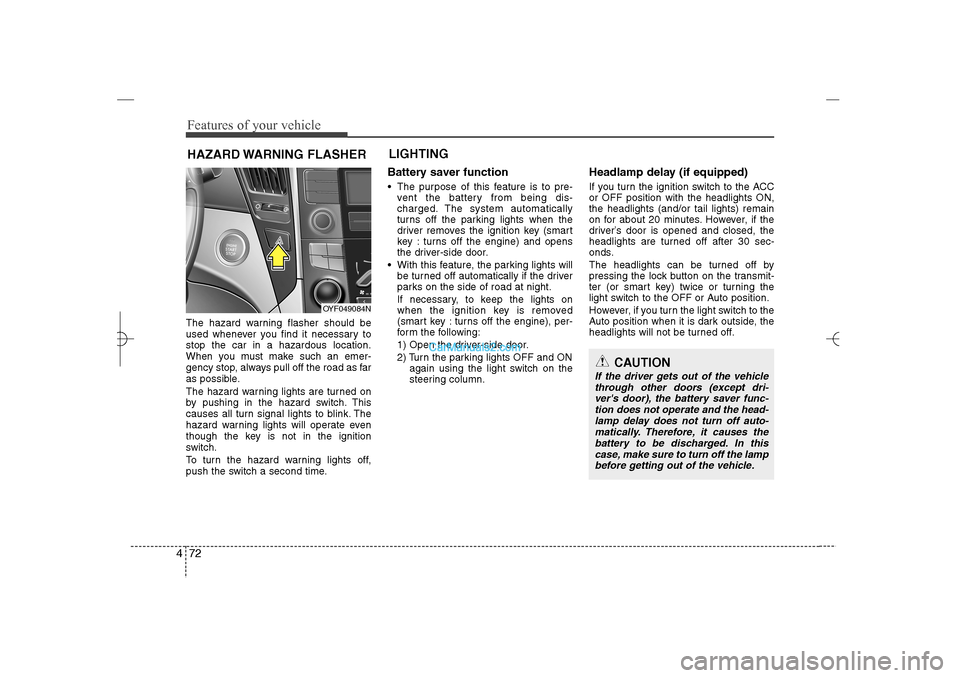
Features of your vehicle72 4The hazard warning flasher should be
used whenever you find it necessary to
stop the car in a hazardous location.
When you must make such an emer-
gency stop, always pull off the road as far
as possible.
The hazard warning lights are turned on
by pushing in the hazard switch. This
causes all turn signal lights to blink. The
hazard warning lights will operate even
though the key is not in the ignition
switch.
To turn the hazard warning lights off,
push the switch a second time.
Battery saver function The purpose of this feature is to pre-
vent the battery from being dis-
charged. The system automatically
turns off the parking lights when the
driver removes the ignition key (smart
key : turns off the engine) and opens
the driver-side door.
With this feature, the parking lights will
be turned off automatically if the driver
parks on the side of road at night.
If necessary, to keep the lights on
when the ignition key is removed
(smart key : turns off the engine), per-
form the following:
1) Open the driver-side door.
2) Turn the parking lights OFF and ON
again using the light switch on the
steering column.
Headlamp delay (if equipped)If you turn the ignition switch to the ACC
or OFF position with the headlights ON,
the headlights (and/or tail lights) remain
on for about 20 minutes. However, if the
driver’s door is opened and closed, the
headlights are turned off after 30 sec-
onds.
The headlights can be turned off by
pressing the lock button on the transmit-
ter (or smart key) twice or turning the
light switch to the OFF or Auto position.
However, if you turn the light switch to the
Auto position when it is dark outside, the
headlights will not be turned off.
HAZARD WARNING FLASHERLIGHTING
OYF049084N
CAUTION
If the driver gets out of the vehicle
through other doors (except dri-
ver's door), the battery saver func-
tion does not operate and the head-
lamp delay does not turn off auto-
matically. Therefore, it causes the
battery to be discharged. In this
case, make sure to turn off the lamp
before getting out of the vehicle.
YF HMA 4a-111.qxp 1/16/2012 6:31 PM Page 72
Page 154 of 410
473
Features of your vehicle
Headlamp welcome functionWhen the headlight switch is in the ON or
AUTO position and all doors (and trunk)
are closed and locked, if you press the
door unlock button on the transmitter (or
the smart key), the headlights will come
on for about 15 seconds. At this time, if
you press the door lock button on the
transmitter (or smart key) the headlights
will turn off immediately.Daytime running light
(if equipped)Daytime Running Lights (DRL) can make
it easier for others to see the front of your
vehicle during the day. DRL can be help-
ful in many different driving conditions,
and it is especially helpful after dawn and
before sunset.
The DRL system will make the head-
lights turn OFF when:
1. The headlight is ON.
2. Engine stops.
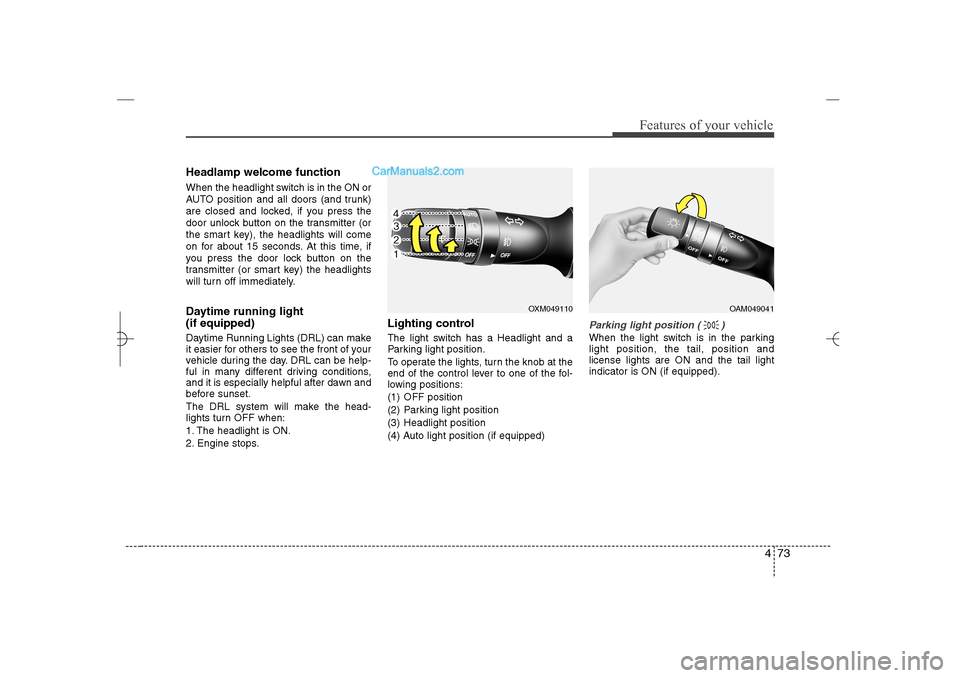
Lighting controlThe light switch has a Headlight and a
Parking light position.
To operate the lights, turn the knob at the
end of the control lever to one of the fol-
lowing positions:
(1) OFF position
(2) Parking light position
(3) Headlight position
(4) Auto light position (if equipped)
Parking light position ( )When the light switch is in the parking
light position, the tail, position and
license lights are ON and the tail light
indicator is ON (if equipped).
OXM049110
OAM049041
YF HMA 4a-111.qxp 1/16/2012 6:31 PM Page 73
Page 160 of 410
479
Features of your vehicle
Automatic turn off function (if
equipped) The interior lights automatically turn off
approximately 20 minutes after the igni-
tion switch is turned off.
If your vehicle is equipped with the theft
alarm system, the interior lights automat-
ically turns off approximately 5 seconds
after the system is armed stage.
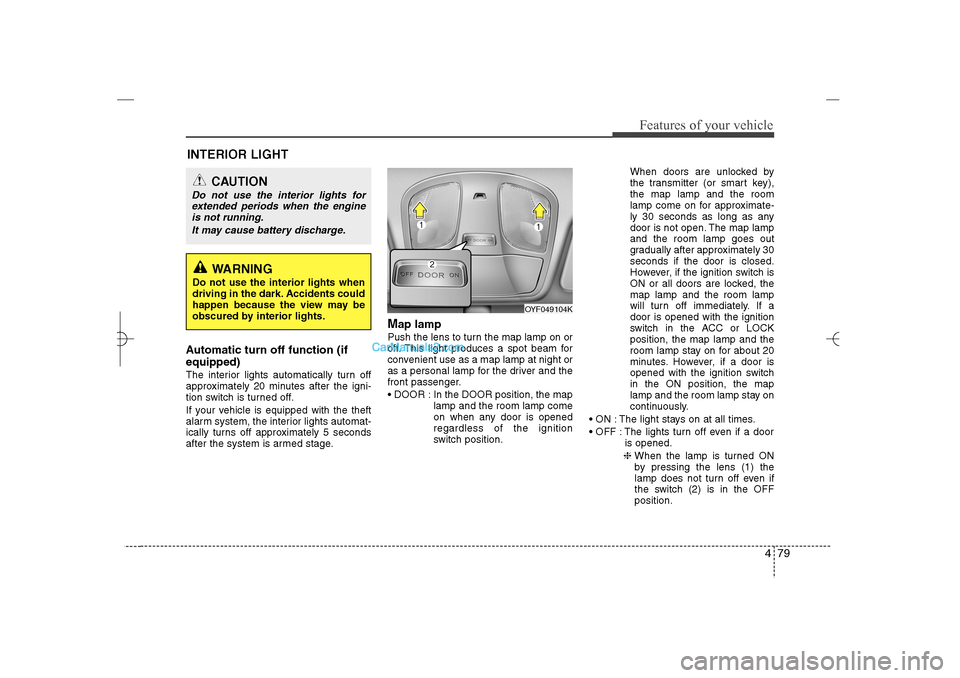
Map lamp Push the lens to turn the map lamp on or
off. This light produces a spot beam for
convenient use as a map lamp at night or
as a personal lamp for the driver and the
front passenger.
DOOR : In the DOOR position, the map
lamp and the room lamp come
on when any door is opened
regardless of the ignition
switch position.When doors are unlocked by
the transmitter (or smart key),
the map lamp and the room
lamp come on for approximate-
ly 30 seconds as long as any
door is not open. The map lamp
and the room lamp goes out
gradually after approximately 30
seconds if the door is closed.
However, if the ignition switch is
ON or all doors are locked, the
map lamp and the room lamp
will turn off immediately. If a
door is opened with the ignition
switch in the ACC or LOCK
position, the map lamp and the
room lamp stay on for about 20
minutes. However, if a door is
opened with the ignition switch
in the ON position, the map
lamp and the room lamp stay on
continuously.
ON : The light stays on at all times.
OFF : The lights turn off even if a door
is opened.
❈ When the lamp is turned ON
by pressing the lens (1) the
lamp does not turn off even if
the switch (2) is in the OFF
position.
OYF049104K
INTERIOR LIGHT
CAUTION
Do not use the interior lights for
extended periods when the engine
is not running.
It may cause battery discharge.
WARNING
Do not use the interior lights when
driving in the dark. Accidents could
happen because the view may be
obscured by interior lights.
YF HMA 4a-111.qxp 1/16/2012 6:32 PM Page 79