2013 Hyundai Sonata warning
[x] Cancel search: warningPage 114 of 410

433
Features of your vehicle
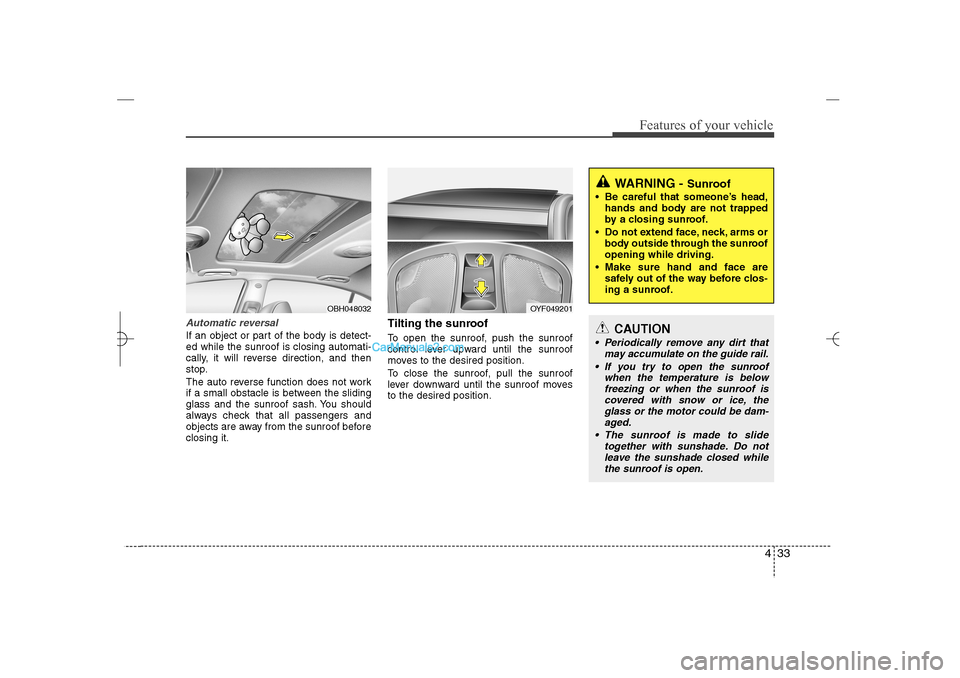
Automatic reversalIf an object or part of the body is detect-
ed while the sunroof is closing automati-
cally, it will reverse direction, and then
stop.
The auto reverse function does not work
if a small obstacle is between the sliding
glass and the sunroof sash. You should
always check that all passengers and
objects are away from the sunroof before
closing it.
Tilting the sunroof To open the sunroof, push the sunroof
control lever upward until the sunroof
moves to the desired position.
To close the sunroof, pull the sunroof
lever downward until the sunroof moves
to the desired position.
OYF049201
OBH048032
WARNING -
Sunroof
Be careful that someone’s head,
hands and body are not trapped
by a closing sunroof.
Do not extend face, neck, arms or
body outside through the sunroof
opening while driving.
Make sure hand and face are
safely out of the way before clos-
ing a sunroof.
CAUTION
Periodically remove any dirt that
may accumulate on the guide rail.
If you try to open the sunroof
when the temperature is below
freezing or when the sunroof is
covered with snow or ice, the
glass or the motor could be dam-
aged.
The sunroof is made to slide
together with sunshade. Do not
leave the sunshade closed while
the sunroof is open.
YF HMA 4a-111.qxp 1/16/2012 6:29 PM Page 33
Page 116 of 410

435
Features of your vehicle
If your vehicle is equipped with a sunroof,
you can slide or tilt your sunroof with the
sunroof control lever located on the over-
head console.
The sunroof can only be opened, closed,
or tilted when the ignition switch is in the
ON position.
✽ ✽
NOTICE• In cold and wet climates, the sunroof
may not work properly due to freez-
ing conditions.
• After washing the car or after there is
rain, be sure to wipe off any water
that is on the sunroof before operating
it.
✽ ✽
NOTICEThe sunroof cannot slide when it is in
the tilt position nor can it be tilted while
in an open or slide position.
PANORAMA SUNROOF (IF EQUIPPED)
OYF049024
CAUTION
Do not continue to move the sun-
roof control lever after the sunroof
is fully opened, closed, or tilted.
Damage to the motor or system
components could occur.
Make sure the sunroof is fully
closed when leaving your vehicle.
If the sunroof is opened, rain or
snow may leak through the sun-
roof and wet the interior as well
as cause theft.
WARNING
Never adjust the sunroof or sun-
shade while driving. This could
result in loss of control and an
accident that may cause death,
serious injury, or property dam-
age.
Do not allow children to operate
the sunroof.
YF HMA 4a-111.qxp 1/16/2012 6:30 PM Page 35
Page 118 of 410

437
Features of your vehicle
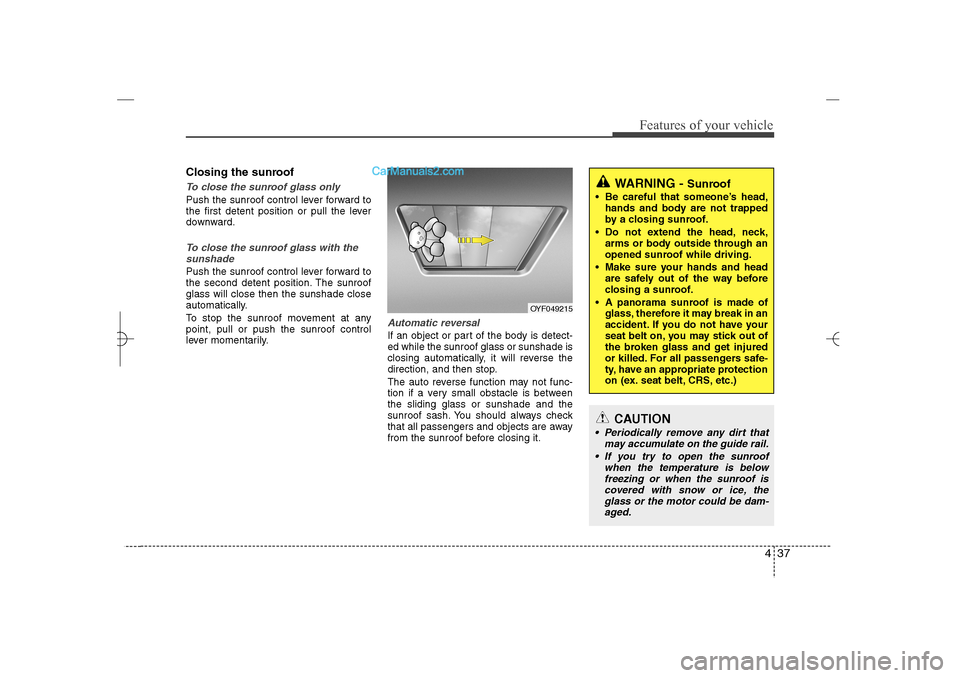
Closing the sunroofTo close the sunroof glass onlyPush the sunroof control lever forward to
the first detent position or pull the lever
downward.To close the sunroof glass with the
sunshade Push the sunroof control lever forward to
the second detent position. The sunroof
glass will close then the sunshade close
automatically.
To stop the sunroof movement at any
point, pull or push the sunroof control
lever momentarily.
Automatic reversalIf an object or part of the body is detect-
ed while the sunroof glass or sunshade is
closing automatically, it will reverse the
direction, and then stop.
The auto reverse function may not func-
tion if a very small obstacle is between
the sliding glass or sunshade and the
sunroof sash. You should always check
that all passengers and objects are away
from the sunroof before closing it.
OYF049215
WARNING -
Sunroof
Be careful that someone’s head,
hands and body are not trapped
by a closing sunroof.
Do not extend the head, neck,
arms or body outside through an
opened sunroof while driving.
Make sure your hands and head
are safely out of the way before
closing a sunroof.
A panorama sunroof is made of
glass, therefore it may break in an
accident. If you do not have your
seat belt on, you may stick out of
the broken glass and get injured
or killed. For all passengers safe-
ty, have an appropriate protection
on (ex. seat belt, CRS, etc.)
CAUTION
Periodically remove any dirt that
may accumulate on the guide rail.
If you try to open the sunroof
when the temperature is below
freezing or when the sunroof is
covered with snow or ice, the
glass or the motor could be dam-
aged.
YF HMA 4a-111.qxp 1/16/2012 6:30 PM Page 37
Page 120 of 410

439
Features of your vehicle
Electric power steering (EPS)The power steering uses a motor to
assist you in steering the vehicle. If the
engine is off or if the power steering sys-
tem becomes inoperative, the vehicle
may still be steered, but it will require
increased steering effort.
The motor driven power steering is con-
trolled by a power steering control unit
which senses the steering wheel torque
and vehicle speed to command the
motor.
The steering becomes heavier as the
vehicle’s speed increases and becomes
lighter as the vehicle’s speed decreases
for optimum steering control.
Should you notice any change in the
effort required to steer during normal
vehicle operation, have the power steer-
ing checked by an authorized HYUNDAI
dealer.
✽ ✽
NOTICEThe following symptoms may occur dur-
ing normal vehicle operation:
• The EPS warning light does not illumi-
nate.
• The steering effort is high immediately
after turning the ignition switch on.
This happens as the system performs
the EPS system diagnostics. When the
diagnostics is completed, the steering
wheel will return to its normal condi-
tion.
• A click noise may be heard from the
EPS relay after the ignition switch is
turned to the ON or LOCK position.
• A motor noise may be heard when the
vehicle is at a stop or at a low driving
speed.
• If the Electric Power Steering System
does not operate normally, the warn-
ing light will illuminate on the instru-
ment cluster. The steering wheel may
become difficult to control or operate
abnormally. Take your vehicle to an
authorized HYUNDAI dealer and
have the vehicle checked as soon as
possible.
• When you operate the steering wheel
in low temperature, abnormal noise
could occur. If temperature rises, the
noise will disappear. This is a normal
condition.
STEERING WHEEL
CAUTION
If the Electric Power Steering
System does not operate normal-
ly, the warning light will illuminate
on the instrument cluster. The
steering wheel may become diffi-
cult to control or operate abnor-
mally. Take your vehicle to an
authorized HYUNDAI dealer and
have the vehicle checked as soon
as possible.
When you operate the steering
wheel in low temperature, abnor-
mal noise could occur. If tempera-
ture rises, the noise will disap-
pear. This is a normal condition.
YF HMA 4a-111.qxp 1/16/2012 6:30 PM Page 39
Page 121 of 410

Features of your vehicle40 4Tilt steering Tilt steering allows you to adjust the
steering wheel before you drive. You can
also raise it to give your legs more room
when you exit and enter the vehicle.
The steering wheel should be positioned
so that it is comfortable for you to drive,
while permitting you to see the instru-
ment panel warning lights and gauges.
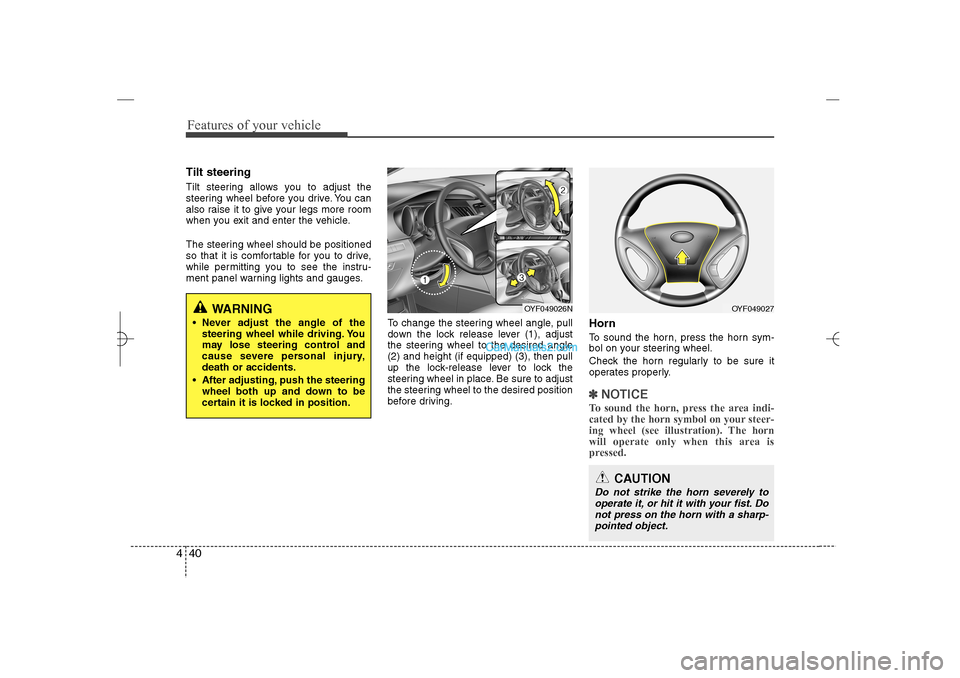
To change the steering wheel angle, pull
down the lock release lever (1), adjust
the steering wheel to the desired angle
(2) and height (if equipped) (3), then pull
up the lock-release lever to lock the
steering wheel in place. Be sure to adjust
the steering wheel to the desired position
before driving.
HornTo sound the horn, press the horn sym-
bol on your steering wheel.
Check the horn regularly to be sure it
operates properly.✽ ✽
NOTICETo sound the horn, press the area indi-
cated by the horn symbol on your steer-
ing wheel (see illustration). The horn
will operate only when this area is
pressed.
OYF049026N
OYF049027
CAUTION
Do not strike the horn severely to
operate it, or hit it with your fist. Do
not press on the horn with a sharp-
pointed object.
WARNING
Never adjust the angle of the
steering wheel while driving. You
may lose steering control and
cause severe personal injury,
death or accidents.
After adjusting, push the steering
wheel both up and down to be
certain it is locked in position.
YF HMA 4a-111.qxp 1/16/2012 6:30 PM Page 40
Page 122 of 410

441
Features of your vehicle
MIRRORS Inside rearview mirrorAdjust the rearview mirror so that the
center view through the rear window is
seen. Make this adjustment before you
start driving.
Day/night rearview mirror Make this adjustment before you start
driving and while the day/night lever is in
the day position.
Pull the day/night lever toward you to
reduce glare from the headlights of the
vehicles behind you during night driving.Remember that you lose some rearview
clarity in the night position.Electric chromic mirror (ECM) with
HomeLink
®system and compass
(if equipped)
Your vehicle may be equipped with a
Gentex Automatic-Dimming Mirror with a
Z-Nav™ Electronic Compass Display
and an Integrated HomeLink
®Wireless
Control System. During nighttime driving,
this feature will automatically detect and
reduce rearview mirror glare while the
compass indicates the direction the vehi-
cle is pointed. The HomeLink®Universal
Transceiver allows you to activate your
garage door(s), electric gate, home light-
ing, etc.
WARNING -
Rear visibility
Do not place objects in the rear
seat or cargo area which would
interfere with your vision through
the rear window.
OYF049028N
Day
Night
WARNING
Do not modify the inside mirror and
do not install a wide mirror. It could
result in injury, during an accident
or deployment of the air bag.
YF HMA 4a-111.qxp 1/16/2012 6:30 PM Page 41
Page 125 of 410

Features of your vehicle44 4To adjust the Zone setting:
1. Determine the desired Zone Number
based upon your current location on
the Zone Map.
2. Press and hold the button for 6 sec-
onds, the current Zone Number will
appear on the display.
3. Pressing and holding the button
again will cause the numbers to incre-
ment (Note: they will repeat …13, 14,
15, 1, 2, …). Releasing the button
when the desired Zone Number
appears on the display will set the new
Zone.
4. Within about 5 seconds the compass
will start displaying a compass head-
ing again.
There are some conditions that can
cause changes to the vehicle magnets,
such as installing a ski rack or a CB
antenna. Body repair work on the vehicle
can also cause changes to the vehicle's
magnetic field. In these situations, the
compass will need to be re-calibrated to
quickly correct for these changes. To re-
calibrate the compass:1. Press and hold the button for more
than 9 seconds. When the compass
memory is cleared a "C" will appear in
the display.
2. To calibrate the compass, drive the
vehicle in 2 complete circles at less
than 5 mph (8 km/h).
Integrated HomeLink
®Wireless Control
System
The HomeLink
®Wireless Control System
provides a convenient way to replace up
to three hand-held radio-frequency (RF)
transmitters with a single built-in device.
This innovative feature will learn the
radio frequency codes of most current
transmitters to operate devices such as
gate operators, garage door openers,
entry door locks, security systems, even
home lighting. Both standard and rolling
code-equipped transmitters can be pro-
grammed by following the outlined proce-
dures. Additional HomeLink
®information
can be found at: www.homelink.com or
by calling 1-800-355-3515.Retain the original transmitter of the RF
device you are programming for use in
other vehicles as well as for future
HomeLink
®programming. It is also sug-
gested that upon the sale of the vehicle,
the programmed HomeLink
®buttons be
erased for security purposes.
WARNING
Before programming HomeLink
®to
a garage door opener or gate oper-
ator, make sure that people and
objects are out of the way of the
device to prevent potential harm or
damage. Do not use HomeLink®
with any garage door opener that
lacks the safety stop and reverse
features required by U.S. federal
safety standards (this includes any
garage door opener model manu-
factured before April 1, 1982). A
garage door that cannot detect an
object - signaling the door to stop
and reverse - does not meet current
U.S. federal safety standards. Using
a garage door opener without these
features increases the risk of seri-
ous injury or death.
YF HMA 4a-111.qxp 1/16/2012 6:30 PM Page 44
Page 129 of 410

Features of your vehicle48 4Outside rearview mirror Be sure to adjust mirror angles before
driving.
Your vehicle is equipped with both left-
hand and right-hand outside rearview
mirrors. The mirrors can be adjusted
remotely with the remote switch. The mir-
ror heads can be folded back to prevent
damage during an automatic car wash or
when passing in a narrow street.
Remote controlThe electric remote control mirror switch
allows you to adjust the position of the
left and right outside rearview mirrors. To
adjust the position of either mirror, the
ignition switch should be in the ACC or
ON position, or engine is running. Push
the switch (1) to R or L to select the right
side mirror or the left side mirror, then
press a corresponding point on the mirror
adjustment control to position the select-
ed mirror up, down, left or right.
After the adjustment, put the switch into
the neutral (center) position to prevent
inadvertent adjustment.
WARNING -
Rearview
mirrors
The right outside rearview mirror
is convex. Objects seen in the
mirror are closer than they
appear.
Use your interior rearview mirror
or direct observation to deter-
mine the actual distance of fol-
lowing vehicles when changing
lanes.
CAUTION
Do not scrape ice off the mirror
face; this may damage the surface
of the glass. If ice should restrict
movement of the mirror, do not
force the mirror for adjustment. To
remove ice, use a deicer spray, or a
sponge or soft cloth with warm
water.
CAUTION
If the mirror is jammed with ice, do
not adjust the mirror by force. Use
an approved spray de-icer (not radi-
ator antifreeze) to release the
frozen mechanism or move the
vehicle to a warm place and allow
the ice to melt.
WARNING
Do not adjust or fold the outside
rearview mirrors while the vehicle
is moving. This could result in loss
of control, and an accident which
could cause death, serious injury
or property damage.
OYF049033
YF HMA 4a-111.qxp 1/16/2012 6:30 PM Page 48