2013 HYUNDAI I40 run flat
[x] Cancel search: run flatPage 325 of 534

Downloaded from www.Manualslib.com manuals search engine Driving your vehicle
32
5
To release EPB (electric parking brake)
automatically:
Shift lever in P (Park)
With the engine running depress thebrake pedal and shift out of P (Park) to
R (Rear) or D (Drive).
Shift lever in N (Neutral) With the engine running depress the
brake pedal and shift out of N (Neutral)
to R (Rear) or D (Drive).
Manual transaxle vehicle 1. Start the engine.
2. Fasten the driver's seat belt.
3. Close the driver's door, engine hood and tailgate.
4. Depress the clutch pedal with the gear engaged.
5. Depress the accelerator pedal while releasing the clutch pedal.
Automatic transaxle vehicle 1. Start the engine.
2. Fasten the driver's seat belt.
3. Close the driver's door, engine hood and tailgate.
4. Depress the accelerator pedal while the shift lever is in R (Rear), D
(Drive) or Sports mode.
Make sure the brake warning light goes
off.✽ ✽ NOTICE
• For your safety, you can engage the
EPB even though the ignition switch or
engine stop/start button is in the OFF
position, but you cannot release it.
• For your safety, depress the brake pedal and release the parking brake
manually with the EPB switch when
you drive downhill or when backing up
the vehicle.
✽ ✽ NOTICE -Manual transaxle
A vehicle towing a trailer on a hill or on
an incline may slightly roll backwards
when starting the vehicle. To prevent the
situation follow the below instructions.
1. Depress the clutch pedal and select a
gear.
2. Keep pulling up the EPB switch.
3. Depress the accelerator pedal and slowly release the clutch pedal.
4. If the vehicle starts off with enough driving power release the EPB switch.
Do not follow the above procedure when
driving on a flat level ground. The vehi-
cle may suddenly move forward.
CAUTION
If the parking brake warning light is still on even though the EPBhas been released, have the sys- tem checked by an authorizedHYUNDAI dealer.
Do not drive your vehicle with the EPB applied. It may cause exces-sive brake pad and brake rotorwear.
Page 396 of 534

Downloaded from www.Manualslib.com manuals search engine 621
What to do in an emergency
IF YOU HAVE A FLAT TIRE (WITH TIREMOBILITYKIT, IF EQUIPPED)
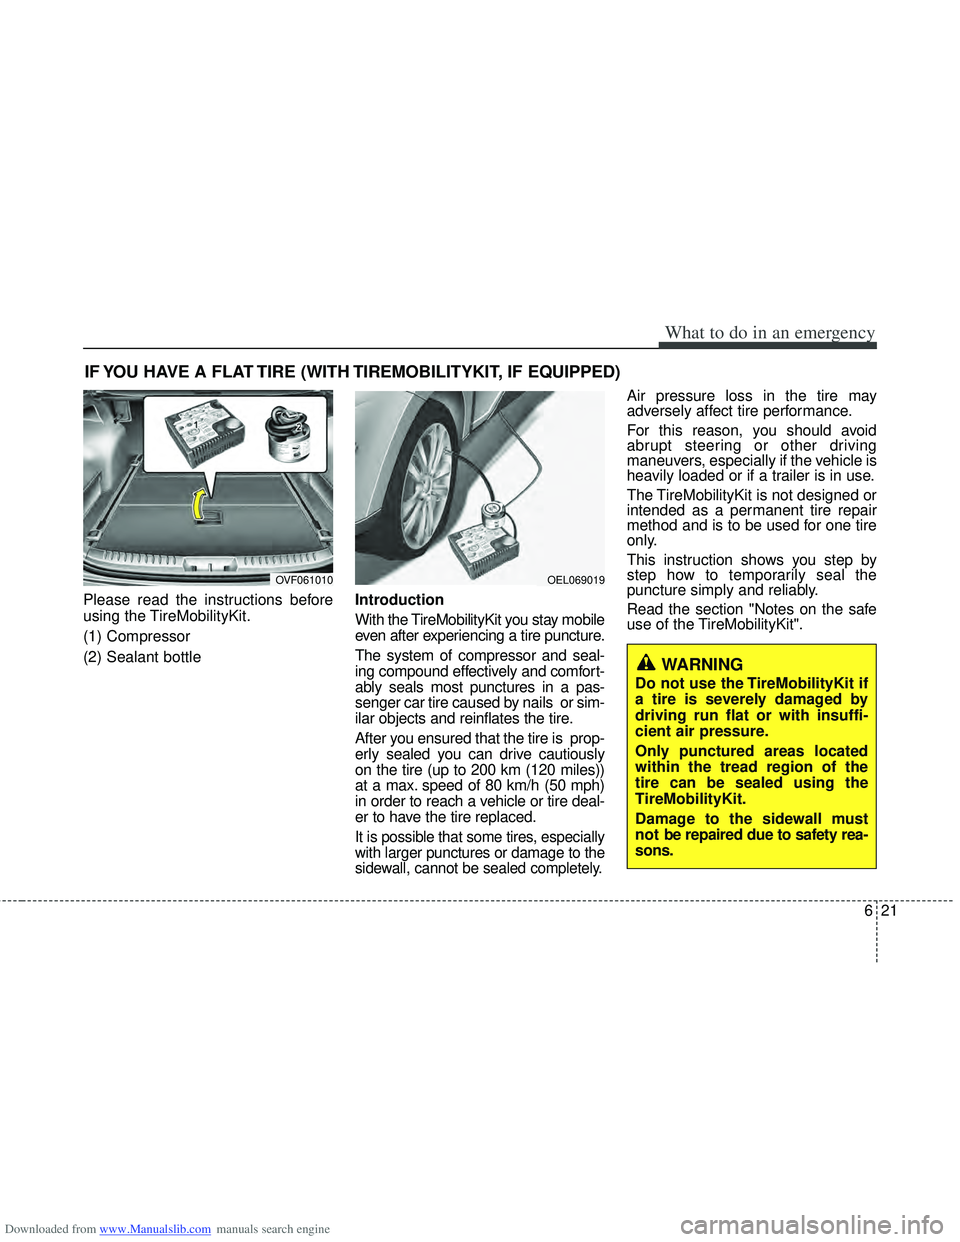
Please read the instructions before
using the TireMobilityKit.
(1) Compressor
(2) Sealant bottleIntroduction
With the TireMobilityKit you stay mobile
even after experiencing a tire puncture.
The system of compressor and seal-
ing compound effectively and comfort-
ably seals most punctures in a pas-
senger car tire caused by nails or sim-
ilar objects and reinflates the tire.
After you ensured that the tire is prop-
erly sealed you can drive cautiously
on the tire (up to 200 km (120 miles))
at a max. speed of 80 km/h (50 mph)
in order to reach a vehicle or tire deal-
er to have the tire replaced.
It is possible that some tires, especially
with larger punctures or damage to the
sidewall, cannot be sealed completely.
Air pressure loss in the tire may
adversely affect tire performance.
For this reason, you should avoid
abrupt steering or other driving
maneuvers, especially if the vehicle is
heavily loaded or if a trailer is in use.
The TireMobilityKit is not designed or
intended as a permanent tire repair
method and is to be used for one tire
only.
This instruction shows you step by
step how to temporarily seal the
puncture simply and reliably.
Read the section "Notes on the safe
use of the TireMobilityKit".
OEL069019
WARNING
Do not use the TireMobilityKit if
a tire is severely damaged by
driving run flat or with insuffi-
cient air pressure.
Only punctured areas located
within the tread region of the
tire can be sealed using the
TireMobilityKit.
Damage to the sidewall must
not be repaired due to safety rea-
sons.
OVF061010
Page 398 of 534

Downloaded from www.Manualslib.com manuals search engine 623
What to do in an emergency
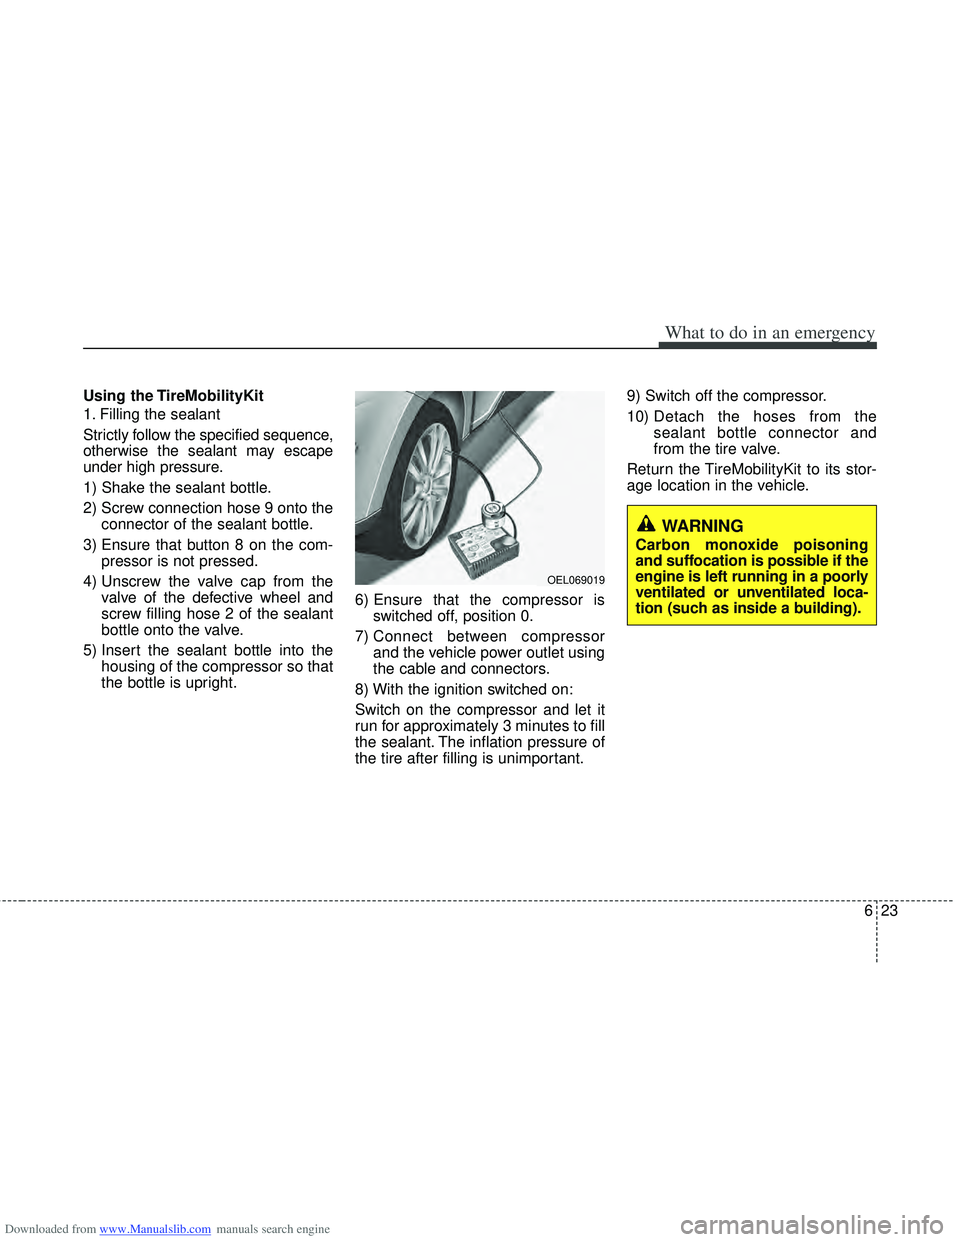
Using the TireMobilityKit
1. Filling the sealant
Strictly follow the specified sequence,
otherwise the sealant may escape
under high pressure.
1) Shake the sealant bottle.
2) Screw connection hose 9 onto theconnector of the sealant bottle.
3) Ensure that button 8 on the com- pressor is not pressed.
4) Unscrew the valve cap from the valve of the defective wheel and
screw filling hose 2 of the sealant
bottle onto the valve.
5) Insert the sealant bottle into the housing of the compressor so that
the bottle is upright. 6) Ensure that the compressor is
switched off, position 0.
7) Connect between compressor and the vehicle power outlet using
the cable and connectors.
8) With the ignition switched on:
Switch on the compressor and let it
run for approximately 3 minutes to fill
the sealant. The inflation pressure of
the tire after filling is unimportant. 9) Switch off the compressor.
10)
Detach the hoses from the
sealant bottle connector and
from the tire valve.
Return the TireMobilityKit to its stor-
age location in the vehicle.
WARNING
Carbon monoxide poisoning
and suffocation is possible if the
engine is left running in a poorly
ventilated or unventilated loca-
tion (such as inside a building).
OEL069019
Page 399 of 534

Downloaded from www.Manualslib.com manuals search engine What to do in an emergency
24
6
Distributing the sealant
Immediately drive approximately 3 km
(2 miles) to evenly distribute the
sealant in the tire. Producing the tire inflation pres-
sure
1) After driving approximately 3 km (2
miles), stop at a suitable location.
2) Connect connection hose 9 of the compressor directly to the tire
valve.
3) Connect between compressor and the vehicle power outlet using
the cable and connectors.
4) Adjust the tire inflation pressure to the recommended tire pressure in
section 8. With the ignition
switched on, proceed as follows.
- To increase the inflation pres- sure: Switch on the compressor,
position I. To check the current
inflation pressure setting, briefly
switch off the compressor. - To reduce the inflation pres-
sure: Press the button 8 on the
compressor.
WARNING
Do not let the compressor run for
more than 10 minutes, otherwise
the device will overheat and may
be damaged.
WARNING
The tire inflation pressure must
be at least 200 kPa (29 psi). If it is
not, do not continue driving. Call
for road side service or towing.
CAUTION
Do not exceed a speed of 80 km/h (50 mph). If possible, donot fall below a speed of 20km/h (12 mph).
While driving, if you experienceany unusual vibration, ride dis-turbance or noise, reduce yourspeed and drive with cautionuntil you can safely pull off ofthe side of the road.
Call for road side service or tow-ing.
CAUTION
If the inflation pressure is notmaintained, drive the vehicle asecond time, refer toDistributing the sealant. Thenrepeat steps 1 to 4.
Use of the TireMobilityKit maybe ineffectual for tire damagelarger than approximately 4 mm(0.16 in).
Please contact the nearestHYUNDAI dealer, or a workshopthat works according toHYUNDAI repair procedureswith correspondingly trainedpersonnel if the tire cannot bemade roadworthy with theTireMobilityKit.
Page 400 of 534

Downloaded from www.Manualslib.com manuals search engine 625
What to do in an emergency
Notes on the safe use of the
TireMobilityKit
Park your car at the side of theroad so that you can work with the
TireMobilityKit away from moving
traffic. Place your warning triangle
in a prominent place to make pass-
ing vehicles aware of your location.
To be sure your vehicle won't move, even when you're on fairly
level ground, always set your park-
ing brake.
Only use the TireMobilityKit for sealing/inflation passenger car
tires. Do not use on motorcycles,
bicycles or any other type of tires.
Do not remove any foreign objects- such as nails or screws -that have
penetrated the tire.
Before using the TireMobilityKit, read the precautionary advice
printed on the sealant bottle!
Provided the car is outdoors, leave the engine running. Otherwise
operating the compressor may
eventually drain the car battery.
Never leave the TireMobilityKit unattended while it is being used.
Do not leave the compressor run- ning for more than 10 min. at a time
or it may overheat. Do not use the TireMobilityKit if the
ambient temperature is below -
30°C (-22°F).
Do not use the sealing compound after its expiration date which can
be found on the label of the bottle.
Keep away from children. Technical Data
System voltage: DC 12 V
Working voltage: DC 10 - 15 V
Amperage rating: max. 15 A
Suitable for use at temperatures:
-30 ~ +70°C (-22 ~ +158°F)
Max. working pressure: 6 bar (87 psi)
Size
Compressor: 168 x 150 x 68 mm (6.6 x 5.9 x 2.7 in.)
Sealant bottle: 104 x ø 85 mm (4.1 x ø 3.3 in.)
Compressor weight: 1.05 kg (2.31 lbs)
Sealant volume: 300 ml (18.3 cu. in.)
✽ ✽NOTICE
Sealing compound and spare parts can
be obtained and replaced at an author-
ized vehicle or tire dealer. Empty sealing
compound bottles may be disposed of at
home. Liquid residue from the sealing
compound should be disposed of by your
vehicle or tire dealer or in accordance
with local waste disposal regulations.
WARNING
Have your tire repaired as soon
as possible. The tire may loose
air pressure at any time after
inflating with the TMK.
CAUTION
The Tire Mobility Kit is a tempo-
rary fix to the tire and the tireshould be inspected by anauthorized HYUNDAI dealer assoon as possible.
CAUTION -TPMS
(if equipped
)
When using Tire Mobility Kit, thetire sealant can damage the tirepressure sensor. After using theTire Mobility Kit, have the tirepressure sensor checked by anauthorized HYUNDAI dealer.
Page 526 of 534

Downloaded from www.Manualslib.com manuals search engine I3
Index
Emergency Stop Signal (ESS).....................................5-45
Hill-start assist control (HAC) ....................................5-45
Power brakes ...............................................................5-29
Vehicle stability management......................................5-44
Brakes/clutch fluid .........................................................7-48
Bulb replacement ...........................................................7-85
Bulb wattage ....................................................................8-3
Button start/stop, see engine start/stop button.................5-8
Camera (Rear view) .......................................................4-94
Capacities (Lubricants) ....................................................8-5
Care Exterior care ................................................................7-99
Interior care ...............................................................7-104
Tire care .......................................................................7\
-61
Cargo security screen...................................................4-147
Center console storage .................................................4-136
Central door lock switch................................................4-16
Certification label ............................................................8-8
Chains Tire chains ...................................................................5-70
Changing tires ..................................................................6-9
Checking tire inflation pressure.....................................7-63
Child restraint system ....................................................3-29 ISOFIX system ............................................................3-35 Seat belt .......................................................................3\
-30
Tether anchor system ...................................................3-33
Child-protector rear door lock .......................................4-19
Cigarette lighter ...........................................................4-140
Climate control air filter ......................................4-120, 131
Climate control air filter ................................................7-53
Clothes hanger .............................................................4-144
Combined instrument, see instrument cluster ...............4-48
Compact spare tire .........................................................6-14
Compact spare tire replacement ....................................7-66
Cool box.......................................................................4\
-137
Coolant ........................................................................\
...7-45
Cooling fluid, see engine coolant ..................................7-45
Crankcase emission control system .............................7-105
Cruise control system ....................................................5-48
Cup holder ...................................................................4-141\
Curtain air bag ...............................................................3-54
Dashboard illumination, see instrument panel illumination . ........................................................................\
......................4-49
Dashboard, see instrument cluster .................................4-48
Daytime running light..................................................4-102
Deadlocks.......................................................................4\
-18
Defogging (Windshield) ..............................................4-133
Defroster (Rear window) .............................................4-111
C
D