Page 141 of 432
Features of your vehicle
62 4
To check bulb operation, check whether
the parking brake and brake fluid warning
light illuminates when the ignition switch
is in the ON position.D150331ABH
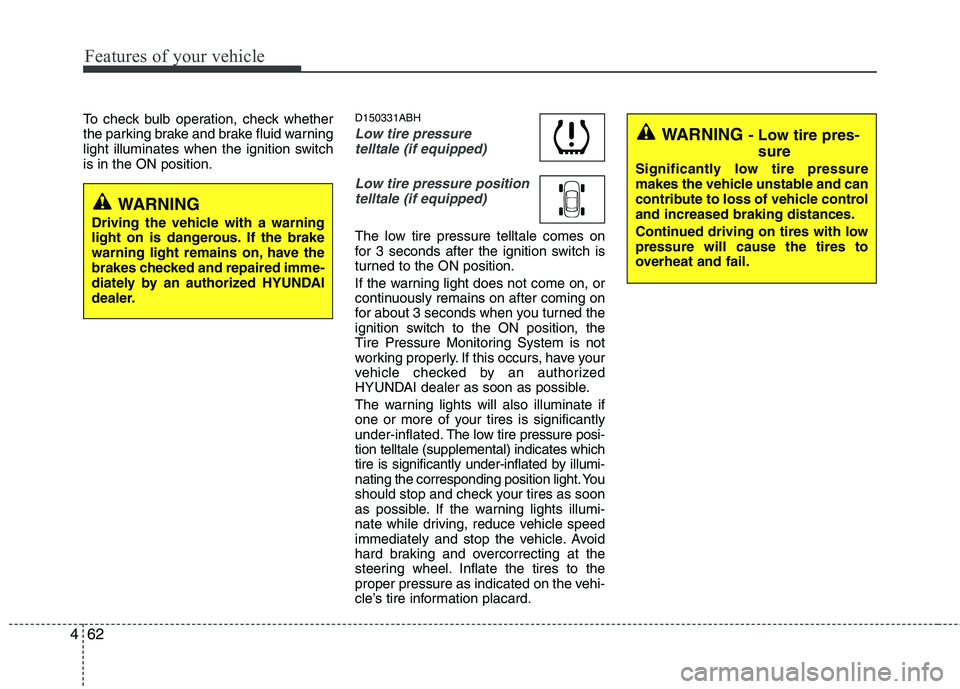
Low tire pressure
telltale (if equipped)
Low tire pressure position
telltale (if equipped)
The low tire pressure telltale comes on
for 3 seconds after the ignition switch is
turned to the ON position.
If the warning light does not come on, or
continuously remains on after coming on
for about 3 seconds when you turned the
ignition switch to the ON position, the
Tire Pressure Monitoring System is not
working properly. If this occurs, have your
vehicle checked by an authorized
HYUNDAI dealer as soon as possible.
The warning lights will also illuminate if
one or more of your tires is significantly
under-inflated.The low tire pressure posi-
tion telltale (supplemental) indicates which
tire is significantly under-inflated by illumi-
nating the corresponding position light. You
should stop and check your tires as soon
as possible. If the warning lights illumi-
nate while driving, reduce vehicle speed
immediately and stop the vehicle. Avoid
hard braking and overcorrecting at the
steering wheel. Inflate the tires to the
proper pressure as indicated on the vehi-
cle’s tire information placard.
WARNING - Low tire pres-
sure
Significantly low tire pressure
makes the vehicle unstable and can
contribute to loss of vehicle control
and increased braking distances.
Continued driving on tires with low
pressure will cause the tires to
overheat and fail.
WARNING
Driving the vehicle with a warning
light on is dangerous. If the brake
warning light remains on, have the
brakes checked and repaired imme-
diately by an authorized HYUNDAI
dealer.
Page 159 of 432
Features of your vehicle
80 4
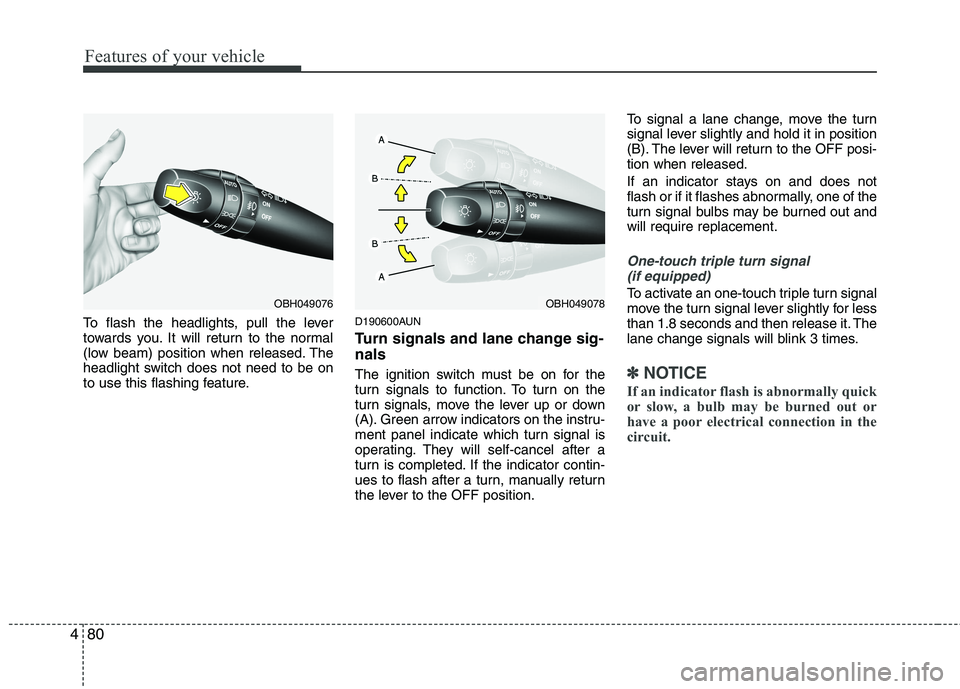
To flash the headlights, pull the lever
towards you. It will return to the normal
(low beam) position when released. The
headlight switch does not need to be on
to use this flashing feature.D190600AUN
Turn signals and lane change sig-
nals
The ignition switch must be on for the
turn signals to function. To turn on the
turn signals, move the lever up or down
(A). Green arrow indicators on the instru-
ment panel indicate which turn signal is
operating. They will self-cancel after a
turn is completed. If the indicator contin-
ues to flash after a turn, manually return
the lever to the OFF position.To signal a lane change, move the turn
signal lever slightly and hold it in position
(B). The lever will return to the OFF posi-
tion when released.
If an indicator stays on and does not
flash or if it flashes abnormally, one of the
turn signal bulbs may be burned out and
will require replacement.
One-touch triple turn signal
(if equipped)
To activate an one-touch triple turn signal
move the turn signal lever slightly for less
than 1.8 seconds and then release it. The
lane change signals will blink 3 times.
✽ ✽
NOTICE
If an indicator flash is abnormally quick
or slow, a bulb may be burned out or
have a poor electrical connection in the
circuit.
OBH049078OBH049076
Page 335 of 432
7
Engine compartment / 7-2
Maintenance services / 7-4
Owner maintenance / 7-5
Scheduled maintenance service / 7-7
Explanation of scheduled maintenance items / 7-12
Engine oil / 7-15
Engine coolant / 7-17
Brake fluid / 7-20
Power steering fluid / 7-21
Washer fluid / 7-22
Parking brake / 7-23
Air cleaner / 7-23
Climate control air filter / 7-26
Wiper blades / 7-28
Battery / 7-31
Tires and wheels / 7-34
Fuses / 7-48
Light bulbs / 7-62
Appearance care / 7-71
Emission control system / 7-77
California perchlorate notice / 7-80
Maintenance
Page 396 of 432
Maintenance
62 7
LIGHT BULBS
G220000AEN
Use only the bulbs of the specified
wattage.
✽ ✽
NOTICE
After driving in rain or washing, the
headlight and taillight lenses could
appear frosty. This condition is caused by
the temperature difference between the
lamp inside and outside. This is similar
to the condensation on your windows
inside your vehicle during the rain and
doesn’t indicate a problem with your
vehicle. If the water leaks into the lamp
bulb circuitry, have the vehicle checked
by an authorized HYUNDAI dealer.
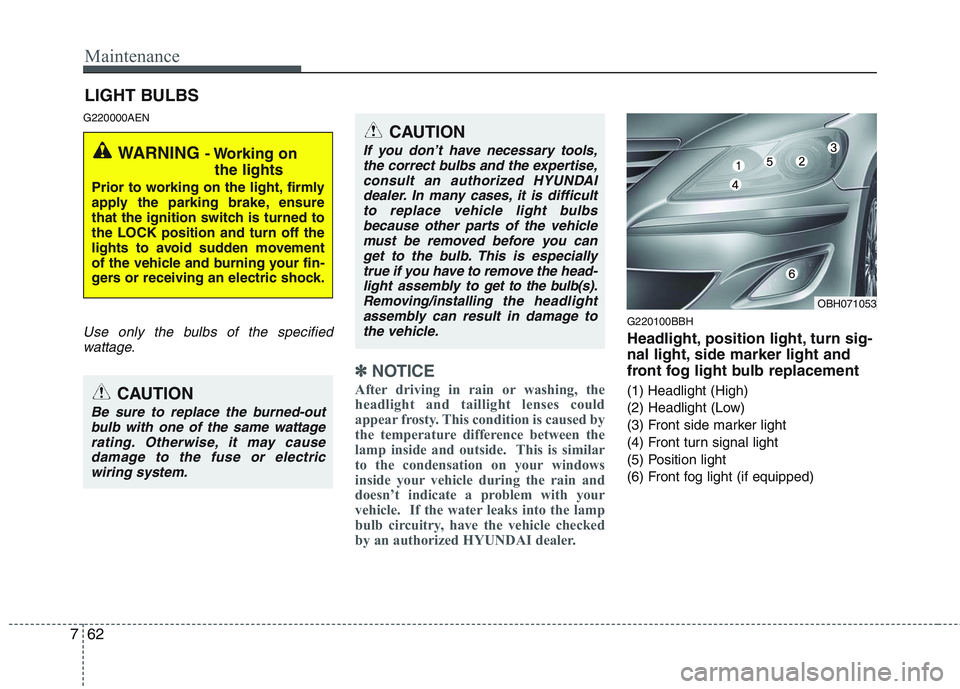
G220100BBH
Headlight, position light, turn sig-
nal light, side marker light and
front fog light bulb replacement
(1) Headlight (High)
(2) Headlight (Low)
(3) Front side marker light
(4) Front turn signal light
(5) Position light
(6) Front fog light (if equipped)
WARNING - Working on
the lights
Prior to working on the light, firmly
apply the parking brake, ensure
that the ignition switch is turned to
the LOCK position and turn off the
lights to avoid sudden movement
of the vehicle and burning your fin-
gers or receiving an electric shock.
CAUTION
Be sure to replace the burned-out
bulb with one of the same wattage
rating. Otherwise, it may cause
damage to the fuse or electric
wiring system.
CAUTION
If you don’t have necessary tools,
the correct bulbs and the expertise,
consult an authorized HYUNDAI
dealer. In many cases, it is difficult
to replace vehicle light bulbs
because other parts of the vehicle
must be removed before you can
get to the bulb. This is especially
true if you have to remove the head-
light assembly to
get to the bulb(s).
Removing/installingthe headlight
assembly can result in damage to
the vehicle.OBH071053
Page 397 of 432
763
Maintenance
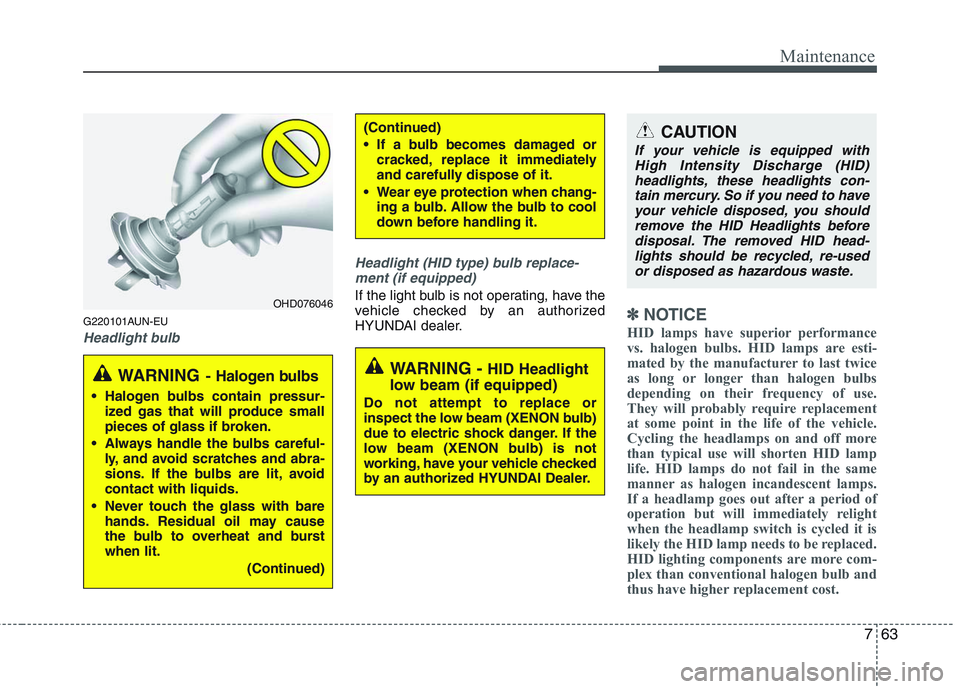
G220101AUN-EU
Headlight bulbHeadlight (HID type) bulb replace-
ment (if equipped)
If the light bulb is not operating, have the
vehicle checked by an authorized
HYUNDAI dealer.
✽ ✽
NOTICE
HID lamps have superior performance
vs. halogen bulbs. HID lamps are esti-
mated by the manufacturer to last twice
as long or longer than halogen bulbs
depending on their frequency of use.
They will probably require replacement
at some point in the life of the vehicle.
Cycling the headlamps on and off more
than typical use will shorten HID lamp
life. HID lamps do not fail in the same
manner as halogen incandescent lamps.
If a headlamp goes out after a period of
operation but will immediately relight
when the headlamp switch is cycled it is
likely the HID lamp needs to be replaced.
HID lighting components are more com-
plex than conventional halogen bulb and
thus have higher replacement cost.
OHD076046
WARNING- Halogen bulbs
Halogen bulbs contain pressur-
ized gas that will produce small
pieces of glass if broken.
Always handle the bulbs careful-
ly, and avoid scratches and abra-
sions. If the bulbs are lit, avoid
contact with liquids.
Never touch the glass with bare
hands. Residual oil may cause
the bulb to overheat and burst
when lit.
(Continued)
(Continued)
If a bulb becomes damaged or
cracked, replace it immediately
and carefully dispose of it.
Wear eye protection when chang-
ing a bulb. Allow the bulb to cool
down before handling it.
WARNING - HID Headlight
low beam (if equipped)
Do not attempt to replace or
inspect the low beam (XENON bulb)
due to electric shock danger. If the
low beam (XENON bulb) is not
working, have your vehicle checked
by an authorized HYUNDAI Dealer.
CAUTION
If your vehicle is equipped with
High Intensity Discharge (HID)
headlights, these headlights con-
tain mercury. So if you need to have
your vehicle disposed, you should
remove the HID Headlights before
disposal. The removed HID head-
lights should be recycled, re-used
or disposed as hazardous waste.
Page 398 of 432
Maintenance
64 7
G220102ABH-EU
Headlight (bulb type), front turn sig-
nal, position, side marker and fog
light bulbs (if equipped)
If the light bulb is not operating, have the
vehicle checked by an authorized
HYUNDAI dealer.
✽ ✽
NOTICE
Always have the headlight aiming adjust-
ed after an accident or the headlight
assembly is reinstalled at an authorized
HYUNDAI dealer.
G220200AEN
Side repeater light bulb replace-
ment (if equipped)
If the light bulb is not operating, have the
vehicle checked by an authorized
HYUNDAI dealer.
G220300ABH
Rear combination light bulb
replacement
(1) Back-up light
(2) Rear turn signal light
(3) Stop and tail light
(4) Rear side marker light
(5) Tail light
OBH078031OBH071032
Page 399 of 432
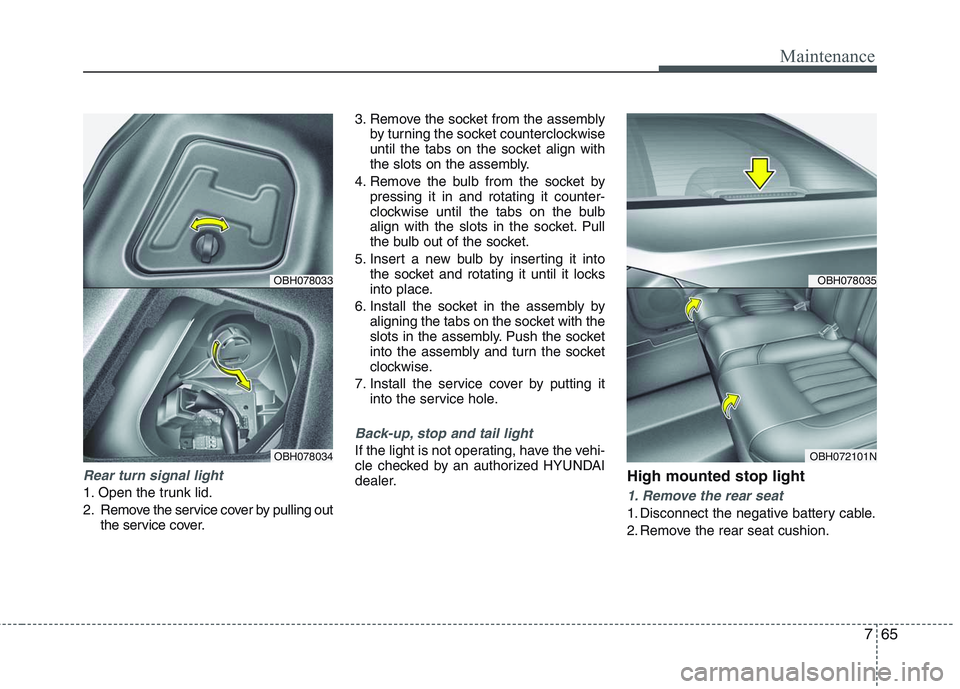
765
Maintenance
Rear turn signal light
1. Open the trunk lid.
2. Remove the service cover by pulling out
the service cover.3. Remove the socket from the assembly
by turning the socket counterclockwise
until the tabs on the socket align with
the slots on the assembly.
4. Remove the bulb from the socket by
pressing it in and rotating it counter-
clockwise until the tabs on the bulb
align with the slots in the socket. Pull
the bulb out of the socket.
5. Insert a new bulb by inserting it into
the socket and rotating it until it locks
into place.
6. Install the socket in the assembly by
aligning the tabs on the socket with the
slots in the assembly. Push the socket
into the assembly and turn the socket
clockwise.
7. Install the service cover by putting it
into the service hole.
Back-up, stop and tail light
If the light is not operating, have the vehi-
cle checked by an authorized HYUNDAI
dealer.
High mounted stop light
1. Remove the rear seat
1. Disconnect the negative battery cable.
2. Remove the rear seat cushion.
OBH078033
OBH078034
OBH078035
OBH072101N
Page 403 of 432
769
Maintenance
7. Loosen the mounting screws, then
remove the package tray trim.3. Replace the high mounted stop
light
1. Remove the high mounted stop lamp
after removing screws.
2. Install a new light.
4. Installation
Installation is the reverse of removal.
G220500AEN
License plate light bulb replace-
ment
1. Loosen the lens retaining screws with
a philips head screwdriver.
2. Remove the lens.
3. Remove the bulb by pulling it straight
out.
4. Install a new bulb.
5. Reinstall the lens securely with the
lens retaining screws.
OVI071136NOBH078036OVI071137N