Page 356 of 432

Maintenance
22 7
WASHER FLUID
G120100AUN
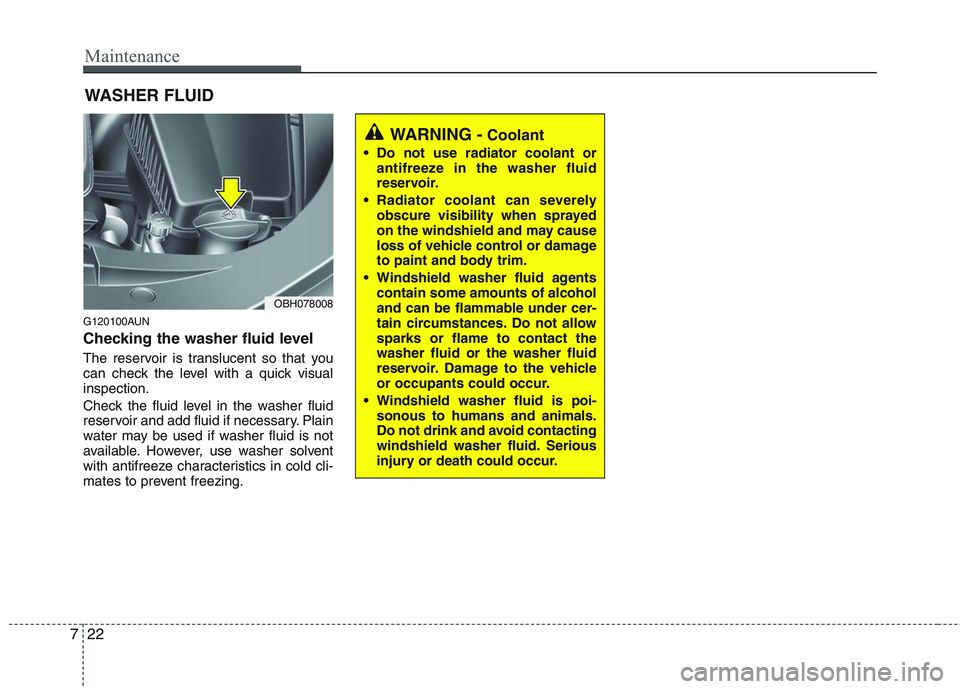
Checking the washer fluid level
The reservoir is translucent so that you
can check the level with a quick visual
inspection.
Check the fluid level in the washer fluid
reservoir and add fluid if necessary. Plain
water may be used if washer fluid is not
available. However, use washer solvent
with antifreeze characteristics in cold cli-
mates to prevent freezing.
WARNING -Coolant
Do not use radiator coolant or
antifreeze in the washer fluid
reservoir.
Radiator coolant can severely
obscure visibility when sprayed
on the windshield and may cause
loss of vehicle control or damage
to paint and body trim.
Windshield washer fluid agents
contain some amounts of alcohol
and can be flammable under cer-
tain circumstances. Do not allow
sparks or flame to contact the
washer fluid or the washer fluid
reservoir. Damage to the vehicle
or occupants could occur.
Windshield washer fluid is poi-
sonous to humans and animals.
Do not drink and avoid contacting
windshield washer fluid. Serious
injury or death could occur.
OBH078008
Page 357 of 432
723
Maintenance
G140100ABH
Checking the parking brake
Check whether the stroke is within spec-
ification when the parking brake pedal is
depressed with 44 lb (20 kg, 196 N) of
force. Also, the parking brake alone
should securely hold the vehicle on a fair-
ly steep grade. If the stroke is more or
less than specified, have the parking
brake adjusted by an authorized
HYUNDAI dealer.
Stroke : 3 notches (or 3 clicks)
G160100ABH-EU
Filter replacement
It must be replaced when necessary, and
should not be cleaned and reused.
Main air cleaner
1. Loosen the air cleaner cover attaching
clips and open the cover.
OBH071010
OBH071050
OBH058009
FOOT PARKING BRAKE
(IF EQUIPPED)AIR CLEANER
OBH071011
■ Main air cleaner
■ Chamber air cleaner (if equipped)
Page 358 of 432
Maintenance
24 7
2. Replace the air cleaner filter.
3. Lock the cover with the cover attaching
clips.Chamber air cleaner (if equipped)
1. Loosen the air cleaner cover attaching
clips and open the cover.2. Replace the air cleaner filter after
pulling up the locking tab (1).
3. Lock the cover with the cover attaching
clips.
OBH078013OBH071051OVI072052
Page 359 of 432
725
Maintenance
Replace the filter according to the
Maintenance Schedule.
If the vehicle is operated in extremely
dusty or sandy areas, replace the ele-
ment more often than the usual recom-
mended intervals. (Refer to
“Maintenance under severe usage condi-
tions” in this section.)
CAUTION
Do not drive with the air cleaner
removed; this will result in exces-
sive engine wear.
When removing the air cleaner fil-
ter, be careful that dust or dirt
does not enter the air intake, or
damage may result.
Use a HYUNDAI genuine part. Use
of non-genuine parts could dam-
age the air flow sensor.
Page 360 of 432
Maintenance
26 7
CLIMATE CONTROL AIR FILTER
G170100AEN
Filter inspection
The climate control air filter should be
replaced every 15,000 miles (24,000
km). If the vehicle is operated in severely
air-polluted cities or on dusty rough
roads for a long period, it should be
inspected more frequently and replaced
earlier. When you replace the climate
control air filter, replace it performing the
following procedure, and be careful to
avoid damaging other components.
G170200ABH
Filter replacement
1. With the glove box open, remove the
stoppers on both sides to allow the
glove box to hang freely on the hinges.2. Remove the climate control air filter
case pulling out both sides of the
cover.
OBH078016OBH078015
Page 361 of 432
727
Maintenance
3. Replace the climate control air filter.
4. Reassemble in the reverse order of
disassembly.
✽ ✽
NOTICE
When replacing the climate control air
filter install it properly. Otherwise, the
system may produce noise and the effec-
tiveness of the filter may be reduced.
OBH078017
Page 362 of 432

Maintenance
28 7
WIPER BLADES
G180100AUN
Blade inspection
✽
✽
NOTICE
Commercial hot waxes applied by auto-
matic car washes have been known to
make the windshield difficult to clean.
Contamination of either the windshield or
the wiper blades with foreign matter can
reduce the effectiveness of the wind-
shield wipers. Common sources of con-
tamination are insects, tree sap, and hot
wax treatments used by some commer-
cial car washes. If the blades are not wip-
ing properly, clean both the window and
the blades with a good cleaner or mild
detergent, and rinse thoroughly with
clean water.
G180200AUN
Blade replacement
When the wipers no longer clean ade-
quately, the blades may be worn or
cracked, and require replacement.
G180201ABH-EU
Front windshield wiper blade
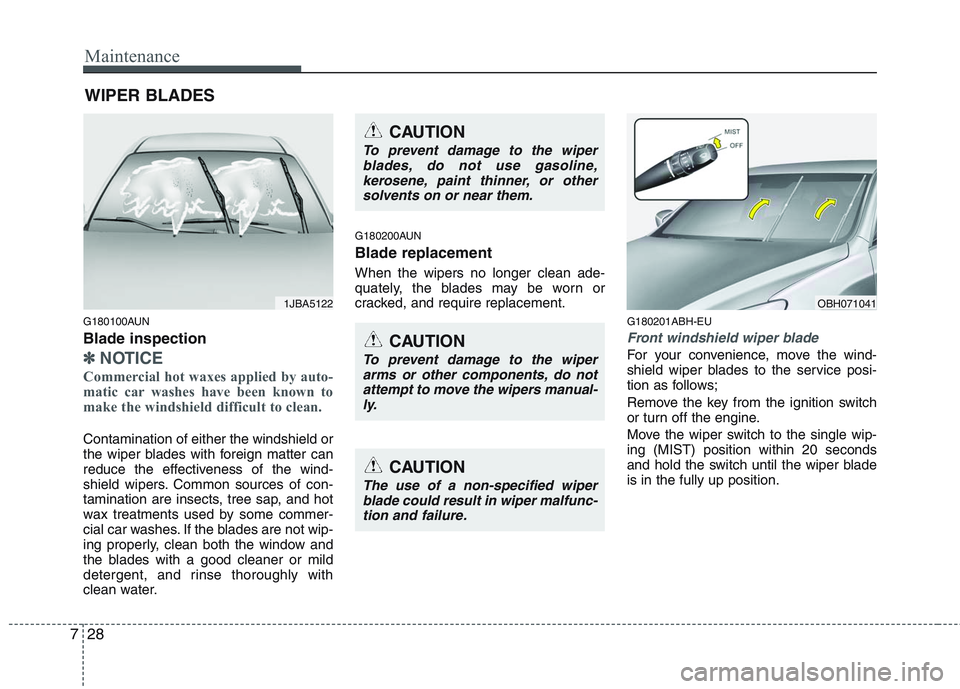
For your convenience, move the wind-
shield wiper blades to the service posi-
tion as follows;
Remove the key from the ignition switch
or turn off the engine.
Move the wiper switch to the single wip-
ing (MIST) position within 20 seconds
and hold the switch until the wiper blade
is in the fully up position.
1JBA5122
CAUTION
To prevent damage to the wiper
blades, do not use gasoline,
kerosene, paint thinner, or other
solvents on or near them.
CAUTION
To prevent damage to the wiper
arms or other components, do not
attempt to move the wipers manual-
ly.
CAUTION
The use of a non-specified wiper
blade could result in wiper malfunc-
tion and failure.
OBH071041
Page 363 of 432
729
Maintenance
Type A
1. Raise the wiper arm.2. Open the cover of the blade. Press the
clip behind the wiper arm and remove
the blade assembly downward.3. Install the new blade assembly in the
reverse order of removal.
4. Return the wiper arm on the wind-
shield.
5. Turn the ignition switch to the ON posi-
tion.
6. Move the wiper switch to any position
and then to the OFF position.
OHM078059OHM078060
CAUTION
Do not allow the wiper arm to fall
against the windshield, since it may
chip or crack the windshield.
OHG070043