Page 124 of 479

435
Features of your vehicle
Opening the fuel filler lid
The fuel filler lid must be opened
from inside the vehicle by pressing
the fuel filler lid open button located
on the driver’s door.
✽NOTICE
If the fuel filler lid does not open
because ice has formed around it,
tap lightly or push on the lid to break
the ice and release the lid. Do not pry
on the lid. If necessary, spray around
the lid with an approved de-icer fluid
(do not use radiator anti-freeze) or
move the vehicle to a warm place
and allow the ice to melt.
1. Stop the engine.
2. Push the fuel filler lid opener but-
ton, then the fuel filler lid slowly
open (1).
3. To remove the cap, turn the fuel
tank cap (2) counterclockwise.
4. Refuel as needed.
Closing the fuel filler lid
1. To install the cap, turn it clockwise
until it “clicks”. This indicates that
the cap is securely tightened.
2. Close the fuel filler lid and push it
lightly and make sure that it is
securely closed.
FUEL FILLER LID
OVI049024
OVI043025N
WARNING - Refueling
• If pressurized fuel sprays out,
it can cover your clothes or
skin and thus subject you to
the risk of fire and burns.
Always remove the fuel cap
carefully and slowly. If the cap
is venting fuel or if you hear a
hissing sound, wait until the
condition stops before com-
pletely removing the cap.
• Do not "top off" after the noz-
zle automatically shuts off
when refueling.
• Always check that the fuel cap
is installed securely to pre-
vent fuel spillage in the event
of an accident.
Page 134 of 479

445
Features of your vehicle
Tilt/Telescopic steering
Tilt/Telescopic steering allows you to
adjust the steering wheel before you
drive. You can also raise it to give
your legs more room when you exit
and enter the vehicle.
The steering wheel should be posi-
tioned so that it is comfortable for
you to drive, while permitting you to
see the instrument panel warning
lights and gauges.
Electric type
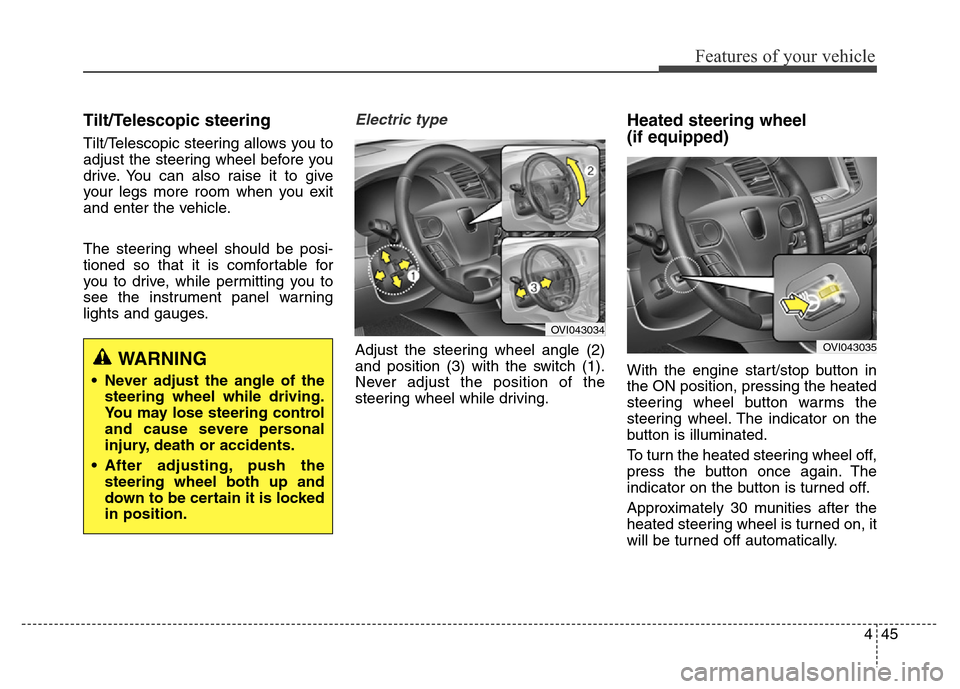
Adjust the steering wheel angle (2)
and position (3) with the switch (1).
Never adjust the position of the
steering wheel while driving.
Heated steering wheel
(if equipped)
With the engine start/stop button in
the ON position, pressing the heated
steering wheel button warms the
steering wheel. The indicator on the
button is illuminated.
To turn the heated steering wheel off,
press the button once again. The
indicator on the button is turned off.
Approximately 30 munities after the
heated steering wheel is turned on, it
will be turned off automatically.WARNING
• Never adjust the angle of the
steering wheel while driving.
You may lose steering control
and cause severe personal
injury, death or accidents.
• After adjusting, push the
steering wheel both up and
down to be certain it is locked
in position.
OVI043034
OVI043035
Page 136 of 479
447
Features of your vehicle
Inside rearview mirror
Adjust the rearview mirror so that the
center view through the rear window
is seen. Make this adjustment before
you start driving.
Electric chromic mirror (ECM)
with compass
1. On/Off button
2. Status Indicator
3. Rear Light Sensor
4. Display Window (if equipped)
MIRRORS
WARNING - Rear visibility
Do not place objects in the rear
seat which would interfere with
your vision through the rear
window.
WARNING
Do not adjust the rearview mir-
ror while the vehicle is moving.
This could result in loss of con-
trol, and an accident which
could cause death, serious
injury or property damage.
WARNING
Do not modify the inside mirror
and do not install a wide mirror.
It could result in injury, during
an accident or deployment of
the air bag.
OVI049037L
Page 145 of 479
Features of your vehicle
56 4
Instrument cluster control
Adjusting Instrument Cluster
Illumination
The brightness of the instrument
panel illumination can be adjusted by
pressing the illumination control but-
tons (“+” or “-”) when the Engine
Start/Stop button is ON or the tale
lights are turned on.• The brightness has 20 levels : 1
(MIN) ~ 20 (MAX)
• If you hold the illumination control
button (“+” or “-”), the brightness
will be changed continuously.
• If the brightness reaches to the
maximum or minimum level, an
alarm will sound.
OVI043051OVIEDI3903
WARNING
Never adjust the instrument
cluster while driving. This could
result in loss of control and lead
to an accident that may cause
death, serious injury, or proper-
ty damage.
Page 149 of 479
Features of your vehicle
60 4
Fuel Gauge
This gauge indicates the approxi-
mate amount of fuel remaining in the
fuel tank.
✽NOTICE
• The fuel tank capacity is given in
chapter 8.
• The fuel gauge is supplemented by
a low fuel warning light, which
will illuminate when the fuel tank
is nearly empty.
• On inclines or curves, the fuel
gauge pointer may fluctuate or the
low fuel warning light may come
on earlier than usual due to the
movement of fuel in the tank.
WARNING
Never remove the radiator cap
when the engine is hot. The
engine coolant is under pres-
sure and could severely burn.
Wait until the engine is cool
before adding coolant to the
reservoir.
CAUTION
If the gauge pointer moves
beyond the normal range area
toward the “H” position, it indi-
cates overheating that may
damage the engine.
Do not continue driving with an
overheated engine. If your vehi-
cle overheats, refer to “If the
Engine Overheats” in chapter 6.
OVIDDI2907
■Type A
■ Type BOVIDDI2915
Page 150 of 479

461
Features of your vehicle
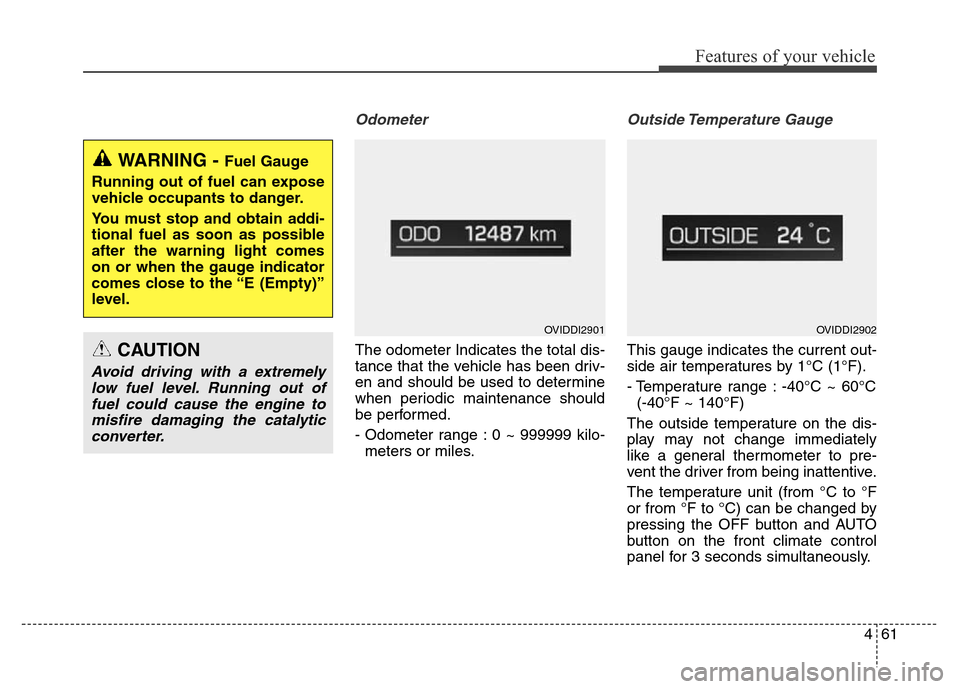
Odometer
The odometer Indicates the total dis-
tance that the vehicle has been driv-
en and should be used to determine
when periodic maintenance should
be performed.
- Odometer range : 0 ~ 999999 kilo-
meters or miles.
Outside Temperature Gauge
This gauge indicates the current out-
side air temperatures by 1°C (1°F).
- Temperature range : -40°C ~ 60°C
(-40°F ~ 140°F)
The outside temperature on the dis-
play may not change immediately
like a general thermometer to pre-
vent the driver from being inattentive.
The temperature unit (from °C to °F
or from °F to °C) can be changed by
pressing the OFF button and AUTO
button on the front climate control
panel for 3 seconds simultaneously.
WARNING - Fuel Gauge
Running out of fuel can expose
vehicle occupants to danger.
You must stop and obtain addi-
tional fuel as soon as possible
after the warning light comes
on or when the gauge indicator
comes close to the “E (Empty)”
level.
CAUTION
Avoid driving with a extremely
low fuel level. Running out of
fuel could cause the engine to
misfire damaging the catalytic
converter.
OVIDDI2901OVIDDI2902
Page 166 of 479
477
Features of your vehicle
Press start button with smart key
• This warning message illuminates
if you press the Engine Start/Stop
Button while the warning message
“Key not detected” is illuminating.
• At this time, the immobilizer indica-
tor light blinks.
Low Key Battery
• This warning message illuminates
if the battery of the smart key is
discharged when the Engine
Start/Stop Button changes to the
OFF position.
Key not detected
• This warning message illuminates
if the smart key is not detected
when you press the Engine
Start/Stop Button.
OVIEDI3929OVIEDI3930OVIEDI3931
Page 171 of 479
Features of your vehicle
82 4
Check Power System
• This warning message illuminates
if the battery voltage is abnormally
low, or the battery has poor per-
formance. We recommend that the
vehicle be inspected by an author-
ized HYUNDAI dealer.
Low Washer Fluid
• This warning message illuminates
on the service reminder mode if
the washer fluid level in the reser-
voir is nearly empty.
• It means that you should refill the
washer fluid.
Check BSD System (if equipped)
• This warning message illuminates
if there is a malfunction with the
Blind Spot Detection (BSD) sys-
tem. And the light on the BSD
switch will turn off and the BSD
system will be automatically deac-
tivated. We recommend that the
vehicle be inspected by an author-
ized HYUNDAI dealer.
❈For more details, refer to "Blind
Spot Detection (BSD) System" in
chapter 5.
OVIEDI3945OVIEDI3946OVIEDI3947