Page 197 of 479
Features of your vehicle
108 4
• The parking assist button turns on
automatically and activates the
parking assist system when you
shift the gear to the R (Reverse)
position. It will turn off automatical-
ly when you shift out of R (Reverse)
and drive above 20 km/h.
• The sensing distance while backing
up is approximately 120 cm when
you are driving less than 10 km/h.
• The sensing distance while moving
forward is approximately 100 cm
when you are driving less than 10
km/h.
• When more than two objects are
sensed at the same time, the clos-
est one will be recognized first.
✽NOTICE
It may not operate if it’s distance
from the object is already less than
approximately 25 cm when the sys-
tem is ON.
✽NOTICE
The indicator may differ from the illustration as objects or sensors status.
If the indicator blinks, we recommend that the system be checked by an
authorized HYUNDAI dealer.
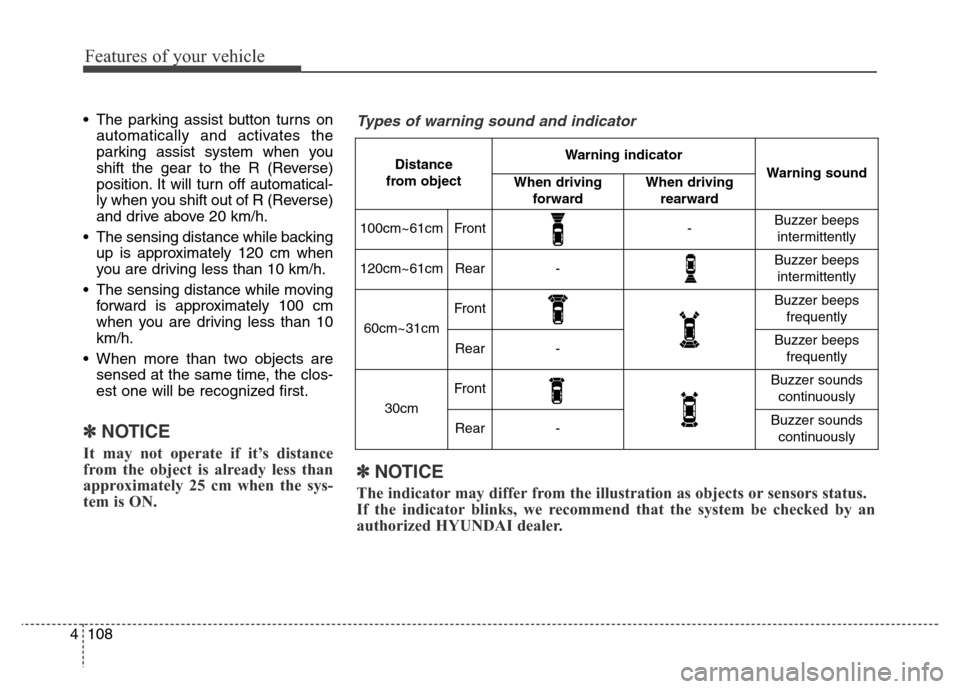
Types of warning sound and indicator
Distance
from object Warning indicator
Warning soundWhen driving
forwardWhen driving
rearward
100cm~61cmFront-Buzzer beeps
intermittently
120cm~61cmRear-Buzzer beeps
intermittently
60cm~31cm
FrontBuzzer beeps
frequently
Rear-Buzzer beeps
frequently
30cm
FrontBuzzer sounds
continuously
Rear-Buzzer sounds
continuously
Page 198 of 479
4109
Features of your vehicle
Non-operational conditions of
parking assist system
Parking assist system may not
operate normally when:
1. Moisture is frozen to the sensor. (It
will operate normally when mois-
ture melts.)
2. Sensor is covered with foreign
matter, such as snow or water, or
the sensor cover is blocked. (It will
operate normally when the materi-
al is removed or the sensor is no
longer blocked.)
3. Sensor is stained with foreign mat-
ter such as snow or water.
(Sensing range will return to nor-
mal when removed.)
4.The parking assist button is off.
There is a possibility of parking
assist system malfunction when:
1. Driving on uneven road surfaces
such as unpaved roads, gravel,
bumps, or gradient.
2. Objects generating excessive noise
such as vehicle horns, loud motor-
cycle engines, or truck air brakes
can interfere with the sensor.
3. Heavy rain or water spray.
4. Wireless transmitters or mobile
phones present near the sensor.
5. Sensor is covered with snow.
Detecting range may decrease
when:
1. Outside air temperature is
extremely hot or cold.
2. Undetectable objects smaller than
1 m and narrower than 14 cm in
diameter.
The following objects may not be
recognized by the sensor:
1. Sharp or slim objects such as
ropes, chains or small poles.
2. Objects, which tend to absorb sen-
sor frequency such as clothes,
spongy material or snow.
Page 199 of 479
Features of your vehicle
110 4
✽NOTICE
1. The warning may not sound
sequentially depending on the
speed and shapes of the objects
detected.
2. The parking assist system may
malfunction if the vehicle bumper
height or sensor installation has
been modified. Any non-factory
installed equipment or accessories
may also interfere with the sensor
performance.
3. Sensor may not recognize objects
less than 30 cm from the sensor,
or it may sense an incorrect dis-
tance. Use with caution.
4. When the sensor is frozen or
stained with snow or water, the
sensor may be inoperative until
the stains are removed using a
soft cloth.
5. Do not push, scratch or strike the
sensor with any hard objects that
could damage the surface of the
sensor. Sensor damage could
occur.
✽NOTICE
This system can only sense objects
within the range and location of the
sensors, it can not detect objects in
other areas where sensors are not
installed. Also, small or slim objects,
or objects located between sensors
may not be detected.
Always visually check in front and
behind the vehicle when driving.
Be sure to inform any drivers in the
vehicle that may be unfamiliar with
the system regarding the systems
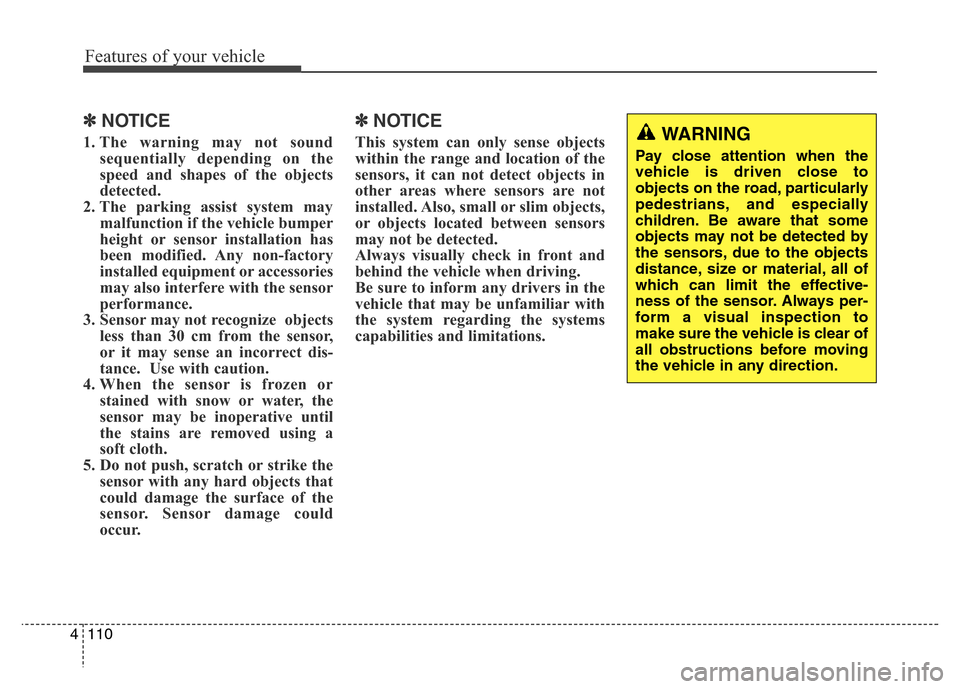
capabilities and limitations.WARNING
Pay close attention when the
vehicle is driven close to
objects on the road, particularly
pedestrians, and especially
children. Be aware that some
objects may not be detected by
the sensors, due to the objects
distance, size or material, all of
which can limit the effective-
ness of the sensor. Always per-
form a visual inspection to
make sure the vehicle is clear of
all obstructions before moving
the vehicle in any direction.
Page 207 of 479
Features of your vehicle
118 4
Lighting control
To operate the lights, turn the knob at
the end of the control lever to one of
the following positions:
(1) OFF position
(2) Auto light / AFLS position
(3) Position lamp position
(4) Headlamp position
Auto light/AFLS position
When the light switch is in the AUTO
light position, the position lamp and
headlamp will be turned ON or OFF
automatically depending on the
amount of light outside the vehicle.
If your vehicle is equipped with the
adaptive front lighting system
(AFLS), it will also operate when the
headlamp is ON.
OVI043092
ODM042244
OVI043501
■Type A
■Type B
CAUTION
• Never place anything near the
sensor, this will ensure better
auto-light system control.
• Don’t clean the sensor using a
window cleaner, the cleaner
may leave a light film which
could interfere with sensor
operation.
• If your vehicle has window tint
or other types of coating on
the front windshield, the Auto
light system may not work
properly.
Page 213 of 479

Features of your vehicle
124 4
Windshield wipers
Operates as follows when the engine
start/stop button is turned ON.MIST / V : For a single wiping cycle,
push the lever upward
and release it with the
lever in the OFF position.
The wipers will operate
continuously if the lever is
pushed upward and held.
OFF / O : Wiper is not in operation
AUTO : Auto control wipe
LO / 1 : Normal wiper speed
HI / 2 : Fast wiper speed
✽NOTICE
If there is heavy accumulation of
snow or ice on the windshield,
defrost the windshield for about 10
minutes, or until the snow and/or ice
is removed before using the wind-
shield wipers to ensure proper oper-
ation.
If you do not remove the snow
and/or ice before using the wiper
and washer, it may damage the
wiper and washer system.
Auto control
The rain sensor located on the upper
end of the windshield glass senses
the amount of rainfall and controls
the wiping cycle for the proper inter-
val. The more it rains, the faster the
wiper operates. When the rain stops,
the wiper stops.
To vary the speed setting, turn the
speed control knob (B).
If the wiper switch is set in AUTO
mode when the engine start/stop
button is ON, the wiper will operate
once to perform a self-check of the
system. Set the wiper to OFF (O)
position when the wiper is not in use.
WIPERS AND WASHERS
OVI043500L
OVI043502L
■Type A
■Type B
Page 214 of 479

4125
Features of your vehicle
Windshield washers
In the OFF (O) position, pull the lever
gently toward you to spray washer
fluid on the windshield and to run the
wipers 1-3 cycles.
Use this function when the wind-
shield is dirty.
CAUTION
When the ignition switch is ON
and the windshield wiper switch
is placed in the AUTO mode, use
caution in the following situa-
tions to avoid any injury to the
hands or other parts of the body:
• Do not touch the upper end of
the windshield glass facing
the rain sensor.
• Do not wipe the upper end of
the windshield glass with a
damp or wet cloth.
• Do not put pressure on the
windshield glass.
CAUTION
When washing the vehicle, set
the wiper switch in the OFF
position to stop the auto wiper
operation.
The wiper may operate and be
damaged if the switch is set in
the AUTO mode while washing
the vehicle.
Do not remove the sensor cover
located on the upper end of the
passenger side windshield
glass. Damage to system parts
could occur and may not be cov-
ered by your vehicle warranty.
When starting the vehicle in
winter, set the wiper switch in
the OFF position. Otherwise,
wipers may operate and ice may
damage the windshield wiper
blades. Always remove all snow
and ice and defrost the wind-
shield properly prior to operat-
ing the windshield wipers.
OVI043099
OVI043099L
■Type A
■Type B
Page 224 of 479
4135
Features of your vehicle
✽NOTICE
Never place anything near the sensor
to ensure better control of the heating
and cooling system.
Manual heating and air condi-
tioning
The heating and cooling system can be
controlled manually by pushing buttons
other than the AUTO button. In this
case, the system works sequentially
according to the order of buttons select-
ed. When pressing any button except
the AUTO button while using automatic
operation, the functions not selected
will be controlled automatically.
1. Start the engine.
2. Set the mode to the desired position.
For improving the effectiveness of
heating and cooling;
- Heating:
- Cooling:
3. Set the temperature control to the
desired position.
4. Set the air intake control to the
outside (fresh) air position.
5. Set the fan speed control to the
desired speed.
6. If air conditioning is desired, turn
the air conditioning system on.
Press the AUTO button in order to
convert to full automatic control of
the system.
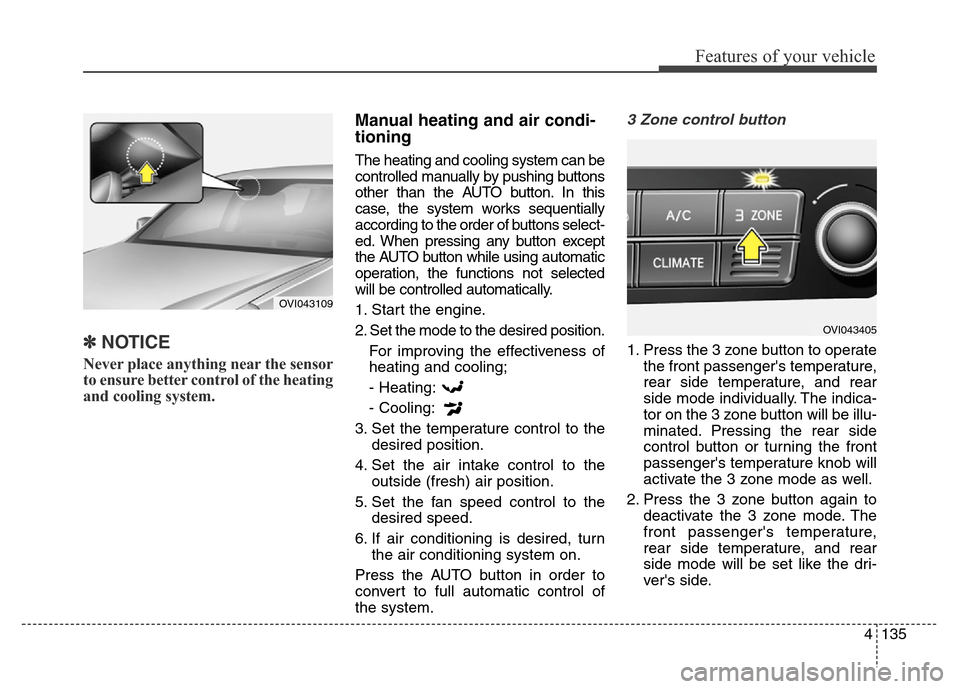
3 Zone control button
1. Press the 3 zone button to operate
the front passenger's temperature,
rear side temperature, and rear
side mode individually. The indica-
tor on the 3 zone button will be illu-
minated. Pressing the rear side
control button or turning the front
passenger's temperature knob will
activate the 3 zone mode as well.
2. Press the 3 zone button again to
deactivate the 3 zone mode. The
front passenger's temperature,
rear side temperature, and rear
side mode will be set like the dri-
ver's side.
OVI043109
OVI043405
Page 240 of 479
4151
Features of your vehicle
If your vehicle is equipped with the
auto defogging system, it is automat-
ically activated when the conditions
are met. However, if you would like to
cancel the auto defogging system,
press the front defroster button 4
times within 2 seconds while press-
ing the AUTO button. The front
defroster indicator will blink 3 times
to notify you that the system is can-
celled. To use the auto defogging
system again, follow the procedures
mentioned above.
If the battery has been disconnected
or discharged, it resets to the auto
defogging status.✽NOTICE
• If the A/C off is manually selected
while the auto defogging system is
on, the auto defogging indicator
will blink 3 times to give notice
that manual operation is canceled.
• If the air quality system (AQS) is
selected while the auto defogging
system is operating at the step 1
outside air position, the recirculat-
ed air position may operate when
the outside air is polluted.
CAUTION
Do not remove the sensor cover
located on the upper end of the
passenger side windshield
glass. Damage to system parts
could occur and may not be cov-
ered by your vehicle warranty.