2013 Hyundai Azera PARKING
[x] Cancel search: PARKINGPage 11 of 403
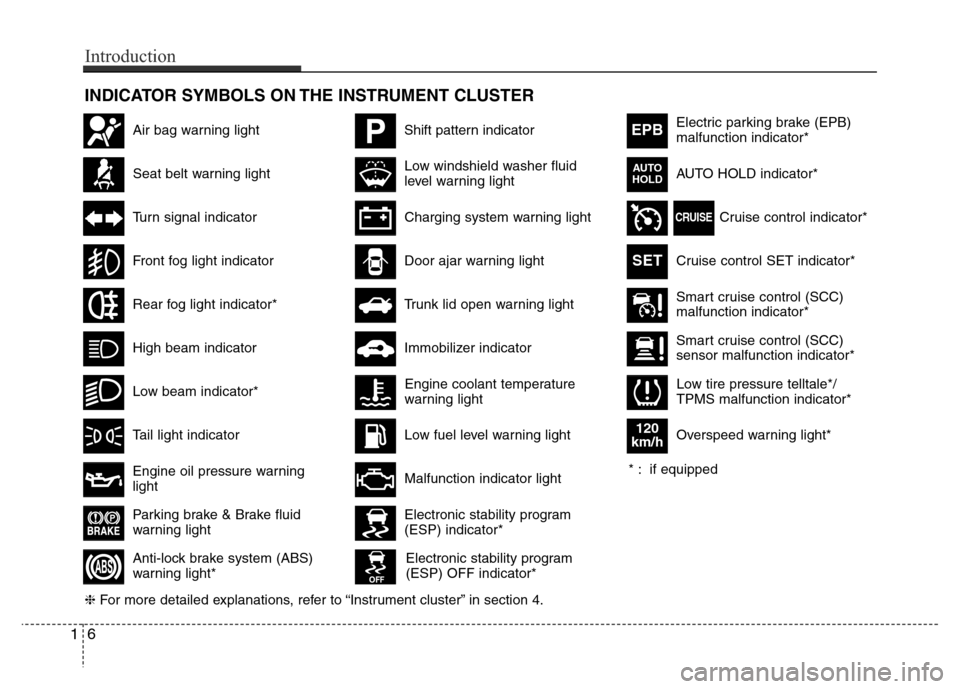
INDICATOR SYMBOLS ON THE INSTRUMENT CLUSTER
Seat belt warning light
High beam indicator
Turn signal indicator
Anti-lock brake system (ABS)
warning light*
Parking brake & Brake fluid
warning light
Engine oil pressure warning
light
Electronic stability program
(ESP) indicator*
Electronic stability program
(ESP) OFF indicator*
Malfunction indicator light
Smart cruise control (SCC)
malfunction indicator*
Smart cruise control (SCC)
sensor malfunction indicator*
Cruise control indicator*
Cruise control SET indicator*
Immobilizer indicator
Low fuel level warning light
❈For more detailed explanations, refer to “Instrument cluster” in section 4.
Charging system warning light
Tail light indicator
Front fog light indicator
Low windshield washer fluid
level warning lightElectric parking brake (EPB)
malfunction indicator*
AUTO HOLD indicator*
EPB
CRUISE
AUTO
HOLD
Engine coolant temperature
warning light
Door ajar warning light
Low tire pressure telltale*/
TPMS malfunction indicator*
PShift pattern indicatorAir bag warning light
Rear fog light indicator*
Overspeed warning light*
120
km/h
SET
* : if equipped
16
Introduction
Low beam indicator*
Trunk lid open warning light
Page 14 of 403
23
Your vehicle at a glance
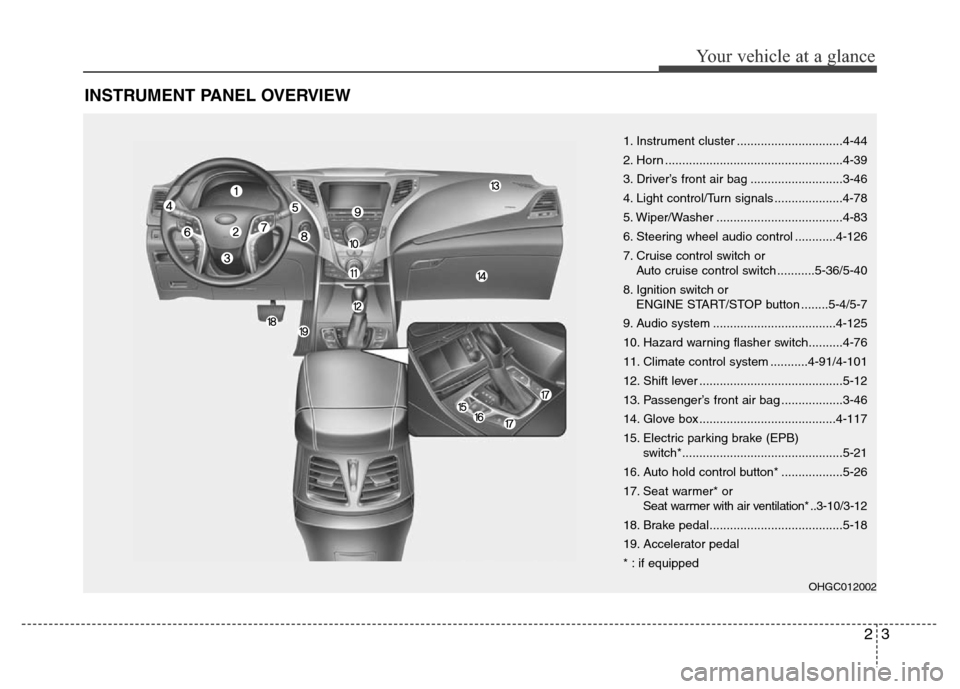
INSTRUMENT PANEL OVERVIEW
1. Instrument cluster ...............................4-44
2. Horn ....................................................4-39
3. Driver’s front air bag ...........................3-46
4. Light control/Turn signals ....................4-78
5. Wiper/Washer .....................................4-83
6. Steering wheel audio control ............4-126
7. Cruise control switch or
Auto cruise control switch ...........5-36/5-40
8. Ignition switch or
ENGINE START/STOP button ........5-4/5-7
9. Audio system ....................................4-125
10. Hazard warning flasher switch..........4-76
11. Climate control system ...........4-91/4-101
12. Shift lever ..........................................5-12
13. Passenger’s front air bag ..................3-46
14. Glove box ........................................4-117
15. Electric parking brake (EPB)
switch*...............................................5-21
16. Auto hold control button* ..................5-26
17. Seat warmer* or
Seat warmer with air ventilation* ..3-10/3-12
18. Brake pedal.......................................5-18
19. Accelerator pedal
* : if equipped
OHGC012002
Page 32 of 403
317
Safety features of your vehicle
5. To use the rear seat, lift and pull the
seatback backward. Push back the
seatback firmly until it clicks into place.
Make sure the seatback is locked in
place. When you return the seatback
to its upright position, always be sure it
has locked into position by pushing on
the top of the seatback.
6. Return the rear seat belt to the proper
position.
CAUTION- Rear seat belts
When returning the rear seatbacks
to the upright position, remember
to return the rear shoulder belts to
their proper position. Routing the
seat belt webbing through the rear
seat belt guides will help keep the
belts from being trapped behind or
under the seats.
WARNING- Cargo
Cargo should always be secured to
prevent it from being thrown about
the vehicle in a collision and caus-
ing injury to the vehicle occupants.
Special care of objects should be
taken when placing them in the rear
seats, since those may hit the front
seat occupants in a frontal colli-
sion.
WARNING - Cargo loading
Make sure the engine is off, the
automatic transaxle is in P (Park)
and the parking brake is securely
applied whenever loading or
unloading cargo. Failure to take
these steps may allow the vehicle
to move if the shift lever is inadver-
tently moved to another position.
WARNING - Uprighting
seat
When you return the seatback to its
upright position, hold the seatback
and return it slowly. If the seatback
is returned without holding it, the
back of the seat could spring for-
ward resulting in injury caused by
being struck by the seatback.
WARNING
When you return the rear seatback
to its upright position after being
folded down:
Be careful not to damage the seat
belt webbing or buckle. Do not
allow the seat belt webbing or
buckle to get caught or pinched in
the rear seat. Ensure that the seat-
back is completely locked into its
upright position by pushing on the
top of the seatback. Otherwise, in
an accident or sudden stop, the
seat could fold down and allow
cargo to enter the passenger com-
partment, which could result in
serious injury or death.
Page 77 of 403
4
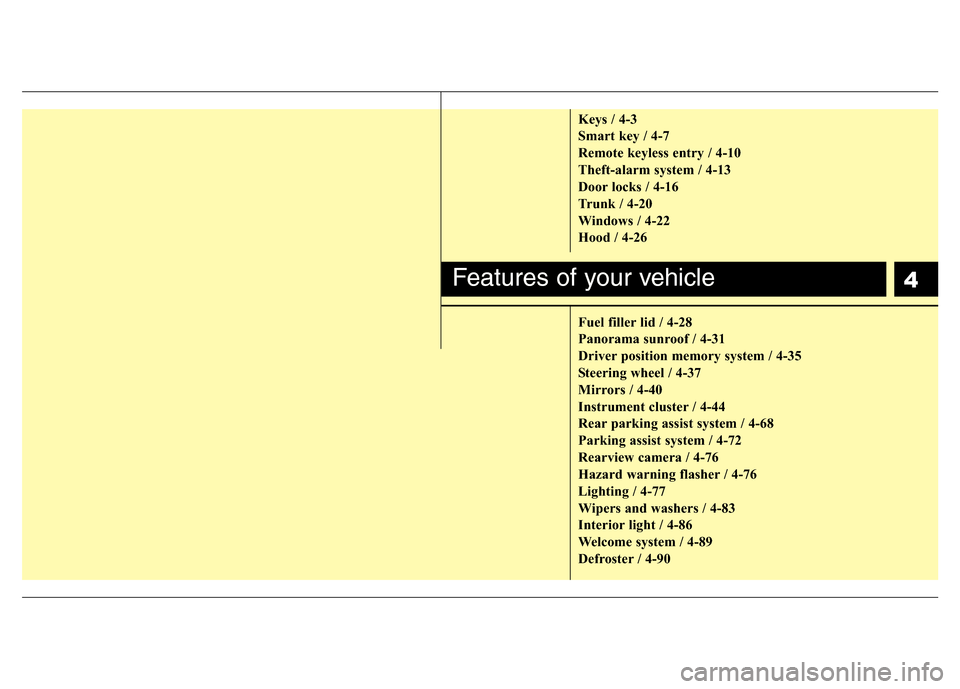
Keys / 4-3
Smart key / 4-7
Remote keyless entry / 4-10
Theft-alarm system / 4-13
Door locks / 4-16
Trunk / 4-20
Windows / 4-22
Hood / 4-26
Fuel filler lid / 4-28
Panorama sunroof / 4-31
Driver position memory system / 4-35
Steering wheel / 4-37
Mirrors / 4-40
Instrument cluster / 4-44
Rear parking assist system / 4-68
Parking assist system / 4-72
Rearview camera / 4-76
Hazard warning flasher / 4-76
Lighting / 4-77
Wipers and washers / 4-83
Interior light / 4-86
Welcome system / 4-89
Defroster / 4-90
Features of your vehicle
Page 80 of 403
Features of your vehicle
4 4
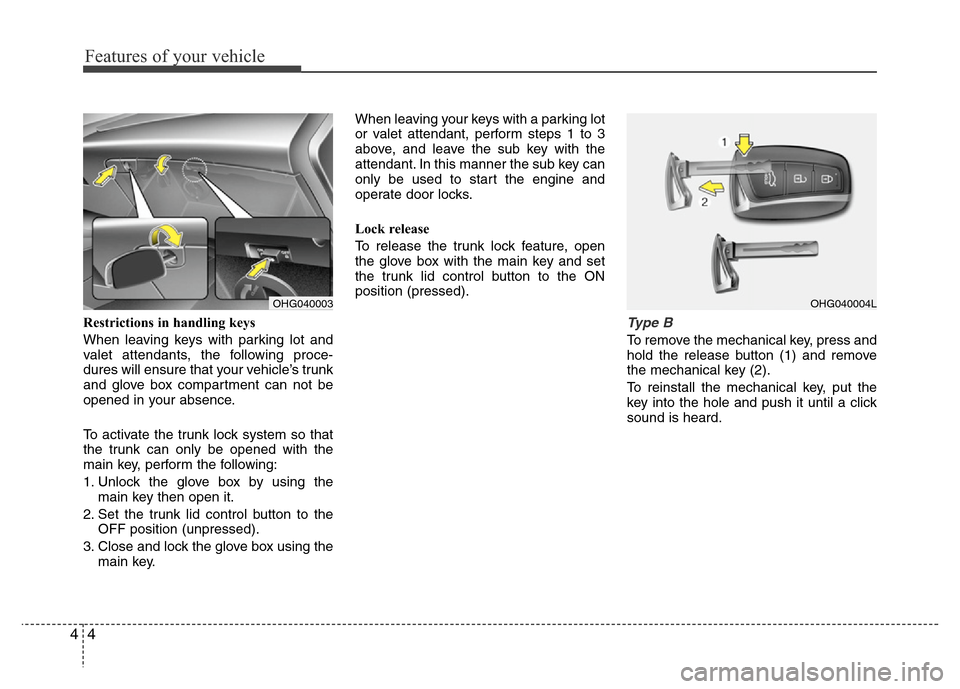
Restrictions in handling keys
When leaving keys with parking lot and
valet attendants, the following proce-
dures will ensure that your vehicle’s trunk
and glove box compartment can not be
opened in your absence.
To activate the trunk lock system so that
the trunk can only be opened with the
main key, perform the following:
1. Unlock the glove box by using the
main key then open it.
2. Set the trunk lid control button to the
OFF position (unpressed).
3. Close and lock the glove box using the
main key.When leaving your keys with a parking lot
or valet attendant, perform steps 1 to 3
above, and leave the sub key with the
attendant. In this manner the sub key can
only be used to start the engine and
operate door locks.
Lock release
To release the trunk lock feature, open
the glove box with the main key and set
the trunk lid control button to the ON
position (pressed).Type B
To remove the mechanical key, press and
hold the release button (1) and remove
the mechanical key (2).
To reinstall the mechanical key, put the
key into the hole and push it until a click
sound is heard.
OHG040003OHG040004L
Page 81 of 403
45
Features of your vehicle
Restrictions in handling keys
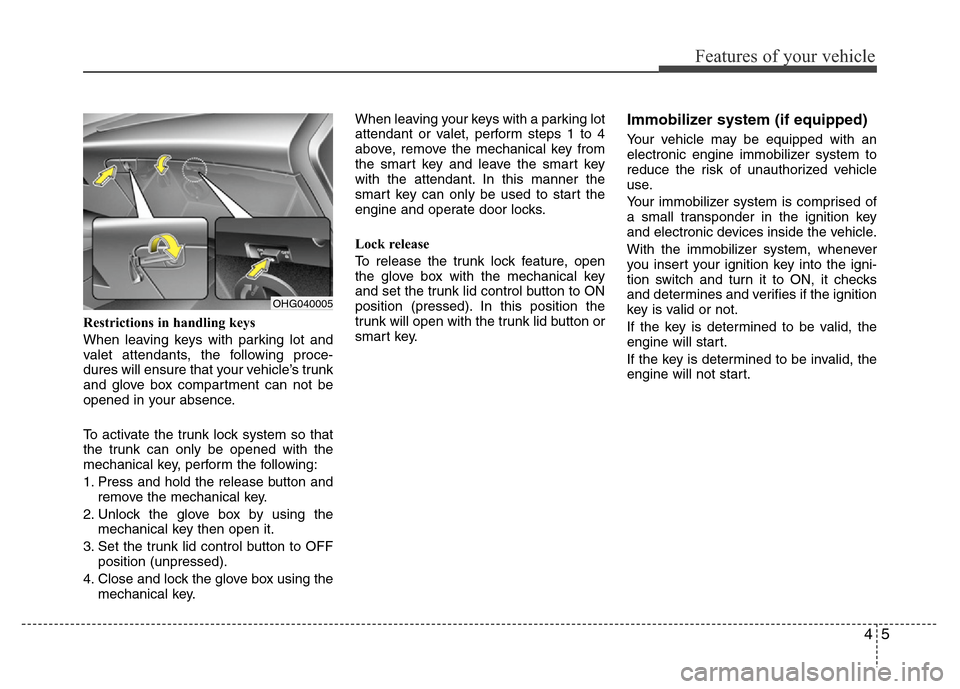
When leaving keys with parking lot and
valet attendants, the following proce-
dures will ensure that your vehicle’s trunk
and glove box compartment can not be
opened in your absence.
To activate the trunk lock system so that
the trunk can only be opened with the
mechanical key, perform the following:
1.
Press and hold the release button and
remove the mechanical key.
2. Unlock the glove box by using the
mechanical key then open it.
3. Set the trunk lid control button to OFF
position (unpressed).
4. Close and lock the glove box using the
mechanical key.When leaving your keys with a parking lot
attendant or valet, perform steps 1 to 4
above, remove the mechanical key from
the smart key and leave the smart key
with the attendant. In this manner the
smart key can only be used to start the
engine and operate door locks.
Lock release
To release the trunk lock feature, open
the glove box with the mechanical key
and set the trunk lid control button to ON
position (pressed). In this position the
trunk will open with the trunk lid button or
smart key.
Immobilizer system (if equipped)
Your vehicle may be equipped with an
electronic engine immobilizer system to
reduce the risk of unauthorized vehicle
use.
Your immobilizer system is comprised of
a small transponder in the ignition key
and electronic devices inside the vehicle.
With the immobilizer system, whenever
you insert your ignition key into the igni-
tion switch and turn it to ON, it checks
and determines and verifies if the ignition
key is valid or not.
If the key is determined to be valid, the
engine will start.
If the key is determined to be invalid, the
engine will not start.
OHG040005
Page 94 of 403
Features of your vehicle
18 4
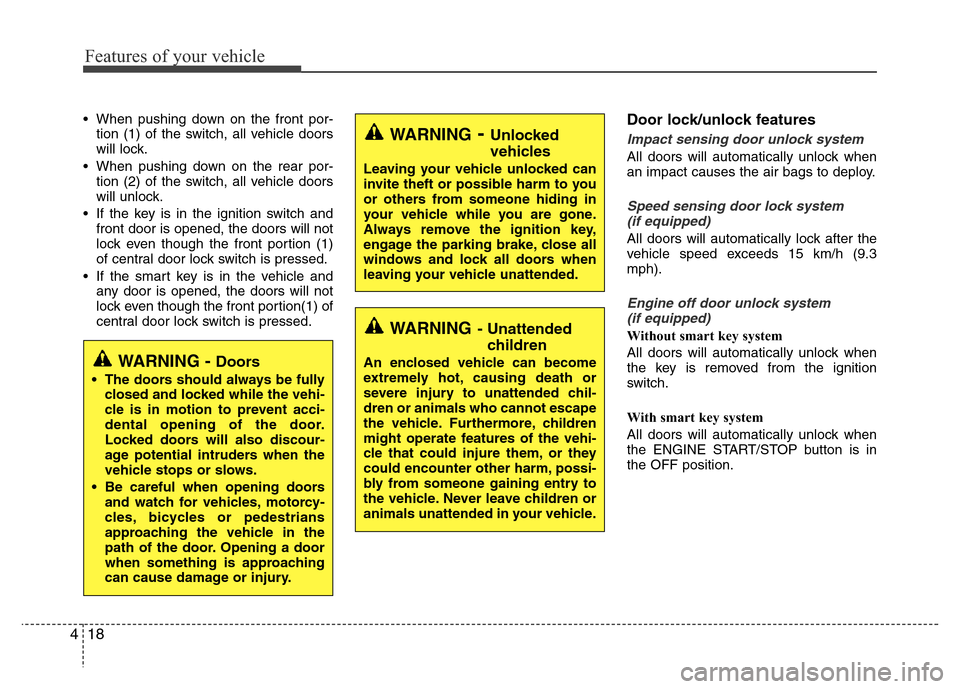
• When pushing down on the front por-
tion (1) of the switch, all vehicle doors
will lock.
• When pushing down on the rear por-
tion (2) of the switch, all vehicle doors
will unlock.
• If the key is in the ignition switch and
front door is opened, the doors will not
lock even though the front portion (1)
of central door lock switch is pressed.
• If the smart key is in the vehicle and
any door is opened, the doors will not
lock even though the front portion(1) of
central door lock switch is pressed.Door lock/unlock features
Impact sensing door unlock system
All doors will automatically unlock when
an impact causes the air bags to deploy.
Speed sensing door lock system
(if equipped)
All doors will automatically lock after the
vehicle speed exceeds 15 km/h (9.3
mph).
Engine off door unlock system
(if equipped)
Without smart key system
All doors will automatically unlock when
the key is removed from the ignition
switch.
With smart key system
All doors will automatically unlock when
the ENGINE START/STOP button is in
the OFF position.
WARNING- Unlocked
vehicles
Leaving your vehicle unlocked can
invite theft or possible harm to you
or others from someone hiding in
your vehicle while you are gone.
Always remove the ignition key,
engage the parking brake, close all
windows and lock all doors when
leaving your vehicle unattended.
WARNING- Unattended
children
An enclosed vehicle can become
extremely hot, causing death or
severe injury to unattended chil-
dren or animals who cannot escape
the vehicle. Furthermore, children
might operate features of the vehi-
cle that could injure them, or they
could encounter other harm, possi-
bly from someone gaining entry to
the vehicle. Never leave children or
animals unattended in your vehicle.WARNING - Doors
• The doors should always be fully
closed and locked while the vehi-
cle is in motion to prevent acci-
dental opening of the door.
Locked doors will also discour-
age potential intruders when the
vehicle stops or slows.
• Be careful when opening doors
and watch for vehicles, motorcy-
cles, bicycles or pedestrians
approaching the vehicle in the
path of the door. Opening a door
when something is approaching
can cause damage or injury.
Page 102 of 403
Features of your vehicle
26 4
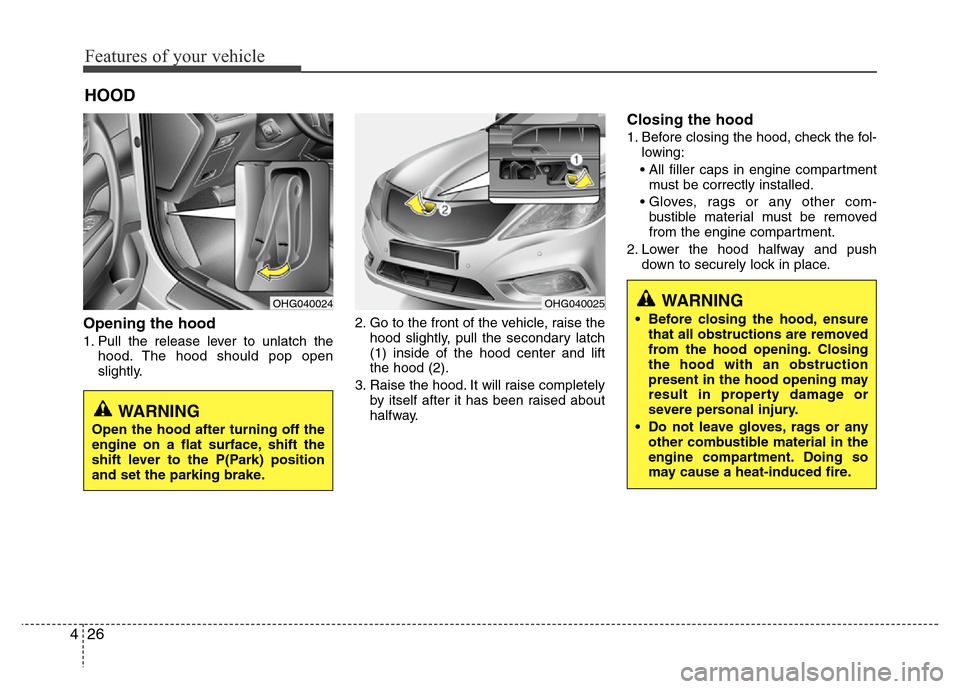
Opening the hood
1. Pull the release lever to unlatch the
hood. The hood should pop open
slightly.2. Go to the front of the vehicle, raise the
hood slightly, pull the secondary latch
(1) inside of the hood center and lift
the hood (2).
3. Raise the hood. It will raise completely
by itself after it has been raised about
halfway.
Closing the hood
1. Before closing the hood, check the fol-
lowing:
• All filler caps in engine compartment
must be correctly installed.
• Gloves, rags or any other com-
bustible material must be removed
from the engine compartment.
2. Lower the hood halfway and push
down to securely lock in place.
HOOD
OHG040024OHG040025WARNING
• Before closing the hood, ensure
that all obstructions are removed
from the hood opening. Closing
the hood with an obstruction
present in the hood opening may
result in property damage or
severe personal injury.
• Do not leave gloves, rags or any
other combustible material in the
engine compartment. Doing so
may cause a heat-induced fire.
WARNING
Open the hood after turning off the
engine on a flat surface, shift the
shift lever to the P(Park) position
and set the parking brake.