Page 380 of 403

Maintenance
68 7
Traffic Change (For Europe)
The low beam light distribution is asym-
metric.
If you go abroad to a country with oppo-
site traffic direction, this asymmetric part
will dazzle oncoming car driver. To pre-
vent dazzle, ECE regulation demand
several technical solutions (ex. automatic
change system, adhesive sheet, down
aiming). This headlamps are designed
not to dazzle opposite drivers. So, you do
not need to change your headlamps in a
country with opposite traffic direction.
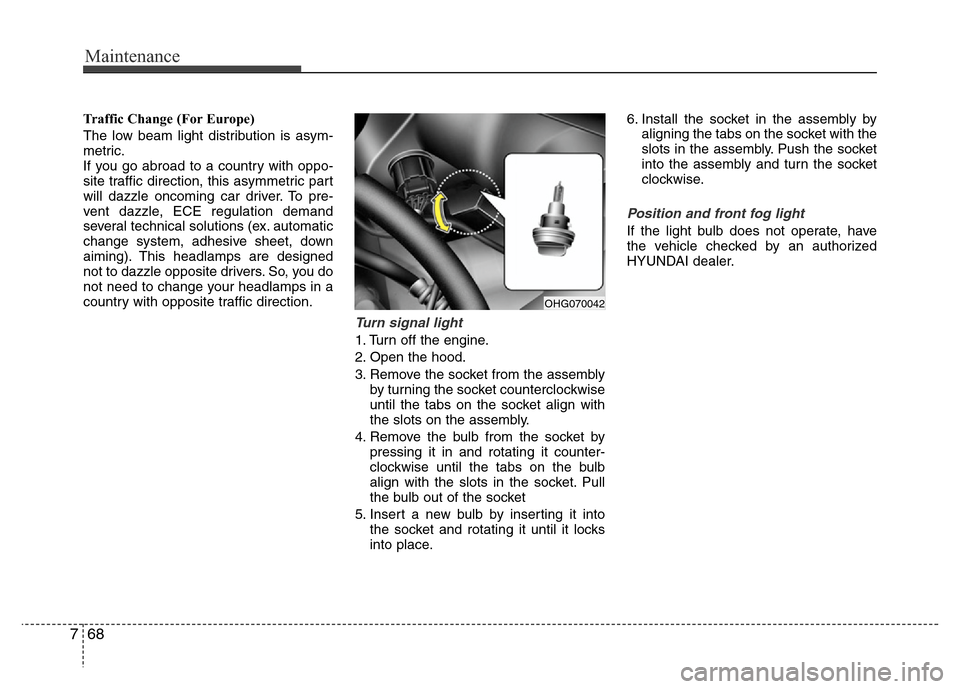
Turn signal light
1. Turn off the engine.
2. Open the hood.
3. Remove the socket from the assembly
by turning the socket counterclockwise
until the tabs on the socket align with
the slots on the assembly.
4. Remove the bulb from the socket by
pressing it in and rotating it counter-
clockwise until the tabs on the bulb
align with the slots in the socket. Pull
the bulb out of the socket
5. Insert a new bulb by inserting it into
the socket and rotating it until it locks
into place.6. Install the socket in the assembly by
aligning the tabs on the socket with the
slots in the assembly. Push the socket
into the assembly and turn the socket
clockwise.
Position and front fog light
If the light bulb does not operate, have
the vehicle checked by an authorized
HYUNDAI dealer.
OHG070042
Page 382 of 403

Maintenance
70 7
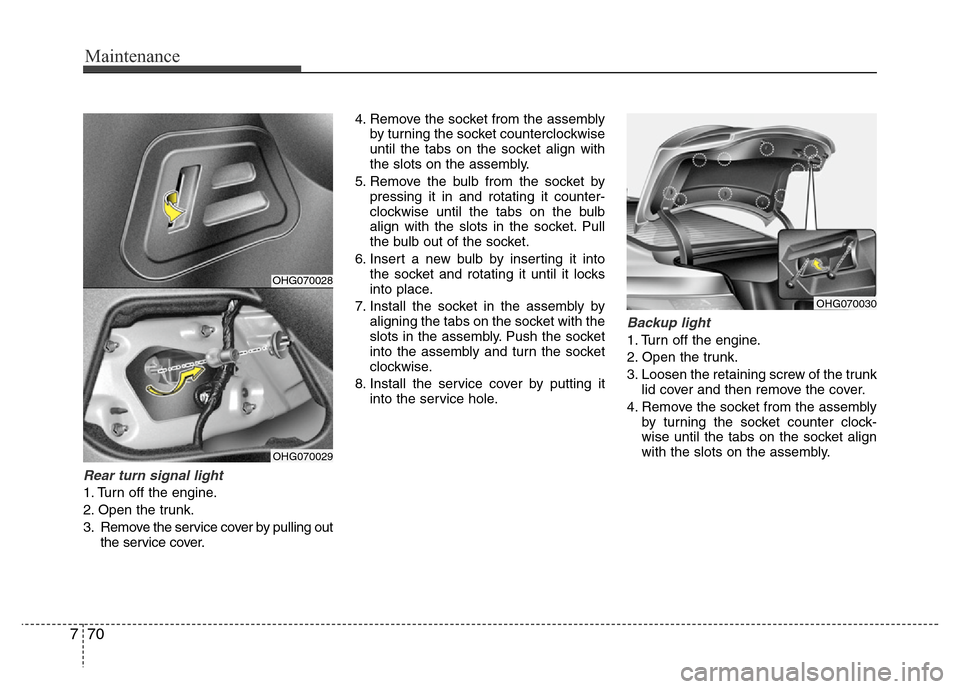
Rear turn signal light
1. Turn off the engine.
2. Open the trunk.
3. Remove the service cover by pulling out
the service cover.4. Remove the socket from the assembly
by turning the socket counterclockwise
until the tabs on the socket align with
the slots on the assembly.
5. Remove the bulb from the socket by
pressing it in and rotating it counter-
clockwise until the tabs on the bulb
align with the slots in the socket. Pull
the bulb out of the socket.
6. Insert a new bulb by inserting it into
the socket and rotating it until it locks
into place.
7. Install the socket in the assembly by
aligning the tabs on the socket with the
slots in the assembly. Push the socket
into the assembly and turn the socket
clockwise.
8. Install the service cover by putting it
into the service hole.
Backup light
1. Turn off the engine.
2. Open the trunk.
3. Loosen the retaining screw of the trunk
lid cover and then remove the cover.
4. Remove the socket from the assembly
by turning the socket counter clock-
wise until the tabs on the socket align
with the slots on the assembly.
OHG070028
OHG070029
OHG070030
Page 383 of 403
771
Maintenance
5. Remove the bulb by pulling it straight
out.
6. Insert a new bulb by inserting it into
the socket and rotating it until it locks
into place.
7. Install the socket into the assembly by
aligning the tabs on the socket with the
slots in the assembly. Push the socket
into the assembly and turn the socket
clockwise.
8. Reinstall the trunk lid cover by pushing
in the screw.
Rear fog light (if equipped)
If the light bulb does not operate, have
the vehicle checked by an authorized
HYUNDAI dealer.
High mounted stop light
replacement (if equipped)
If the light bulb does not operate, have
the vehicle checked by an authorized
HYUNDAI dealer.
OHG070040OHG070031
Page 384 of 403

Maintenance
72 7
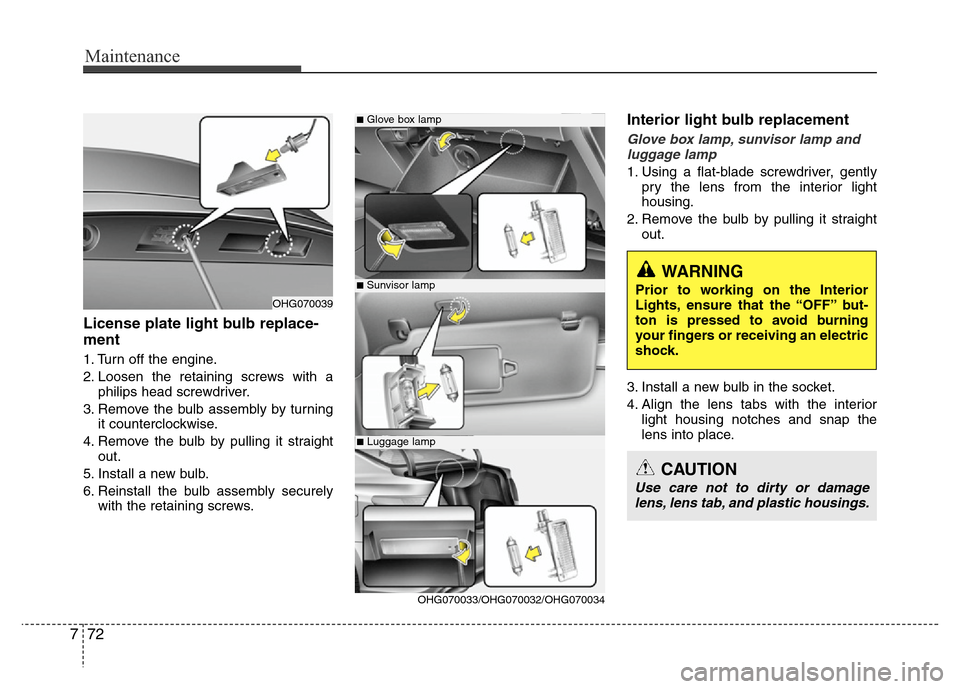
License plate light bulb replace-
ment
1. Turn off the engine.
2. Loosen the retaining screws with a
philips head screwdriver.
3. Remove the bulb assembly by turning
it counterclockwise.
4. Remove the bulb by pulling it straight
out.
5. Install a new bulb.
6. Reinstall the bulb assembly securely
with the retaining screws.
Interior light bulb replacement
Glove box lamp, sunvisor lamp and
luggage lamp
1. Using a flat-blade screwdriver, gently
pry the lens from the interior light
housing.
2. Remove the bulb by pulling it straight
out.
3. Install a new bulb in the socket.
4. Align the lens tabs with the interior
light housing notches and snap the
lens into place.
■Glove box lamp
■Sunvisor lamp
■Luggage lamp
OHG070039
OHG070033/OHG070032/OHG070034
WARNING
Prior to working on the Interior
Lights, ensure that the “OFF” but-
ton is pressed to avoid burning
your fingers or receiving an electric
shock.
CAUTION
Use care not to dirty or damage
lens, lens tab, and plastic housings.
Page:
< prev 1-8 9-16 17-24