Page 59 of 403
Safety features of your vehicle
44 3
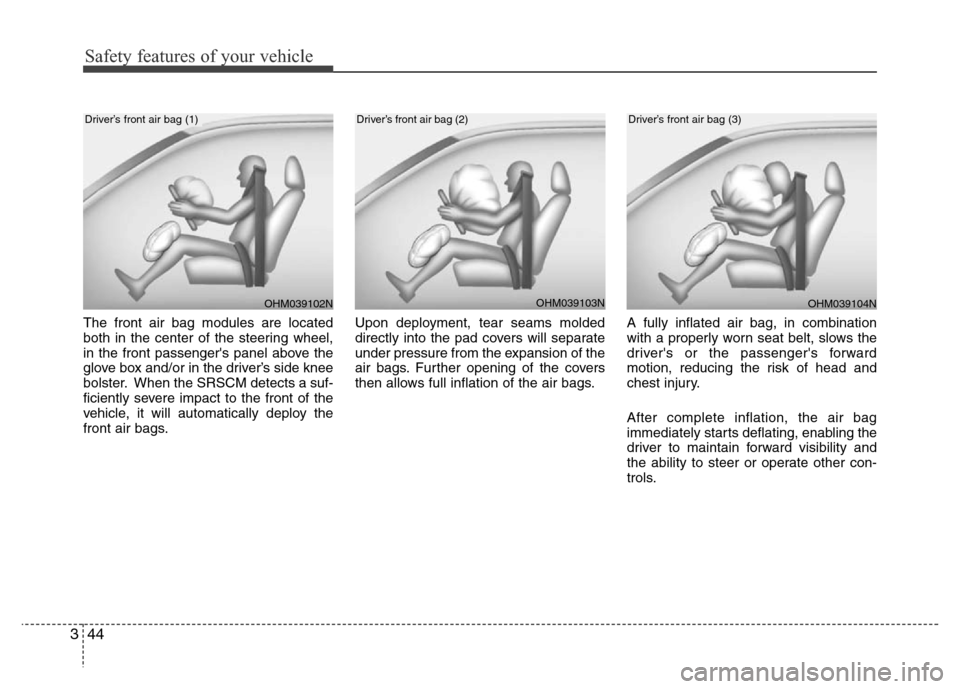
The front air bag modules are located
both in the center of the steering wheel,
in the front passenger's panel above the
glove box and/or in the driver’s side knee
bolster. When the SRSCM detects a suf-
ficiently severe impact to the front of the
vehicle, it will automatically deploy the
front air bags.Upon deployment, tear seams molded
directly into the pad covers will separate
under pressure from the expansion of the
air bags. Further opening of the covers
then allows full inflation of the air bags.A fully inflated air bag, in combination
with a properly worn seat belt, slows the
driver's or the passenger's forward
motion, reducing the risk of head and
chest injury.
After complete inflation, the air bag
immediately starts deflating, enabling the
driver to maintain forward visibility and
the ability to steer or operate other con-
trols.
OHM039103NOHM039104N
Driver’s front air bag (2)Driver’s front air bag (3)
OHM039102N
Driver’s front air bag (1)
Page 61 of 403
Safety features of your vehicle
46 3
Driver's and passenger's front air
bag
Your vehicle is equipped with a
Supplemental Restraint (Air Bag) System
and the lap/shoulder belts at both the
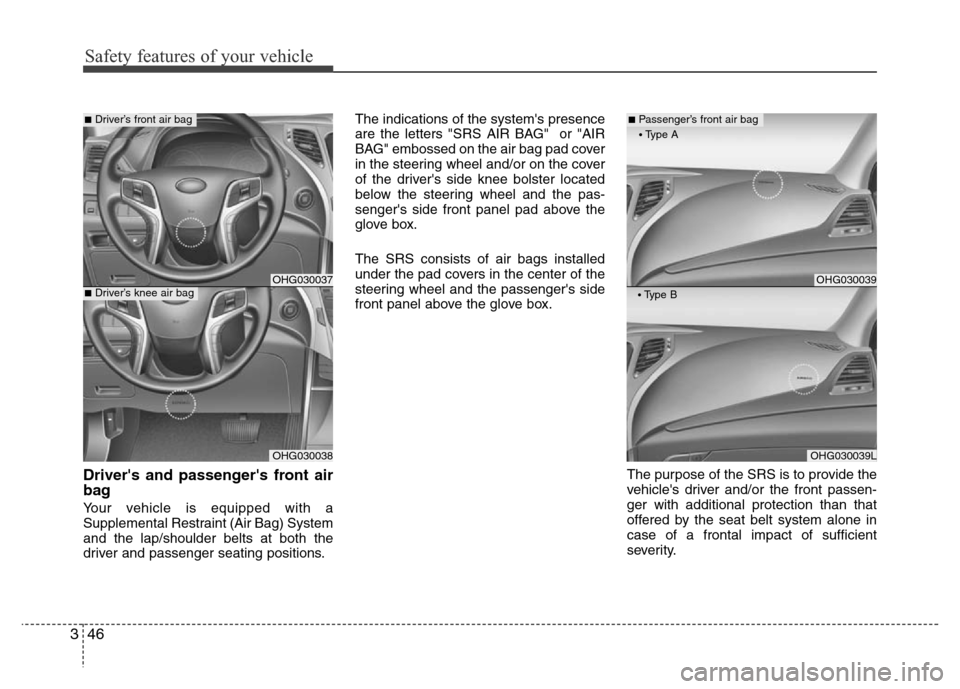
driver and passenger seating positions.The indications of the system's presence
are the letters "SRS AIR BAG" or "AIR
BAG" embossed on the air bag pad cover
in the steering wheel and/or on the cover
of the driver's side knee bolster located
below the steering wheel and the pas-
senger's side front panel pad above the
glove box.
The SRS consists of air bags installed
under the pad covers in the center of the
steering wheel and the passenger's side
front panel above the glove box.
The purpose of the SRS is to provide the
vehicle's driver and/or the front passen-
ger with additional protection than that
offered by the seat belt system alone in
case of a frontal impact of sufficient
severity.
OHG030037
■Driver’s front air bag
OHG030038
■Driver’s knee air bagOHG030039
■Passenger’s front air bag
OHG030039L
• Type B
• Type A
Page 88 of 403
Features of your vehicle
12 4
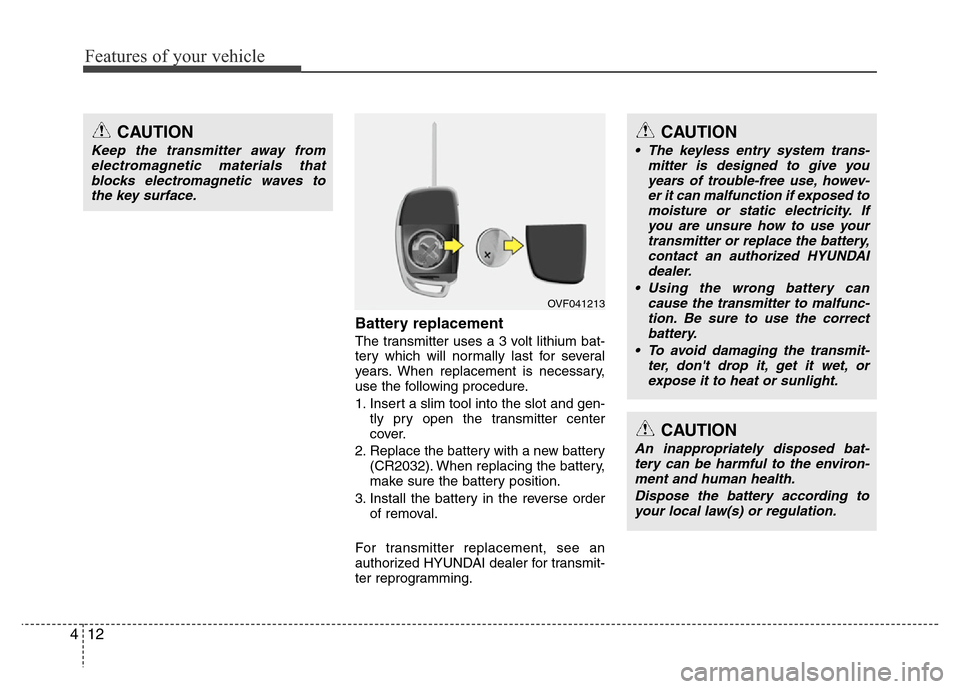
Battery replacement
The transmitter uses a 3 volt lithium bat-
tery which will normally last for several
years. When replacement is necessary,
use the following procedure.
1. Insert a slim tool into the slot and gen-
tly pry open the transmitter center
cover.
2. Replace the battery with a new battery
(CR2032). When replacing the battery,
make sure the battery position.
3. Install the battery in the reverse order
of removal.
For transmitter replacement, see an
authorized HYUNDAI dealer for transmit-
ter reprogramming.
CAUTION
• The keyless entry system trans-
mitter is designed to give you
years of trouble-free use, howev-
er it can malfunction if exposed to
moisture or static electricity. If
you are unsure how to use your
transmitter or replace the battery,
contact an authorized HYUNDAI
dealer.
• Using the wrong battery can
cause the transmitter to malfunc-
tion. Be sure to use the correct
battery.
• To avoid damaging the transmit-
ter, don't drop it, get it wet, or
expose it to heat or sunlight.
CAUTION
An inappropriately disposed bat-
tery can be harmful to the environ-
ment and human health.
Dispose the battery according to
your local law(s) or regulation.
OVF041213
CAUTION
Keep the transmitter away from
electromagnetic materials that
blocks electromagnetic waves to
the key surface.
Page 102 of 403
Features of your vehicle
26 4
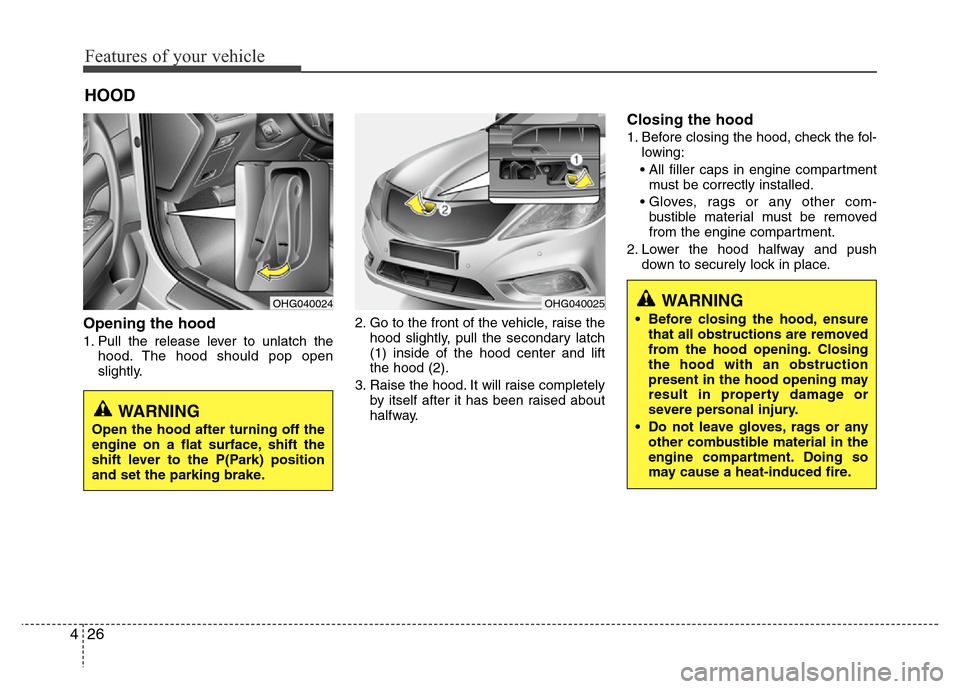
Opening the hood
1. Pull the release lever to unlatch the
hood. The hood should pop open
slightly.2. Go to the front of the vehicle, raise the
hood slightly, pull the secondary latch
(1) inside of the hood center and lift
the hood (2).
3. Raise the hood. It will raise completely
by itself after it has been raised about
halfway.
Closing the hood
1. Before closing the hood, check the fol-
lowing:
• All filler caps in engine compartment
must be correctly installed.
• Gloves, rags or any other com-
bustible material must be removed
from the engine compartment.
2. Lower the hood halfway and push
down to securely lock in place.
HOOD
OHG040024OHG040025WARNING
• Before closing the hood, ensure
that all obstructions are removed
from the hood opening. Closing
the hood with an obstruction
present in the hood opening may
result in property damage or
severe personal injury.
• Do not leave gloves, rags or any
other combustible material in the
engine compartment. Doing so
may cause a heat-induced fire.
WARNING
Open the hood after turning off the
engine on a flat surface, shift the
shift lever to the P(Park) position
and set the parking brake.
Page 116 of 403
Features of your vehicle
40 4
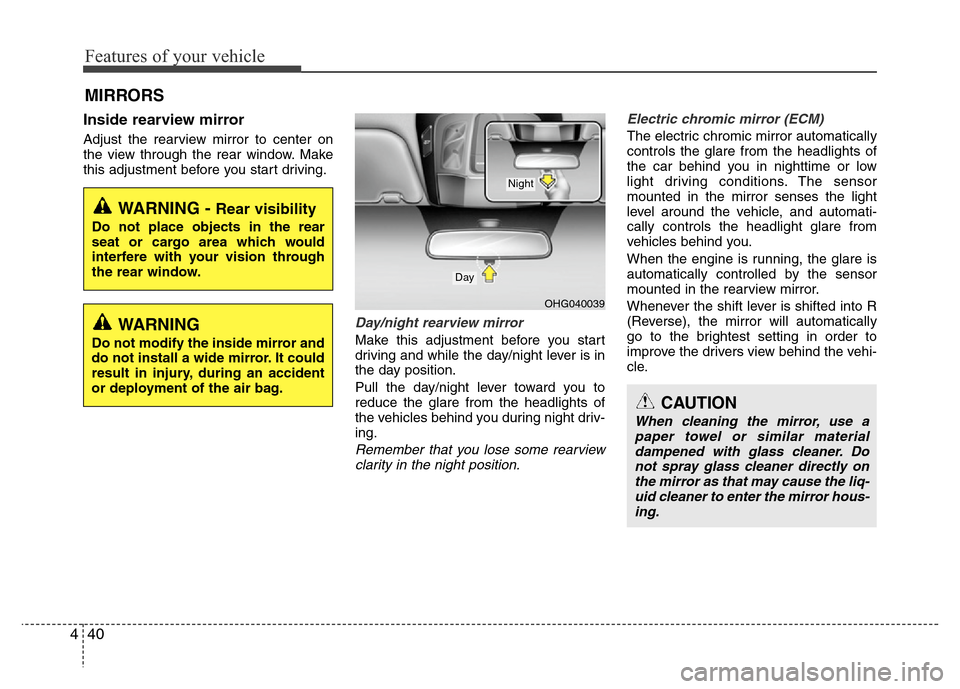
Inside rearview mirror
Adjust the rearview mirror to center on
the view through the rear window. Make
this adjustment before you start driving.
Day/night rearview mirror
Make this adjustment before you start
driving and while the day/night lever is in
the day position.
Pull the day/night lever toward you to
reduce the glare from the headlights of
the vehicles behind you during night driv-
ing.
Remember that you lose some rearview
clarity in the night position.Electric chromic mirror (ECM)
The electric chromic mirror automatically
controls the glare from the headlights of
the car behind you in nighttime or low
light driving conditions. The sensor
mounted in the mirror senses the light
level around the vehicle, and automati-
cally controls the headlight glare from
vehicles behind you.
When the engine is running, the glare is
automatically controlled by the sensor
mounted in the rearview mirror.
Whenever the shift lever is shifted into R
(Reverse), the mirror will automatically
go to the brightest setting in order to
improve the drivers view behind the vehi-
cle.
MIRRORS
CAUTION
When cleaning the mirror, use a
paper towel or similar material
dampened with glass cleaner. Do
not spray glass cleaner directly on
the mirror as that may cause the liq-
uid cleaner to enter the mirror hous-
ing.
WARNING - Rear visibility
Do not place objects in the rear
seat or cargo area which would
interfere with your vision through
the rear window.
OHG040039
Day
Night
WARNING
Do not modify the inside mirror and
do not install a wide mirror. It could
result in injury, during an accident
or deployment of the air bag.
Page 118 of 403
Features of your vehicle
42 4
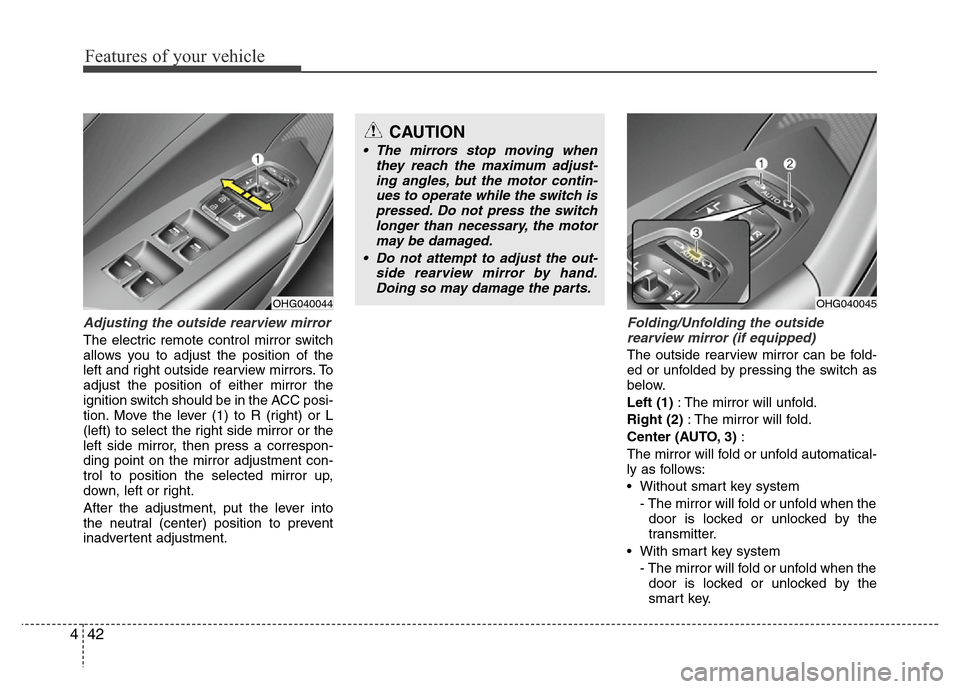
Adjusting the outside rearview mirror
The electric remote control mirror switch
allows you to adjust the position of the
left and right outside rearview mirrors. To
adjust the position of either mirror the
ignition switch should be in the ACC posi-
tion. Move the lever (1) to R (right) or L
(left) to select the right side mirror or the
left side mirror, then press a correspon-
ding point on the mirror adjustment con-
trol to position the selected mirror up,
down, left or right.
After the adjustment, put the lever into
the neutral (center) position to prevent
inadvertent adjustment.
Folding/Unfolding the outside
rearview mirror (if equipped)
The outside rearview mirror can be fold-
ed or unfolded by pressing the switch as
below.
Left (1): The mirror will unfold.
Right (2): The mirror will fold.
Center (AUTO, 3):
The mirror will fold or unfold automatical-
ly as follows:
• Without smart key system
- The mirror will fold or unfold when the
door is locked or unlocked by the
transmitter.
• With smart key system
- The mirror will fold or unfold when the
door is locked or unlocked by the
smart key.
OHG040044
CAUTION
• The mirrors stop moving when
they reach the maximum adjust-
ing angles, but the motor contin-
ues to operate while the switch is
pressed. Do not press the switch
longer than necessary, the motor
may be damaged.
• Do not attempt to adjust the out-
side rearview mirror by hand.
Doing so may damage the parts.
OHG040045
Page 166 of 403
Features of your vehicle
90 4
DEFROSTER
✽NOTICE
If you want to defrost and defog the
front windshield, refer to “Windshield
defrosting and defogging” in this sec-
tion.
Rear window defroster
The defroster heats the window to
remove frost, fog and thin ice from the
rear window, while the engine is running.
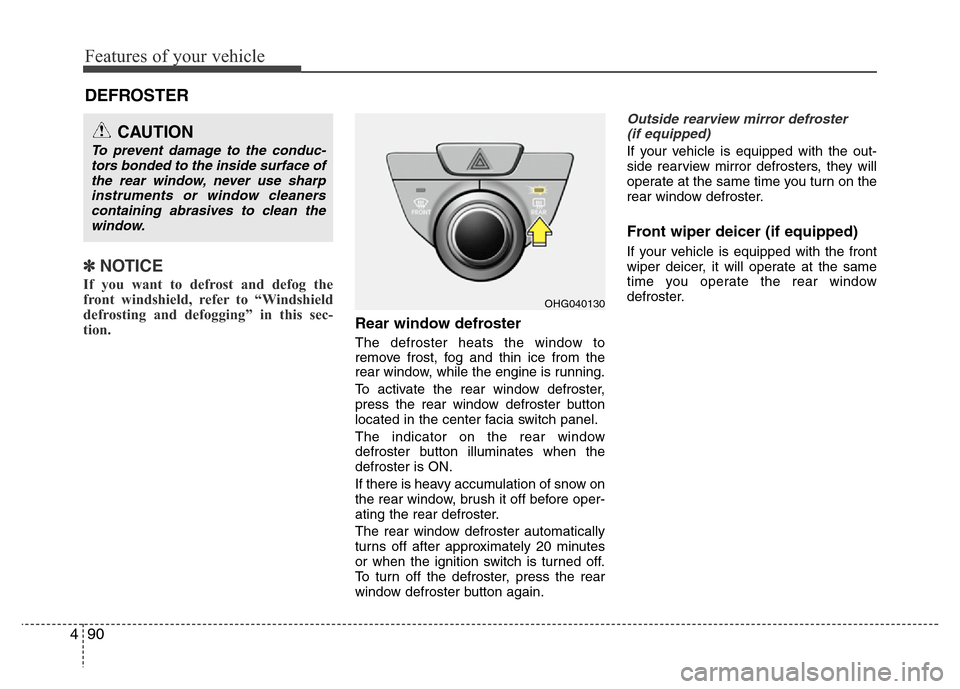
To activate the rear window defroster,
press the rear window defroster button
located in the center facia switch panel.
The indicator on the rear window
defroster button illuminates when the
defroster is ON.
If there is heavy accumulation of snow on
the rear window, brush it off before oper-
ating the rear defroster.
The rear window defroster automatically
turns off after approximately 20 minutes
or when the ignition switch is turned off.
To turn off the defroster, press the rear
window defroster button again.
Outside rearview mirror defroster
(if equipped)
If your vehicle is equipped with the out-
side rearview mirror defrosters, they will
operate at the same time you turn on the
rear window defroster.
Front wiper deicer (if equipped)
If your vehicle is equipped with the front
wiper deicer, it will operate at the same
time you operate the rear window
defroster.
CAUTION
To prevent damage to the conduc-
tors bonded to the inside surface of
the rear window, never use sharp
instruments or window cleaners
containing abrasives to clean the
window.
OHG040130
Page 193 of 403
4117
Features of your vehicle
These compartments can be used to
store small items required by the driver
or passengers.
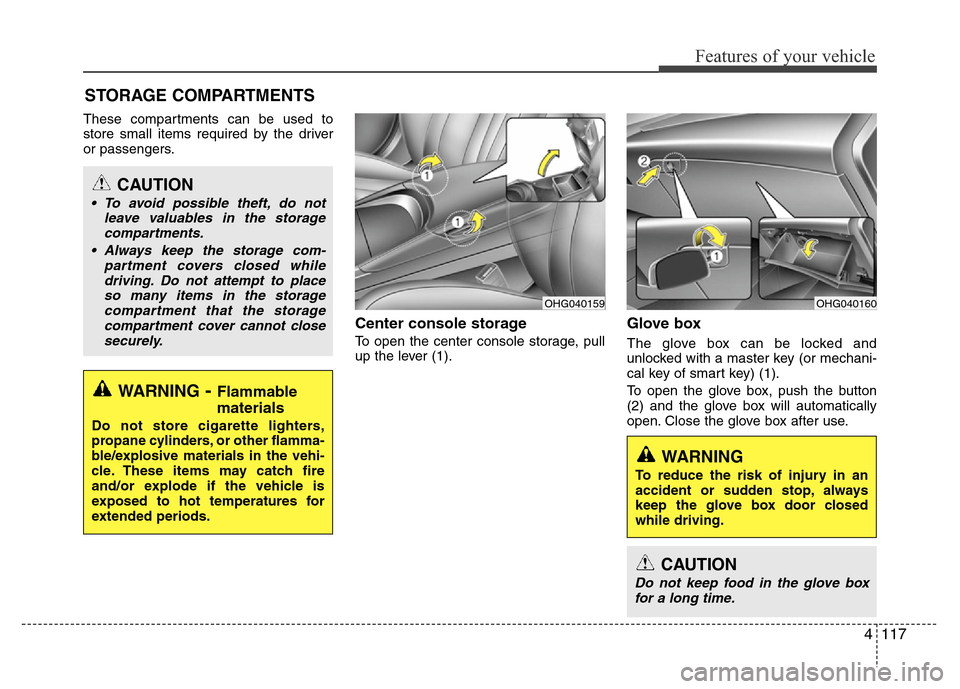
Center console storage
To open the center console storage, pull
up the lever (1).
Glove box
The glove box can be locked and
unlocked with a master key (or mechani-
cal key of smart key) (1).
To open the glove box, push the button
(2) and the glove box will automatically
open. Close the glove box after use.
STORAGE COMPARTMENTS
WARNING- Flammable
materials
Do not store cigarette lighters,
propane cylinders, or other flamma-
ble/explosive materials in the vehi-
cle. These items may catch fire
and/or explode if the vehicle is
exposed to hot temperatures for
extended periods.
CAUTION
• To avoid possible theft, do not
leave valuables in the storage
compartments.
• Always keep the storage com-
partment covers closed while
driving. Do not attempt to place
so many items in the storage
compartment that the storage
compartment cover cannot close
securely.
OHG040160OHG040159
WARNING
To reduce the risk of injury in an
accident or sudden stop, always
keep the glove box door closed
while driving.
CAUTION
Do not keep food in the glove box
for a long time.