2013 HONDA FIT lights
[x] Cancel search: lightsPage 118 of 286

117
uuInterior Lights/Interior Convenience ItemsuInterior Convenience Items
Controls
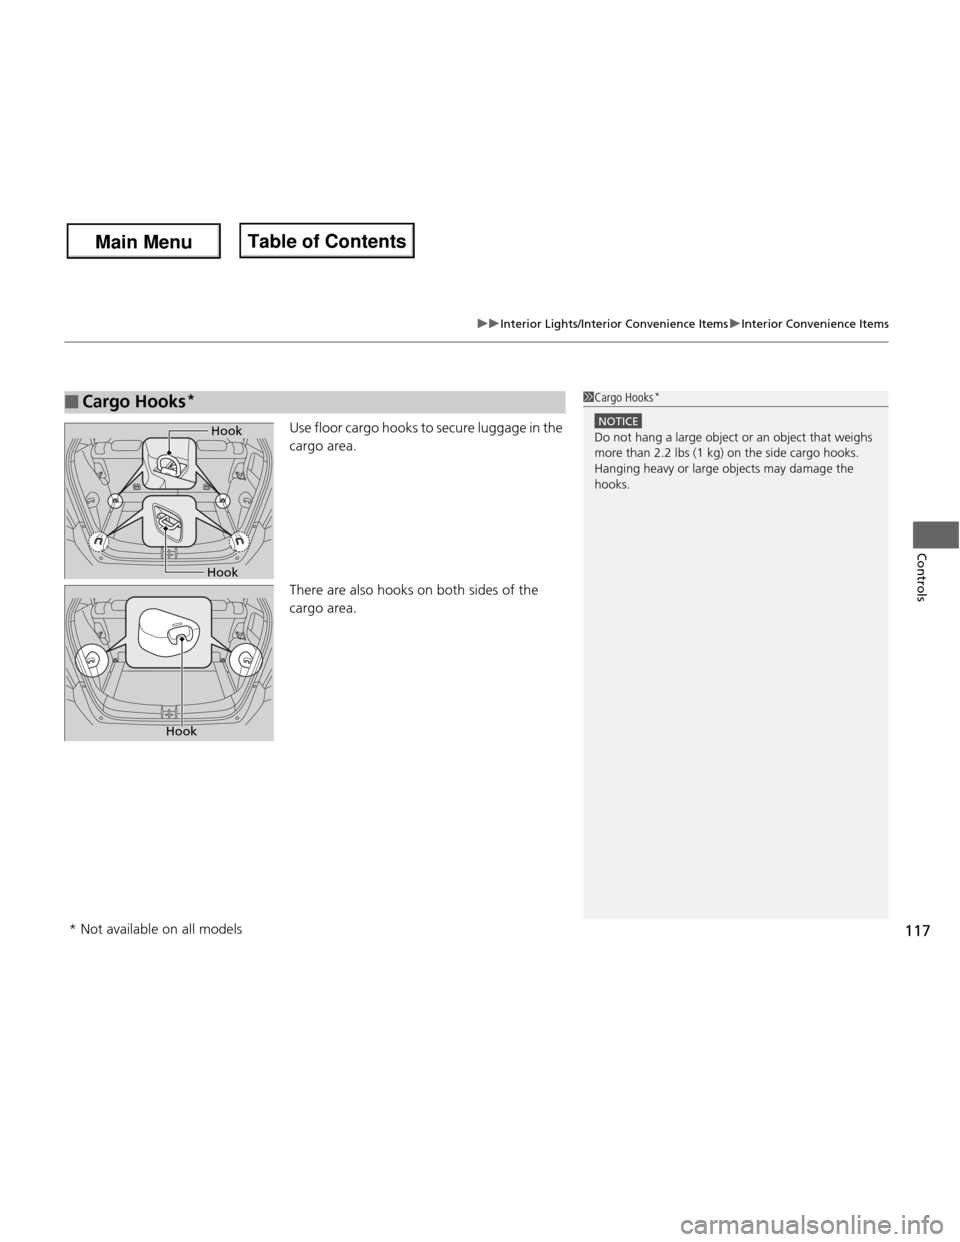
Use floor cargo hooks to secure luggage in the cargo area.
There are also hooks on both sides of the cargo area.
■Cargo Hooks*1Cargo Hooks
*
NOTICE
Do not hang a large object or an object that weighs
more than 2.2 lbs (1 kg) on the side cargo hooks.
Hanging heavy or large objects may damage the hooks.Hook
Hook
Hook
* Not available on all models
Main Menu
Main MenuTable of Contents
Page 155 of 286

154
Driving
Before Driving
Driving Preparation
Check the following items before you start driving. •Make sure there are no obstructions on the windows, door mirrors, exterior
lights, or other parts of the vehicle.
uRemove any frost, snow, or ice.
uRemove any snow on the roof, as this can slip down and obstruct your field of
vision while driving. If frozen solid, remove ice once it has softened.
uWhen removing ice from around the wheels, be sure not to damage the wheel
or wheel components.
• Make sure the hood is securely closed.
uIf the hood opens while driving, your front view will be blocked.
• Make sure the tires are in good condition.
uCheck air pressure, check for damage and excessive wear.
2 Checking and Maintaining Tires P. 222
• Make sure there are no people or objects behind or around the vehicle.
uThere are blind spots from the inside.
■Exterior Checks1Exterior Checks
NOTICE
When doors are frozen shut, use warm water around
the door edges to melt any ice. Do not try to force
them open, as this can damage the rubber trim
around the doors. When done, wipe dry to avoid further freezing.
Do not pour warm water into the key cylinder.
You will be unable to insert key if the water freezes in
the hole.
Heat from the engine and exhaust can ignite
flammable materials left under the hood, causing a
fire. If you've parked your vehicle for an extended
period, inspect and remove any debris that may have
collected, such as dried grass and leaves that have
fallen or have been carried in for use as a nest by a
small animal. Also check under the hood for leftover
flammable materials after you or someone else has
performed maintenance on your vehicle.
Main Menu
Main MenuTable of Contents
Page 162 of 286

161
Continued
Driving
When Driving
Starting the Engine
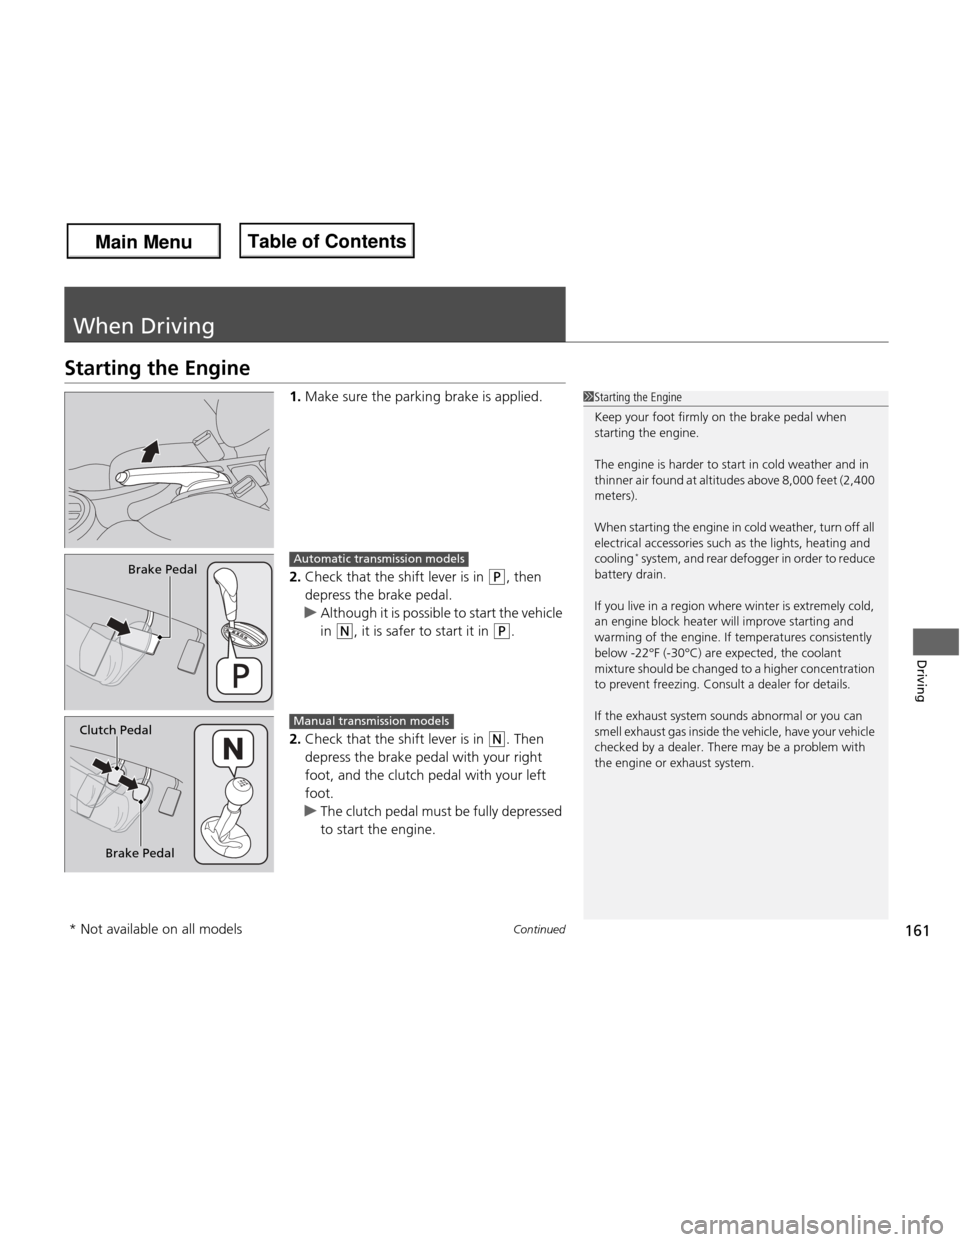
1.Make sure the parking brake is applied.
2. Check that the shift lever is in
(P , then
depress the brake pedal.
uAlthough it is possible to start the vehicle
in
(N , it is safer to start it in (P .
2. Check that the shift lever is in
(N . Then
depress the brake pedal with your right
foot, and the clutch pedal with your left foot.
uThe clutch pedal must be fully depressed
to start the engine.
1Starting the Engine
Keep your foot firmly on the brake pedal when starting the engine.
The engine is harder to start in cold weather and in
thinner air found at altitudes above 8,000 feet (2,400 meters).
When starting the engine in cold weather, turn off all
electrical accessories such as the lights, heating and cooling *
system, and rear defogger in order to reduce
battery drain.
If you live in a region where winter is extremely cold,
an engine block heater will improve starting and
warming of the engine. If temperatures consistently
below -22°F (-30°C) are expected, the coolant
mixture should be changed to a higher concentration
to prevent freezing. Consult a dealer for details.
If the exhaust system sounds abnormal or you can
smell exhaust gas inside the vehicle, have your vehicle
checked by a dealer. There may be a problem with
the engine or exhaust system.
Brake PedalAutomatic transmission models
Brake Pedal
Clutch Pedal
Manual transmission models
* Not available on all models
Main Menu
Main MenuTable of Contents
Page 193 of 286

192
Maintenance
Before Performing Maintenance
Inspection and Maintenance
For your safety, perform all listed inspections and maintenance to keep your vehicle
in good condition. If you become aware of any abnormality (noise, smell, insufficient
brake fluid, oil residue on the ground, etc.), have your vehicle inspected by a dealer.
(Note, however, that service at a dealer is not mandatory to keep your warranties in
effect.) Refer to the separate maintenance booklet for detailed maintenance and
inspection information. ■ Daily inspections
Perform inspections before long distance trips, when washing the vehicle, or when refueling. ■ Periodic inspections
• Check the automatic transmission fluid level monthly.
2 Automatic Transmission Fluid P. 208
• Check the brake fluid level monthly.
2 Brake/Clutch Fluid P. 210
• Check the tire pressure monthly. Examine the tread for wear and foreign objects.
2 Checking and Maintaining Tires P. 222
• Check the operation of the exterior lights monthly.
2 Replacing Light Bulbs P. 212
• Check the condition of the wiper blades at least every six months.
2 Checking and Mainta ining Wiper Blades P. 218
■Types of Inspection and Maintenance
1Inspection and Maintenance
Maintenance, replacement, or repair of
emissions control devices and systems may be
done by any automotive repair establishment or
individuals using parts that are “certified
Page 213 of 286

212
Maintenance
Replacing Light Bulbs
Headlight Bulbs
When replacing, use the following bulbs.1.Remove the coupler.
2. Remove the rubber weather seal.
3. Remove the hold-down wire, then remove the bulb.
4. Insert a new bulb.
High/Low beam headli ght: 60/55 W (HB2)
■High/Low Beam Headlight
1Headlight Bulbs
NOTICE
Halogen bulbs get very hot when lit.
Oil, perspiration, or a scratch on the glass can cause
the bulb to overheat and shatter.
The headlight aim is set by the factory, and does not
need to be adjusted. However, if you regularly carry
heavy items in the cargo area, have the aiming
readjusted at a dealer or by a qualified technician.
The HB2 type is halogen bulb.
When replacing a bulb, handle it by its base, and
protect the glass from contact with your skin or hard
objects. If you touch the glass, clean it with
denatured alcohol and a clean cloth.
The exterior lights’ inside lenses (headlights, brake
lamps, etc.) may fog temporarily after a vehicle wash
or while driving in the rain. This does not impact the
exterior light function.
However, if you see a large amount of water or ice
accumulated inside the lenses, have your vehicle
inspected by a dealer.
Rubber Weather SealCoupler
Bulb
Hold-Down Wire
Main Menu
Main MenuTable of Contents
Page 215 of 286

214
uuReplacing Light BulbsuParking/Side Marker Light Bulbs
Maintenance
Parking/Side Marker Light Bulbs
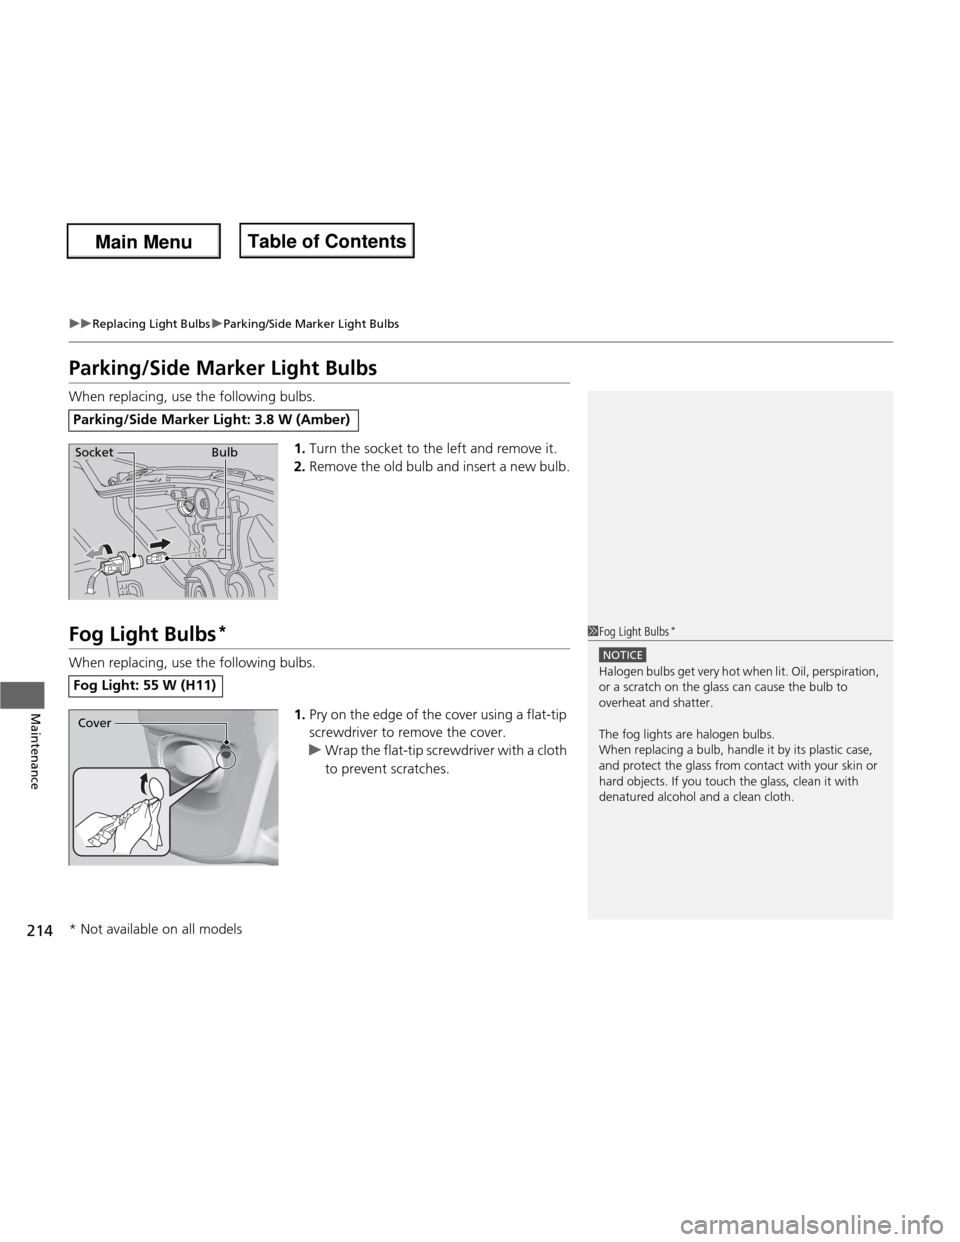
When replacing, use the following bulbs.1.Turn the socket to the left and remove it.
2. Remove the old bulb and insert a new bulb.
Fog Light Bulbs *
When replacing, use the following bulbs.
1.Pry on the edge of the cover using a flat-tip
screwdriver to remove the cover.
uWrap the flat-tip screwdriver with a cloth
to prevent scratches.
Parking/Side Marker Light: 3.8 W (Amber)
BulbSocket
Fog Light: 55 W (H11)
1Fog Light Bulbs *
NOTICE
Halogen bulbs get very hot when li
t. Oil, perspiration,
or a scratch on the glass can cause the bulb to
overheat and shatter.
The fog lights are halogen bulbs.
When replacing a bulb, handle it by its plastic case,
and protect the glass from contact with your skin or
hard objects. If you touch the glass, clean it with
denatured alcohol and a clean cloth.
Cover
* Not available on all models
Main Menu
Main MenuTable of Contents
Page 240 of 286

239
Continued
Handling the Unexpected
If a Tire Goes Flat
Changing a Flat Tire *
If a tire goes flat while driving, grasp the steering wheel firmly, and brake gradually
to reduce speed. Then, stop in a safe place. Replace the flat tire with a compact
spare tire. Go to a dealer as soon as possible to have the full size tire repaired or
replaced. 1. Park the vehicle on firm, level, non-slippery surface and apply the parking brake.
2. Move the shift lever to
(P .
2. Move the shift lever to
(R .
3. Turn on the hazard warning lights and turn the ignition switch to LOCK
(0 .
1Changing a Flat Tire *
Periodically check the tire pressure of the compact
spare. It should be set to the specified pressure.
Specified Pressure: 60 psi (420 kPa, 4.2 kgf/cm 2
)
When driving with the compact spare tire, keep the
vehicle speed under 50 mph (80 km/h). Replace with
a full size tire as soon as possible.
The compact spare tire and wheel in your vehicle are
specifically for this model.
Do not use them with another vehicle.
Do not use another type of compact spare tire or
wheel with your vehicle.
Do not mount tire chains on a compact spare tire.
If a chain-mounted front tire goes flat, remove one of
the full-size rear tires and replace it with the compact
spare tire. Remove the flat front tire and replace it
with the full size tire that was removed from the rear.
Mount the tire chains on the front tire.
Do not use a puncture-repairing agent on a flat tire,
as it can damage the tire pressure sensor.
U.S. models only
Automatic transmission models
Manual transmission models
All models
Main Menu
Main MenuTable of Contents
Page 246 of 286

245
uuIf a Tire Goes FlatuTemporarily Repairing a Flat Tire
Continued
Handling the Unexpected
Temporarily Repairing a Flat Tire
If the tire has a large cut or is otherwise severely damaged, you will need to have the
vehicle towed. If the tire only has a small puncture, from a nail for instance, you can
use the tire repair kit so that you can drive to the nearest service station for a more
permanent repair.
If a tire goes flat while driving, grasp the steering wheel firmly, and brake gradually
to reduce speed. Then stop in a safe place. 1.Park the vehicle on firm, level, and non-slippery ground.
2. Put the shift lever in
(P .
3. Set the parking brake.
4. Turn on the hazard warning lights and turn the ignition switch to LOCK
(0 .
■Getting Ready to Temporarily Repair the Flat Tire
Canadian models with automatic transmission
1Temporarily Repairing a Flat Tire
The kit should not be used in the following situations.
Instead, contact a dealer or a roadside assistant to
have the vehicle towed.
• The tire sealant has expired.
• More than two tires are punctured.
• The puncture is greater than 3/16 inch (4 mm) in diameter.
• The tire side wall is damaged or the puncture is
outside the tire tread.
• Damage has been caused by driving with the tires
extremely under inflated.
• The tire bead is no longer seated.
• A rim is damaged.
Do not remove a nail or screw that punctured the
tire. If you remove it from the tire, you may not be
able to repair the puncture using the kit.
NOTICE
Do not use a puncture-repairing agent other than the
one provided in the ki t that came with your vehicle. If
used, you may permanently damage the tire pressure
sensor.
When the puncture is:
Smaller than 3/16 inch
(4 mm)
Larger than 3/16 inch
(4 mm) Kit Use
YesNo
Contact
Area
Instruction Manual
Air Compressor
Wheel
Label
Sealant Bottle
Expiration Date
Speed Limit Label
Main Menu
Main MenuTable of Contents