Page 509 of 573
508
uuRemote Transmitter CareuReplacing the Button Battery
Maintenance
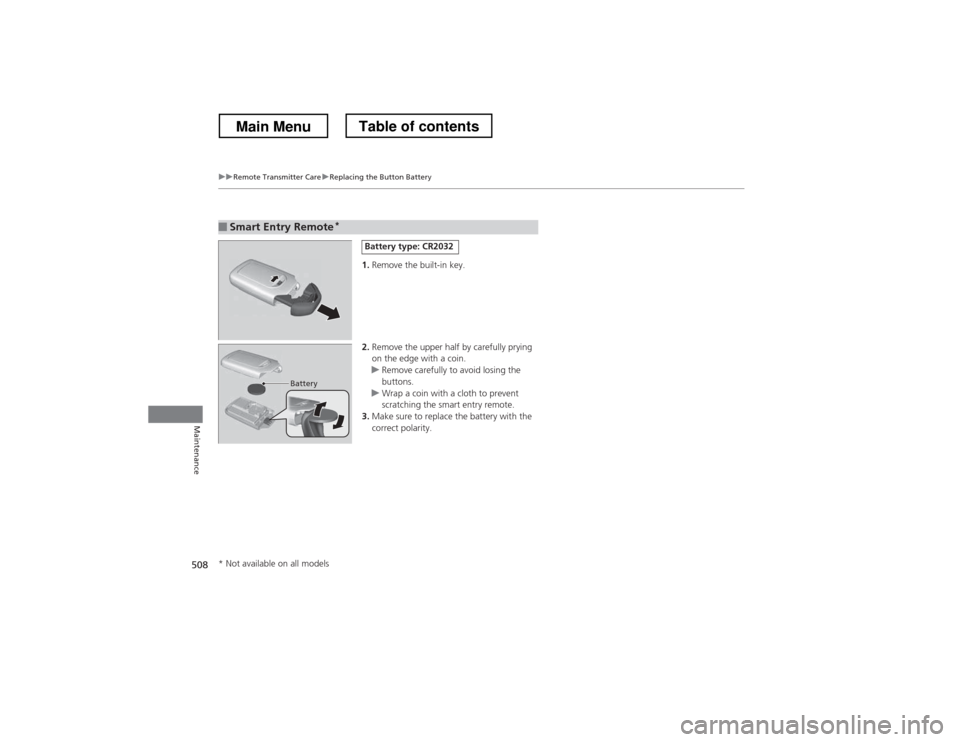
1.Remove the built-in key.
2. Remove the upper half by carefully prying
on the edge with a coin.
uRemove carefully to avoid losing the
buttons.
uWrap a coin with a cloth to prevent
scratching the smart entry remote.
3. Make sure to replace the battery with the
correct polarity.
■Smart Entry Remote *
Battery type: CR2032
Battery
* Not available on all models
Main MenuTable of contents
Page 514 of 573
513
uuCleaninguExterior Care
Maintenance
A good coat of automotive body wax helps protect your vehicle’s paint from the
elements. Wax will wear off over time and expose your vehicle’s paint to the
elements, so reapply as necessary.
If you get gasoline, oil, engine coolant, or battery fluid on resin coated parts, they
may be stained or the coating may peel. Promptly wipe it away using a soft cloth and
clean water.
Wipe using a glass cleaner.
Aluminum is susceptible to deterioration caused by salt and other road
contaminants. Use a sponge and mild detergent to wipe away promptly.
Be careful not to use harsh chemicals (including some commercial wheel cleaners) or
a stiff brush. They can damage the clear coat of the aluminum alloy wheels that
helps keep the aluminum from corroding and tarnishing.
■Applying Wax
■Maintaining the Bumpe rs and Other Resin Coated Parts
■Cleaning the Window
■Maintaining Aluminum Wheels
1Applying Wax
NOTICEChemical solvents and strong cleaners can damage
the paint, metal, and plastic on your vehicle. Wipe up
spills immediately.
1Maintaining the Bumpers and Other Resin Coated Parts
Ask a dealer about the correct coating material when
you want to repair the painted surface of the parts
made of resin.
1Cleaning the Window
Wires are mounted to the inside of the rear window.
Wipe along the same direction as the wires with a
soft cloth so as not to damage them.
Main MenuTable of contents
Page 516 of 573

515
Handling the UnexpectedThis chapter explains how to h andle unexpected troubles.
Tools
Types of Tools .................................. 516
If a Tire Goes Flat Changing a Flat Tire ......................... 517
Engine Does Not Start Checking the Engine ........................ 525
If the Smart Entry Remote Battery is
Weak ..........................................526
Emergency Engine Stop ................... 527
Jump Starting .................................... 528
Shift Lever Does Not Move .............. 531Overheating
How to Handle Overheating............. 532
Indicator, Coming On/Blinking If the Low Oil Pressure Indicator Comes
On................................................ 534
If the Charging System Indicator Comes On ................................................. 534
If the Malfunction Indicator Lamp Comes On or Blinks ................................... 535
If the Brake System Indicator (Red) Comes
On ................................................... 536
If the EPS System Indicator Comes On... 536 If the Low Tire Pressure Indicator Comes
On ................................................. 537
If the TPMS Indicator Comes On ...... 537
Fuses
Fuse Locations ................................. 538
Inspecting and Changing Fuses ........ 541
Emergency Towing ........................... 542
When You Cannot Unlock the Fuel Fill Door ................................................. 543
When You Cannot Open the Tailgate .. 544
Main Menu
Page 527 of 573
526
uuEngine Does Not StartuIf the Smart Entry Remote Battery is Weak
Handling the Unexpected
If the Smart Entry Remote Battery is Weak
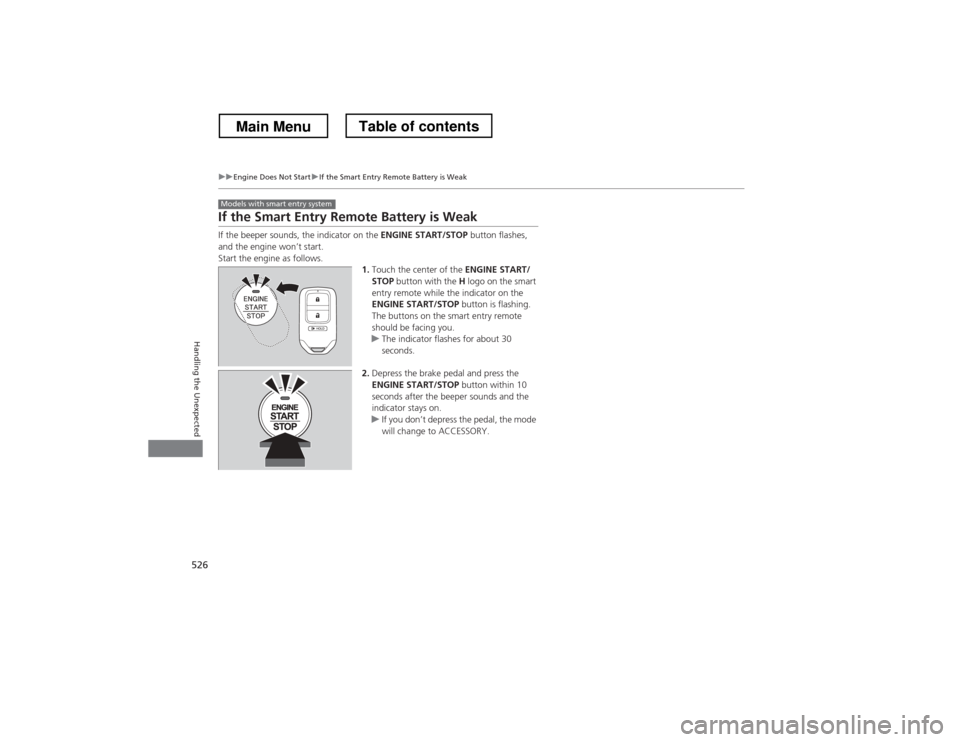
If the beeper sounds, the indicator on the ENGINE START/STOP button flashes,
and the engine won’t start.
Start the engine as follows.
1.Touch the center of the ENGINE START/
STOP button with the H logo on the smart
entry remote while the indicator on the
ENGINE START/STOP button is flashing.
The buttons on the smart entry remote
should be facing you.
uThe indicator flashes for about 30
seconds.
2. Depress the brake pedal and press the
ENGINE START/STOP button within 10
seconds after the beeper sounds and the
indicator stays on.
uIf you don’t depress the pedal, the mode
will change to ACCESSORY.
Models with smart entry system
Main MenuTable of contents
Page 529 of 573
528
Handling the Unexpected
Jump Starting
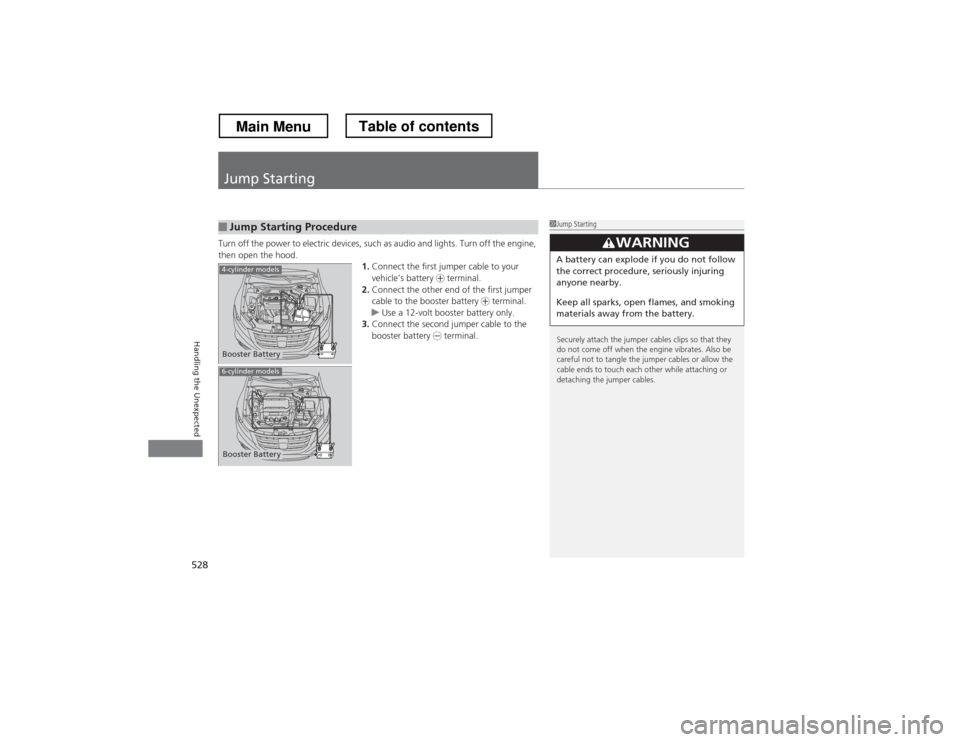
Turn off the power to electric devices, such as audio and lights. Turn off the engine,
then open the hood.1.Connect the first jumper cable to your vehicle’s battery + terminal.
2. Connect the other end of the first jumper
cable to the booster battery + terminal.
uUse a 12-volt booster battery only.
3. Connect the second jumper cable to the
booster battery - terminal.
■Jump Starting Procedure1Jump Starting
Securely attach the jumper cables clips so that they
do not come off when the engine vibrates. Also be
careful not to tangle the jumper cables or allow the
cable ends to touch each other while attaching or
detaching the jumper cables.
3WARNING
A battery can explode if you do not follow
the correct procedure, seriously injuring
anyone nearby.
Keep all sparks, open flames, and smoking
materials away from the battery.
Booster Battery
4-cylinder models
6-cylinder models
Booster Battery
Main MenuTable of contents
Page 530 of 573
Continued529
uuJump Startingu
Handling the Unexpected
4.Connect the other end of the second
jumper cable to the engine mounting bolt
(4-cylinder models)/engine hanger
(6-cylinder models) as shown.
Do not connect this jumper cable to any other part.
5. If your vehicle is connected to another
vehicle, start the assisting vehicle’s engine
and increase its rpm slightly.
6. Attempt to start your vehicle’s engine. If it
turns over slowly, check that the jumper
cables have good metal-to-metal contact.1Jump Starting
Battery performance degrades in cold conditions and
may prevent the engine from starting.4-cylinder models
6-cylinder models
Main MenuTable of contents
Page 531 of 573
530
uuJump Startingu
Handling the Unexpected
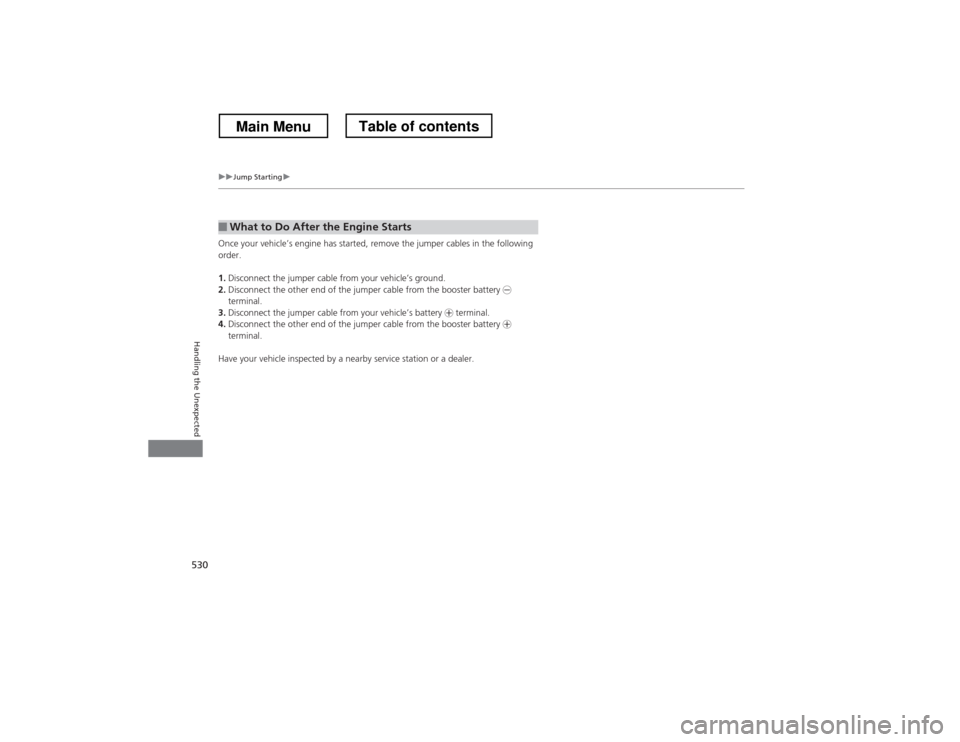
Once your vehicle’s engine has started, remove the jumper cables in the following
order. 1.Disconnect the jumper cable from your vehicle’s ground.
2. Disconnect the other end of the jumper cable from the booster battery -
terminal.
3. Disconnect the jumper cable from your vehicle’s battery + terminal.
4. Disconnect the other end of the jumper cable from the booster battery +
terminal.
Have your vehicle inspected by a nearby service station or a dealer.
■What to Do After the Engine Starts
Main MenuTable of contents
Page 535 of 573

534
Handling the Unexpected
Indicator, Coming On/Blinking
If the Low Oil Pressure Indicator Comes On■Reasons for the indicator to come on
Comes on when the engine oil pressure is low. ■ What to do as soon as the indicator comes on
1. Immediately park the vehicle in a safe place.
2. If necessary, turn the hazard warning lights on.
■ What to do after parking the vehicle
1. Stop the engine and let it sit for about one minute.
2. Open the hood and check the oil level.
uAdd oil as necessary.
3. Start the engine and check the low oil pressure indicator.
uThe light goes out: Start driving again.uThe light does not go out within 10 seconds: Stop the engine and
contact a dealer for repairs immediately.
If the Charging System Indicator Comes On
■Reasons for the indicator to come on
Comes on when the battery is not being charged. ■ What to do when the indicator comes on
Turn off the heating and cooling system *
/climate control system *
, rear
defogger, and other electrical systems, and immediately contact a dealer for repairs.
1If the Low Oil Pressure Indicator Comes On
NOTICERunning the engine with low oil pressure can cause
serious mechanical damage almost immediately.
1If the Charging System Indicator Comes On
If you need to stop temporarily, do not turn off the
engine. Restarting the engine may rapidly discharge the battery.
* Not available on all models
Main MenuTable of contents