Page 50 of 573
49
uuAirbagsuSide Curtain Airbags
Continued
Safe Driving
Side Curtain Airbags
Side curtain airbags help protect the heads of the driver and passengers in outer
seating positions during a moderate-to-severe side impact. The side curtain airbags
equipped in this vehicle are also designed to help reduce the likelihood of partial and
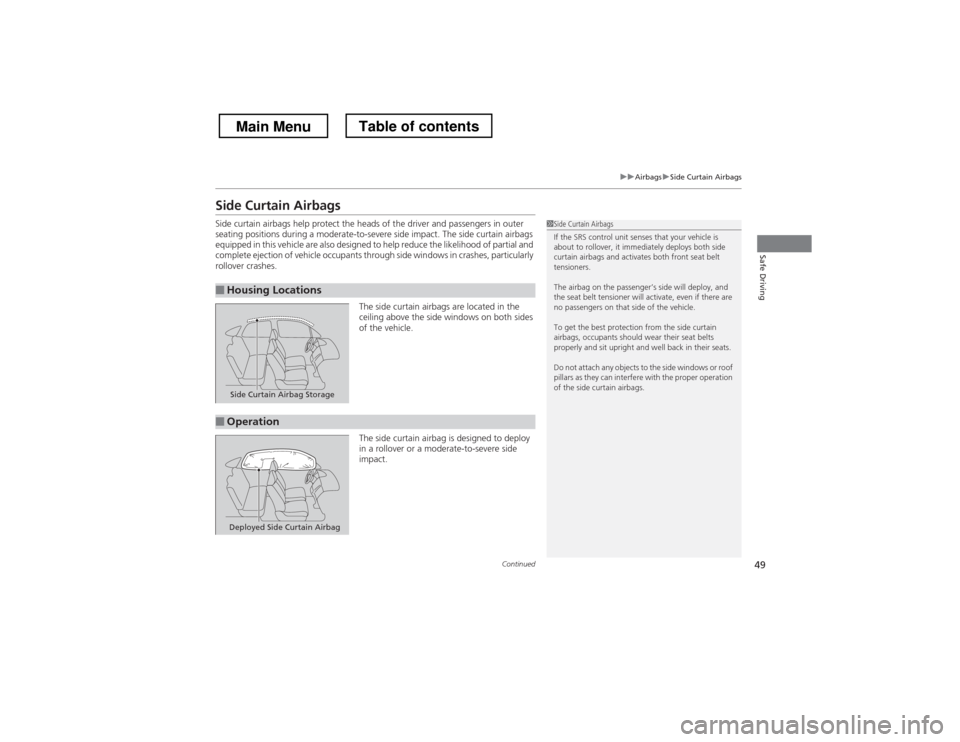
complete ejection of vehicle occupants through side windows in crashes, particularly rollover crashes.The side curtain airbags are located in the
ceiling above the side windows on both sides
of the vehicle.
The side curtain airbag is designed to deploy
in a rollover or a moderate-to-severe side
impact.
■Housing Locations
1Side Curtain Airbags
If the SRS control unit senses that your vehicle is
about to rollover, it immediately deploys both side
curtain airbags and activates both front seat belt
tensioners.
The airbag on the passenger’s side will deploy, and
the seat belt tensioner will activate, even if there are
no passengers on that side of the vehicle.
To get the best protection from the side curtain
airbags, occupants should wear their seat belts
properly and sit upright and well back in their seats.
Do not attach any objects to the side windows or roof
pillars as they can interfere with the proper operation
of the side curtain airbags.
Side Curtain Airbag Storage
■Operation
Deployed Side Curtain Airbag
Main MenuTable of contents
Page 57 of 573
56
uuChild SafetyuSafety of Infants and Small Children
Safe Driving
Safety of Infants and Small Children
An infant must be properly restrained in a rear-facing, reclining child seat until the
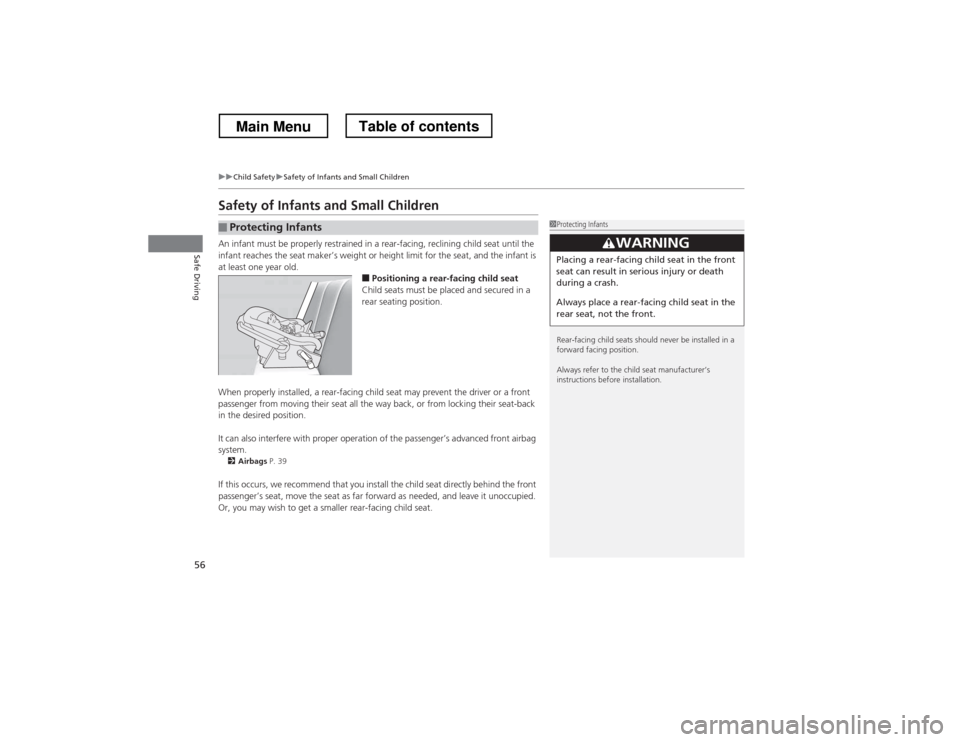
infant reaches the seat maker’s weight or height limit for the seat, and the infant is at least one year old.■Positioning a rear-facing child seat
Child seats must be placed and secured in a
rear seating position.
When properly installed, a rear-facing child seat may prevent the driver or a front
passenger from moving their seat all the way back, or from locking their seat-back
in the desired position.
It can also interfere with proper operation of the passenger’s advanced front airbag system. 2 Airbags P. 39
If this occurs, we recommend that you install the child seat directly behind the front
passenger’s seat, move the seat as far forward as needed, and leave it unoccupied.
Or, you may wish to get a smaller rear-facing child seat.
■Protecting Infants1Protecting Infants
Rear-facing child seats should never be installed in a
forward facing position.
Always refer to the child seat manufacturer’s
instructions before installation.
3WARNING
Placing a rear-facing child seat in the front
seat can result in serious injury or death
during a crash.
Always place a rear-facing child seat in the
rear seat, not the front.
Main MenuTable of contents
Page 59 of 573
uuChild SafetyuSafety of Infants and Small Children
58
Safe DrivingMost child seats are LATCH-compatible (Lower Anchors and Tethers for CHildren).
Some have a rigid-type connec tor, while others have a flexible-type connector. Both
are equally easy to use. Some existing and previously owned child seats can only be
installed using the seat belt. Whichever type you choose, follow the child seat
manufacturer’s use and care instructions as well as the instructions in this manual.
Proper installation is key to maximizing your child’s safety.
In seating positions and vehicles not equipped with LATCH, a LATCH compatible
child seat can be installed using th e seat belt and a top tether for added security.
This is because all child seats are required to be designed so that they can be secured
with a lap belt or the lap part of a lap/shoulder belt. In addition, the child seat
manufacturer may advise that a seat belt be used to attach a LATCH-compatible seat
once a child reaches a specified weight. Please read the child seat owner’s manual
for proper installation instructions. ■ Important consideration when selecting a child seat
Make sure the child seat meets the following three requirements: • The child seat is the correct type and size for the child.
• The child seat is the correct type for the seating position.
• The child seat is compliant with Federal Motor Vehicle Safety Standard 213 or
Canadian Motor Vehicle Safety Standard 213.
■Selecting a Child Seat1Selecting a Child Seat
Installation of a LATCH-compatible child seat is
simple.
LATCH-compatible child seats have been developed
to simplify the installation process and reduce the
likelihood of injuries caused by incorrect installation.
Main MenuTable of contents
Page 60 of 573
59
uuChild SafetyuSafety of Infants and Small Children
Continued
Safe DrivingA LATCH-compatible child seat can be installed in either of the two outer rear seats.
A child seat is attached to the lower anchors with either the rigid or flexible type of
connectors.1.Locate the lower anchors under the marks.
2. Place the child seat on the vehicle seat then
attach the child seat to the lower anchors
according to the instructions that came
with the child seat.
uWhen installing the child seat, make sure
that the lower anchors are not
obstructed by the seat belt or any other
object.
■Installing a LATCH-Compatible Child Seat
Marks
Rigid Type
Lower Anchors
Main MenuTable of contents
Page 66 of 573
65
uuChild SafetyuSafety of Larger Children
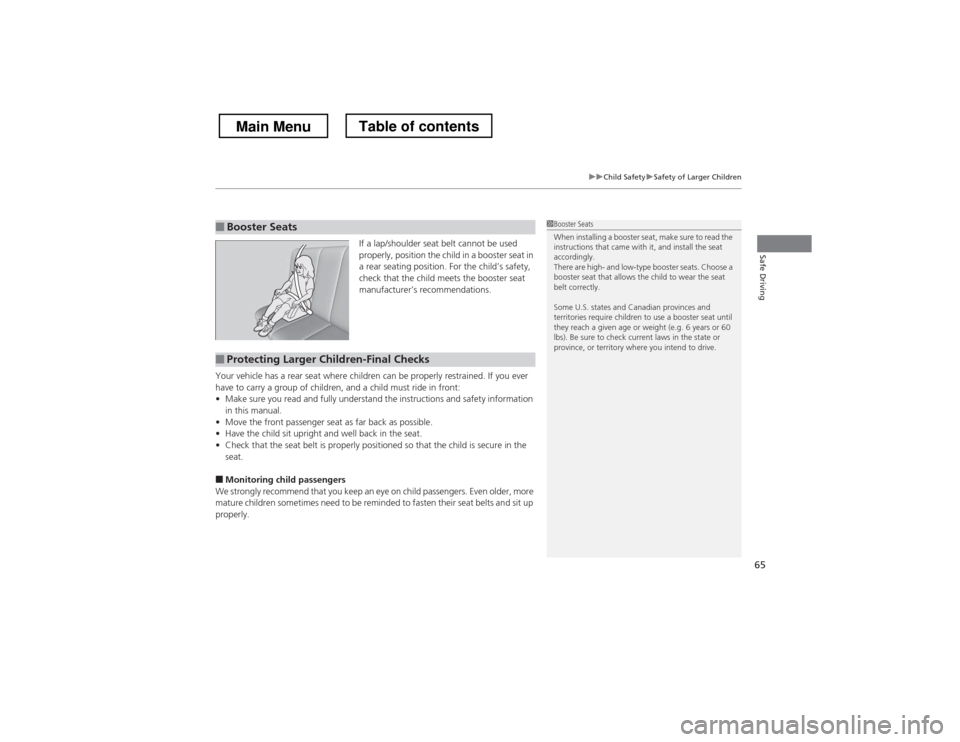
Safe DrivingIf a lap/shoulder seat belt cannot be used
properly, position the child in a booster seat in
a rear seating position. For the child’s safety,
check that the child meets the booster seat
manufacturer’s recommendations.
Your vehicle has a rear seat where children can be properly restrained. If you ever
have to carry a group of children, and a child must ride in front: • Make sure you read and fully understand the instructions and safety information
in this manual.
• Move the front passenger seat as far back as possible.
• Have the child sit upright and well back in the seat.
• Check that the seat belt is properly positioned so that the child is secure in the seat.
■ Monitoring child passengers
We strongly recommend that you keep an eye on child passengers. Even older, more
mature children sometimes need to be reminded to fasten their seat belts and sit up
properly.
■Booster Seats1Booster Seats
When installing a booster seat, make sure to read the
instructions that came with it, and install the seat
accordingly.
There are high- and low-type booster seats. Choose a
booster seat that allows the child to wear the seat
belt correctly.
Some U.S. states and Canadian provinces and
territories require children to use a booster seat until
they reach a given age or weight (e.g. 6 years or 60
lbs). Be sure to check current laws in the state or
province, or territory where you intend to drive.
■Protecting Larger Children-Final Checks
Main MenuTable of contents
Page 88 of 573
87
Controls
This chapter explains how to operate the various controls necessary for driving.
Setting the Clock ................................ 88
Locking and Unlocking the Doors Key Types and Functions ... ................. 91
Low Smart Entry Remote Signal Strength*.. 93Locking/Unlocking the Doors from the
Outside ............................................ 94
Locking/Unlocking the Doors from the
Inside ............................................... 99
Childproof Door Locks ..................... 100
Auto Door Locking/Unlocking .......... 101
Opening and Closing the Tailgate ... 105
Security System ................................ 107
Immobilizer System .......................... 107
Security System Alarm ...................... 107
Opening and Closing the Windows ..... 110
Opening and Closing the Moonroof.. 113Operating the Switches Around the
Steering Wheel
Ignition Switch *
............................... 114
ENGINE START/STOP Button *
........... 115
Ignition Switch and Power Mode Comparison ................................... 118
Turn Signals ..................................... 119
Light Switches.................................. 119
Fog Lights ........................................ 122
Daytime Running Lights ................... 122
Wipers and Washers ........................ 123
Brightness Control ........................... 125
Rear Defogger/Heated Door Mirror Button.. 126Driving Position Memory System *
.... 127 Adjusting the Steering Wheel .......... 129
Adjusting the Mirrors ....................... 130
Interior Rearview Mirror ................... 130
Power Door Mirrors ......................... 131
Adjusting the Seats .......................... 133
Adjusting the Seat Positions ............. 133
Interior Lights/Interior Convenience Items ................................................ 142
Interior Lights .................................. 142
Interior Convenience Items .............. 144
Heating and Cooling System *
......... 154
Using Vents, Heating and A/C.......... 154
Climate Control System *
.................. 157
Using Automatic Climate Control .... 157
Automatic Climate Control Sensors ... 162
* Not available on all models
Main Menu
Page 134 of 573
133
Continued
Controls
Adjusting the Seats
Adjusting the Seat Positions
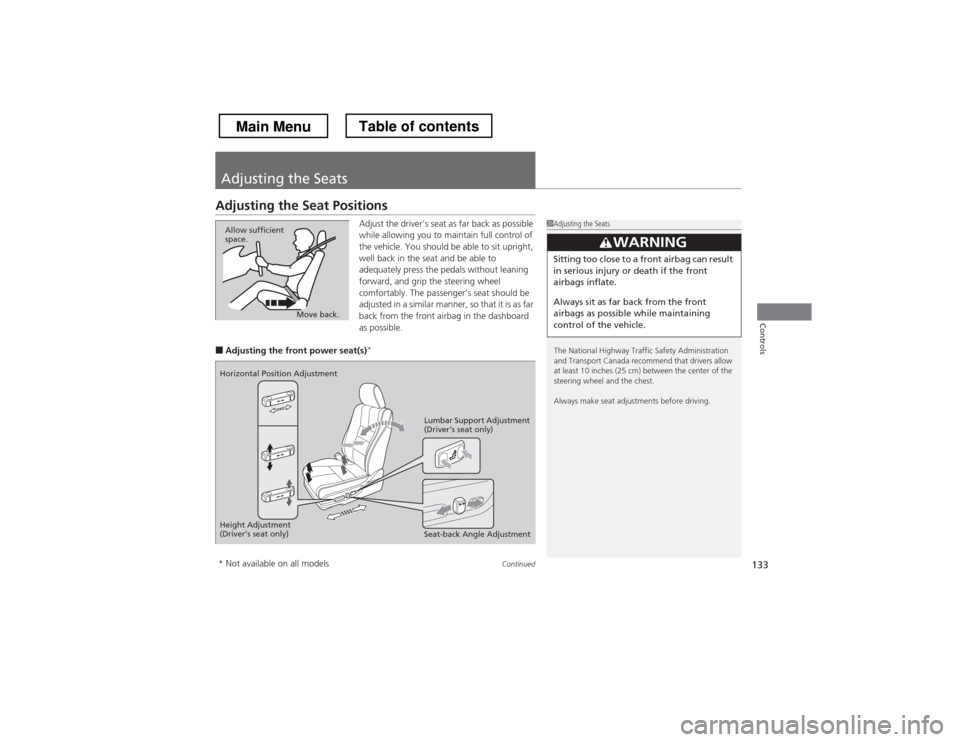
Adjust the driver’s seat as far back as possible
while allowing you to maintain full control of
the vehicle. You should be able to sit upright,
well back in the seat and be able to
adequately press the pedals without leaning
forward, and grip the steering wheel
comfortably. The passenger’s seat should be
adjusted in a similar manner, so that it is as far
back from the front airbag in the dashboard
as possible.
■ Adjusting the front power seat(s) *
1Adjusting the Seats
The National Highway Traffic Safety Administration
and Transport Canada recommend that drivers allow
at least 10 inches (25 cm) between the center of the
steering wheel and the chest.
Always make seat adjustments before driving.
3WARNING
Sitting too close to a front airbag can result
in serious injury or death if the front
airbags inflate.
Always sit as far back from the front
airbags as possible while maintaining
control of the vehicle.
Move back.
Allow sufficient
space.
Horizontal Position Adjustment
Height Adjustment
(Driver
Page 135 of 573
uuAdjusting the SeatsuAdjusting the Seat Positions
134
Controls
■ Adjusting the front manual seat *1Adjusting the front manual seat
*
Once a seat is adjusted correctly, rock it back and
forth to make sure it is locked in position.
Horizontal Position Adjustment
Pull up on the bar to move the seat,
then release the bar.
Seat-back Angle
Adjustment
Pull up the lever to
change the angle.
* Not available on all models
Main MenuTable of contents