2013 HONDA CIVIC HYBRID ECU
[x] Cancel search: ECUPage 264 of 346
263
uuMaintenance Under the HooduAdding Engine Oil
Maintenance
Adding Engine Oil
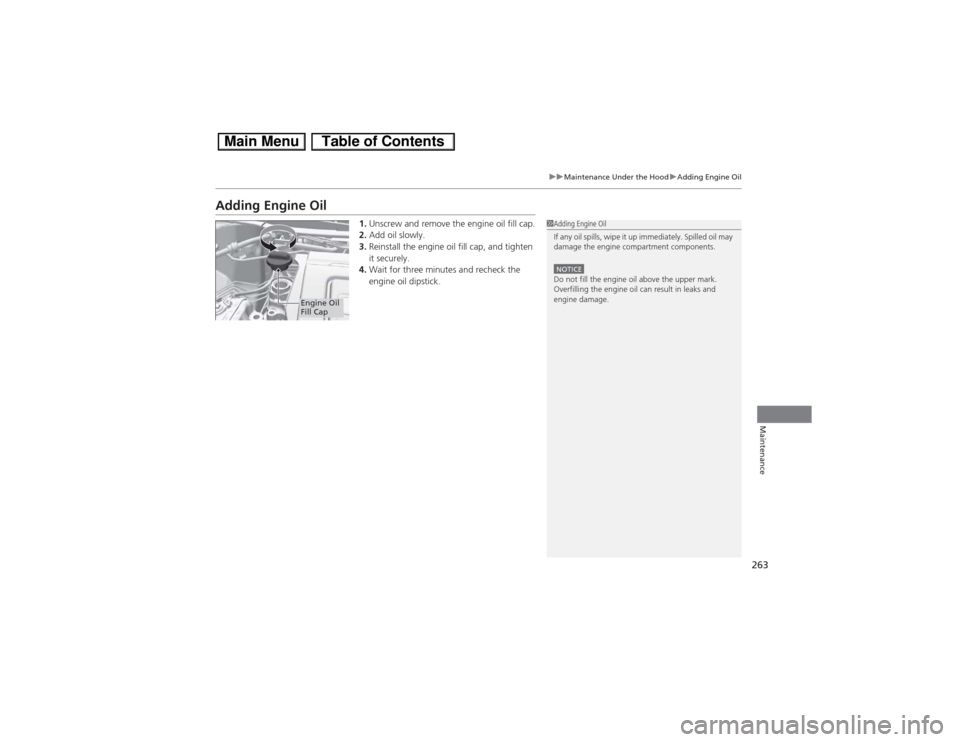
1.Unscrew and remove the engine oil fill cap.
2.Add oil slowly.
3.Reinstall the engine oil fill cap, and tighten
it securely.
4.Wait for three minutes and recheck the
engine oil dipstick.
1Adding Engine Oil
If any oil spills, wipe it up immediately. Spilled oil may
damage the engine compartment components.NOTICEDo not fill the engine oil above the upper mark.
Overfilling the engine oil can result in leaks and
engine damage.
Engine Oil
Fill Cap
Page 266 of 346
265
uuMaintenance Under the HooduChanging the Engine Oil and Oil Filter
Maintenance
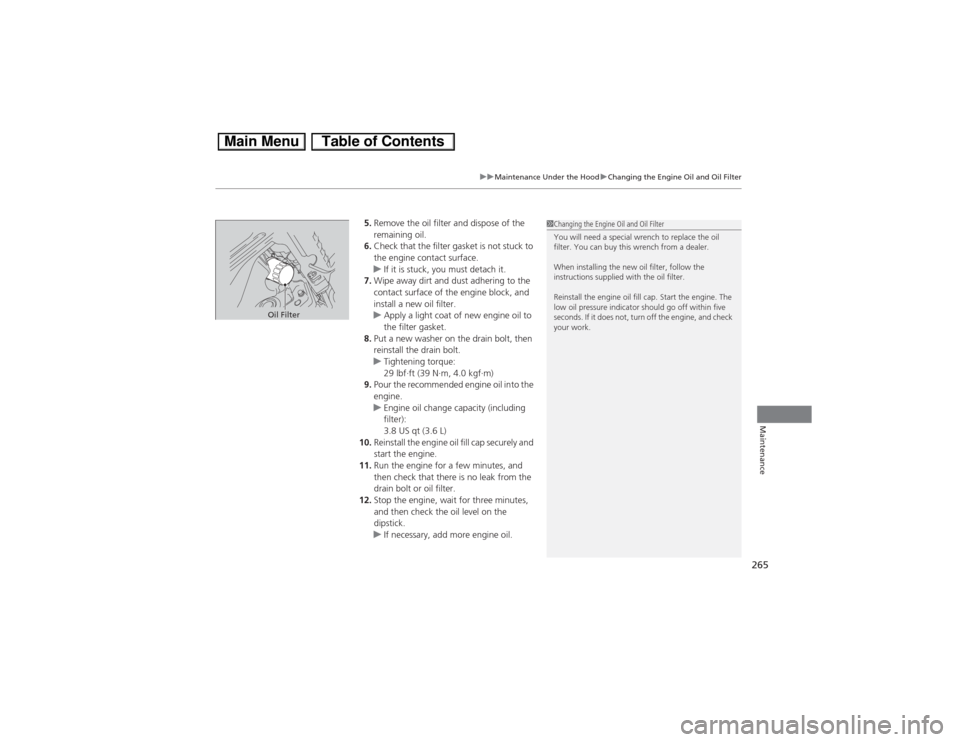
5.Remove the oil filter and dispose of the
remaining oil.
6.Check that the filter gasket is not stuck to
the engine contact surface.
uIf it is stuck, you must detach it.
7.Wipe away dirt and dust adhering to the
contact surface of the engine block, and
install a new oil filter.
uApply a light coat of new engine oil to
the filter gasket.
8.Put a new washer on the drain bolt, then
reinstall the drain bolt.
uTightening torque:
29 lbf∙ft (39 N∙m, 4.0 kgf∙m)
9.Pour the recommended engine oil into the
engine.
uEngine oil change capacity (including
filter):
3.8 US qt (3.6 L)
10.Reinstall the engine oil fill cap securely and
start the engine.
11.Run the engine for a few minutes, and
then check that there is no leak from the
drain bolt or oil filter.
12.Stop the engine, wait for three minutes,
and then check the oil level on the
dipstick.
uIf necessary, add more engine oil.
1Changing the Engine Oil and Oil Filter
You will need a special wrench to replace the oil
filter. You can buy this wrench from a dealer.
When installing the new oil filter, follow the
instructions supplied with the oil filter.
Reinstall the engine oil fill cap. Start the engine. The
low oil pressure indicator should go off within five
seconds. If it does not, turn off the engine, and check
your work.
Oil Filter
Page 269 of 346
268
uuMaintenance Under the HooduTransmission Fluid
Maintenance
Transmission FluidCheck the fluid level when the engine is at normal operating temperature.
1.Park on level ground, and start the engine.
2.Wait until the radiator fan starts and then
turn off the engine.
uPerform step 3 after waiting for about 60
seconds (less than 90 seconds).
3.Remove the dipstick (yellow loop) from the
transmission and wipe it with a clean cloth.
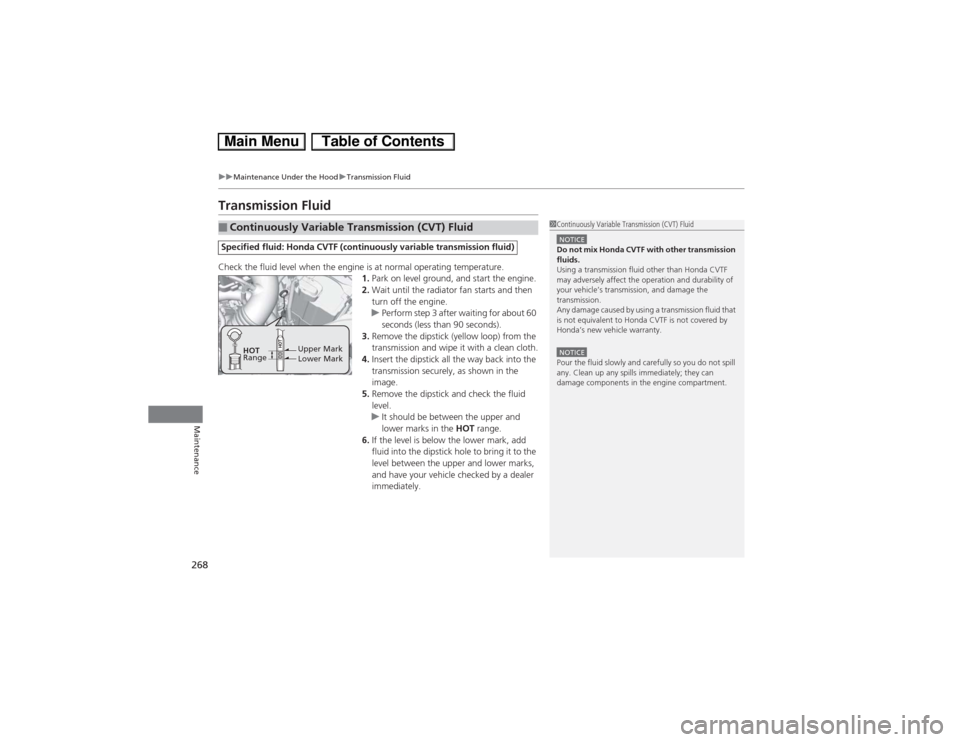
4.Insert the dipstick all the way back into the
transmission securely, as shown in the
image.
5.Remove the dipstick and check the fluid
level.
uIt should be between the upper and
lower marks in the HOT range.
6.If the level is below the lower mark, add
fluid into the dipstick hole to bring it to the
level between the upper and lower marks,
and have your vehicle checked by a dealer
immediately.■Continuously Variable Transmission (CVT) FluidSpecified fluid: Honda CVTF (continuously variable transmission fluid)
1Continuously Variable Transmission (CVT) FluidNOTICEDo not mix Honda CVTF with other transmission
fluids.
Using a transmission fluid other than Honda CVTF
may adversely affect the operation and durability of
your vehicle’s transmission, and damage the
transmission.
Any damage caused by using a transmission fluid that
is not equivalent to Honda CVTF is not covered by
Honda’s new vehicle warranty.NOTICEPour the fluid slowly and carefully so you do not spill
any. Clean up any spills immediately; they can
damage components in the engine compartment.
Upper Mark
Lower Mark HOT
Range
Page 293 of 346
uuCleaninguInterior Care
292Maintenance
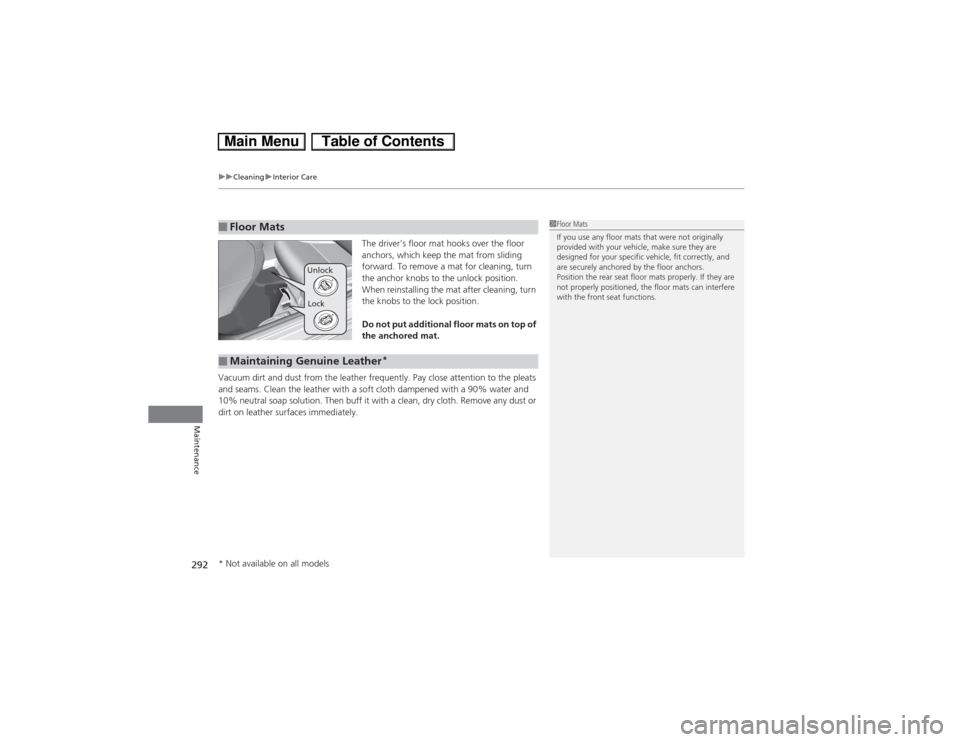
The driver’s floor mat hooks over the floor
anchors, which keep the mat from sliding
forward. To remove a mat for cleaning, turn
the anchor knobs to the unlock position.
When reinstalling the mat after cleaning, turn
the knobs to the lock position.
Do not put additional floor mats on top of
the anchored mat.
Vacuum dirt and dust from the leather frequently. Pay close attention to the pleats
and seams. Clean the leather with a soft cloth dampened with a 90% water and
10% neutral soap solution. Then buff it with a clean, dry cloth. Remove any dust or
dirt on leather surfaces immediately.
■Floor Mats
1Floor Mats
If you use any floor mats that were not originally
provided with your vehicle, make sure they are
designed for your specific vehicle, fit correctly, and
are securely anchored by the floor anchors.
Position the rear seat floor mats properly. If they are
not properly positioned, the floor mats can interfere
with the front seat functions.
Unlock
Lock
■Maintaining Genuine Leather
*
* Not available on all models
Page 311 of 346

uuIf a Tire Goes FlatuChanging a Flat Tire
310Handling the Unexpected
1.Remove the center cap.
2.Place the flat tire face down in the compact
spare tire well.
3.Remove the spacer cone from the wing
bolt, flip it over, and insert it back on the
bolt. Secure the flat tire with the wing bolt.
4.Securely put the jack and wheel nut wrench
back in the tool case. Store the case in the
trunk.
If you replace a flat tire with the compact spare tire, the low tire pressure/TPMS
indicator comes on while you are driving. After driving for a few miles (kilometers),
the indicator will start blinking for a short time and then stay on. CHECK TPMS
SYSTEM appears on the intelligent multi-information display (i-MID), but this is
normal.
If you replace the tire with a specified regular tire, the warning message on the i-MID
and the low tire pressure/TPMS indicator will go off after a few miles (kilometers).
■Storing the Flat Tire
1Storing the Flat Tire
3
WARNING
Loose items can fly around the interior in a
crash and can seriously injure the
occupants.
Store the wheel, jack, and tools securely
before driving.
Spacer
Cone Wing Bolt
For compact spare tireFor normal
tire■TPMS and the Compact Spare Tire
1TPMS and the Compact Spare Tire
The system cannot monitor the pressure of the
compact spare tire. Manually check the compact
spare tire pressure to be sure that it is correct.
Use TPMS specific wheels. Each is equipped with a
tire pressure sensor mounted inside the tire behind
the valve stem.
U.S. models
Page 313 of 346
312Handling the Unexpected
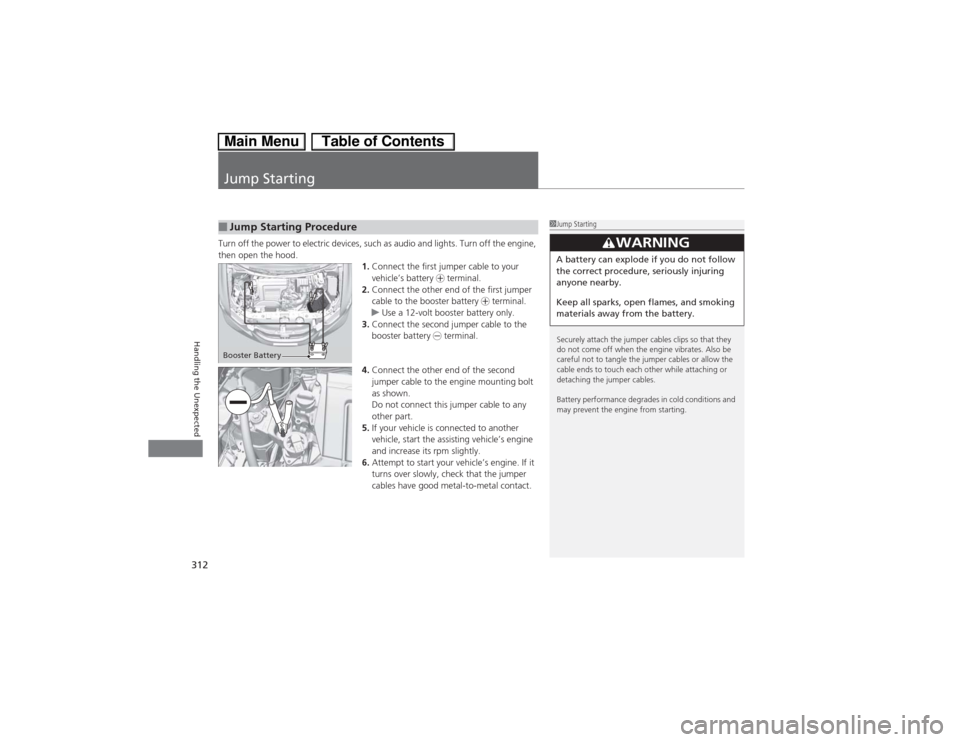
Jump StartingTurn off the power to electric devices, such as audio and lights. Turn off the engine,
then open the hood.
1.Connect the first jumper cable to your
vehicle’s battery + terminal.
2.Connect the other end of the first jumper
cable to the booster battery + terminal.
uUse a 12-volt booster battery only.
3.Connect the second jumper cable to the
booster battery - terminal.
4.Connect the other end of the second
jumper cable to the engine mounting bolt
as shown.
Do not connect this jumper cable to any
other part.
5.If your vehicle is connected to another
vehicle, start the assisting vehicle’s engine
and increase its rpm slightly.
6.Attempt to start your vehicle’s engine. If it
turns over slowly, check that the jumper
cables have good metal-to-metal contact.■Jump Starting Procedure
1Jump Starting
Securely attach the jumper cables clips so that they
do not come off when the engine vibrates. Also be
careful not to tangle the jumper cables or allow the
cable ends to touch each other while attaching or
detaching the jumper cables.
Battery performance degrades in cold conditions and
may prevent the engine from starting.
3
WARNING
A battery can explode if you do not follow
the correct procedure, seriously injuring
anyone nearby.
Keep all sparks, open flames, and smoking
materials away from the battery.
Booster Battery
Page 338 of 346

Index
337Index
Index
AAccessories and Modifications................ 250
Accessory Power Sockets......................... 137
Additives
Coolant .................................................. 266
Engine Oil ............................................... 263
Washer ................................................... 270
Additives, Engine Oil............................... 261
Adjusting
Front Seats.............................................. 129
Head Restraints ....................................... 131
Headlights .............................................. 271
Mirrors.................................................... 128
Steering Wheel ....................................... 127
Temperature ............................................. 87
Air Conditioning System (Climate
Control System)...................................... 140
Changing the Mode................................ 140
Defrosting the Windshield and
Windows .............................................. 141
Dust and Pollen Filter .............................. 290
Recirculation/Fresh Air Mode................... 140
Sensor .................................................... 142
Using Automatic Climate Control............ 140
Air Pressure...................................... 279, 327
Airbags....................................................... 39
Advanced Airbags ..................................... 45
After a Collision ........................................ 43
Airbag Care .............................................. 51
Event Data Recorders ................................ 24
Front Airbags (SRS) ................................... 42Indicator .............................................. 49, 71
Passenger Airbag Off Indicator .................. 50
Sensors...................................................... 45
Side Airbags .............................................. 46
Side Curtain Airbags .................................. 48
AM/FM Radio............................................ 150
Ambient Meter............................................. 8
Anti-lock Brake System (ABS).................. 242
Indicator .................................................... 71
Audio Antenna......................................... 145
Audio Remote Controls...................... 17, 148
Audio System............................................ 144
Adjusting the Sound ................................ 149
Auxiliary Input Jack .................................. 146
Error Messages ........................................ 168
MP3/WMA/AAC ...................................... 163
Reactivating............................................. 146
Recommended CDs ................................. 172
Recommended Drives .............................. 174
Remote Controls ..................................... 148
Security Code .......................................... 146
Theft Protection....................................... 146
USB Adapter Cable .................................. 145
USB Flash Drives ...................................... 174
Authorized Manuals................................. 335
Auto Door Locking/Unlocking................. 111
Customize ........................................... 91, 98
Auto Idle Stop........................................... 222
Auto Idle Stop Indicator............................. 73
Automatic Lighting.................................. 121Automatic Transmission (CVT)................. 218
Creeping ................................................. 218
Fluid ........................................................ 268
Kickdown ................................................ 218
Operating the Shift Lever................... 18, 220
Shift Lever Does Not Move ...................... 314
Shifting ................................................... 219
Auxiliary Input Jack.................................. 146
Average Fuel Economy.............................. 86
Average Speed........................................... 87
BBattery...................................................... 288
Charging System Indicator................. 69, 317
Jump Starting .......................................... 312
Maintenance (Checking the 12 Volt
Battery) ................................................. 288
Maintenance (Replacing) ......................... 289
Belts (Seat).................................................. 32
Beverage Holders..................................... 136
Bluetooth® Audio..................................... 166
Bluetooth® HandsFreeLink®..................... 175
Booster Seats (For Children)...................... 63
Page 341 of 346
340Index
GGasoline (Fuel)
Economy ................................................. 249
Gauge ....................................................... 82
Information ............................................. 246
Instant Fuel Economy ........................... 82, 87
Low Fuel Indicator ..................................... 70
Refueling ................................................. 246
Gauges......................................................... 82
Gear Shift Lever Positions
Automatic Transmission (CVT) ................. 219
Glass (care)................................................ 293
Glove Box.................................................. 135HHalogen Bulbs........................................... 271
Handling the Unexpected........................ 295
HandsFreeLink® (HFL)............................... 175
Automatic Import of Cellular Phonebook
and Call History ..................................... 191
Automatic Transferring ............................ 189
Caller’s ID Information ............................. 189
HFL Buttons ............................................. 175
HFL Menus .............................................. 177
HFL Status Display.................................... 176
Making a Call .......................................... 195
Options During a Call .............................. 200
Phone Setup ............................................ 182
Receiving a Call ....................................... 199
Speed Dial ............................................... 192Text Message .................................. 187, 201
To Clear the System ................................ 190
To Create a Security PIN .......................... 188
Hazard Warning Button.............................. 2
Head Restraints........................................ 131
Headlights................................................. 121
Aiming .................................................... 271
Automatic Operation............................... 121
Dimming ......................................... 120, 123
Operating........................................ 120, 123
Heaters (Seat)........................................... 139
HFL (HandsFreeLink®)............................... 175
High Temperature Indicator...................... 76
High-Beam Indicator.................................. 75
Hill Start Assist System............................. 216
Honda IMA System..................................... 10
IIdentification Numbers............................ 328
Engine and Transmission ......................... 328
Vehicle Identification ............................... 328
Ignition Switch......................................... 119
Illumination Control................................. 125
Knob ....................................................... 125
IMA System Indicator................................. 74
Immobilizer System.................................. 115
Indicator.................................................... 75
Indicators.................................................... 68
Anti-lock Brake System (ABS)..................... 71
Auto Idle Stop ........................................... 73Brake System ............................................ 68
Charging System............................... 69, 317
CRUISE CONTROL ............................. 75, 226
CRUISE MAIN.................................... 75, 225
Door Open................................................ 31
ECON Mode ..................................... 76, 221
Electric Power Steering (EPS)
System ............................................ 73, 319
Forward Collision Warning (FCW) ............. 77
High Temperature ..................................... 76
High-Beam................................................ 75
IMA System .............................................. 74
Immobilizer System ................................... 75
Lane Departure Warning (LDW) ................ 78
Lights On .................................................. 75
Low Fuel ................................................... 70
Low Oil Pressure ............................... 72, 317
Low Temperature...................................... 76
Low Tire Pressure/TPMS .................... 73, 237
Malfunction Indicator Lamp .............. 69, 318
Parking Brake and Brake System ....... 68, 319
Seat Belt Reminder.............................. 33, 70
Security System Alarm............................... 76
Shift Lever Position.................................... 69
Supplemental Restraint System ........... 49, 71
System Message ....................................... 74
Transmission ............................................. 70
Trunk Open .............................................. 72
Turn Signal ............................................... 74
Vehicle Stability Assist (VSA®)
System ............................................ 71, 235