Page 225 of 375
Adjusting automatic transmission fluid levels
Before adding any fluid, make sure the correct type is used. The type of
fluid used is normally indicated on the dipstick and also in the
Capacities and Specificationschapter.
Note:Use of a non-approved automatic transmission fluid may cause
internal transmission component damage.
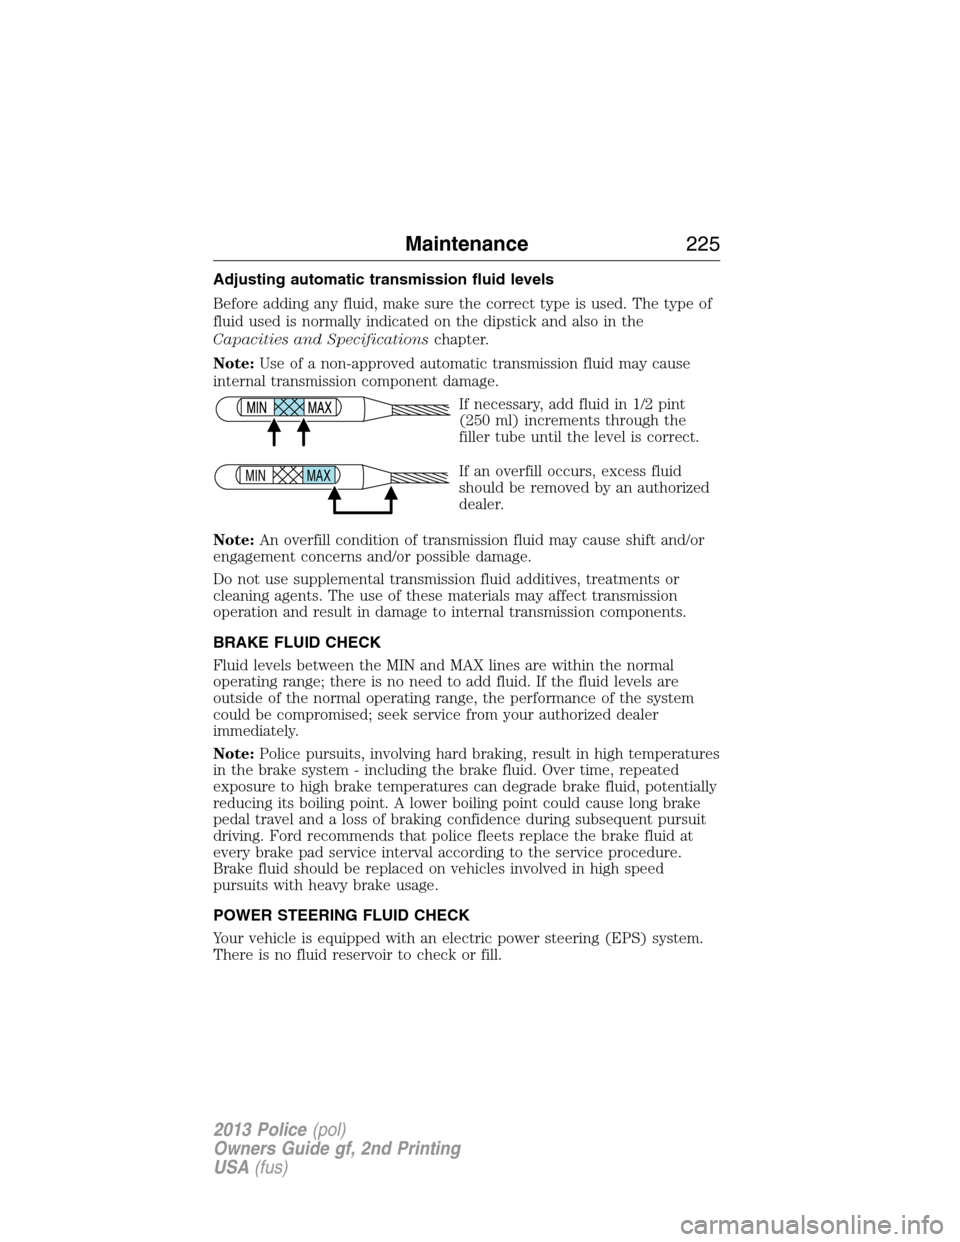
If necessary, add fluid in 1/2 pint
(250 ml) increments through the
filler tube until the level is correct.
If an overfill occurs, excess fluid
should be removed by an authorized
dealer.
Note:An overfill condition of transmission fluid may cause shift and/or
engagement concerns and/or possible damage.
Do not use supplemental transmission fluid additives, treatments or
cleaning agents. The use of these materials may affect transmission
operation and result in damage to internal transmission components.
BRAKE FLUID CHECK
Fluid levels between the MIN and MAX lines are within the normal
operating range; there is no need to add fluid. If the fluid levels are
outside of the normal operating range, the performance of the system
could be compromised; seek service from your authorized dealer
immediately.
Note:Police pursuits, involving hard braking, result in high temperatures
in the brake system - including the brake fluid. Over time, repeated
exposure to high brake temperatures can degrade brake fluid, potentially
reducing its boiling point. A lower boiling point could cause long brake
pedal travel and a loss of braking confidence during subsequent pursuit
driving. Ford recommends that police fleets replace the brake fluid at
every brake pad service interval according to the service procedure.
Brake fluid should be replaced on vehicles involved in high speed
pursuits with heavy brake usage.
POWER STEERING FLUID CHECK
Your vehicle is equipped with an electric power steering (EPS) system.
There is no fluid reservoir to check or fill.
MAX MIN
Maintenance225
2013 Police(pol)
Owners Guide gf, 2nd Printing
USA(fus)
Page 227 of 375
WARNING:Keep batteries out of reach of children. Batteries
contain sulfuric acid. Avoid contact with skin, eyes or clothing.
Shield your eyes when working near the battery to protect against possible
splashing of acid solution. In case of acid contact with skin or eyes, flush
immediately with water for a minimum of 15 minutes and get prompt
medical attention. If acid is swallowed, call a physician immediately.
WARNING:Battery posts, terminals and related accessories contain
lead and lead compounds.Note:Wash hands after handling.
Note:If your battery has a cover/shield, make sure it is reinstalled after
the battery has been cleaned or replaced.
For longer, trouble-free operation, keep the top of the battery clean and
dry. Also, make certain the battery cables are always tightly fastened to
the battery terminals.
Note:Electrical or electronic accessories or components added to the
vehicle by the dealer or the owner may adversely affect battery
performance and durability.
The Motorcraft�maintenance-free battery normally does not require
additional water during its life of service.
If you see any corrosion on the battery or terminals, remove the cables
from the terminals and clean with a wire brush. You can neutralize the
acid with a solution of baking soda and water.
It is recommended that the negative battery cable terminal be disconnected
from the battery if you plan to store your vehicle for an extended period of
time. This will minimize the discharge of your battery during storage.
Because your vehicle’s engine is electronically controlled by a computer,
some control conditions are maintained by power from the battery. When
the battery is disconnected or a new battery is installed, the engine must
relearn its idle and fuel trim strategy for optimum driveability and
performance. To begin this process:
1. With the vehicle at a complete stop, set the parking brake.
2. Put the gearshift in P (Park), turn off all accessories and start the engine.
3. Run the engine until it reaches normal operating temperature.
4. Allow the engine to idle for at least one minute.
5. Turn the A/C on and allow the engine to idle for at least one minute.
Maintenance227
2013 Police(pol)
Owners Guide gf, 2nd Printing
USA(fus)
Page 233 of 375
CHANGING A BULB
Lamp Assembly Condensation
Exterior lamps are vented to accommodate normal changes in pressure.
Condensation can be a natural by-product of this design. When moist air
enters the lamp assembly through the vents, there is a possibility that
condensation can occur when the temperature is cold. When normal
condensation occurs, a thin film of mist can form on the interior of the
lens. The thin mist eventually clears and exits through the vents during
normal operation. Clearing time may take as long as 48 hours under dry
weather conditions.
These are examples of acceptable condensation:
•Presence of thin mist (no streaks, drip marks or droplets).
•Fine mist covers less than 50% of the lens.
These are examples of unacceptable moisture (usually caused by a lamp
water leak):
•Water puddle inside the lamp.
•Large water droplets, drip marks or streaks present on the interior of
the lens.
Take your vehicle to a dealer for service if any of the above conditions of
unacceptable moisture are present.
Maintenance233
2013 Police(pol)
Owners Guide gf, 2nd Printing
USA(fus)
Page 234 of 375
Replacing headlamp bulbs
WARNING:Handle a halogen headlamp bulb carefully and keep
out of children’s reach. Grasp the bulb only by its plastic base
and do not touch the glass. The oil from your hand could cause the
bulb to break the next time the headlamps are operated.
Note:If the bulb is accidentally touched, it should be cleaned with
rubbing alcohol before being used.
Headlamp (Sedan):
A. Front parking lamp/turn signal
bulb
B. Low/High beam headlamp bulb
C. Sidemarker bulb
Low/High beam bulbs (Sedan)
1. Make sure the headlamp switch is
in the off position, then open the
hood.
2. Reach in behind the headlamp
assembly to access the bulbs and
connectors.
3. Remove service cap.
4. Remove bulb from the headlamp assembly by turning it
counterclockwise, then pull it straight out.
ABC
234Maintenance
2013 Police(pol)
Owners Guide gf, 2nd Printing
USA(fus)
Page 235 of 375
Headlamp (Utility):
A. Low/High beam headlamp bulb
B. Front parking lamp/turn signal
bulb
C. Sidemarker bulb
Low/High beam bulbs (Utility)
1. Make sure the headlamp switch is
in the off position, then open the
hood.
2. Reach in behind the headlamp
assembly to access the bulbs and
connectors.
3. Remove service cap.
4. Turn the bulb base counterclockwise and remove
it.
5. Disconnect the electrical connector.
Reverse steps to reinstall bulb(s).
Maintenance235
2013 Police(pol)
Owners Guide gf, 2nd Printing
USA(fus)
Page 236 of 375
Front parking lamp/turn signal/sidemarker bulbs without wig-wags
(Sedan)
1. Make sure headlamp switch is in
the off position, then open the
hood.
2. Reach in behind the headlamp
assembly to access the bulb sockets
and connectors.
3. Rotate the bulb socket
counterclockwise and remove from
the lamp assembly.
4. Carefully pull the bulb out of the socket and push in the new bulb.
Install the new bulbs in reverse order from the steps above.
Front parking lamp/turn signal and sidemarker bulbs without
wig-wags (Utility)
1. Make sure that the headlamp control is
in the off position.
2. Open the hood.
3. Remove the hood overslam bumper
tower to service park/turn or sidemarker
bulbs (if needed).
236Maintenance
2013 Police(pol)
Owners Guide gf, 2nd Printing
USA(fus)
Page 255 of 375
TIRE CARE
Information About Uniform Tire Quality Grading
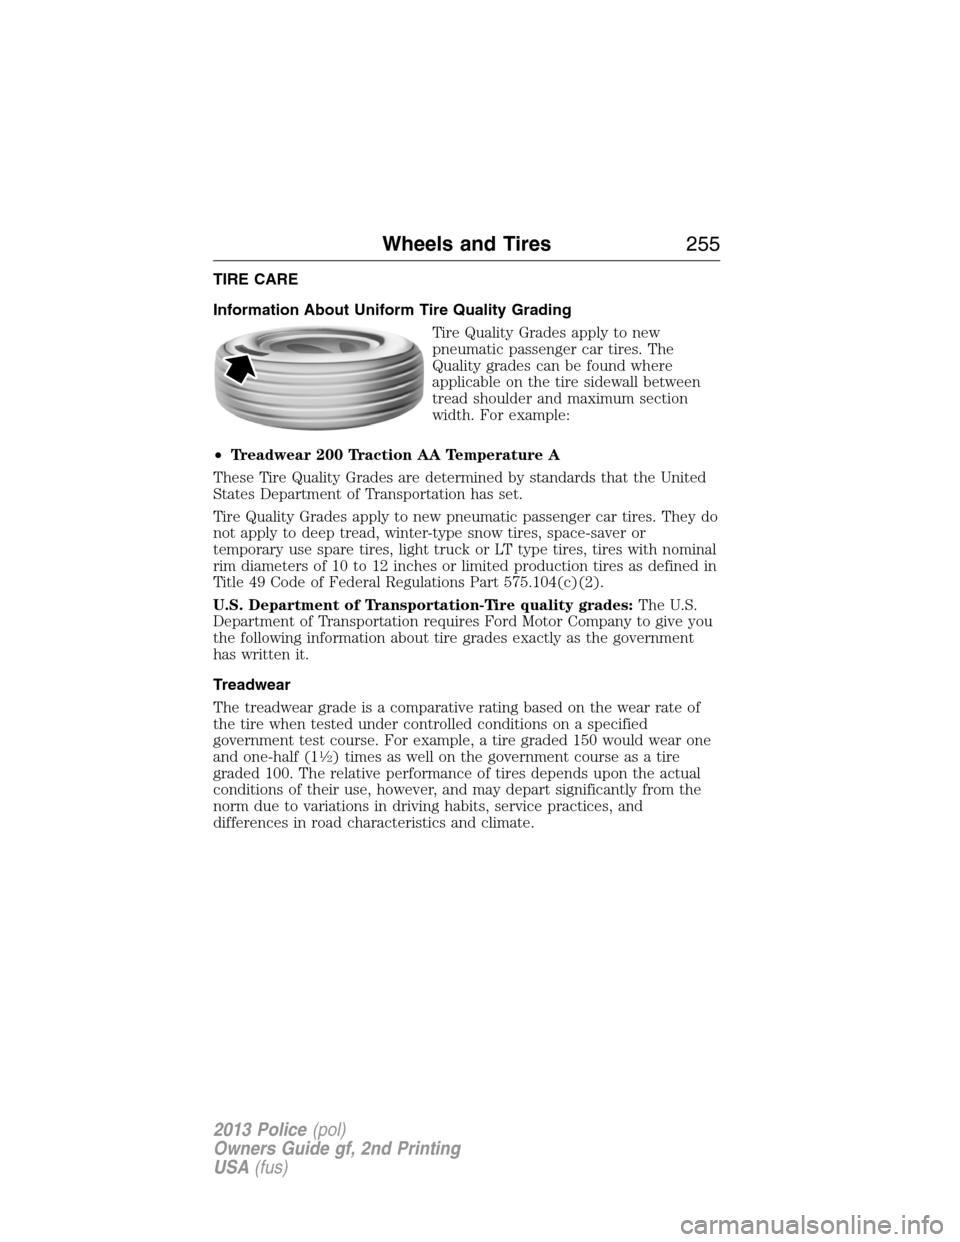
Tire Quality Grades apply to new
pneumatic passenger car tires. The
Quality grades can be found where
applicable on the tire sidewall between
tread shoulder and maximum section
width. For example:
•Treadwear 200 Traction AA Temperature A
These Tire Quality Grades are determined by standards that the United
States Department of Transportation has set.
Tire Quality Grades apply to new pneumatic passenger car tires. They do
not apply to deep tread, winter-type snow tires, space-saver or
temporary use spare tires, light truck or LT type tires, tires with nominal
rim diameters of 10 to 12 inches or limited production tires as defined in
Title 49 Code of Federal Regulations Part 575.104(c)(2).
U.S. Department of Transportation-Tire quality grades:The U.S.
Department of Transportation requires Ford Motor Company to give you
the following information about tire grades exactly as the government
has written it.
Treadwear
The treadwear grade is a comparative rating based on the wear rate of
the tire when tested under controlled conditions on a specified
government test course. For example, a tire graded 150 would wear one
and one-half (1
1�2) times as well on the government course as a tire
graded 100. The relative performance of tires depends upon the actual
conditions of their use, however, and may depart significantly from the
norm due to variations in driving habits, service practices, and
differences in road characteristics and climate.
Wheels and Tires255
2013 Police(pol)
Owners Guide gf, 2nd Printing
USA(fus)
Page 258 of 375
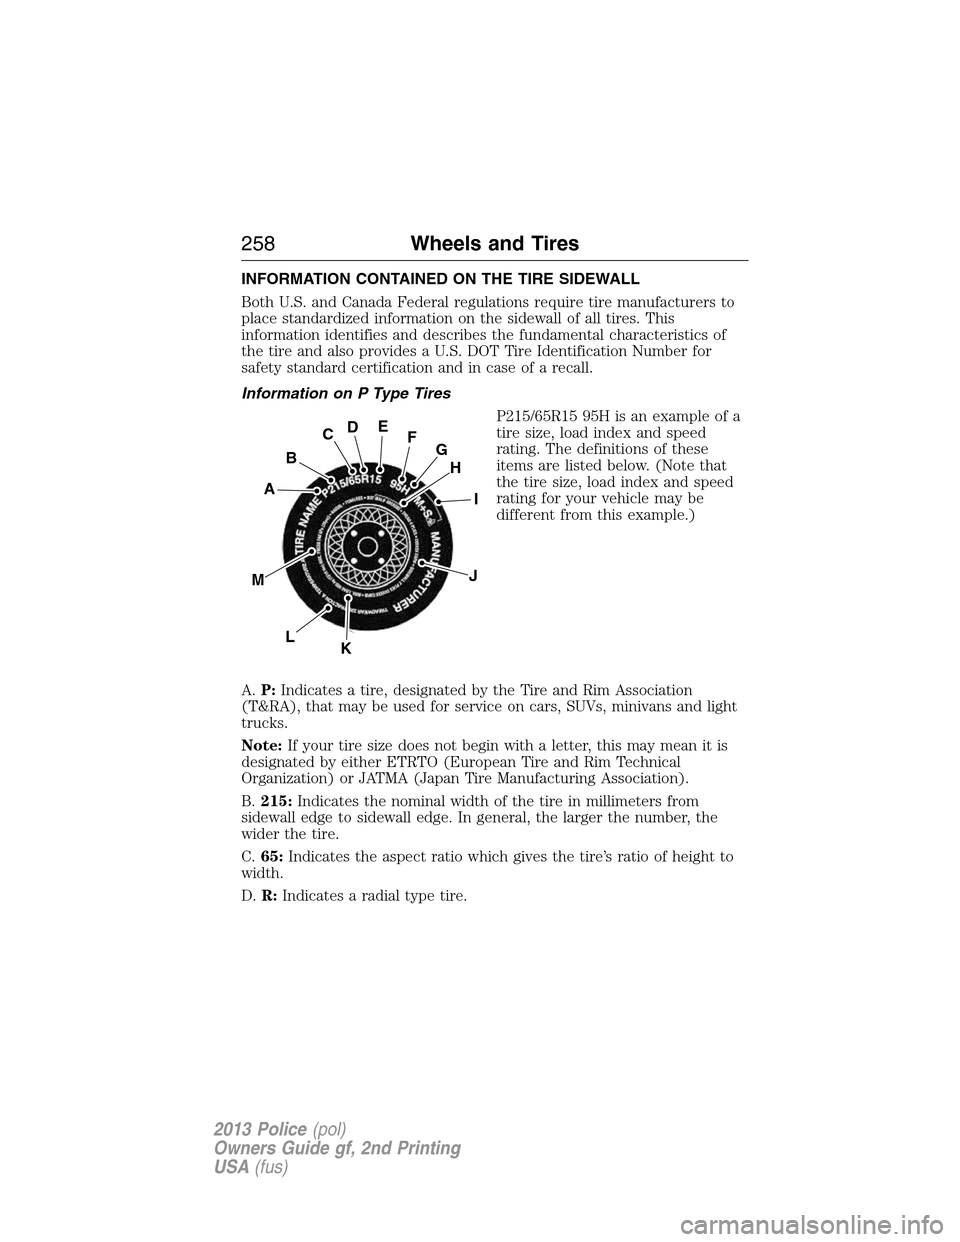
INFORMATION CONTAINED ON THE TIRE SIDEWALL
Both U.S. and Canada Federal regulations require tire manufacturers to
place standardized information on the sidewall of all tires. This
information identifies and describes the fundamental characteristics of
the tire and also provides a U.S. DOT Tire Identification Number for
safety standard certification and in case of a recall.
Information on P Type Tires
P215/65R15 95H is an example of a
tire size, load index and speed
rating. The definitions of these
items are listed below. (Note that
the tire size, load index and speed
rating for your vehicle may be
different from this example.)
A.P:Indicates a tire, designated by the Tire and Rim Association
(T&RA), that may be used for service on cars, SUVs, minivans and light
trucks.
Note:If your tire size does not begin with a letter, this may mean it is
designated by either ETRTO (European Tire and Rim Technical
Organization) or JATMA (Japan Tire Manufacturing Association).
B.215:Indicates the nominal width of the tire in millimeters from
sidewall edge to sidewall edge. In general, the larger the number, the
wider the tire.
C.65:Indicates the aspect ratio which gives the tire’s ratio of height to
width.
D.R:Indicates a radial type tire.
H
I
J
KL
M
A
B
CDEFG
258Wheels and Tires
2013 Police(pol)
Owners Guide gf, 2nd Printing
USA(fus)