Page 55 of 375

Airbags and Police Equipment
WARNING:Do not place objects or mount equipment in front of
the airbag module cover or in front of the seat areas that may
come in contact with a deploying airbag. Failure to follow this
instruction could result in personal injury.
WARNING:Dash, tunnel or console-mounted equipment should
not be placed outside of the specified zone. Failure to follow this
instruction could result in personal injury.
WARNING:Do not mount equipment between the side of front
seat to the door trim to block deployment of the side airbag.
Failure to follow this instruction could result in personal injury.
Dual driver and passenger airbags, side airbags and knee airbags affect
the way police equipment can be mounted in police vehicles.
Any surfaces that could come into contact with an airbag, once it has
deployed, must not damage the airbag or alter its deployment path.
Once the airbag has fully deployed, any peripheral equipment surfaces
that could come into contact with the airbag (such as when the airbag
deflates with the loading of an occupant) must not damage the airbag or
alter its deployment path. Sharp edges, corners or protrusions could
damage the nylon airbag material and reduce the effectiveness of the
airbag.
Some approximate dimensions for airbags, at full inflation, are provided
in Figures 1 through 5. These dimensions are somewhat flexible and
represent free form deployments without the loading of occupants. The
shaded areas in Figures 6 through 8 represent available police equipment
mounting zones. These zones are shown for police vehicles equipped
with standard bucket seats. The zone dimensions provided in Figures 6
through 8 are approximate and will vary with the loading of occupants in
the seats.
All airbag and equipment mounting zone dimensions are approximate
due to different airbag deployment characteristics.
Supplementary Restraints System55
2013 Police(pol)
Owners Guide gf, 2nd Printing
USA(fus)
Page 60 of 375
Figure 7
1. Area on top of instrument panel
2. Area in front of center console from tunnel up to instrument panel
3. Prisoner screen (reference only)
4. 10 inches (254 mm)
5. Area on tunnel between seats
6. Height: 8.5 inches (216 mm)
7. 12 inches (305 mm)
8. Area on tunnel beneath center console
9. Tunnel
10. Depth: 1.5 inches (38 mm)
A5A
4 A6
A3
A
7
A8 A
9A
10A
1
A2
60Supplementary Restraints System
2013 Police(pol)
Owners Guide gf, 2nd Printing
USA(fus)
Page 61 of 375
Figure 8
1. Area on top of the instrument panel.
Note:Equipment must not interfere
with driver visibility.
2. Area on tunnel between seats
3. 9 inches (229 mm)
AIRBAG DISPOSAL
Contact your authorized dealer as soon as possible. Airbags MUST BE
disposed of by qualified personnel.
Supplementary Restraints System61
2013 Police(pol)
Owners Guide gf, 2nd Printing
USA(fus)
Page 73 of 375
ADJUSTING THE STEERING WHEEL
WARNING:Do not adjust the steering wheel when your vehicle
is moving.
Note:Make sure that you are sitting in the correct position. Refer to
Sitting In the Correct Positionin theSeatschapter.
1. Unlock the steering column.
2. Adjust the steering wheel to the
desired position.
Note:The telescope adjustment
feature is only available on the
sedan.
3. Lock the steering column.
AUDIO CONTROL
SEEK:Press to select the next or
previous stored preset or track.
Press and hold to select the next or
previous frequency or seek through
a track.
MEDIA:Press repeatedly to scroll
through available audio modes.
MUTE:Press to silence the radio.
VOL (Volume):Press to increase or decrease the volume.
SEEK
MEDIA
MUTE
V
O
L
Steering Wheel73
2013 Police(pol)
Owners Guide gf, 2nd Printing
USA(fus)
Page 118 of 375

SITTING IN THE CORRECT POSITION
WARNING:Sitting improperly out of position or with the seat
back reclined too far can take off weight from the seat cushion
and affect the decision of the passenger sensing system, resulting in
serious injury or death in a crash. Always sit upright against your seat
back, with your feet on the floor.
WARNING:Do not recline the seat back as this can cause the
occupant to slide under the seat’s safety belt, resulting in severe
personal injury in the event of a collision.
WARNING:Do not place objects higher than the seat backs to
reduce the risk of injury in a collision or during heavy braking or
when stopping suddenly.
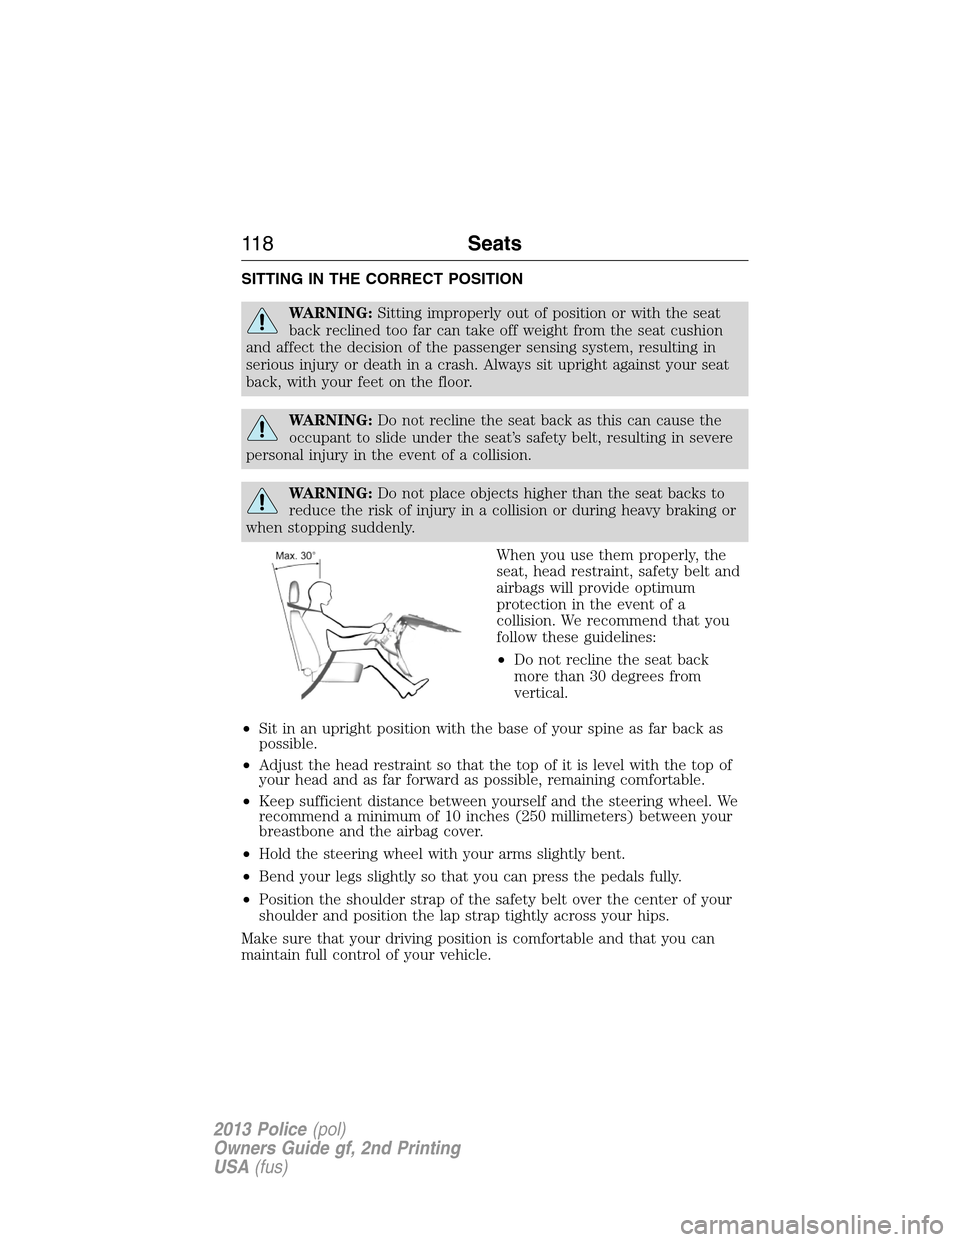
When you use them properly, the
seat, head restraint, safety belt and
airbags will provide optimum
protection in the event of a
collision. We recommend that you
follow these guidelines:
•Do not recline the seat back
more than 30 degrees from
vertical.
•Sit in an upright position with the base of your spine as far back as
possible.
•Adjust the head restraint so that the top of it is level with the top of
your head and as far forward as possible, remaining comfortable.
•Keep sufficient distance between yourself and the steering wheel. We
recommend a minimum of 10 inches (250 millimeters) between your
breastbone and the airbag cover.
•Hold the steering wheel with your arms slightly bent.
•Bend your legs slightly so that you can press the pedals fully.
•Position the shoulder strap of the safety belt over the center of your
shoulder and position the lap strap tightly across your hips.
Make sure that your driving position is comfortable and that you can
maintain full control of your vehicle.
11 8Seats
2013 Police(pol)
Owners Guide gf, 2nd Printing
USA(fus)
Page 119 of 375

HEAD RESTRAINTS
WARNING:To minimize the risk of neck injury in the event of a
crash, the driver and passenger occupants should not sit in
and/or operate the vehicle, until the head restraint is placed in its
proper position. The driver should never adjust the head restraint while
the vehicle is in motion.
WARNING:The adjustable head restraint is a safety device.
Whenever possible it should be installed and properly adjusted
when the seat is occupied.
WARNING:Install the head restraint properly to minimize the
risk of neck injury in the event of a crash.
Note:Before adjusting any head restraint, adjust the seatback to an
upright driving/riding position. Properly adjust the head restraint so that
the top of the head restraint is even with the top of your head and
positioned as close as possible to the back of your head. For occupants
of extremely tall stature, adjust the head restraint to its full up position.
To adjust the head restraint, do the following:
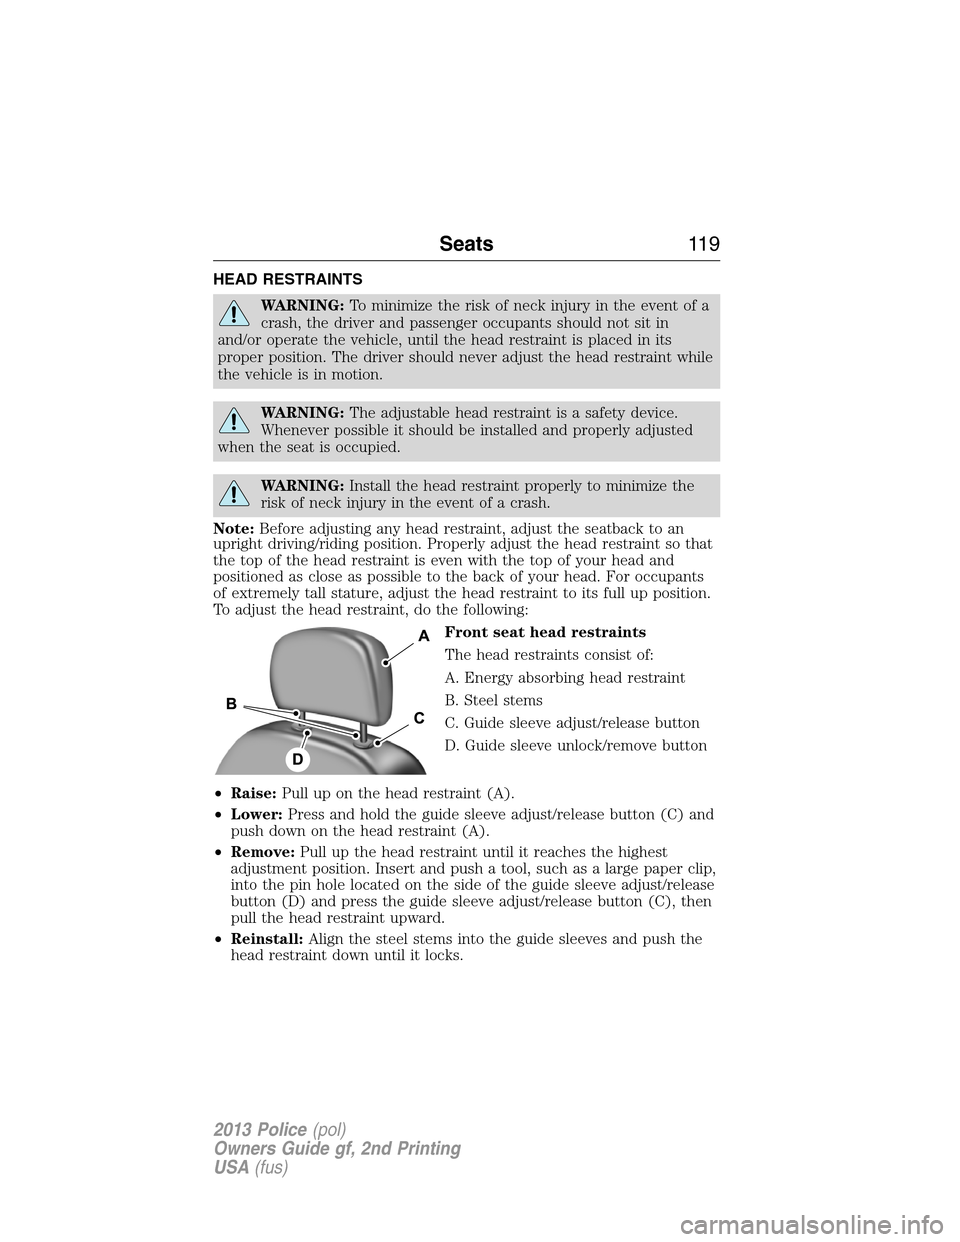
Front seat head restraints
The head restraints consist of:
A. Energy absorbing head restraint
B. Steel stems
C. Guide sleeve adjust/release button
D. Guide sleeve unlock/remove button
•Raise:Pull up on the head restraint (A).
•Lower:Press and hold the guide sleeve adjust/release button (C) and
push down on the head restraint (A).
•Remove:Pull up the head restraint until it reaches the highest
adjustment position. Insert and push a tool, such as a large paper clip,
into the pin hole located on the side of the guide sleeve adjust/release
button (D) and press the guide sleeve adjust/release button (C), then
pull the head restraint upward.
•Reinstall:Align the steel stems into the guide sleeves and push the
head restraint down until it locks.
Seats11 9
2013 Police(pol)
Owners Guide gf, 2nd Printing
USA(fus)
Page 120 of 375

Tilting Head Restraints (If Equipped)
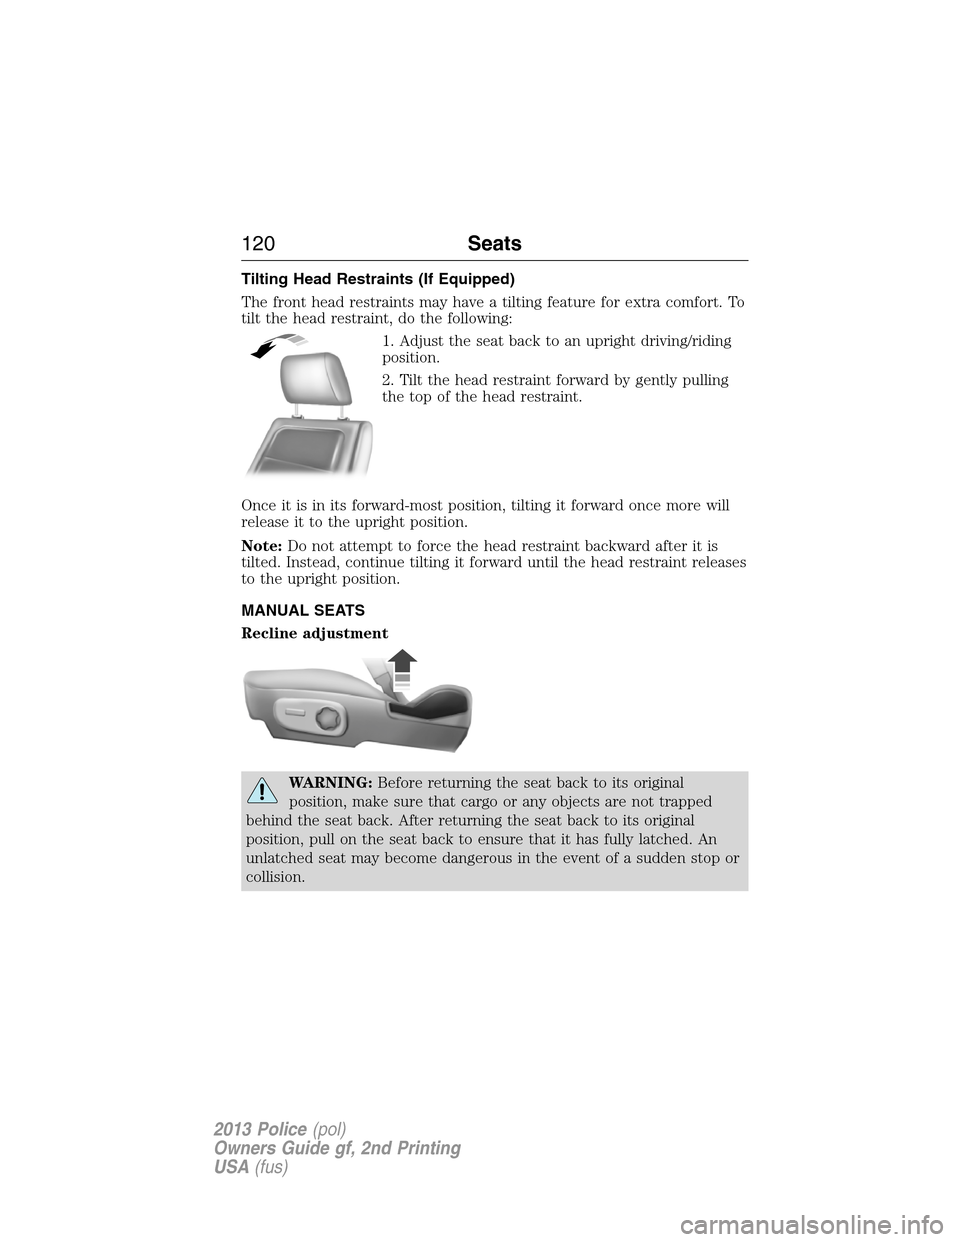
The front head restraints may have a tilting feature for extra comfort. To
tilt the head restraint, do the following:
1. Adjust the seat back to an upright driving/riding
position.
2. Tilt the head restraint forward by gently pulling
the top of the head restraint.
Once it is in its forward-most position, tilting it forward once more will
release it to the upright position.
Note:Do not attempt to force the head restraint backward after it is
tilted. Instead, continue tilting it forward until the head restraint releases
to the upright position.
MANUAL SEATS
Recline adjustment
WARNING:Before returning the seat back to its original
position, make sure that cargo or any objects are not trapped
behind the seat back. After returning the seat back to its original
position, pull on the seat back to ensure that it has fully latched. An
unlatched seat may become dangerous in the event of a sudden stop or
collision.
120Seats
2013 Police(pol)
Owners Guide gf, 2nd Printing
USA(fus)
Page 121 of 375
Moving the seats backwards and forwards
WARNING:Do not adjust the driver’s seat or seat back while the
vehicle is moving.
WARNING:Rock the seat backwards and forwards after
releasing the lever to make sure that it is fully engaged.
Lumbar adjustment (if equipped)
POWER SEATS (IF EQUIPPED)
WARNING:Never adjust the driver’s seat or seat back when the
vehicle is moving.
WARNING:Before returning the seat back to its original
position, make sure that cargo or any objects are not trapped
behind the seat back.
Seats121
2013 Police(pol)
Owners Guide gf, 2nd Printing
USA(fus)