Page 81 of 375
Headlamp Flasher
Sedan
Utility
Pull toward you slightly to activate and release to deactivate.
SPOT LIGHT CONTROL (IF EQUIPPED)
•Use the switch on the chrome
handle to turn the spot light on
and off.
•Rotate and twist the handle to
adjust the position of the spot
light.
Lighting81
2013 Police(pol)
Owners Guide gf, 2nd Printing
USA(fus)
Page 88 of 375
EXTERIOR MIRRORS
Power Exterior Mirrors
WARNING:Do not adjust the mirror while the vehicle is in
motion.
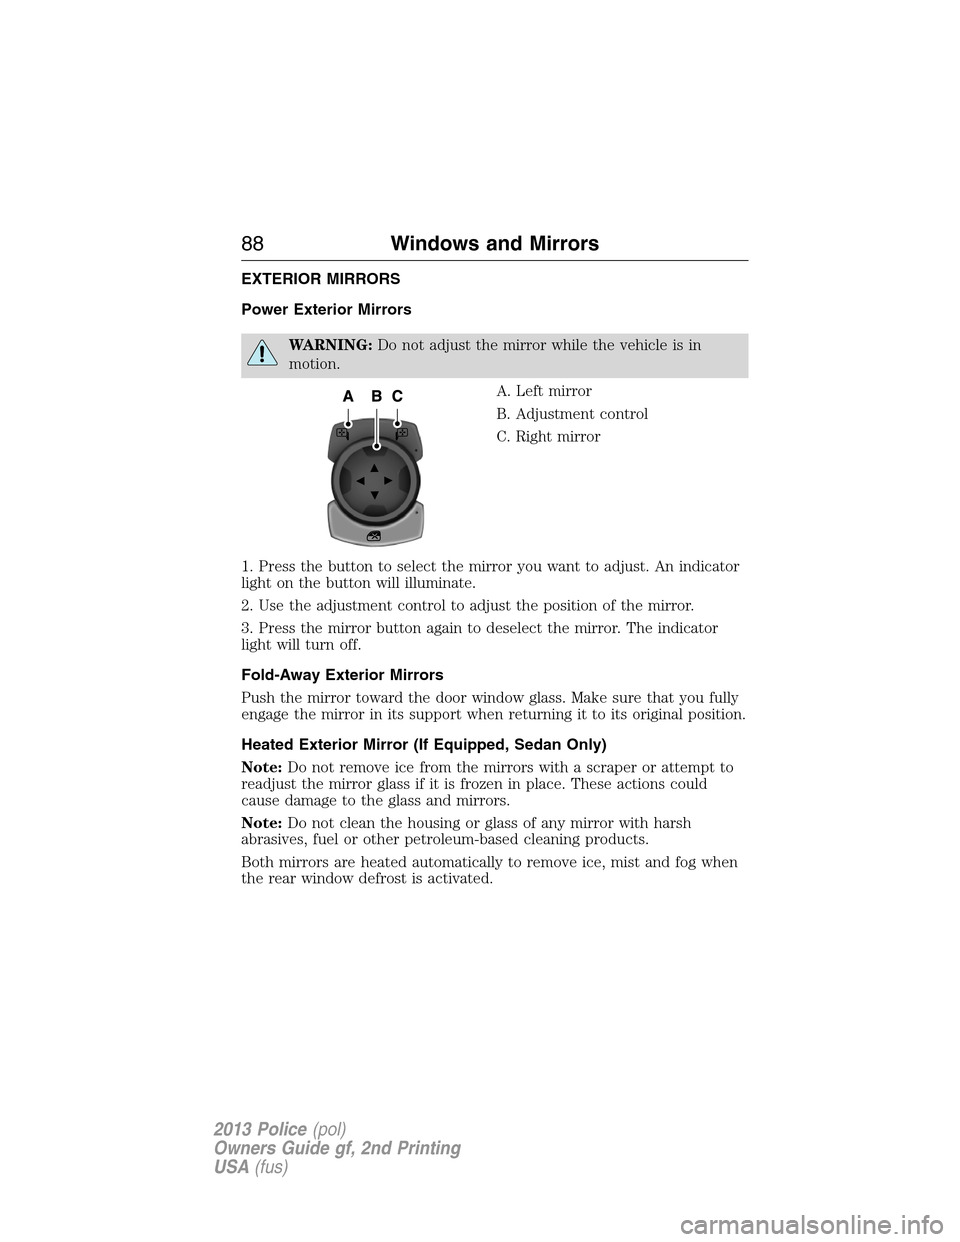
A. Left mirror
B. Adjustment control
C. Right mirror
1. Press the button to select the mirror you want to adjust. An indicator
light on the button will illuminate.
2. Use the adjustment control to adjust the position of the mirror.
3. Press the mirror button again to deselect the mirror. The indicator
light will turn off.
Fold-Away Exterior Mirrors
Push the mirror toward the door window glass. Make sure that you fully
engage the mirror in its support when returning it to its original position.
Heated Exterior Mirror (If Equipped, Sedan Only)
Note:Do not remove ice from the mirrors with a scraper or attempt to
readjust the mirror glass if it is frozen in place. These actions could
cause damage to the glass and mirrors.
Note:Do not clean the housing or glass of any mirror with harsh
abrasives, fuel or other petroleum-based cleaning products.
Both mirrors are heated automatically to remove ice, mist and fog when
the rear window defrost is activated.
88Windows and Mirrors
2013 Police(pol)
Owners Guide gf, 2nd Printing
USA(fus)
Page 90 of 375
INTERIOR MIRROR
WARNING:Do not adjust the mirror when your vehicle is
moving.
Note:Do not clean the housing or glass of any mirror with harsh
abrasives, fuel or other petroleum or ammonia based cleaning products.
You can adjust the interior mirror to your preference. Some mirrors also
have a second pivot point. This lets you move the mirror head up or
down and from side to side.
Pull the tab below the mirror toward you to reduce glare at night.
Auto-Dimming Mirror (If Equipped)
Note:Do not block the sensors on the front and back of the mirror.
Mirror performance may be affected. A rear center passenger or raised
rear center head restraint may also block light from reaching the sensor.
The mirror will dim automatically to reduce glare when bright lights are
detected from behind your vehicle. It will automatically return to normal
reflection when you select reverse gear to make sure you have a clear
view when backing up.
SUN VISORS
Slide-On-Rod
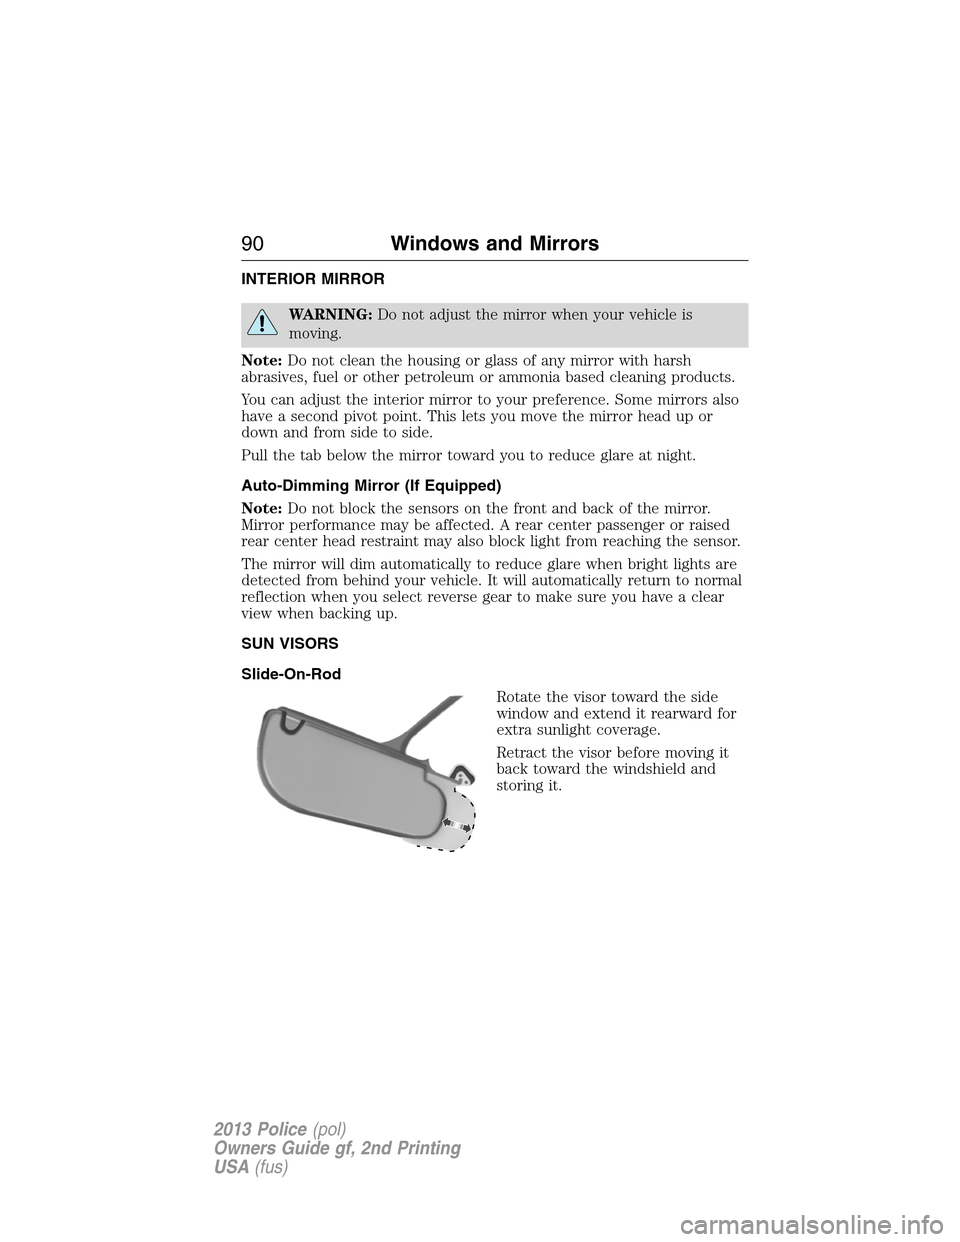
Rotate the visor toward the side
window and extend it rearward for
extra sunlight coverage.
Retract the visor before moving it
back toward the windshield and
storing it.
90Windows and Mirrors
2013 Police(pol)
Owners Guide gf, 2nd Printing
USA(fus)
Page 99 of 375
Settings
Convenience DTE Calculation Normal or Towing
Locks Remote Unlock All Doors or
Driver First
Oil life Reset Set XXX%
Wipers Courtesy Wipe
Reverse Wiper
System Reset Hold OK to Reset to Factory Default
System Check
All active warnings will display first if applicable. The system check
menu may appear different based upon equipment options and current
vehicle status. Use the up/down arrow buttons to scroll through the
list. Engine hour meter and idle hours are also displayed in the system
check.
Trip Computer
Resetting the Trip Computer
Press and hold OK on the current screen to reset the respective trip,
distance, time and fuel information.
Trip Odometer
Registers the mileage of individual journeys.
Distance to E
Indicates the approximate distance the vehicle will travel on the fuel
remaining in the tank. Changes in driving pattern may cause the value to
vary.
Inst Fuel Econ
Shows instantaneous fuel usage.
Average fuel
Indicates the average fuel consumption since the function was last reset.
Fuel Used
Shows the amount of fuel used for a given trip.
Total Odometer
Registers the total mileage of the vehicle.
Information Displays99
2013 Police(pol)
Owners Guide gf, 2nd Printing
USA(fus)
Page 106 of 375
GENERAL AUDIO INFORMATION
Radio Frequencies and Reception Factors
AM and FM frequencies are established by the Federal Communications
Commission (FCC) and the Canadian Radio and Telecommunications
Commission (CRTC). Those frequencies are:
AM: 530, 540–1700, 1710 kHz
FM: 87.9–107.7, 107.9 MHz
Radio reception factors
Distance/StrengthThe further you travel from an FM station,
the weaker the signal and the weaker the
reception.
TerrainHills, mountains, tall buildings, bridges,
tunnels, freeway overpasses, parking garages,
dense tree foliage and thunderstorms can
interfere with your reception.
Station OverloadWhen you pass a ground-based broadcast
repeating tower, a stronger signal may
overtake a weaker one and result in the audio
system muting.
CD/CD Player Information
Note:CD units are designed to play commercially pressed 4.75 in
(12 cm) audio compact discs only. Due to technical incompatibility,
certain recordable and re-recordable compact discs may not function
correctly when used in Ford CD players.
Note:CDs with homemade paper (adhesive) labels should not be
inserted into the CD player as the label may peel and cause the CD to
become jammed. It is recommended that homemade CDs be identified
with permanent felt tip marker rather than adhesive labels. Ballpoint
pens may damage CDs. Please contact your authorized dealer for further
information.
Note:Do not use any irregularly shaped discs or discs with a scratch
protection film attached.
106Audio System
2013 Police(pol)
Owners Guide gf, 2nd Printing
USA(fus)
Page 107 of 375
Always handle discs by their edges only. Clean the disc with an approved
CD cleaner only, wiping from the center of the disc toward the edge. Do
not clean in a circular motion.
Do not expose discs to direct sunlight or heat sources for extended
periods of time.
MP3 Track and Folder Structure
Audio systems capable of recognizing and playing MP3 individual tracks
and folder structures work as follows:
•There are two different modes for MP3 disc playback: MP3 track
mode (system default) and MP3 folder mode.
•MP3 track mode ignores any folder structure on the MP3 disc. The
player numbers each MP3 track on the disc (noted by the .mp3 file
extension) from T001 to a maximum of T255.Note:The maximum
number of playable MP3 files may be less depending on the structure
of the CD and exact model of radio present.
•MP3 folder mode represents a folder structure consisting of one level
of folders. The CD player numbers all MP3 tracks on the disc (noted
by the .mp3 file extension) and all folders containing MP3 files, from
F001 (folder) T001 (track) to F253 T255.
•Creating discs with only one level of folders helps with navigation
through the disc files.
If you are burning your own MP3 discs, it is important to understand
how the system reads the structures you create. While various files may
be present, (files with extensions other than mp3), only files with the
.mp3 extension are played; other files are ignored by the system. This
enables you to use the same MP3 disc for a variety of tasks on your work
computer, home computer and your in-vehicle system.
In track mode, the system displays and plays the structure as if it were
only one level deep (all .mp3 files are played, regardless of being in a
specific folder). In folder mode, the system only plays the .mp3 files in
the current folder.
Audio System107
2013 Police(pol)
Owners Guide gf, 2nd Printing
USA(fus)
Page 123 of 375
Fold-flat seatback (if equipped)
WARNING:Before returning the seat back to its original
position, make sure that cargo or any objects are not trapped
behind the seat back. After returning the seat back to its original
position, pull on the seat back to ensure that it has fully latched. An
unlatched seat may become dangerous in the event of a sudden stop or
collision.
Lift the handle and fold the seat back forward until it is flat.
Note:For the bench seats, make sure the center safety belt is
unbuckled before folding the seat back.
Lift the seat back toward the rear of
the vehicle until you hear a click.
Seats123
2013 Police(pol)
Owners Guide gf, 2nd Printing
USA(fus)
Page 131 of 375
We recommend that you do the following for safe and correct operation:
•Use a 16-gauge outdoor extension cord that is product certified by
Underwriter’s Laboratory or Canadian Standards Association. This
extension cord must be able to be used outdoors, in cold
temperatures, and be clearly markedSuitable for Use with Outdoor
Appliances. Never use an indoor extension cord outdoors; it could
result in an electric shock or become a fire hazard.
•Use as short an extension cord as possible.
•Do not use multiple extension cords.
•Make sure that when in operation, the extension cord plug and the
heater cord plug connections are free and clear of water. This could
cause an electric shock or fire.
•Make sure your vehicle is parked in a clean area, clear of
combustibles.
•Make sure the heater, heater cord and extension cord are firmly
connected.
•Check for heat anywhere in the electrical hookup once the system has
been operating for approximately 30 minutes.
•Make sure the system is unplugged and properly stowed before driving
your vehicle. Make sure the protective cover seals the prongs of the
block heater cord plug when not in use.
•Make sure the heater system is checked for proper operation before
winter.
Using the Engine Block Heater
Make sure the receptacle terminals are clean and dry prior to use. Clean
them with a dry cloth, if necessary.
The heater uses 0.4 to 1.0 kilowatt-hours of energy per hour of use. The
system does not have a thermostat. It achieves maximum temperature
after approximately three hours of operation. Using the heater longer
than three hours does not improve system performance and
unnecessarily uses electricity.
Starting and Stopping the Engine131
2013 Police(pol)
Owners Guide gf, 2nd Printing
USA(fus)