2013 FORD F250 spare tire location
[x] Cancel search: spare tire locationPage 277 of 577
ROADSIDE ASSISTANCE
Vehicles Sold in the U.S.: Getting Roadside Assistance
To fully assist you should you have a vehicle concern, Ford Motor
Company offers a complimentary roadside assistance program. This
program is separate from the New Vehicle Limited Warranty. The service
is available:
•24 hours a day, seven days a week
•for the coverage period listed on the Roadside Assistance Card
included in your owner’s manual portfolio.
Roadside assistance will cover:
•a flat tire change with a good spare (except vehicles that have been
supplied with a tire inflation kit).
•battery jump start.
•lock-out assistance (key replacement cost is the customer’s
responsibility).
•fuel delivery – Independent Service Contractors, if not prohibited by
state, local or municipal law, shall deliver up to 2.0 gallons (7.5 liters)
of gasoline or 5.0 gallons (18.9 liters) of diesel fuel to a disabled
vehicle. Fuel delivery service is limited to two no-charge occurrences
within a 12-month period.
•winch out – available within 100 feet (30.5 meters) of a paved or
county maintained road, no recoveries.
•towing – Ford and Lincoln eligible vehicles towed to an authorized
dealer within 35 miles (56 kilometers) of the disablement location or
to the nearest authorized dealer. If a member requests to be towed to
an authorized dealer more than 35 miles (56 kilometers) from the
disablement location, the member shall be responsible for any mileage
costs in excess of 35 miles (56 kilometers).
Trailers shall be covered up to $200 if the disabled eligible vehicle
requires service at the nearest authorized dealer. If the trailer is disabled,
but the towing vehicle is operational, the trailer does not qualify for any
roadside services.
276Roadside Emergencies
2013 F-250/350/450/550(f23)
Owners Guide gf, 3rd Printing, December 2012
USA(fus)
Page 369 of 577
Low tire
pressure
warning lightPossible cause Customer action required
Flashing warning
lightSpare tire in use Repair the damaged road wheel and
tire and reinstall it on the vehicle to
restore system function. For a
description on how the system
functions, seeWhen your
temporary spare tire is installedin
this section.
Tire pressure
monitoring
system
malfunctionIf the tires are properly inflated and
the spare tire is not in use but the
light remains on, contact your
authorized dealer as soon as possible.
When inflating your tires
When putting air into your tires (such as at a gas station or in your
garage), the tire pressure monitoring system may not respond
immediately to the air added to your tires.
It may take up to two minutes of driving over 20 mph (32 km/h) for the
light to turn off after you have filled your tires to the recommended
inflation pressure.
How temperature affects your tire pressure
The tire pressure monitoring system monitors tire pressure in each
pneumatic tire. While driving in a normal manner, a typical passenger tire
inflation pressure may increase approximately 2 to 4 psi (14 to 28 kPa)
from a cold start situation. If the vehicle is stationary overnight with the
outside temperature significantly lower than the daytime temperature, the
tire pressure may decrease approximately 3 psi (21 kPa) for a drop of 30°F
(17°C) in ambient temperature. This lower pressure value may be detected
by the system as being significantly lower than the recommended inflation
pressure and activate the system warning light for low tire pressure. If the
low tire pressure warning light is on, visually check each tire to verify that
no tire is flat. If one or more tires are flat, repair as necessary. Check air
pressure in the road tires. If any tire is under-inflated, carefully drive the
vehicle to the nearest location where air can be added to the tires. Inflate
all the tires to the recommended inflation pressure.
368Wheels and Tires
2013 F-250/350/450/550(f23)
Owners Guide gf, 3rd Printing, December 2012
USA(fus)
Page 373 of 577
Dissimilar Spare Tire and Wheel Assembly Information
WARNING:Failure to follow these guidelines could result in an
increased risk of loss of vehicle control, injury or death.
If you have a dissimilar spare tire and wheel assembly, then it is intended
for temporary use only. This means that if you need to use it, you should
replace it as soon as possible with a road tire and wheel assembly that is
the same size and type as the road tires and wheels that were originally
provided by Ford. If the dissimilar spare tire or wheel is damaged, it
should be replaced rather than repaired.
A dissimilar spare tire and wheel assembly is defined as a spare tire or
wheel that is different in brand, size or appearance from the road tires
and wheels and can be one of three types:
1.T-type mini-spare:This spare tire begins with the letter T for tire
size and may have Temporary Use Only molded in the sidewall.
2.Full-size dissimilar spare with label on wheel:This spare tire
has a label on the wheel that states: THIS TIRE AND WHEEL FOR
TEMPORARY USE ONLY
When driving with one of the dissimilar spare tires listed above, do not:
•exceed 50 mph (80 km/h).
•load the vehicle beyond maximum vehicle load rating listed on the
Safety Compliance Label.
•tow a trailer.
•
use snow chains on the end of the vehicle with the dissimilar spare tire.
•use more than one dissimilar spare tire at a time.
•use commercial car washing equipment.
•try to repair the dissimilar spare tire.
Use of one of the dissimilar spare tires listed above at any one wheel
location can lead to impairment of the following:
•Handling, stability and braking performance
•Comfort and noise
•Ground clearance and parking at curbs
•Winter weather driving capability
•Wet weather driving capability
•All-wheel driving capability
372Wheels and Tires
2013 F-250/350/450/550(f23)
Owners Guide gf, 3rd Printing, December 2012
USA(fus)
Page 374 of 577
3.Full-size dissimilar spare without label on wheel
When driving with the full-size dissimilar spare tire and wheel assembly,
do not:
•exceed 70 mph (113 km/h).
•use more than one dissimilar spare tire and wheel at a time.
•use commercial car washing equipment.
•use snow chains on the end of the vehicle with the dissimilar spare
tire and wheel.
The usage of a full-size dissimilar spare tire and wheel assembly can lead
to impairment of the following:
•Handling, stability and braking performance
•Comfort and noise
•Ground clearance and parking at curbs
•Winter weather driving capability
•Wet weather driving capability
•All-wheel driving capability (if applicable)
•Load leveling adjustment (if applicable)
When driving with the full-size dissimilar spare tire and wheel assembly,
additional caution should be given to:
•towing a trailer.
•driving vehicles equipped with a camper body.
•driving vehicles with a load on the cargo rack.
Drive cautiously when using a full-size dissimilar spare tire and wheel,
and seek service as soon as possible.
Location of the Spare Tire and Tools
If your vehicle is equipped with a spare tire, jack and associated tools,
refer to the following table for their locations:
Tool Location
Spare tire (pick-up trucks only) Under the vehicle, just forward of
the rear bumper
Jack Regular cab and Crew Cab:
Fastened to floor pan behind
rearmost seat on passenger side
SuperCab: Under rear bench seat
on passenger side
Wheels and Tires373
2013 F-250/350/450/550(f23)
Owners Guide gf, 3rd Printing, December 2012
USA(fus)
Page 375 of 577
![FORD F250 2013 Owners Manual Tool Location
Jack handle, lug wrench, lug
wrench extension (only available
on Dual Rear Wheel [DRW]
vehicles) and wheel chock (only
available on Single Rear Wheel
[SRW] vehicles equipped with a
diese FORD F250 2013 Owners Manual Tool Location
Jack handle, lug wrench, lug
wrench extension (only available
on Dual Rear Wheel [DRW]
vehicles) and wheel chock (only
available on Single Rear Wheel
[SRW] vehicles equipped with a
diese](/manual-img/11/58774/w960_58774-374.png)
Tool Location
Jack handle, lug wrench, lug
wrench extension (only available
on Dual Rear Wheel [DRW]
vehicles) and wheel chock (only
available on Single Rear Wheel
[SRW] vehicles equipped with a
diesel engine)Regular cab: Fastened to floor
behind driver seat
SuperCab: Fastened to floor under
rear seat
Crew Cab: Fastened to floor
behind rear seat at driver side
Key and spare tire lock In the glove box
Removing the Spare Tire (With Spare Tire Carrier Only)
1. The following tools are required to remove the spare tire:
•one handle extension and two
typical extensions. To assemble,
align the button with the hole
and slide the parts together.
To disconnect, press the button and pull apart.
•one wheel nut wrench. Slide over
the square end of the jack
handle.
374Wheels and Tires
2013 F-250/350/450/550(f23)
Owners Guide gf, 3rd Printing, December 2012
USA(fus)
Page 378 of 577
WARNING:Always use the jack provided as original equipment
with your vehicle. If using a jack other than the one provided as
original equipment with your vehicle, make sure the jack capacity is
adequate for the vehicle weight, including any vehicle cargo or
modifications.
Note:Passengers should not remain in the vehicle when the vehicle is
being jacked.
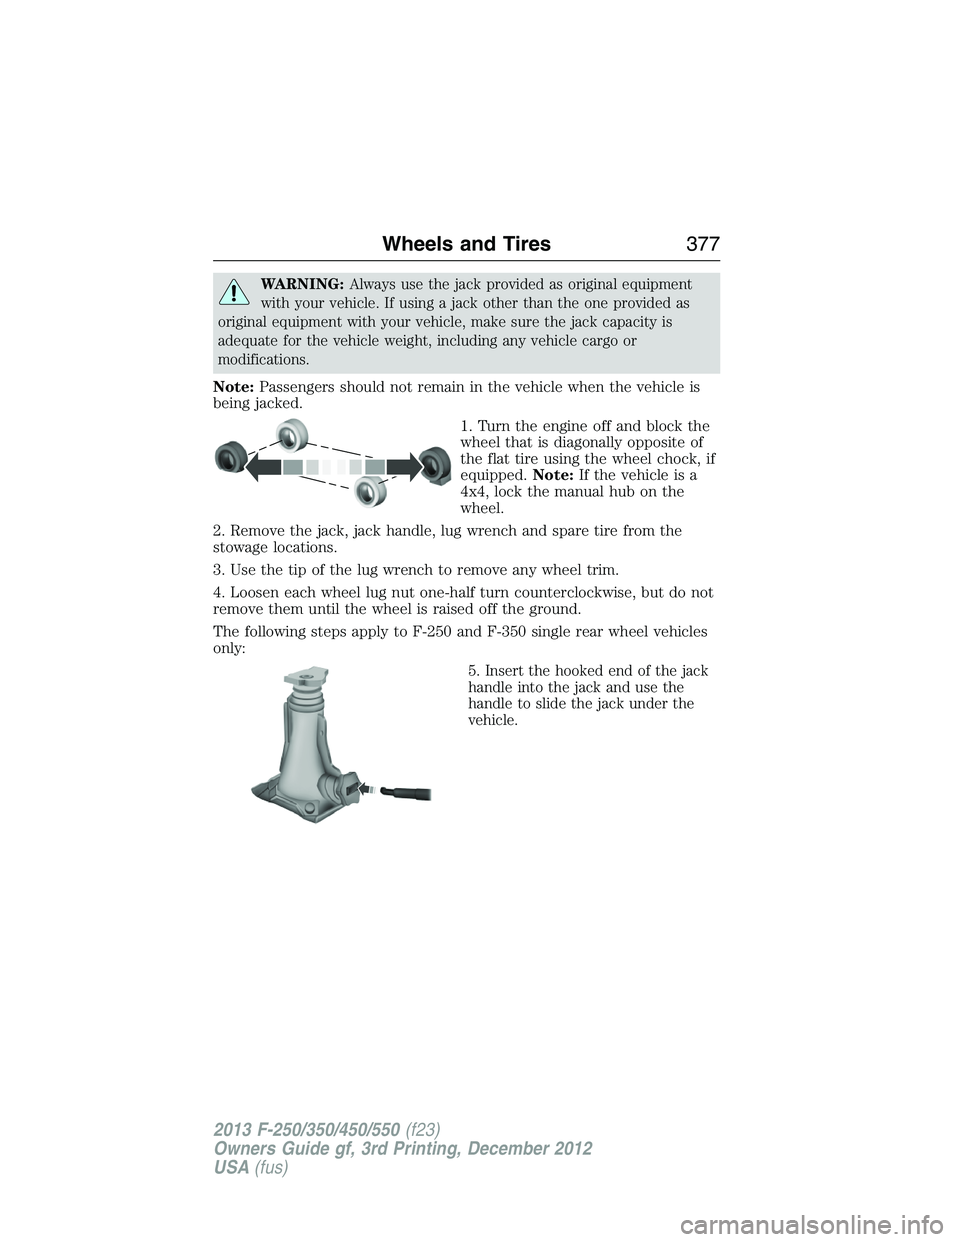
1. Turn the engine off and block the
wheel that is diagonally opposite of
the flat tire using the wheel chock, if
equipped.Note:If the vehicle is a
4x4, lock the manual hub on the
wheel.
2. Remove the jack, jack handle, lug wrench and spare tire from the
stowage locations.
3. Use the tip of the lug wrench to remove any wheel trim.
4. Loosen each wheel lug nut one-half turn counterclockwise, but do not
remove them until the wheel is raised off the ground.
The following steps apply to F-250 and F-350 single rear wheel vehicles
only:
5. Insert the hooked end of the jack
handle into the jack and use the
handle to slide the jack under the
vehicle.
Wheels and Tires377
2013 F-250/350/450/550(f23)
Owners Guide gf, 3rd Printing, December 2012
USA(fus)
Page 380 of 577
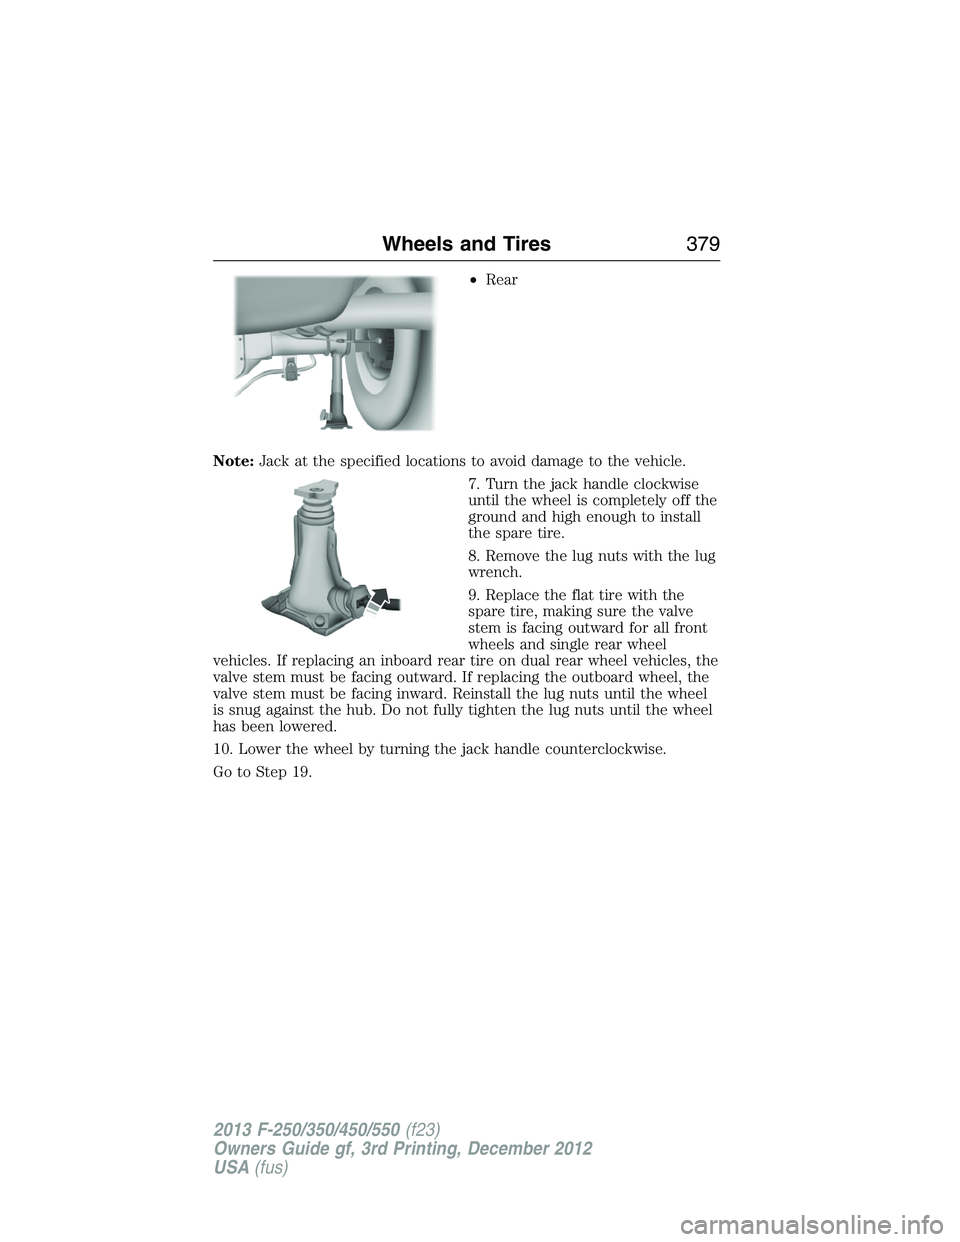
•Rear
Note:Jack at the specified locations to avoid damage to the vehicle.
7. Turn the jack handle clockwise
until the wheel is completely off the
ground and high enough to install
the spare tire.
8. Remove the lug nuts with the lug
wrench.
9. Replace the flat tire with the
spare tire, making sure the valve
stem is facing outward for all front
wheels and single rear wheel
vehicles. If replacing an inboard rear tire on dual rear wheel vehicles, the
valve stem must be facing outward. If replacing the outboard wheel, the
valve stem must be facing inward. Reinstall the lug nuts until the wheel
is snug against the hub. Do not fully tighten the lug nuts until the wheel
has been lowered.
10. Lower the wheel by turning the jack handle counterclockwise.
Go to Step 19.
Wheels and Tires379
2013 F-250/350/450/550(f23)
Owners Guide gf, 3rd Printing, December 2012
USA(fus)