2013 FORD F250 wheel
[x] Cancel search: wheelPage 153 of 577
5. Direct the outer instrument panel vents toward the side windows.
6. To increase airflow to the outer instrument panel vents, close the
vents located in the middle of the instrument panel.
HEATED WINDOWS AND MIRRORS (IF EQUIPPED)
Heated Rear Window
Note:The engine must be running to use this feature.
Note:If your vehicle is equipped with a sliding rear window, the feature
still operates when the window is opened.
Press the button to clear the rear window of thin ice and fog. Press
the button again within 10 minutes to switch it off. It switches off
automatically after 10 minutes, or when you switch the ignition off.
Do not use razor blades or other sharp objects to clean the inside
of the rear window or to remove decals from the inside of the
rear window. This may cause damage to the heated grid lines.
Your warranty does not cover this damage.
Heated Exterior Mirror (If Equipped)
Note:Do not remove ice from the mirrors with a scraper or attempt to
readjust the mirror glass that has frozen in place. These actions could
cause damage to the glass and mirrors.
Note:Do not clean the housing or glass of any mirror with harsh
abrasives, fuel or other petroleum-based cleaning products.
Both mirrors heat to remove ice, mist and fog when you turn the rear
window defroster on.
REMOTE START CLIMATE OPERATION (IF EQUIPPED)
The climate control system adjusts the cabin temperature during remote
start.
You cannot adjust the system during remote start operation. Turn the
ignition on to return the system to its previous settings. You can now
make adjustments. You will need to turn certain vehicle-dependent
features back on, such as:
•heated seats
•cooled seats
•heated steering wheel
•heated mirrors
•heated rear window.
152Climate Control
2013 F-250/350/450/550(f23)
Owners Guide gf, 3rd Printing, December 2012
USA(fus)
Page 154 of 577
Manual Climate Systems
In hot weather, the climate control system is set to MAX A/C.
In moderate weather, the system either heats or cools (based on
previous settings). The rear defroster and heated mirrors are not
automatically turned on.
In cold weather, maximum heat is provided in floor/defrost mode. The
rear defroster and heated mirrors are automatically turned on. If your
vehicle is equipped with a diesel engine and a supplemental heater, the
supplemental heater also turns on.
Automatic Climate Systems
Automatic Settings
The climate control system automatically sets the interior temperature to
72°F (22°C).
In hot weather, the system is set to 72°F (22°C). Cooled seats are set to
high (if available, and selected to AUTO in the information display).
In moderate weather, the system either heats or cools (based on
previous settings). The rear defroster, heated mirrors and heated/cooled
seats are not automatically turned on.
In cold weather, the system is set to 72°F (22°C). The heated seats and
heated steering wheel (if equipped) are set to high. The rear defroster
and heated mirrors are automatically turned on.
Heated and Cooled Devices
The climate control system controls other heated and cooled devices
inside the vehicle. These devices (if equipped) may also be switched
on during remote start. Heated devices are typically switched on during
cold weather, and cooled devices during hot weather. If your vehicle
is equipped with a diesel engine and a supplemental heater, the
supplemental heater also turns on.
Climate Control153
2013 F-250/350/450/550(f23)
Owners Guide gf, 3rd Printing, December 2012
USA(fus)
Page 155 of 577
SITTING IN THE CORRECT POSITION
WARNING:Sitting improperly out of position or with the seat back
reclined too far can take off weight from the seat cushion and affect
the passenger sensing system, resulting in serious injury or death in a
crash. Always sit upright against your seat back, with your feet on the floor.
WARNING:Do not recline the seat back as this can cause the
occupant to slide under the seat’s safety belt, resulting in severe
personal injury in the event of a crash.
WARNING:Do not place objects higher than the seat backs to
reduce the risk of injury in a crash or during heavy braking or
when stopping suddenly.
When you use them properly, the
seat, head restraint, safety belt and
airbags will provide optimum
protection in the event of a crash.
We recommend that you follow
these guidelines:
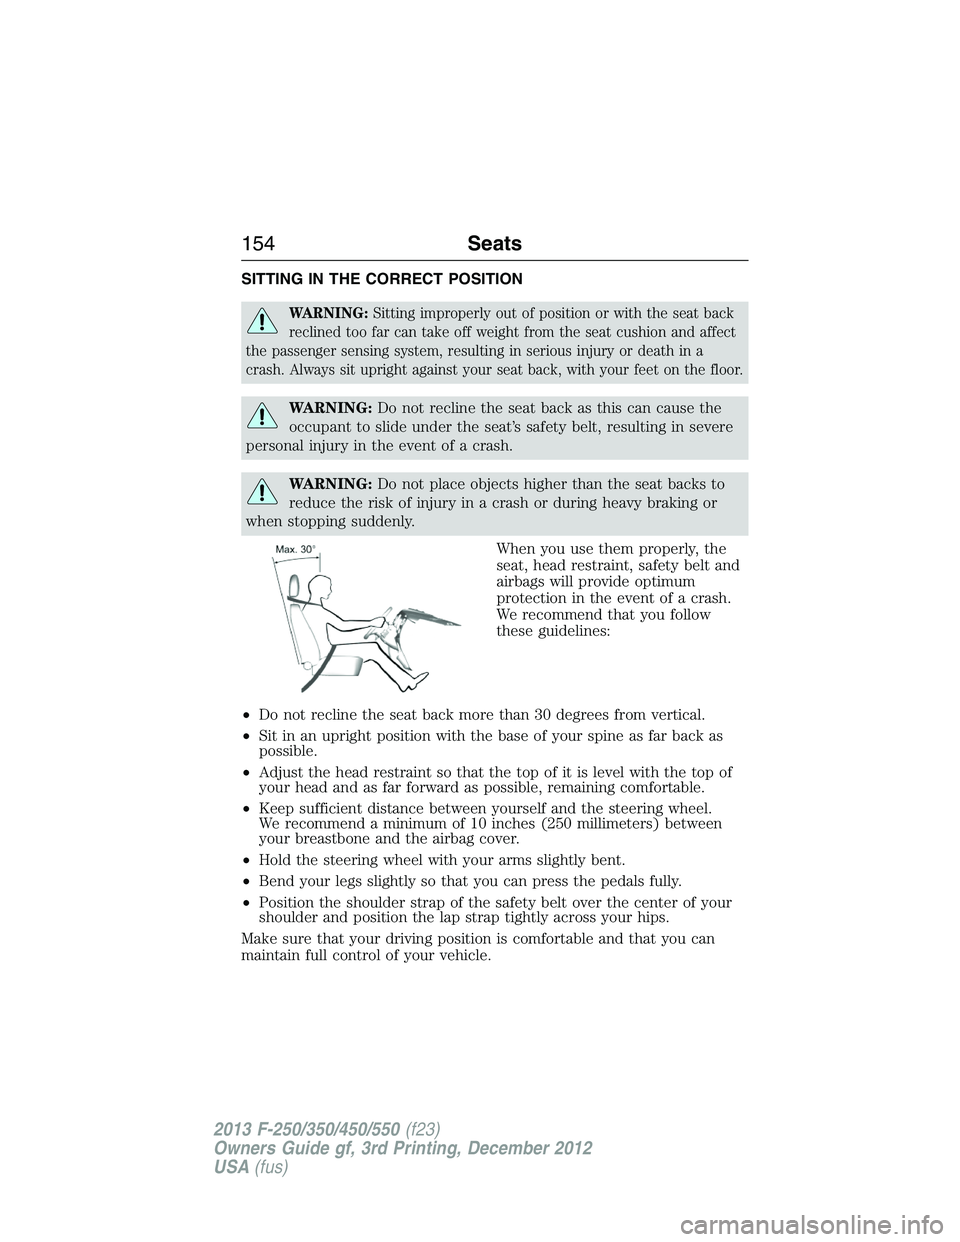
•Do not recline the seat back more than 30 degrees from vertical.
•Sit in an upright position with the base of your spine as far back as
possible.
•Adjust the head restraint so that the top of it is level with the top of
your head and as far forward as possible, remaining comfortable.
•Keep sufficient distance between yourself and the steering wheel.
We recommend a minimum of 10 inches (250 millimeters) between
your breastbone and the airbag cover.
•Hold the steering wheel with your arms slightly bent.
•Bend your legs slightly so that you can press the pedals fully.
•Position the shoulder strap of the safety belt over the center of your
shoulder and position the lap strap tightly across your hips.
Make sure that your driving position is comfortable and that you can
maintain full control of your vehicle.
154Seats
2013 F-250/350/450/550(f23)
Owners Guide gf, 3rd Printing, December 2012
USA(fus)
Page 200 of 577
AUTOMATIC TRANSMISSION OPERATION
Understanding the Shift Positions of the 5–Speed Automatic
Transmission (If Equipped)
WARNING:Do not use the tow/haul feature when driving in icy
or slippery conditions as the increased engine braking can cause
the rear wheels to slide and the vehicle to swing around with the
possible loss of vehicle control.
WARNING:Always set the parking brake fully and make sure
the gearshift is latched in P (Park). Turn the ignition to the off
position and remove the key whenever you leave your vehicle.
P (Park)
This position locks the transmission and prevents the rear wheels from
turning.
To put your vehicle in gear:
•Start the engine
•Press the brake pedal
•Move the gearshift lever into the desired gear
To put your vehicle in P (Park):
•Come to a complete stop
•Move the gearshift lever and securely latch it in P (Park)
R (Reverse)
With the gearshift lever in R (Reverse), the vehicle will move backward.
Always come to a complete stop before shifting into and out of R
(Reverse).
N (Neutral)
With the gearshift lever in N (Neutral), the vehicle can be started and is
free to roll. Hold the brake pedal down while in this position.
Transmission199
2013 F-250/350/450/550(f23)
Owners Guide gf, 3rd Printing, December 2012
USA(fus)
Page 202 of 577
1 (First)
•Provides maximum engine braking.
•Allows upshifts by moving gearshift lever.
•The transmission will not downshift into 1 (First) at high speeds; it
will downshift to a lower gear and then shift into 1 (First) when the
vehicle reaches slower speeds.
Forced downshifts
•Allowed in D (Overdrive) or D (Drive).
•Press the accelerator to the floor.
•Allows transmission to select an appropriate gear.
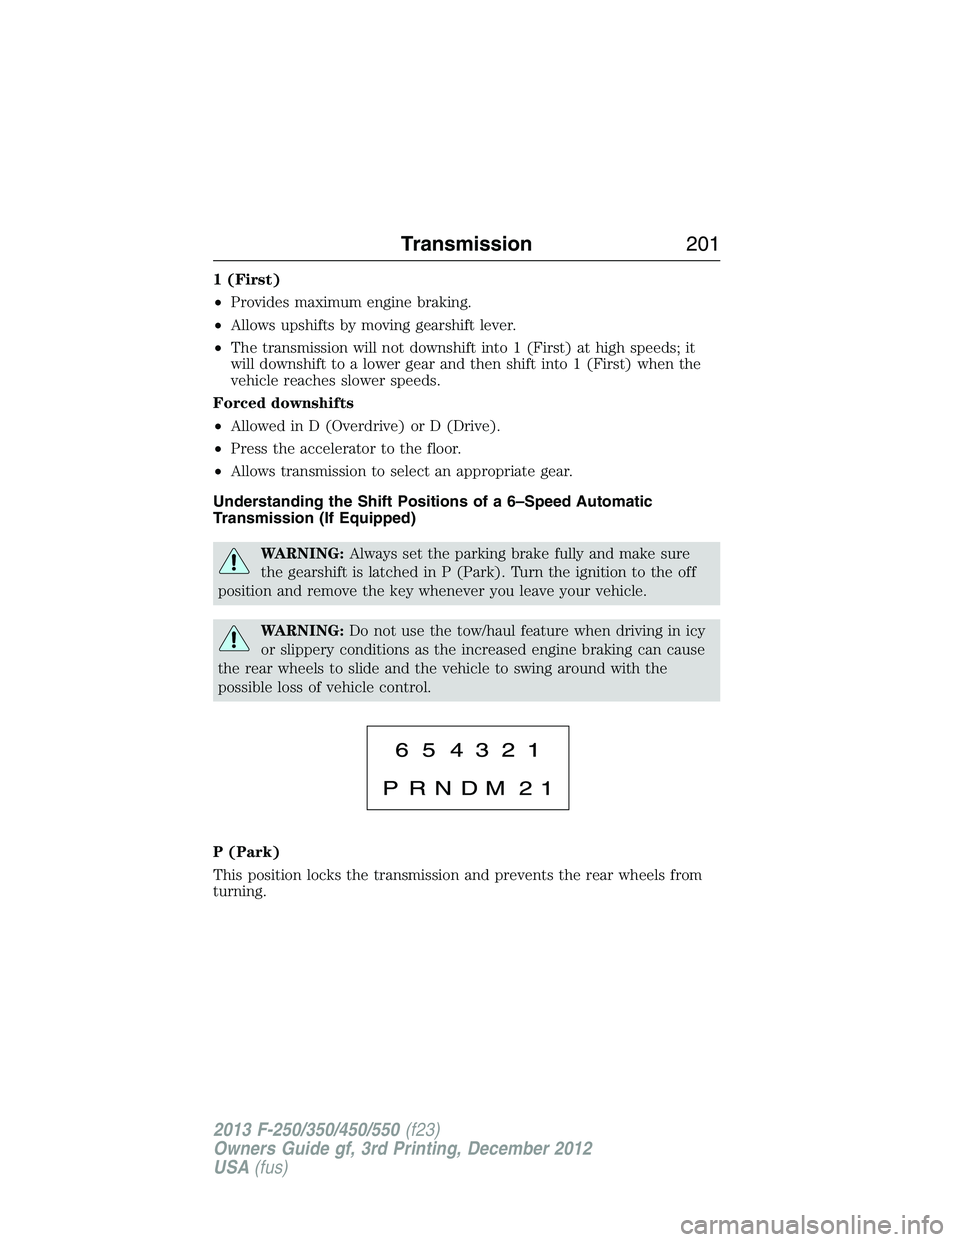
Understanding the Shift Positions of a 6–Speed Automatic
Transmission (If Equipped)
WARNING:Always set the parking brake fully and make sure
the gearshift is latched in P (Park). Turn the ignition to the off
position and remove the key whenever you leave your vehicle.
WARNING:Do not use the tow/haul feature when driving in icy
or slippery conditions as the increased engine braking can cause
the rear wheels to slide and the vehicle to swing around with the
possible loss of vehicle control.
P (Park)
This position locks the transmission and prevents the rear wheels from
turning.
Transmission201
2013 F-250/350/450/550(f23)
Owners Guide gf, 3rd Printing, December 2012
USA(fus)
Page 207 of 577

Brake-shift interlock
WARNING:Do not drive your vehicle until you verify that the
brake lamps are working.
WARNING:When doing this procedure, you will be taking
the vehicle out of park which means the vehicle can roll freely.
To avoid unwanted vehicle movement, always fully set the parking
brake prior to doing this procedure. Use wheel chocks if appropriate.
WARNING:If the parking brake is fully released, but the brake
warning lamp remains illuminated, the brakes may not be
working properly. See your authorized dealer as soon as possible.
This vehicle is equipped with a brake-shift interlock feature that prevents
the gearshift lever from being moved from P (Park) when the ignition is
in the 3 (on) position and the brake pedal is not pressed.
If you cannot move the gearshift lever out of P (Park) with ignition in
the on position and the brake pedal pressed, it is possible that a fuse has
blown or the vehicle’s brake lamps are not operating properly. Refer to
theFuseschapter.
If the fuse is not blown and the brake lamps are working properly, the
following procedure will allow you to move the gearshift lever from P
(Park):
1. Apply the parking brake. Turn the ignition key to 1 (off), then remove
the key.
2. Move the steering column to the full down and full rearward position
(toward the driver’s seat).
3. Remove the gearshift lever boot.
4. Place fingers into hole where the gearshift lever boot was removed
from and pull top half of shroud up and forward to separate it from the
lower half of the shroud. There is a hinge at the forward edge of the top
shroud. Roll the top half of the shroud upward on the hinge point to
clear the hazard flasher button, then pull straight rearward toward the
driver’s seat to remove.
5. Remove the top half of the shroud.
206Transmission
2013 F-250/350/450/550(f23)
Owners Guide gf, 3rd Printing, December 2012
USA(fus)
Page 210 of 577
USING FOUR-WHEEL DRIVE (4WD) (IF EQUIPPED )
WARNING:For important information regarding safe operation
of this type of vehicle, seeGeneral Informationin theWheels
and Tireschapter.
Note:Do not use 4X4 mode on dry, hard surfaced roads. Doing so will
produce excessive noise, increase tire wear and may damage drive
components. 4X4 mode is only intended for consistently slippery or loose
surfaces.
Note:
If 4X4 low is selected while the vehicle is moving above 3 mph
(5 km/h), the 4WD system will not perform a shift. This is normal and
should be no reason for concern. Refer toShifting to/from 4L (4X4 Low)
for proper operation.
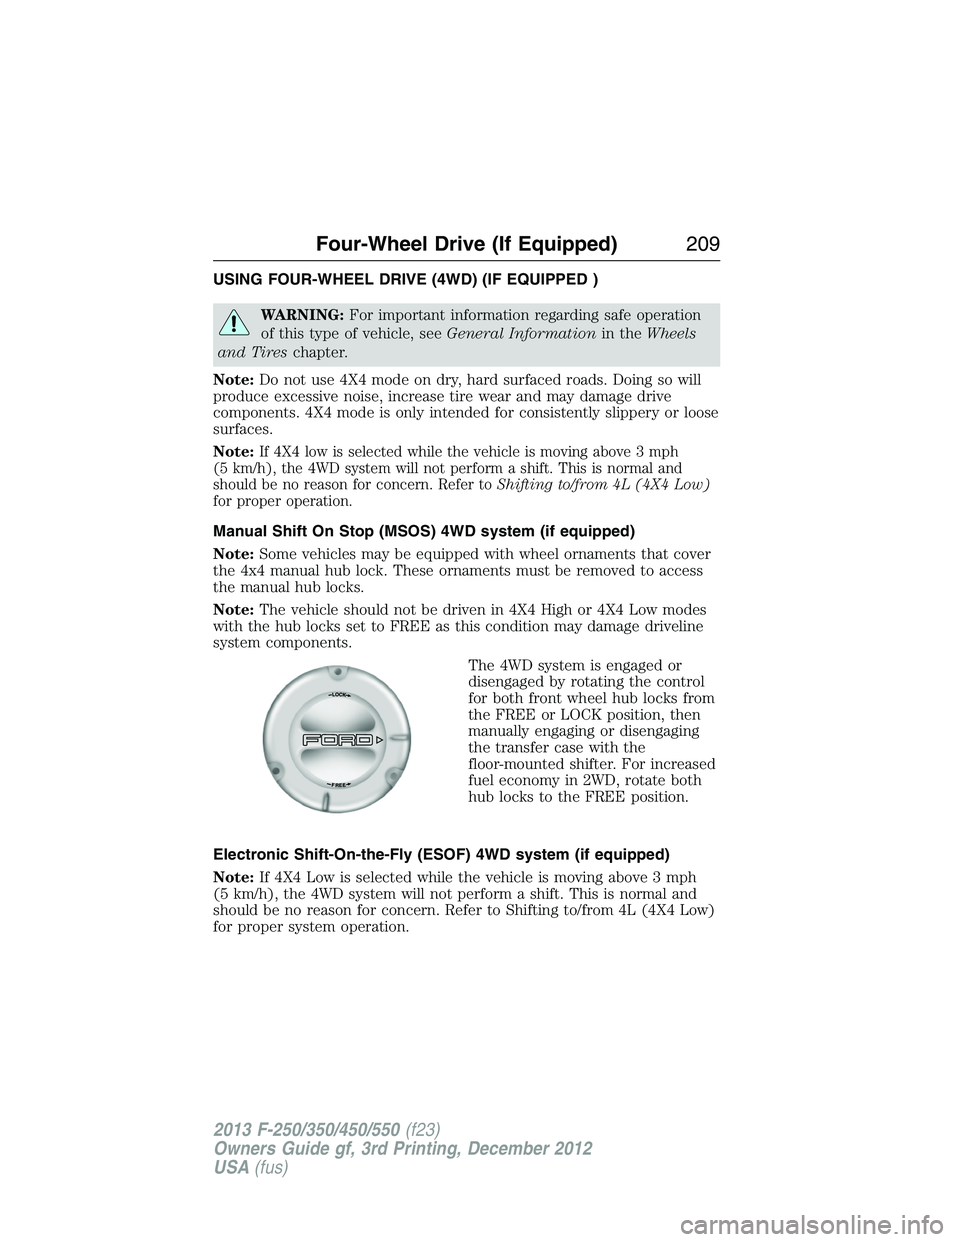
Manual Shift On Stop (MSOS) 4WD system (if equipped)
Note:Some vehicles may be equipped with wheel ornaments that cover
the 4x4 manual hub lock. These ornaments must be removed to access
the manual hub locks.
Note:The vehicle should not be driven in 4X4 High or 4X4 Low modes
with the hub locks set to FREE as this condition may damage driveline
system components.
The 4WD system is engaged or
disengaged by rotating the control
for both front wheel hub locks from
the FREE or LOCK position, then
manually engaging or disengaging
the transfer case with the
floor-mounted shifter. For increased
fuel economy in 2WD, rotate both
hub locks to the FREE position.
Electronic Shift-On-the-Fly (ESOF) 4WD system (if equipped)
Note:If 4X4 Low is selected while the vehicle is moving above 3 mph
(5 km/h), the 4WD system will not perform a shift. This is normal and
should be no reason for concern. Refer to Shifting to/from 4L (4X4 Low)
for proper system operation.
Four-Wheel Drive (If Equipped)209
2013 F-250/350/450/550(f23)
Owners Guide gf, 3rd Printing, December 2012
USA(fus)
Page 211 of 577
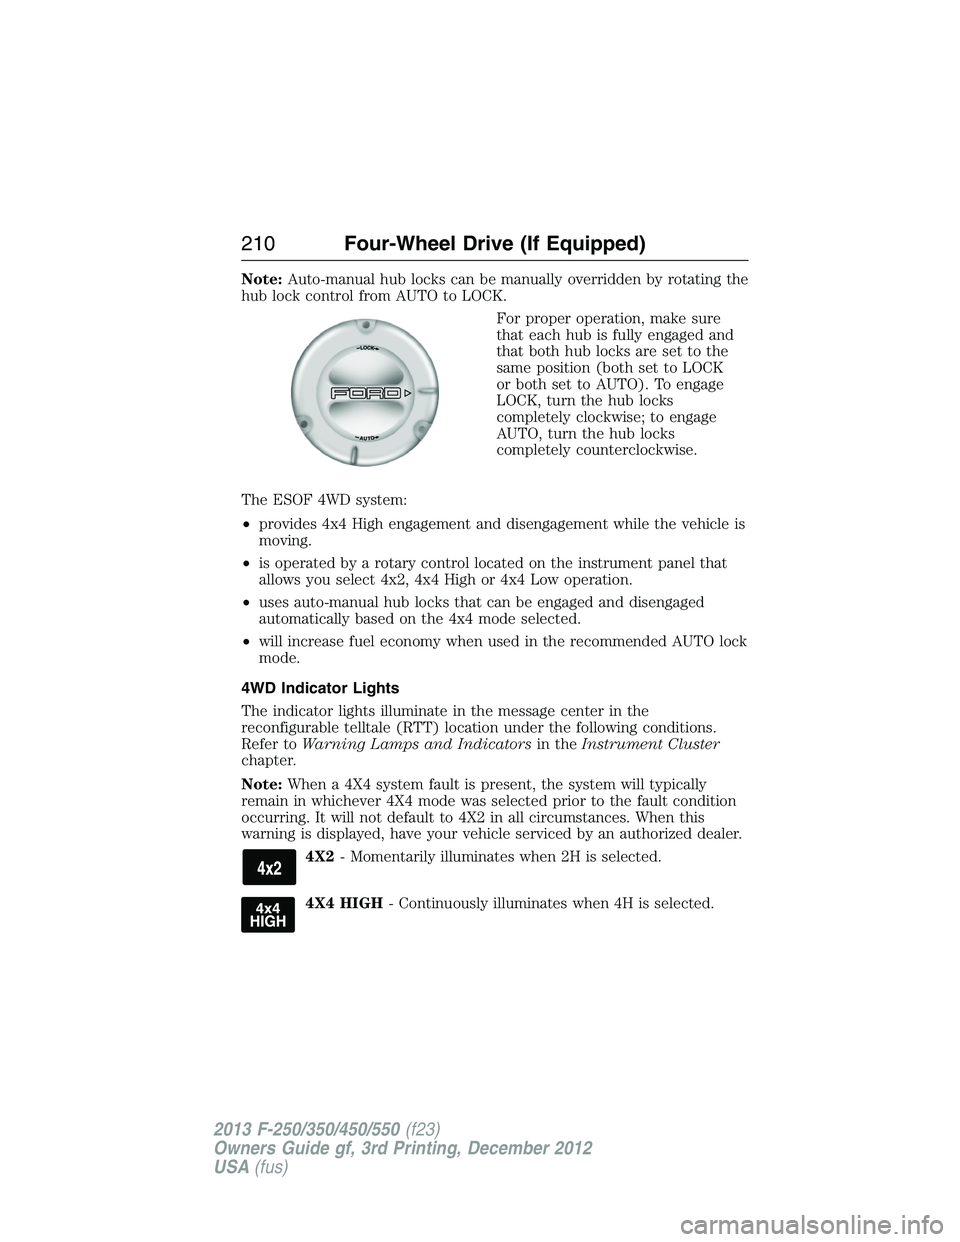
Note:Auto-manual hub locks can be manually overridden by rotating the
hub lock control from AUTO to LOCK.
For proper operation, make sure
that each hub is fully engaged and
that both hub locks are set to the
same position (both set to LOCK
or both set to AUTO). To engage
LOCK, turn the hub locks
completely clockwise; to engage
AUTO, turn the hub locks
completely counterclockwise.
The ESOF 4WD system:
•provides 4x4 High engagement and disengagement while the vehicle is
moving.
•is operated by a rotary control located on the instrument panel that
allows you select 4x2, 4x4 High or 4x4 Low operation.
•uses auto-manual hub locks that can be engaged and disengaged
automatically based on the 4x4 mode selected.
•will increase fuel economy when used in the recommended AUTO lock
mode.
4WD Indicator Lights
The indicator lights illuminate in the message center in the
reconfigurable telltale (RTT) location under the following conditions.
Refer toWarning Lamps and Indicatorsin theInstrument Cluster
chapter.
Note:When a 4X4 system fault is present, the system will typically
remain in whichever 4X4 mode was selected prior to the fault condition
occurring. It will not default to 4X2 in all circumstances. When this
warning is displayed, have your vehicle serviced by an authorized dealer.
4X2- Momentarily illuminates when 2H is selected.
4X4 HIGH- Continuously illuminates when 4H is selected.
210Four-Wheel Drive (If Equipped)
2013 F-250/350/450/550(f23)
Owners Guide gf, 3rd Printing, December 2012
USA(fus)