2013 FORD F250 lights
[x] Cancel search: lightsPage 178 of 577
3.Press and release the program button. The larger purple LED will flash
Note:The next two steps must be completed in 30 seconds.
4. Press and release the Genie Intellicode 2 hand-held transmitter’s
previously programmed button. Both indicator lights on the garage door
opener motor unit should now flash purple.
5. Press and hold the previously programmed button on the sun visor for
two seconds. Repeat this step up to 3 times until the garage door moves.
Programming is now complete.
Clearing a HomeLink device
To erase programming from the three HomeLink buttons, press and hold
the two outer HomeLink buttons until the indicator light begins to flash.
The LED will begin flashing in 10 to 20 seconds, at which time both
buttons should be released. Programming has now been erased, and the
LED should blink slowly to indicate the device is in train mode when any
one of the three HomeLink buttons is pressed.
FCC and RSS-210 Industry Canada Compliance
This device complies with Part 15 of the FCC Rules and with RSS-210 of
Industry Canada. Operation is subject to the following two conditions:
(1) this device may not cause harmful interference, and (2) this device
must accept any interference received, including interference that may
cause undesired operation.
Changes or modifications to your device not expressly approved by the
party responsible for compliance can void the user’s authority to operate
the equipment.
Universal Garage Door Opener (If Equipped)177
2013 F-250/350/450/550(f23)
Owners Guide gf, 3rd Printing, December 2012
USA(fus)
Page 181 of 577

Your vehicle may have more than
one power point, located:
•on the back of the center console
•on the instrument panel.
Your power points are not designed for the following electric appliances
and may prevent the appliances from working properly:
•Cathode ray tube type televisions
•Motor loads, such as vacuum cleaners, electric saws and other electric
power tools, compressor-driven refrigerators, etc.
•Measuring devices, which process precise data, such as medical
equipment, measuring equipment, etc.
•Other appliances requiring an extremely stable power supply:
microcomputer-controlled electric blankets, touch sensor lamps, etc.
Power points can switch to a fault mode when overloaded, overheated
or shorted. Unplug your device and turn the ignition off then on for
overloading and shorting conditions. Let the system cool off, then turn
the ignition off then on for an overheating condition.
Power points can provide power whenever the ignition is on and the
indicator lights are on. Each indicator light is located in the top left
corner of the power point.
When the indicator light is:
•on — power point is ready to supply power
•off — power point power supply is off; ignition is not on
•blinking — power point is in fault mode.
180Auxiliary Power Points
2013 F-250/350/450/550(f23)
Owners Guide gf, 3rd Printing, December 2012
USA(fus)
Page 184 of 577
IGNITION SWITCH
Note:To switch the engine off when your vehicle is moving, move the
transmission selector lever to positionN.Use the brakes to bring your
vehicle to a safe stop. After your vehicle has stopped, switch the engine
off and move the transmission selector lever to positionP.Turn the key
to the accessory or off position.
Note:Do not store the key in the ignition after the vehicle is turned off
and you have left the vehicle. This could cause a drain on the battery.
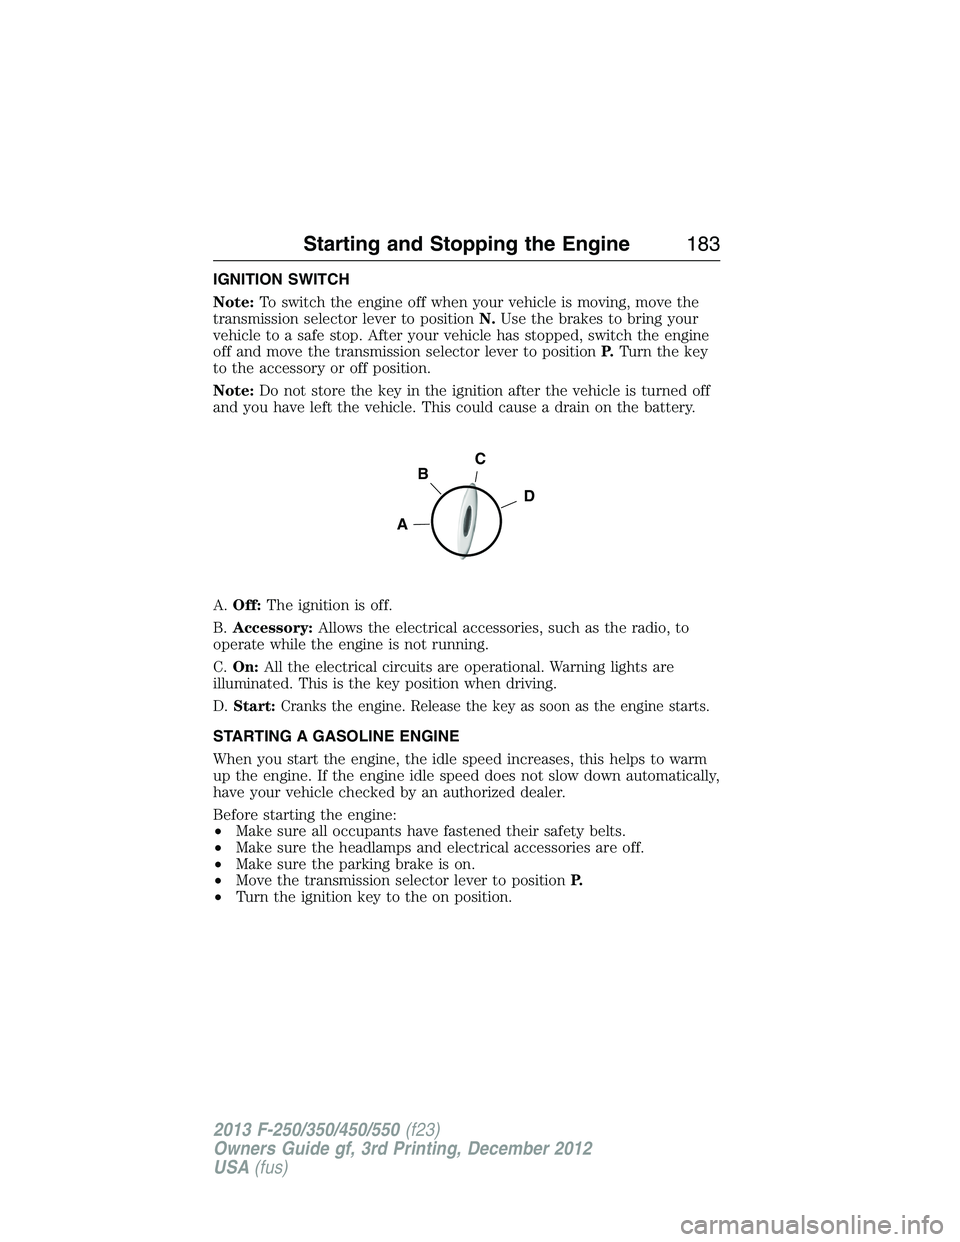
A.Off:The ignition is off.
B.Accessory:Allows the electrical accessories, such as the radio, to
operate while the engine is not running.
C.On:All the electrical circuits are operational. Warning lights are
illuminated. This is the key position when driving.
D.
Start:Cranks the engine. Release the key as soon as the engine starts.
STARTING A GASOLINE ENGINE
When you start the engine, the idle speed increases, this helps to warm
up the engine. If the engine idle speed does not slow down automatically,
have your vehicle checked by an authorized dealer.
Before starting the engine:
•Make sure all occupants have fastened their safety belts.
•Make sure the headlamps and electrical accessories are off.
•Make sure the parking brake is on.
•Move the transmission selector lever to positionP.
•Turn the ignition key to the on position.
C
D
B
A
Starting and Stopping the Engine183
2013 F-250/350/450/550(f23)
Owners Guide gf, 3rd Printing, December 2012
USA(fus)
Page 185 of 577
Some warning lights briefly illuminate.
Note:Do not touch the accelerator pedal.
1. Fully press the brake pedal.
2. Turn the key to the start position to start the engine. Release the key
when the engine starts.
Note:The engine may continue cranking for up to 15 seconds or until it
starts.
Note:If you cannot start the engine on the first try, wait for a short
period and try again.
If you have difficulty starting the engine when the temperature is below
-13°F (-25°C), press the accelerator pedal slightly and try again.
Failure to Start
If you cannot start the engine after three attempts, wait 10 seconds and
follow this procedure:
1. Fully press the brake pedal.
2. Fully press the accelerator pedal and hold it there.
3. Start the engine.
Stopping the Engine When Your Vehicle is Stationary
1. Move the transmission selector lever to positionP.
2. Turn the key to the off position.
Stopping the Engine When Your Vehicle is Moving
WARNING:When you switch off the engine when your vehicle is
still moving, this results in a loss of brake and steering assistance.
The steering does not lock, but higher effort is required. When you
switch off the ignition, some electrical circuits, warning lamps and
indicators may also be off.
1. Move the transmission selector lever to positionNand use the brakes
to bring your vehicle to a safe stop.
2. When your vehicle has stopped, move the transmission selector lever
to positionPand turn the key to the off position.
184Starting and Stopping the Engine
2013 F-250/350/450/550(f23)
Owners Guide gf, 3rd Printing, December 2012
USA(fus)
Page 209 of 577

HILL START ASSIST
WARNING:The hill start assist feature does not replace the
parking brake. When you leave the vehicle, always apply the
parking brake and shift the transmission into P (Park).
WARNING:You must remain in the vehicle once you have
activated the hill start assist feature.
WARNING:During all times, you are responsible for controlling
the vehicle, supervising the hill start assist system and
intervening, if required.
WARNING:If the engine is revved excessively, or if a
malfunction is detected when the hill start assist feature is
active, the hill start assist feature will be deactivated.
Hill start assist keeps your vehicle stationary long enough to move your
foot from the brake pedal to the accelerator pedal when your vehicle is
on a slope.
The brakes are released automatically once the engine has developed
sufficient drive to prevent the vehicle from rolling down the slope. This
is an advantage when pulling away on a slope, (for example from a car
park ramp, traffic lights or when reversing uphill into a parking space).
Using Hill Start Assist
1. Press the brake pedal to bring the vehicle to a complete standstill.
Keep the brake pedal pressed.
2. If the sensors detect that the vehicle is on a slope, the hill start assist
feature will be activated automatically.
3. When you remove your foot from the brake pedal, the vehicle will
remain on the slope without rolling away for approximately two or three
seconds. This hold time will automatically be extended if you are in the
process of driving off.
4. Drive off in the normal manner. The brakes will be released
automatically.
208Transmission
2013 F-250/350/450/550(f23)
Owners Guide gf, 3rd Printing, December 2012
USA(fus)
Page 211 of 577
Note:Auto-manual hub locks can be manually overridden by rotating the
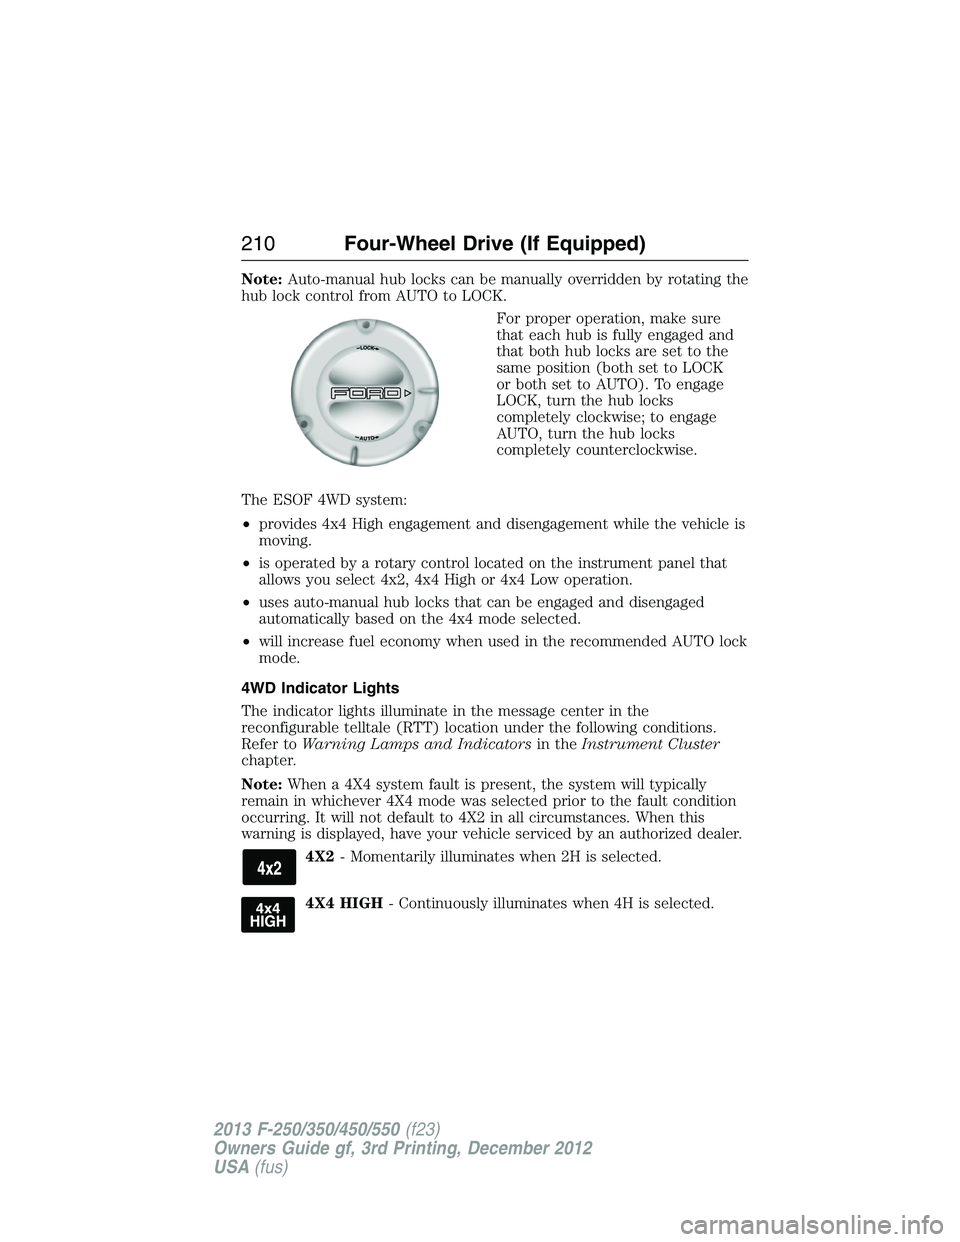
hub lock control from AUTO to LOCK.
For proper operation, make sure
that each hub is fully engaged and
that both hub locks are set to the
same position (both set to LOCK
or both set to AUTO). To engage
LOCK, turn the hub locks
completely clockwise; to engage
AUTO, turn the hub locks
completely counterclockwise.
The ESOF 4WD system:
•provides 4x4 High engagement and disengagement while the vehicle is
moving.
•is operated by a rotary control located on the instrument panel that
allows you select 4x2, 4x4 High or 4x4 Low operation.
•uses auto-manual hub locks that can be engaged and disengaged
automatically based on the 4x4 mode selected.
•will increase fuel economy when used in the recommended AUTO lock
mode.
4WD Indicator Lights
The indicator lights illuminate in the message center in the
reconfigurable telltale (RTT) location under the following conditions.
Refer toWarning Lamps and Indicatorsin theInstrument Cluster
chapter.
Note:When a 4X4 system fault is present, the system will typically
remain in whichever 4X4 mode was selected prior to the fault condition
occurring. It will not default to 4X2 in all circumstances. When this
warning is displayed, have your vehicle serviced by an authorized dealer.
4X2- Momentarily illuminates when 2H is selected.
4X4 HIGH- Continuously illuminates when 4H is selected.
210Four-Wheel Drive (If Equipped)
2013 F-250/350/450/550(f23)
Owners Guide gf, 3rd Printing, December 2012
USA(fus)
Page 227 of 577
System indicator lights and messages
WARNING:If a failure has been detected within the Traction
Control System, the stability control light will illuminate steadily.
Verify that the Traction Control System was not manually disabled
using the stability control button. If the stability control light still
illuminates steadily, have the system serviced by an authorized dealer
immediately. Operating your vehicle with Traction Control disabled
could lead to an increased risk of loss of vehicle control, vehicle
rollover, personal injury and death.
The stability control light temporarily illuminates on engine
start-up and flashes when a driving condition activates the
stability system.
The stability control off light temporarily illuminates on engine
start-up and stays on when the traction control system is
turned off or if a problem occurs in the stability system.
226Traction Control
2013 F-250/350/450/550(f23)
Owners Guide gf, 3rd Printing, December 2012
USA(fus)
Page 237 of 577

Guidelines and the Centerline
Note:Fixed guidelines are only available when the transmission is in R
(Reverse).
Note:The centerline is only available if fixed guidelines are on.
A. Rear bumper
B. Fixed guideline: Red zone
C. Fixed guideline: Yellow zone
D. Fixed guideline: Green zone
E. Centerline
The fixed guidelines fade in and out depending on the steering wheel
position.
Always use caution while reversing. Objects in the red zone are closest
to your vehicle and objects in the green zone are further away. Objects
are getting closer to your vehicle as they move from the green zone to
the yellow or red zones. Use the side view mirrors and rear view mirror
to get better coverage on both sides and rear of the vehicle.
Selectable settings for this feature are FIXED and OFF.
Visual Park Aid Alert
Note:Visual park alert is only available when the transmission is in R
(Reverse).
Note:The reverse sensing system is not effective at speeds above 3 mph
(5 km/h) and may not detect certain angular or moving objects.
The visual park aid alert allows the driver to view the area that is being
detected by the reverse sensing system. The system uses red, yellow
and green highlights which appear on top of the video image when an
object is detected by the reverse sensing system. The alert highlights the
closest object detected. The reverse sensing alert can be disabled and if
visual park aid alert is enabled, highlighted areas are still displayed.
Selectable settings for this feature are ON and OFF.
A
E
D
C
B
236Parking Aids
2013 F-250/350/450/550(f23)
Owners Guide gf, 3rd Printing, December 2012
USA(fus)