2013 FORD EXPEDITION change time
[x] Cancel search: change timePage 201 of 497
It is best not to alternate repeatedly between gasoline and E85. If you do
switch fuels, it is recommended that you add as much fuel as
possible—at least half a tank. Do not add less than five gallons (18.9L)
when refueling. You should drive the vehicle immediately after refueling
for at least 5 miles (8 km) to allow the vehicle to adapt to the change in
ethanol concentration. If you exclusively use E85 fuel, it is recommended
to fill the fuel tank with regular unleaded gasoline at each scheduled oil
change.
Octane Recommendations
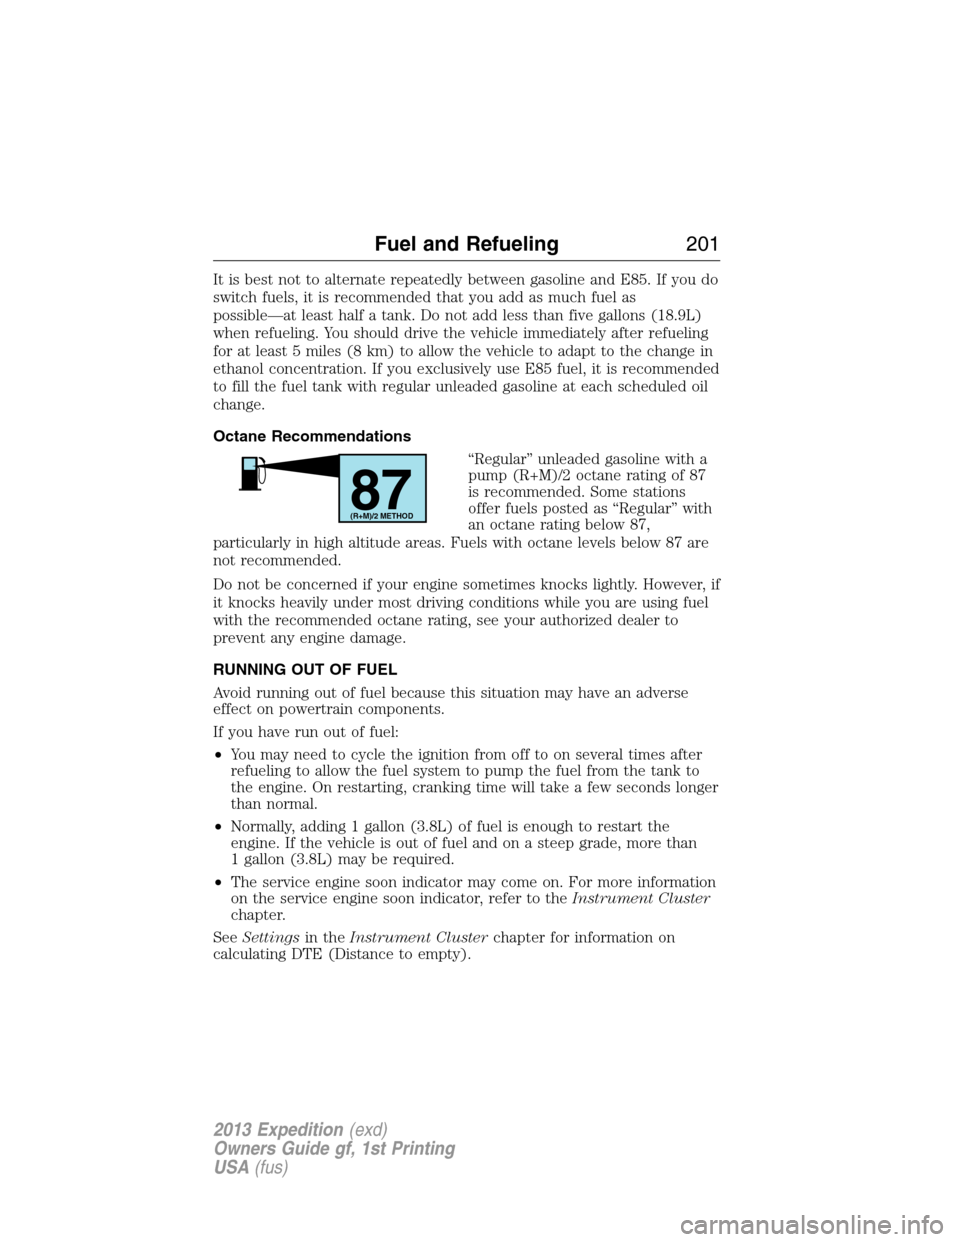
“Regular” unleaded gasoline with a
pump (R+M)/2 octane rating of 87
is recommended. Some stations
offer fuels posted as “Regular” with
an octane rating below 87,
particularly in high altitude areas. Fuels with octane levels below 87 are
not recommended.
Do not be concerned if your engine sometimes knocks lightly. However, if
it knocks heavily under most driving conditions while you are using fuel
with the recommended octane rating, see your authorized dealer to
prevent any engine damage.
RUNNING OUT OF FUEL
Avoid running out of fuel because this situation may have an adverse
effect on powertrain components.
If you have run out of fuel:
•You may need to cycle the ignition from off to on several times after
refueling to allow the fuel system to pump the fuel from the tank to
the engine. On restarting, cranking time will take a few seconds longer
than normal.
•Normally, adding 1 gallon (3.8L) of fuel is enough to restart the
engine. If the vehicle is out of fuel and on a steep grade, more than
1 gallon (3.8L) may be required.
•The service engine soon indicator may come on. For more information
on the service engine soon indicator, refer to theInstrument Cluster
chapter.
SeeSettingsin theInstrument Clusterchapter for information on
calculating DTE (Distance to empty).
87(R+M)/2 METHOD
Fuel and Refueling201
2013 Expedition(exd)
Owners Guide gf, 1st Printing
USA(fus)
Page 219 of 497
How Your Vehicle Differs From Other Vehicles
WARNING:Vehicles with a higher center of gravity such as
utility and four-wheel drive vehicles handle differently than
vehicles with a lower center of gravity. Utility and four-wheel drive
vehicles arenotdesigned for cornering at speeds as high as passenger
cars any more than low-slung sports cars are designed to perform
satisfactorily under off-road conditions. Avoid sharp turns, excessive
speed and abrupt maneuvers in these vehicles. Failure to drive
cautiously could result in an increased risk of loss of vehicle control,
vehicle rollover, personal injury and death.
Truck and utility vehicles can differ from some other vehicles. Your
vehicle may be higher to allow it to travel over rough terrain without
getting hung up or damaging underbody components.
The differences that make your vehicle so versatile also make it handle
differently than an ordinary passenger car.
Maintain steering wheel control at all times, especially in rough terrain.
Since sudden changes in terrain can result in abrupt steering wheel
motion, make sure you grip the steering wheel from the outside. Do not
grip the spokes.
Drive cautiously to avoid vehicle damage from concealed objects such as
rocks and stumps.
You should either know the terrain or examine maps of the area before
driving. Map out your route before driving in the area. To maintain
steering and braking control of your vehicle, you must have all four
wheels on the ground and they must be rolling, not sliding or spinning.
Driving Off-Road With Truck and Utility Vehicles
Note:On some 4WD models, the initial shift from two-wheel drive to
four-wheel drive while the vehicle is moving can cause some momentary
clunk and ratcheting sounds. This is the front drivetrain coming up to
speed and the automatic locking hubs engaging and is not cause for
concern.
Note:Your vehicle may be equipped with a front air dam that can
become damaged (due to reduced ground clearance) when taking your
vehicle off-road. This air dam can be taken off by removing two bolts.
4WD vehicles are specially equipped for driving on sand, snow, mud and
rough terrain and have operating characteristics that are somewhat
different from conventional vehicles, both on and off the road.
Four-Wheel Drive (If Equipped)219
2013 Expedition(exd)
Owners Guide gf, 1st Printing
USA(fus)
Page 259 of 497
Explanation of Information Display Warning Messages
Note:Your TBC can be diagnosed by your authorized dealer to
determine exactly which trailer fault has occurred. However, if the fault
is with the trailer this diagnosis isnotcovered under your Ford
warranty.
TRAILER BRAKE MODULE FAULT:Displays in response to faults
sensed by the TBC (accompanied by a single chime). If this message is
displayed, please contact your authorized dealer as soon as possible for
diagnosis and repair. The TBC may still function, but performance may
be degraded.
WIRING FAULT ON TRAILER:Displays when a short circuit on the
electric brake output wire has occurred. If theWIRING FAULT ON
TRAILERmessage is displayed and accompanied by a single chime,
with no trailer connected, the problem is with the vehicle wiring between
the TBC to the 7–pin connector at the bumper. If the message is only
displayed with a trailer connected, the problem is related to the trailer
wiring. Consult your trailer dealer for assistance. This can be a short to
ground (i.e., chaffed wire), short to voltage (i.e., pulled pin on trailer
emergency break-away battery) or the trailer brakes may be drawing too
much current.
Points to Remember
Note:Do not attempt removal of the TBC without consulting the
Workshop Manual.Damage to the unit may result.
•Adjust GAIN setting before using the TBC for the first time.
•Adjust GAIN setting (according to procedure above) whenever road,
weather and trailer or vehicle loading conditions change from when
the GAIN was initially set.
•The manual control lever should only be used for proper adjustment
of the GAIN during trailer setup. Misuse, such as application during
trailer sway, could cause instability of trailer or tow vehicle.
•Avoid towing in adverse weather conditions. The TBC does not
provide anti-lock control of the trailer wheels. Trailer wheels can lock
up on slippery surfaces, resulting in reduced stability of trailer and
tow vehicle.
•The TBC is equipped with a feature which reduces output at vehicle
speeds below 11 mph (18 km/h) so trailer and vehicle braking is not
jerky or harsh. This feature is only available when applying the brakes
using the vehicle’s brake pedal, not the TBC.
•The controller interacts with the brake control system and powertrain
control system of the vehicle to provide the best performance on
different road conditions.
Towing259
2013 Expedition(exd)
Owners Guide gf, 1st Printing
USA(fus)
Page 262 of 497
Replace the rear axle lubricant anytime the rear axle has been
submerged in water. Water may have contaminated the rear axle
lubricant, which is not normally checked or changed unless a leak is
suspected or other axle repair is required.
WRECKER TOWING
Note:Vehicles equipped with air suspension must turn off the air
suspension control and ignition switch prior to towing. SeeAir
suspensionin theDriving Aidschapter.
If you need to have your vehicle towed, contact a professional towing
service or, if you are a member of a roadside assistance program, your
roadside assistance service provider.
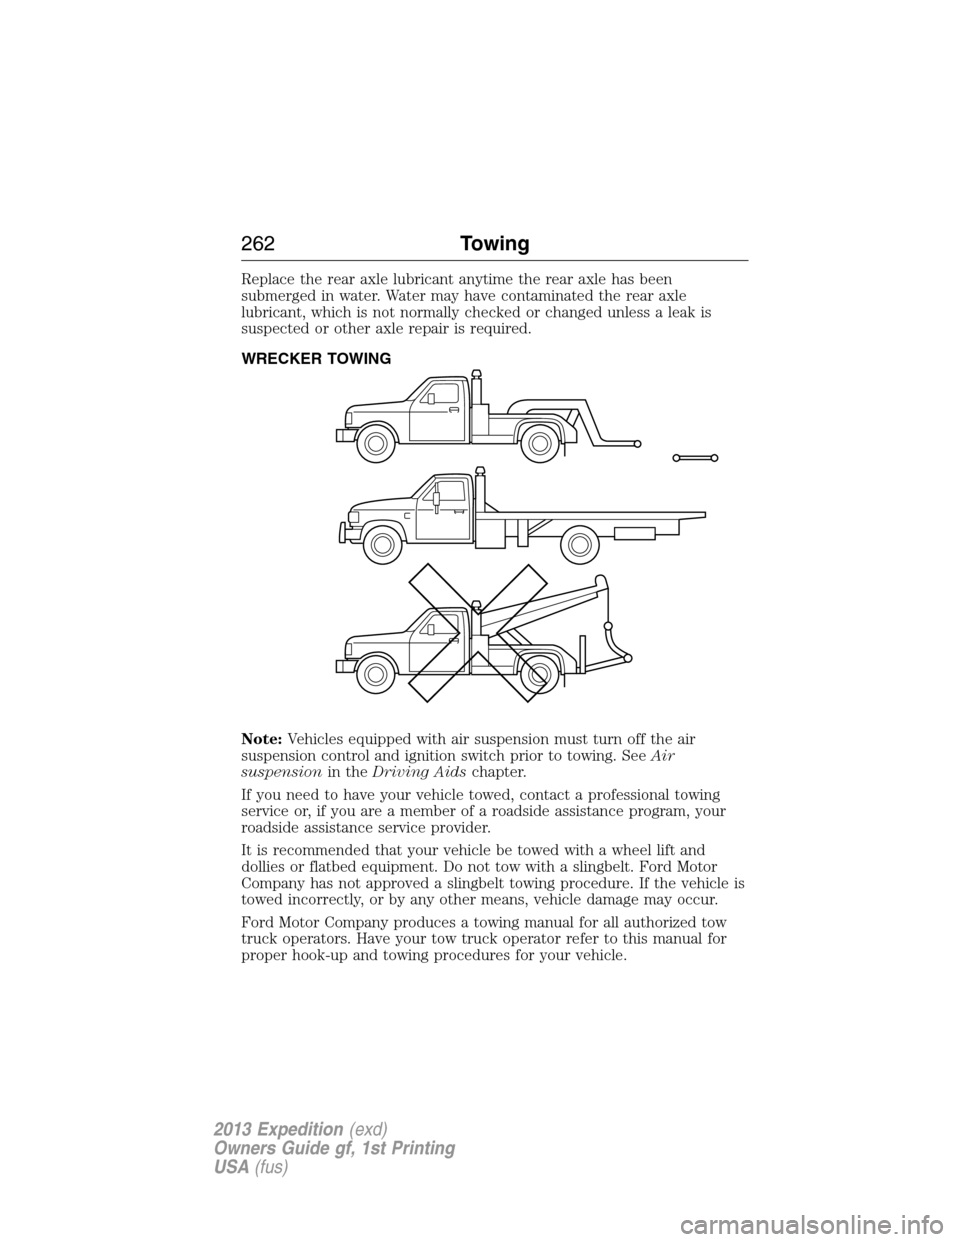
It is recommended that your vehicle be towed with a wheel lift and
dollies or flatbed equipment. Do not tow with a slingbelt. Ford Motor
Company has not approved a slingbelt towing procedure. If the vehicle is
towed incorrectly, or by any other means, vehicle damage may occur.
Ford Motor Company produces a towing manual for all authorized tow
truck operators. Have your tow truck operator refer to this manual for
proper hook-up and towing procedures for your vehicle.
262Towing
2013 Expedition(exd)
Owners Guide gf, 1st Printing
USA(fus)
Page 264 of 497
BREAKING-IN
You need to break in new tires for approximately 300 miles
(480 kilometers). During this time, your vehicle may exhibit some unique
driving characteristics. Avoid driving too fast during the first 1000 miles
(1600 kilometers). Vary your speed frequently and change up through
the gears early. Do not labor the engine. Do not tow during the first
1000 miles (1600 kilometers).
ECONOMICAL DRIVING
Fuel economy is affected by several things such as how you drive, the
conditions you drive under and how you maintain your vehicle.
There are some things to keep in mind that may improve your fuel
economy:
•Accelerate and slow down in a smooth, moderate fashion.
•Drive at steady speeds without stopping.
•Anticipate stops; slowing down may eliminate the need to stop.
•Combine errands and minimize stop-and-go driving.
•Close the windows for high-speed driving.
•Drive at reasonable speeds (traveling at 55 mph [88 km/h] uses 15%
less fuel than traveling at 65 mph [105 km/h]).
•Keep the tires properly inflated and use only the recommended size.
•Use the recommended engine oil.
•Perform all regularly scheduled maintenance.
There are also some things you may not want to do because they may
reduce your fuel economy:
•Sudden or hard accelerations.
•Rev the engine before turning it off.
•Idle for periods longer than one minute.
•Warm up your vehicle on cold mornings.
•Use the air conditioner or front defroster.
•Use the speed control in hilly terrain.
•Rest your foot on the brake pedal while driving.
•Drive a heavily loaded vehicle or tow a trailer.
264Driving Hints
2013 Expedition(exd)
Owners Guide gf, 1st Printing
USA(fus)
Page 276 of 497
procedure outlined earlier in this chapter in theGetting the services
you needsection, you may be eligible to participate in the BBB AUTO
LINE program.
The BBB AUTO LINE program consists of two parts – mediation and
arbitration. During mediation, a representative of the BBB will contact
both you and Ford Motor Company to explore options for settlement of
the claim. If an agreement is not reached during mediation or you do not
want to participate in mediation, and if your claim is eligible, you may
participate in the arbitration process. An arbitration hearing will be
scheduled so that you can present your case in an informal setting
before an impartial person. The arbitrator will consider the testimony
provided and make a decision after the hearing.
Disputes submitted to the BBB AUTO LINE program are usually decided
within forty days after you file your claim with the BBB. You are not
bound by the decision, and may reject the decision and proceed to court
where all findings of the BBB Auto Line dispute, and decision, are
admissible in the court action. Should you choose to accept the BBB
AUTO LINE decision, Ford is then bound by the decision, and must
comply with the decision within 30 days of receipt of your acceptance
letter.
BBB AUTO LINE Application: Using the information provided below,
please call or write to request a program application. You will be asked
for your name and address, general information about your new vehicle,
information about your warranty concerns, and any steps you have
already taken to try to resolve them. A Customer Claim Form will be
mailed that will need to be completed, signed and returned to the BBB
along with proof of ownership. Upon receipt, the BBB will review the
claim for eligibility under the Program Summary Guidelines.
You can get more information by calling BBB AUTO LINE at
1-800-955-5100, or writing to:
BBB AUTO LINE
3033 Wilson Boulevard, Suite 600
Arlington, Virginia 22201
BBB AUTO LINE applications can also be requested by calling the Ford
Motor Company Customer Relationship Center at 1-800-392-3673.
Note:Ford Motor Company reserves the right to change eligibility
limitations, modify procedures, or to discontinue this process at any time
without notice and without obligation.
276Customer Assistance
2013 Expedition(exd)
Owners Guide gf, 1st Printing
USA(fus)
Page 307 of 497
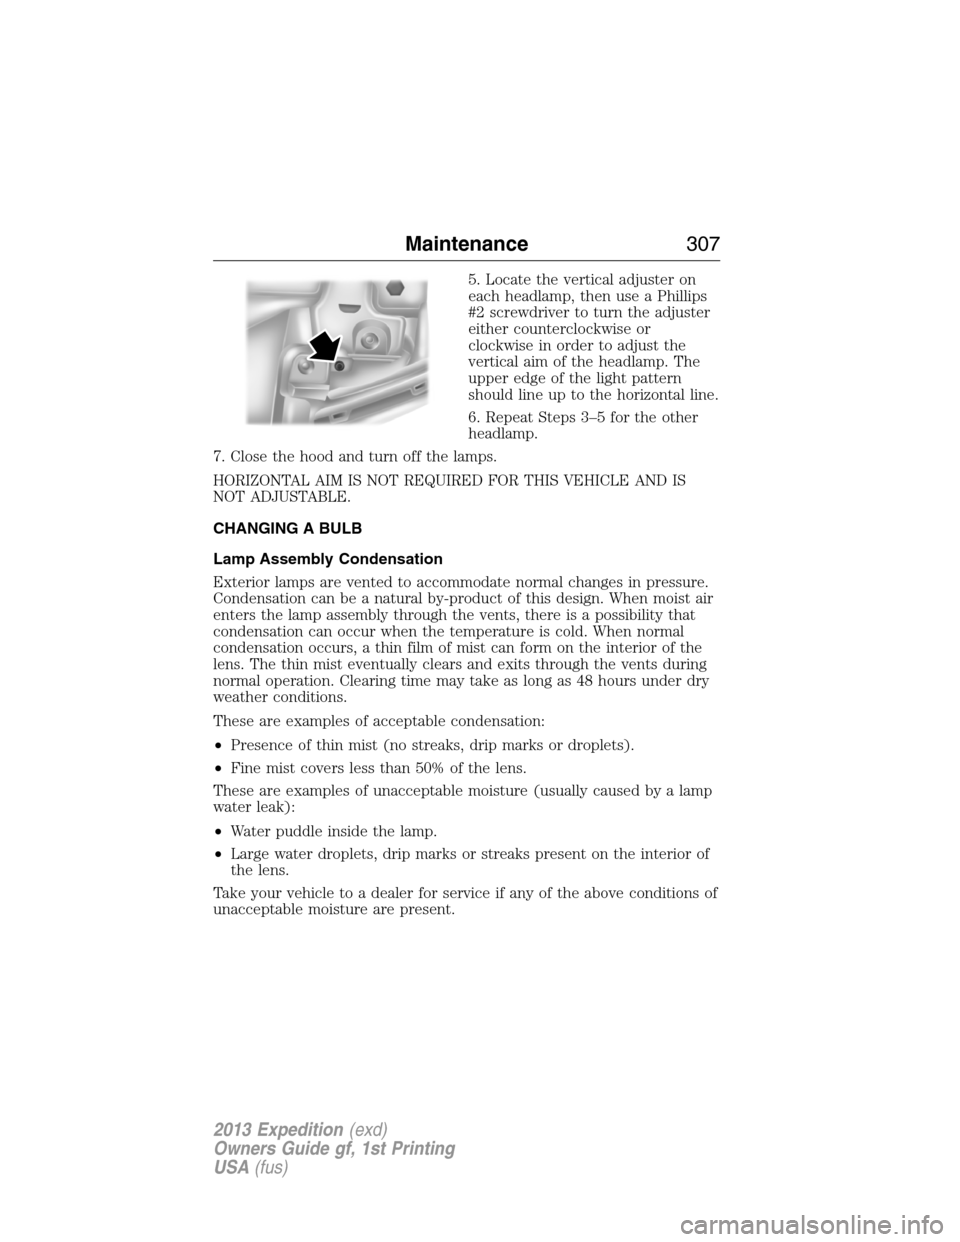
5. Locate the vertical adjuster on
each headlamp, then use a Phillips
#2 screwdriver to turn the adjuster
either counterclockwise or
clockwise in order to adjust the
vertical aim of the headlamp. The
upper edge of the light pattern
should line up to the horizontal line.
6. Repeat Steps 3–5 for the other
headlamp.
7. Close the hood and turn off the lamps.
HORIZONTAL AIM IS NOT REQUIRED FOR THIS VEHICLE AND IS
NOT ADJUSTABLE.
CHANGING A BULB
Lamp Assembly Condensation
Exterior lamps are vented to accommodate normal changes in pressure.
Condensation can be a natural by-product of this design. When moist air
enters the lamp assembly through the vents, there is a possibility that
condensation can occur when the temperature is cold. When normal
condensation occurs, a thin film of mist can form on the interior of the
lens. The thin mist eventually clears and exits through the vents during
normal operation. Clearing time may take as long as 48 hours under dry
weather conditions.
These are examples of acceptable condensation:
•Presence of thin mist (no streaks, drip marks or droplets).
•Fine mist covers less than 50% of the lens.
These are examples of unacceptable moisture (usually caused by a lamp
water leak):
•Water puddle inside the lamp.
•Large water droplets, drip marks or streaks present on the interior of
the lens.
Take your vehicle to a dealer for service if any of the above conditions of
unacceptable moisture are present.
Maintenance307
2013 Expedition(exd)
Owners Guide gf, 1st Printing
USA(fus)
Page 311 of 497
Replacing License Plate Lamp Bulbs
The license plate bulbs are located in the license plate housing assembly
on the liftgate. To change the license plate bulbs:
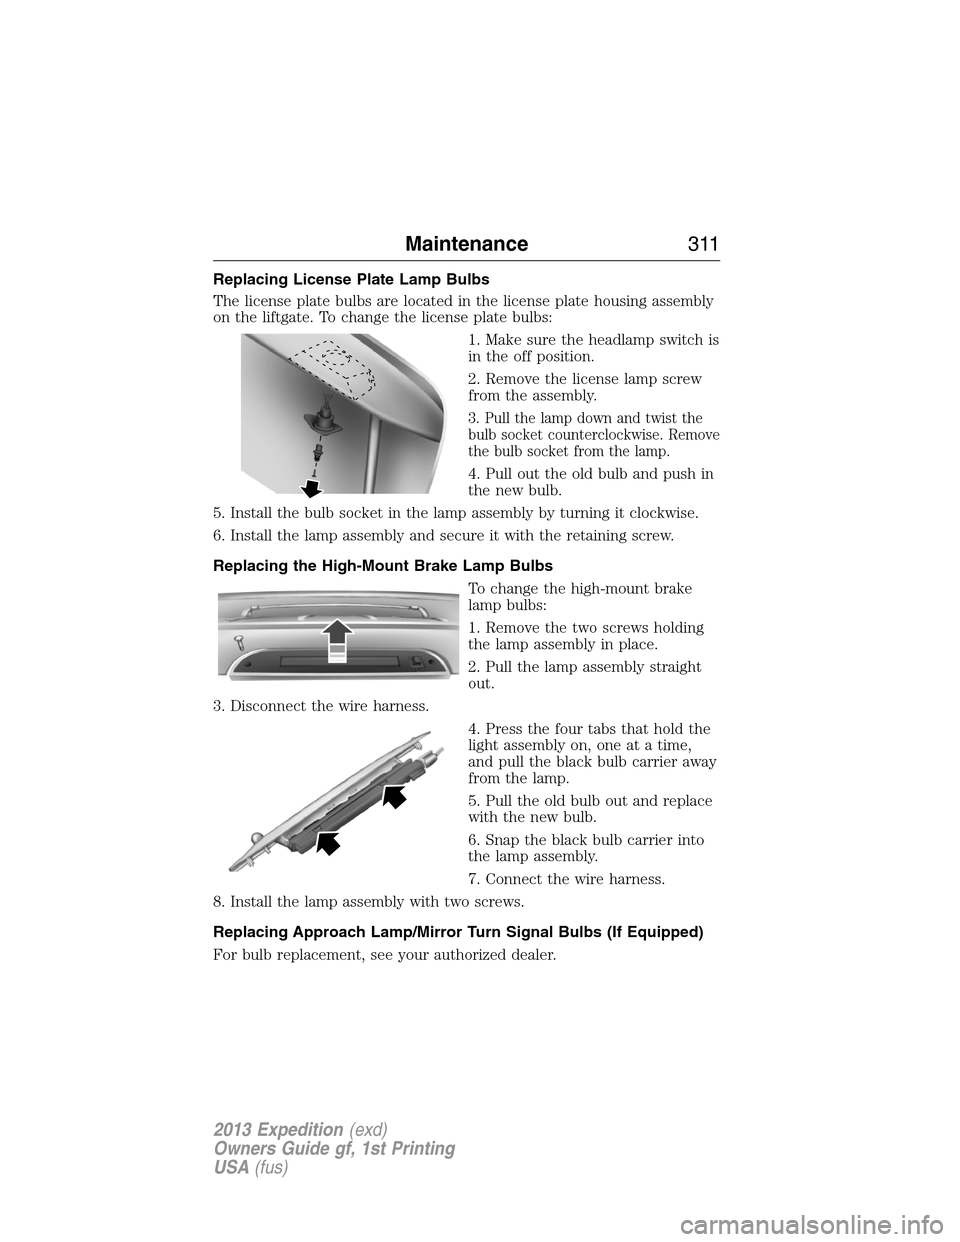
1. Make sure the headlamp switch is
in the off position.
2. Remove the license lamp screw
from the assembly.
3. Pull the lamp down and twist the
bulb socket counterclockwise. Remove
the bulb socket from the lamp.
4. Pull out the old bulb and push in
the new bulb.
5. Install the bulb socket in the lamp assembly by turning it clockwise.
6. Install the lamp assembly and secure it with the retaining screw.
Replacing the High-Mount Brake Lamp Bulbs
To change the high-mount brake
lamp bulbs:
1. Remove the two screws holding
the lamp assembly in place.
2. Pull the lamp assembly straight
out.
3. Disconnect the wire harness.
4. Press the four tabs that hold the
light assembly on, one at a time,
and pull the black bulb carrier away
from the lamp.
5. Pull the old bulb out and replace
with the new bulb.
6. Snap the black bulb carrier into
the lamp assembly.
7. Connect the wire harness.
8. Install the lamp assembly with two screws.
Replacing Approach Lamp/Mirror Turn Signal Bulbs (If Equipped)
For bulb replacement, see your authorized dealer.
Maintenance311
2013 Expedition(exd)
Owners Guide gf, 1st Printing
USA(fus)