Page 439 of 683
NOTE:There is a difference in temperature (in any
conditions other than full cold or full hot), between the
upper and lower outlets for added comfort. The warmer
air goes to the floor outlets. This feature gives improved
comfort during sunny but cool conditions.
13. Panel Mode Button
Air is directed through the outlets in the instru-
ment panel. These outlets can be adjusted for
direction, and turned on or off to control airflow.
NOTE:For maximum airflow to the rear, the center
instrument panel outlets can be directed toward the rear
seat passengers.
Economy Mode
If ECONOMY mode is desired, press the A/C button to
turn off the indicator light and the A/C compressor.Rotate the temperature control knob to the desired tem-
perature. Also, make sure to select only Panel, Bi-Level or
Floor modes.
Max A/C
For maximum cooling use the A/C and Recirculation
mode buttons at the same time.
Rear Manual Climate Control — If Equipped
The Rear Manual Climate Control system has floor air
outlets at the rear of the right side sliding door, and
overhead outlets at each outboard rear seating position.
The unit provides warm or cool air through the floor and
upper outlets.
The rear blower and temperature controls for the rear
seat passengers are located in the headliner, near the
center of the vehicle.
4
UNDERSTANDING YOUR INSTRUMENT PANEL 437
Page 449 of 683
Panel Mode
Air is directed through the outlets in the instru-
ment panel. These outlets can be adjusted for
direction, and turned on or off to control airflow.
NOTE:For maximum airflow to the rear, the center
instrument panel outlets can be directed toward the rear
seat passengers.
Bi-Level Mode
Air comes from the instrument panel outlets, floor
outlets and defrost outlets. A slight amount of air is
also directed through the side window demister outlets.
NOTE:In many temperature positions, the BI-LEVEL
mode is designed to provide cooler air out of the panel
outlets and warmer air from the floor outlets.Floor Mode
Air comes from the floor outlets. A slight amount
of air is directed through the defrost and side
window demister outlets.
Mix Mode
Air comes from the floor, defrost and side window
demist outlets. This mode works best in cold or
snowy conditions. It allows you to stay comfortable,
while keeping the windshield clear.
Defrost Mode
Air comes from the windshield and side window
demist outlets. Use DEFROST mode with maxi-
mum blower and temperature settings for best wind-
shield and side window defrosting.
4
UNDERSTANDING YOUR INSTRUMENT PANEL 447
Page 462 of 683
▫Fuel Requirements....................534
▫Selection Of Engine Oil For Flexible Fuel
Vehicles (E-85) And Gasoline Vehicles.......535
▫Starting............................536
▫Cruising Range.......................536
▫Replacement Parts....................536
▫Maintenance........................536
�ADDING FUEL........................537
▫Fuel Filler Cap (Gas Cap)...............537
▫Loose Fuel Filler Cap Message............538�VEHICLE LOADING....................539
▫Vehicle Certification Label...............539
�TRAILER TOWING.....................541
▫Common Towing Definitions.............542
▫Towing Tips.........................554
�RECREATIONAL TOWING
(BEHIND MOTORHOME, ETC.)............556
▫Towing This Vehicle Behind Another Vehicle . .556
▫Recreational Towing – All Models..........556
460 STARTING AND OPERATING
Page 464 of 683
3. If the engine fails to start, the starter will disengage
automatically in 10 seconds. If this occurs, turn the
ignition switch to the OFF position, wait 10 to 15 sec-
onds, then repeat the “Normal Starting” procedure
(Steps 1–3 above).
NOTE: This vehicle is equipped with a transmission
shift interlocking system. The brake pedal must be
pressed to shift out of PARK.
Extreme Cold Weather (Below –20°F Or �29°C)
To ensure reliable starting at these temperatures, use of
an externally powered electric engine block heater (avail-
able from your authorized dealer) is recommended.
If The Engine Fails To Start
WARNING!
•Never pour fuel or other flammable liquids into
the throttle body air inlet opening in an attempt to
start the vehicle. This could result in a flash fire
causing serious personal injury.
•Do not attempt to push or tow your vehicle to get it
started. Vehicles equipped with an automatic trans-
mission cannot be started this way. Unburned fuel
could enter the catalytic converter and once the
engine has started, ignite and damage the converter
and vehicle.
(Continued)
462 STARTING AND OPERATING
Page 471 of 683
The transmission shift lever has only PARK, REVERSE,
NEUTRAL, and DRIVE shift positions. Manual down-
shifts can be made using the Electronic Range Select
(ERS) shift control (described later in this section). Mov-
ing the shift lever to the left or right (–/+) while in the
DRIVE position will select the highest available transmis-
sion gear, and will display that gear in the instrument
cluster as 6, 5, 4, 3, 2, 1.
Gear Ranges
DO NOT race the engine when shifting from PARK or
NEUTRAL into another gear range.
NOTE:After selecting any gear range, wait a moment to
allow the selected gear to engage before accelerating.
This is especially important when the engine is cold.
PARK
This range supplements the parking brake by locking the
transmission. The engine can be started in this range.
Never attempt to use PARK while the vehicle is in
motion. Apply the parking brake when leaving the
vehicle in this range.
When parking on a level surface, you may place the shift
lever in PARK first, and then apply the parking brake.
When parking on a hill, apply the parking brake before
placing the shift lever in PARK, otherwise the load on the
transmission locking mechanism may make it difficult to
move the shift lever out of PARK. As an added precau-
tion, turn the front wheels toward the curb on a downhill
grade, and away from the curb on an uphill grade.
5
STARTING AND OPERATING 469
Page 474 of 683
REVERSE
This range is for moving the vehicle backward. Shift into
REVERSE only after the vehicle has come to a complete
stop.
NEUTRAL
Use this range when the vehicle is standing for prolonged
periods with the engine running. The engine may be
started in this range. Apply the parking brake and shift
the transmission into PARK if you must leave the vehicle.
WARNING!
Do not coast in NEUTRAL and never turn off the
ignition to coast down a hill. These are unsafe
practices that limit your response to changing traffic
or road conditions. You might lose control of the
vehicle and have a collision.
CAUTION!
Towing the vehicle, coasting, or driving for any other
reason with the transmission in NEUTRAL can cause
severe transmission damage. Refer to “Recreational
Towing” in “Starting And Operating” and “Towing A
Disabled Vehicle” in “What To Do In Emergencies”
for further information.
DRIVE
This range should be used for most city and highway
driving. It provides the smoothest upshifts and down-
shifts, and the best fuel economy. The transmission
automatically upshifts through underdrive first, second,
third, and fourth gears, direct fifth gear and overdrive
sixth gear. The DRIVE position provides optimum driv-
ing characteristics under all normal operating conditions.
472 STARTING AND OPERATING
Page 475 of 683

When frequent transmission shifting occurs (such as
when operating the vehicle under heavy loading condi-
tions, in hilly terrain, traveling into strong head winds, or
while towing heavy trailers), use the Electronic Range
Select (ERS) shift control (described below) to select a
lower gear range. Under these conditions, using a lower
gear range will improve performance and extend trans-
mission life by reducing excessive shifting and heat
buildup.
During cold temperatures, transmission operation may be
modified depending on engine and transmission tempera-
ture as well as vehicle speed. This feature improves warm
up time of the engine and transmission to achieve maxi-
mum efficiency. Engagement of the torque converter clutch
is inhibited until the transmission fluid is warm (refer to
the “Note” under “Torque Converter Clutch” in this sec-
tion). During extremely cold temperatures (-16°F [-27°C] orbelow), operation may briefly be limited to third gear only.
Normal operation will resume once the transmission tem-
perature has risen to a suitable level.
Transmission Limp Home Mode
Transmission function is monitored electronically for
abnormal conditions. If a condition is detected that could
result in transmission damage, Transmission Limp Home
Mode is activated. In this mode, the transmission remains
in third gear regardless of which forward gear is selected.
PARK, REVERSE, and NEUTRAL will continue to oper-
ate. The Malfunction Indicator Light (MIL) may be illu-
minated. Limp Home Mode allows the vehicle to be
driven to an authorized dealer for service without dam-
aging the transmission.
5
STARTING AND OPERATING 473
Page 484 of 683
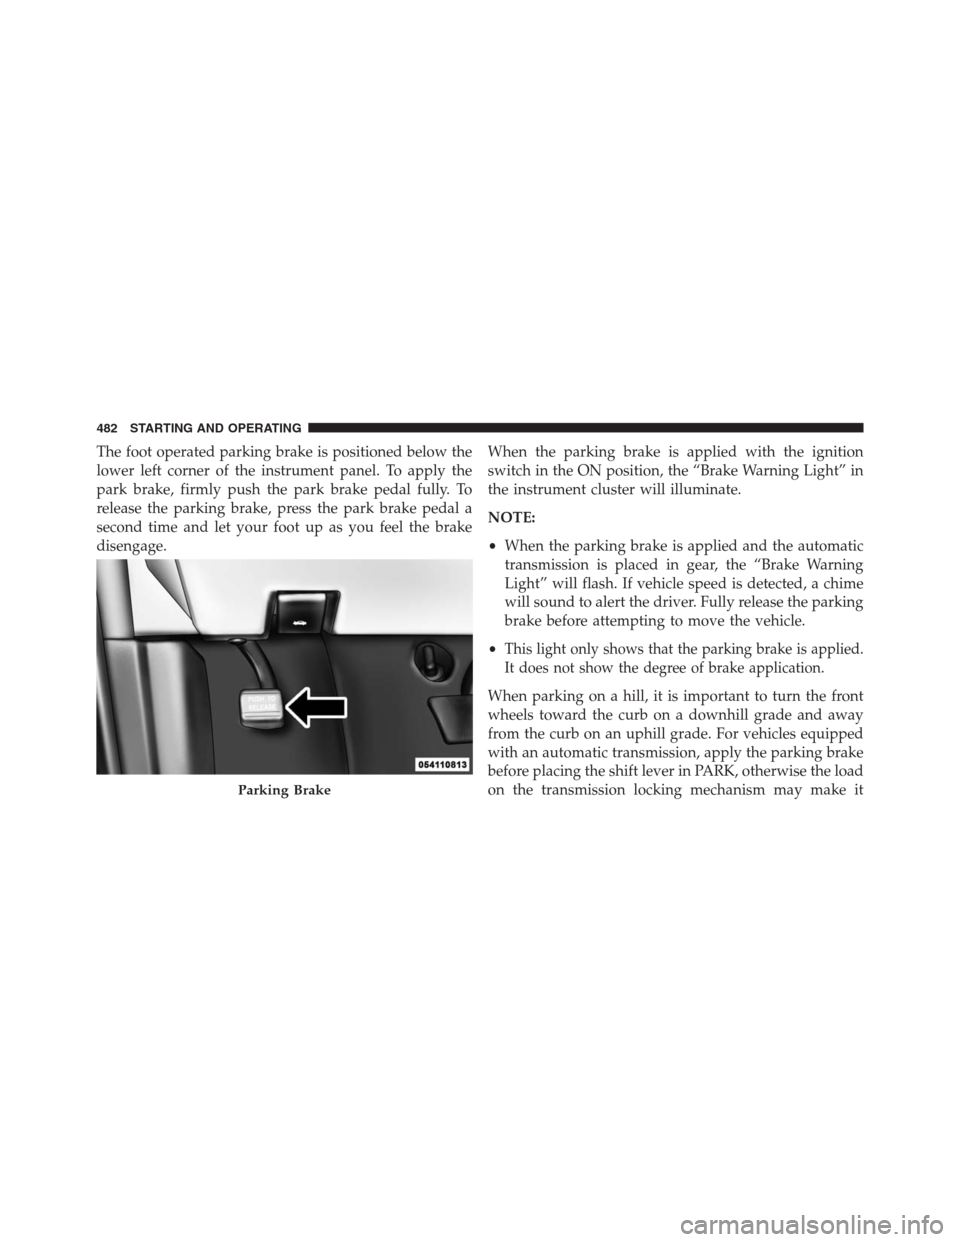
The foot operated parking brake is positioned below the
lower left corner of the instrument panel. To apply the
park brake, firmly push the park brake pedal fully. To
release the parking brake, press the park brake pedal a
second time and let your foot up as you feel the brake
disengage.When the parking brake is applied with the ignition
switch in the ON position, the “Brake Warning Light” in
the instrument cluster will illuminate.
NOTE:
•When the parking brake is applied and the automatic
transmission is placed in gear, the “Brake Warning
Light” will flash. If vehicle speed is detected, a chime
will sound to alert the driver. Fully release the parking
brake before attempting to move the vehicle.
•
This light only shows that the parking brake is applied.
It does not show the degree of brake application.
When parking on a hill, it is important to turn the front
wheels toward the curb on a downhill grade and away
from the curb on an uphill grade. For vehicles equipped
with an automatic transmission, apply the parking brake
before placing the shift lever in PARK, otherwise the load
on the transmission locking mechanism may make it
Parking Brake
482 STARTING AND OPERATING