2013 DODGE DART ad blue
[x] Cancel search: ad bluePage 65 of 132

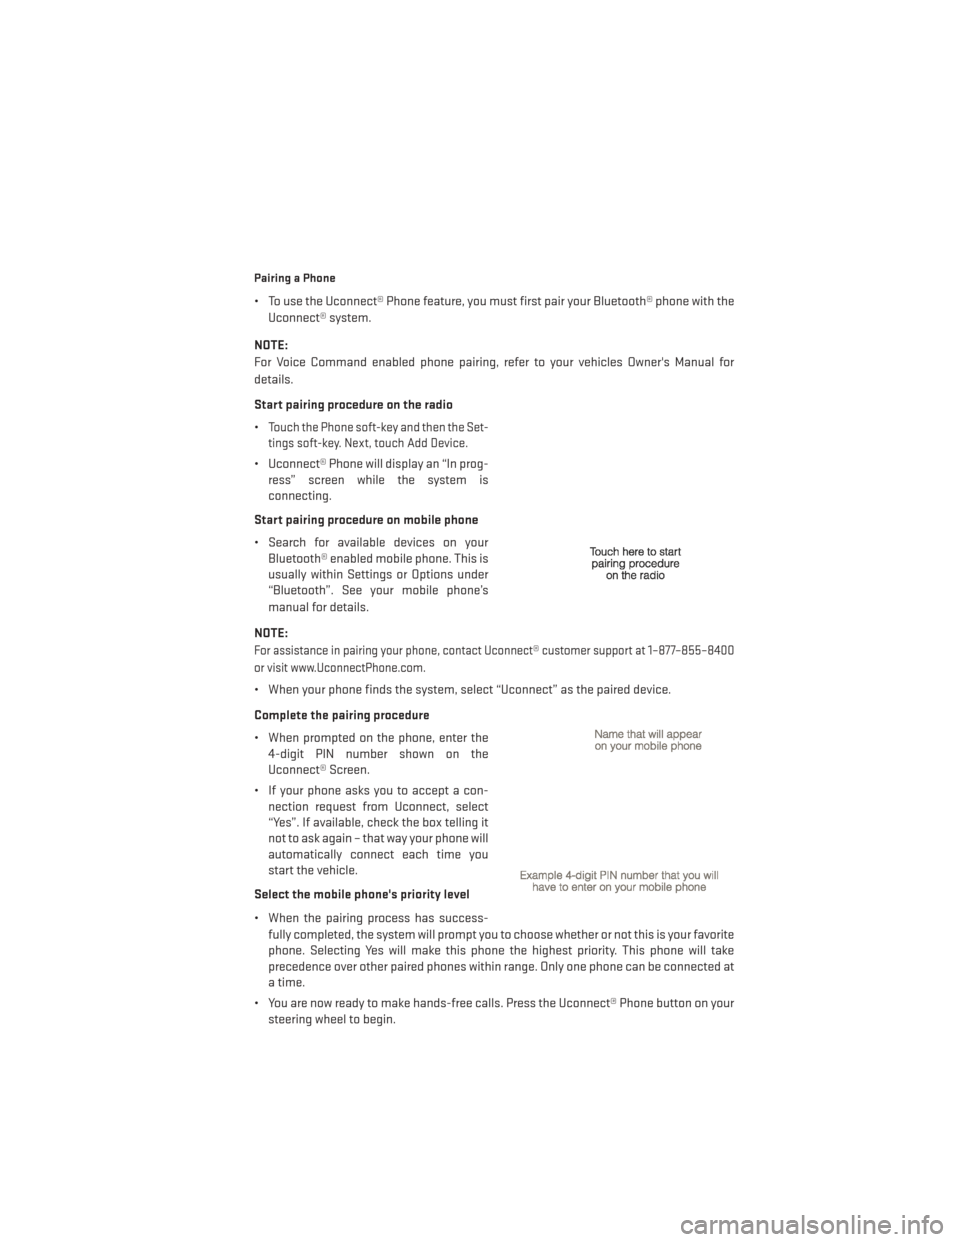
Pairing a Phone
• To use the Uconnect® Phone feature, you must first pair your Bluetooth® phone with theUconnect® system.
NOTE:
For Voice Command enabled phone pairing, refer to your vehicles Owner's Manual for
details.
Start pairing procedure on the radio
•
Touch the Phone soft-key and then the Set-
tings soft-key. Next, touch Add Device.
• Uconnect® Phone will display an “In prog- ress” screen while the system is
connecting.
Start pairing procedure on mobile phone
• Search for available devices on your Bluetooth® enabled mobile phone. This is
usually within Settings or Options under
“Bluetooth”. See your mobile phone’s
manual for details.
NOTE:
For assistance in pairing your phone, contact Uconnect® customer support at 1–877–855–8400
or visit www.UconnectPhone.com.
• When your phone finds the system, select “Uconnect” as the paired device.
Complete the pairing procedure
• When prompted on the phone, enter the 4-digit PIN number shown on the
Uconnect® Screen.
• If your phone asks you to accept a con- nection request from Uconnect, select
“Yes”. If available, check the box telling it
not to ask again – that way your phone will
automatically connect each time you
start the vehicle.
Select the mobile phone's priority level
• When the pairing process has success- fully completed, the system will prompt you to choose whether or not this is your favorite
phone. Selecting Yes will make this phone the highest priority. This phone will take
precedence over other paired phones within range. Only one phone can be connected at
a time.
• You are now ready to make hands-free calls. Press the Uconnect® Phone button on your steering wheel to begin.
ELECTRONICS
63
Page 68 of 132

Changing The Volume
• Start a dialogue by pressing the Phone button, then say a command for example -
"Help".
• Use the radio ON/OFF VOLUME rotary knob to adjust the volume to a comfortable level while the Uconnect® system is speaking. Please note the volume setting for Uconnect® is
different than the audio system.
NOTE:
To access help, press the Uconnect® Phone
button on the steering wheel and say
"help." Touch the display or push either
orbutton and say "cancel" to cancel
the help session.
Voice Text Reply
• Uconnect® Phone can read or send new text messages on your mobile phone.
• Your mobile phone must support Voice Text Reply over Bluetooth® in order to use this feature. If the Uconnect® Phone determines your phone is not compatible with Voice Text
Reply messaging over Bluetooth® the “Messaging” button will be greyed out and the
feature will not be available for use.
NOTE: • For mobile phone compatibility and pairing instructions, please visitwww.UconnectPhone.com
• When the vehicle is in motion, Uconnect® Phone Voice Text Reply is only available though Voice Commands.
Read Messages:
• If you receive a new text message while your phone is connected to Uconnect® Phone, an announcement will be made to notify you that you have a new text message. Once a
message is received and viewed or listened to, you will have the following options:
• Send a Reply
•Forward
• Call
Send Messages Using Soft-Keys:
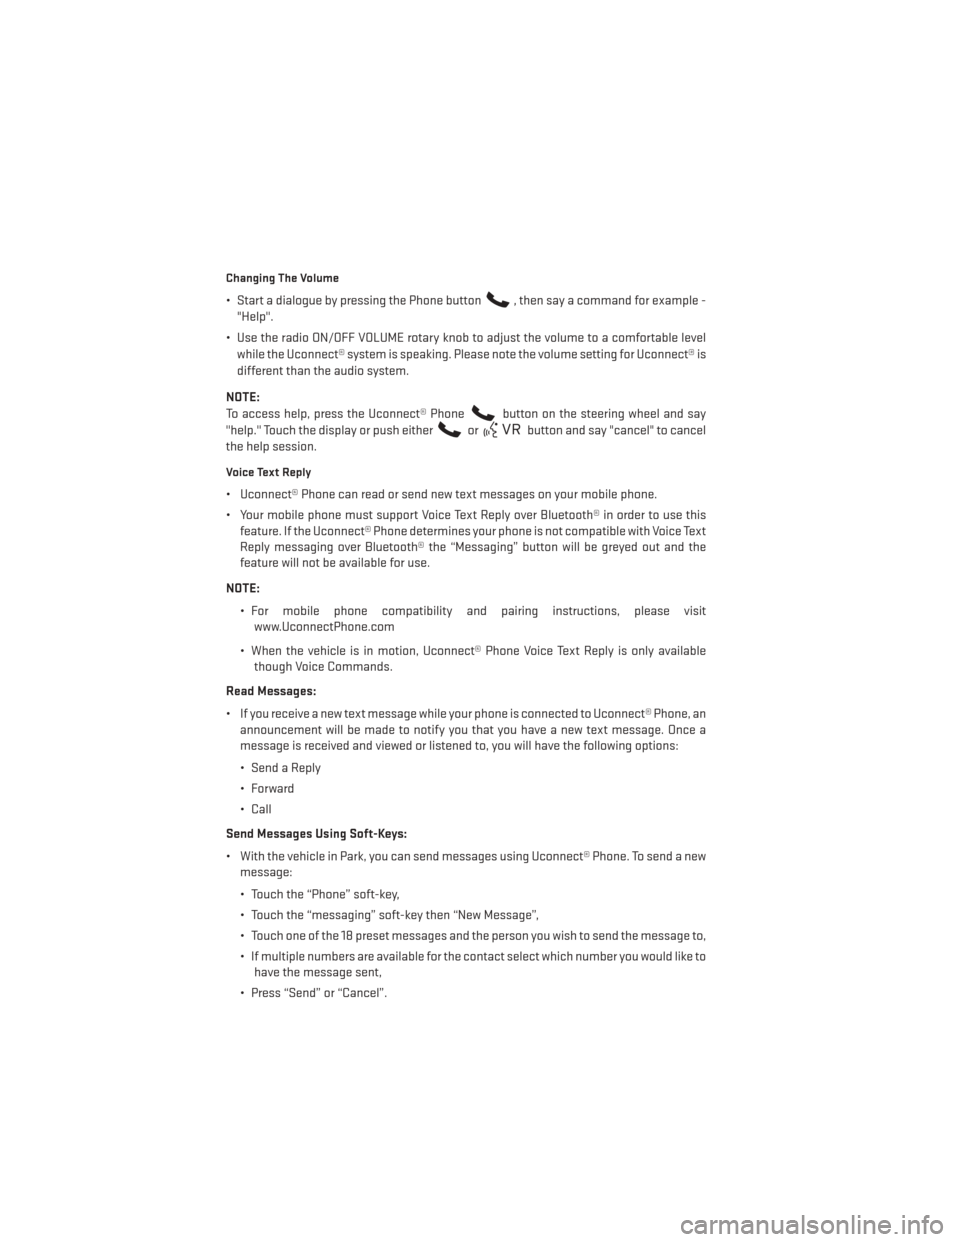
• With the vehicle in Park, you can send messages using Uconnect® Phone. To send a new message:
• Touch the “Phone” soft-key,
• Touch the “messaging” soft-key then “New Message”,
• Touch one of the 18 preset messages and the person you wish to send the message to,
• If multiple numbers are available for the contact select which number you would like tohave the message sent,
• Press “Send” or “Cancel”.
ELECTRONICS
66
Page 77 of 132

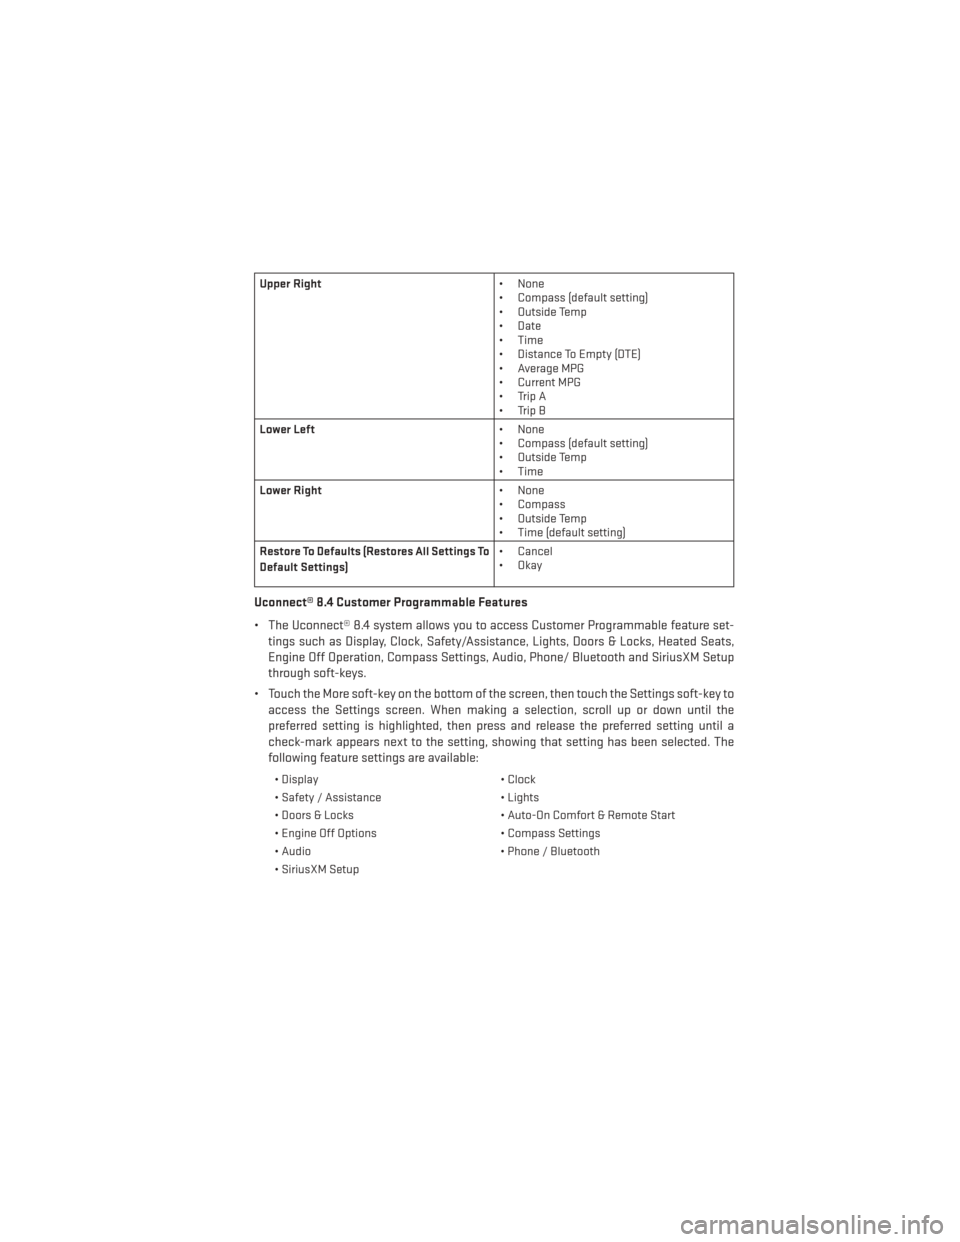
Upper Right• None
• Compass (default setting)
• Outside Temp
• Date
• Time
• Distance To Empty (DTE)
• Average MPG
• Current MPG
• Trip A
• Trip B
Lower Left • None
• Compass (default setting)
• Outside Temp
• Time
Lower Right • None
• Compass
• Outside Temp
• Time (default setting)
Restore To Defaults (Restores All Settings To
Default Settings) • Cancel
•Okay
Uconnect® 8.4 Customer Programmable Features
• The Uconnect® 8.4 system allows you to access Customer Programmable feature set-
tings such as Display, Clock, Safety/Assistance, Lights, Doors & Locks, Heated Seats,
Engine Off Operation, Compass Settings, Audio, Phone/ Bluetooth and SiriusXM Setup
through soft-keys.
• Touch the More soft-key on the bottom of the screen, then touch the Settings soft-key to access the Settings screen. When making a selection, scroll up or down until the
preferred setting is highlighted, then press and release the preferred setting until a
check-mark appears next to the setting, showing that setting has been selected. The
following feature settings are available:
• Display • Clock
• Safety / Assistance • Lights
• Doors & Locks • Auto-On Comfort & Remote Start
• Engine Off Options • Compass Settings
• Audio • Phone / Bluetooth
• SiriusXM Setup
ELECTRONICS
75
Page 117 of 132

FUSES
Interior Fuses
• The interior fuse panel is located on the driver's side under the instrument panel.
Cavity Cartridge Fuse Mini FuseDescription
F1 — 20 Amp Yellow Front Heated Seats
F2 — 20 Amp Yellow Rear Heated Seats, Heated Steer-
ing Wheel
F3 — 10 Amp Red PAM, Rear Camera, LBSS, RBSS,
Compass
F4 — 15 Amp Blue IPC
F5 — 10 Amp Red HVAC, Humidity Sensor, In-Car
Temperature Sensor, Inside Mirror
Assembly
F18 — 15 Amp Blue Radio
F19 — 10 Amp Red Fuel Door
F20 — 10 Amp Red SCCM, SAS, Switch Bank
F21 — 10 Amp Red Diagnostic Port
F22 — 10 Amp Red UGDO, EOM
F23 — 20 Amp Yellow Sunroof
F24 —5 Amp Tan Direct Battery For Underhood PDC
(RLY Coils)
F25 —5 Amp Tan DDCT Feed #4
F26 —5 Amp Tan Stop Lamp Switch
F27 — 10 Amp Red Pneumatic Lumbar Support (Sole-
noid), Pneumatic Lumbar Support
(Pump Motor)
MAINTAINING YOUR VEHICLE
115
Page 118 of 132

Underhood Fuses
• The Power Distribution Center is located on the right side of the engine compartment,behind the battery.
Cavity Maxi Fuse Mini Fuse Description
F01 70 Amp Tan —Direct Battery Feed #1 To BCM
F02 60 Amp Blue —Direct Battery Feed #2 To BCM
F03 30 Amp Green —Output For Starter Relay #1
F04 40 Amp Orange —ESP Pump Motor
F05 40 Amp Orange —DDCT Feed #1 (SDU)
F06 30 Amp Green —Direct Battery Feed #3 To BCM
F07 40 Amp Orange —
Run RLY Output (For EBL RLY Coil),
Run RLY Output (For ORC), Run RLY Output (For Blower Motor RLY Coil), Run RLY Output (For iPDC)
F09 —5 Amp TanRadiator Fan Enable RLY Output,
Radiator Fan Enable RLY Coil Output
F10 —10 Amp Red ORC
F11 —20 Amp Yellow ECM, EPS, Backup Lamp Switch,
Run/Start RLY Output (For A/C
Clutch RLY Coil, Fuel Pump RLY Coil, Starter RLY #1)
MAINTAINING YOUR VEHICLE
116
Page 119 of 132

Cavity Maxi Fuse Mini FuseDescription
F14 —15 Amp Blue DDCT Feed #2
F15 —15 Amp Blue DDCT Feed #3
F16 —15 Amp Blue Ignition Coils, Coil Capacitor
F17 —15 Amp Blue ESC, Brake Pedal Switch, OCM
F18 —20 Amp Yellow ECM
F19 —10 Amp Red A/C Compressor Clutch
F20 —30 Amp Green EBL
F21 —20 Amp Yellow Fuel Pump
F22 —10 Amp Red ORC
F23 —25 Amp Natural ESC
F24 —20 Amp Yellow ECM, Fuel Injectors, Active Grill
Shutter (AGS)
F30 —20 Amp Yellow Power Outlet (Console)
F81 60 Amp Blue —Interior PDC Battery Feed, Power
Seats
F82 30 Amp Green —Amplifier
F83 40 Amp Orange —HVAC Blower Motor
F84 —20 Amp Yellow Run/Accessory RLY Output, Cigar
Lighter
F85 —10 Amp Red Sunroof, LRSM, Power Outlet
(Console), UCI/AUX Port, CigarLighter
F86 —20 Amp Yellow —
F87 —10 Amp Red Wastegate, Purge Solenoid, OBD
Vent Valve, Oxygen Sensor Heat-ers
F88 —10 Amp Red Heated Outside Mirrors
MAINTAINING YOUR VEHICLE
117
Page 125 of 132

Airbag...................16
Alarm (Security Alarm)..........13
Audio Settings ............39,41
Automatic Headlights ..........26
Automatic Temperature Control (ATC)................29,30
Automatic Transmission Fluid Type ..............108
AxleFluid................108
Belts, Seat .................15
BrakeFluid................108
Break-In Recommendations, New Vehicle .................24
BulbReplacement........... .119
Calibration, Compass ...........72
Change Oil Indicator ...........83
Changing A Flat Tire ...........86
Child Restraint ...............17
Child Restraint Tether Anchors ......17
Clock Setting ...............39
Compass Calibration ...........72
Cooling System Coolant Capacity ..........108
Cruise Light ................27
Customer Assistance ..........120
Customer Programmable Features ....75
Defects, Reporting ............121
Dimmer Control ..............26
Dimmer Switch, Headlight ........26
Electronics Your Vehicle's Sound System ....36
Electronic Vehicle Information Center (EVIC)..................71
Emergency, In Case of Brake Warning Light .........82
Freeing Vehicle When Stuck .....101
Jacking ................86
Overheating .............85
Engine Break-In Recommendations .....24
Compartment ............105
Oil ..................108
Oil Selection .............108
Overheating .............85 Starting ................12
Stopping
...............12
EventDataRecorder...........102
Exterior Lights ..............119
FlatTireChanging ............86
Fluid Capacities .............108
Fluids ..................108
Fluids, Lubricants and Genuine Parts . .108
FogLights ................26
Folding Rear Seat .............21
Freeing A Stuck Vehicle .........101
Front Heated Seats ............22
Fuel Filler Cap (Gas Cap) .........83
Filler Door Emergency Release . . .104
Filler Door (Gas Cap) .........104
Specifications ............108
Fuse ...................115
Fuses.................. .115
Garage Door Opener (HomeLink®) ....76
Headlights Automatic ..............
26
Dimmer Switch ............26
HighBeam ..............25
Heated Seats ...............22
Heated Steering Wheel ..........23
High Beam/Low Beam Select (Dimmer) Switch .................25
HomeLink® (Garage Door Opener) ....76
Hood Release ..............103
Instrument Cluster .............6
Indicators ...............7
Instrument Cluster Warning Lights . .6, 80
Intermittent Wipers (Delay Wipers) ....25
Introduction ................2
iPod®/USB/MP3 Control Bluetooth Streaming Audio .....56
Jacking Instructions ...........87
Jack Location ..............86
Jack Operation ..............87
Jump Starting ..............98
KeyFob...................8
INDEX
123
Page 128 of 132

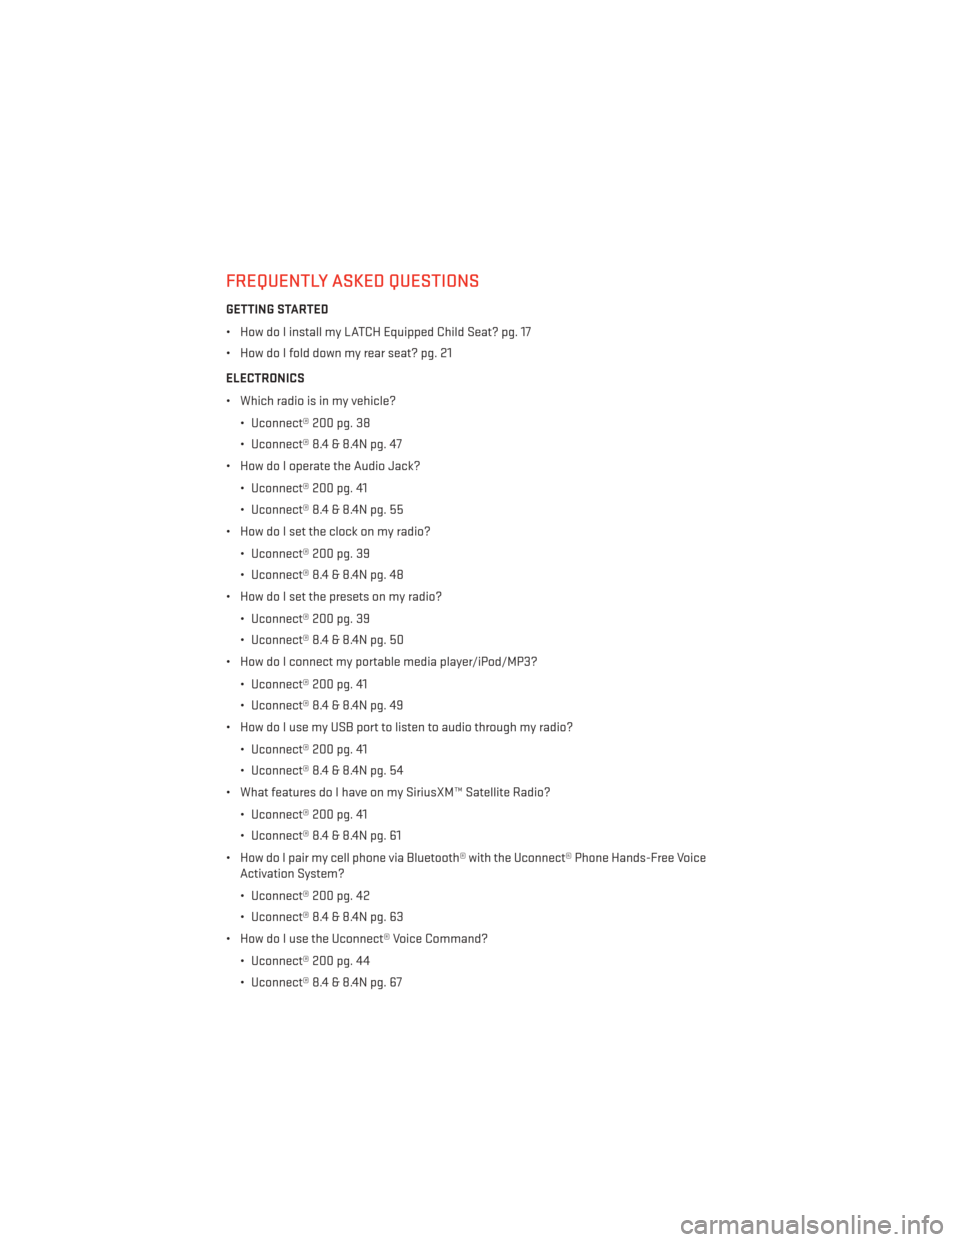
FREQUENTLY ASKED QUESTIONS
GETTING STARTED
• How do I install my LATCH Equipped Child Seat? pg. 17
• How do I fold down my rear seat? pg. 21
ELECTRONICS
• Which radio is in my vehicle?• Uconnect® 200 pg. 38
• Uconnect® 8.4 & 8.4N pg. 47
• How do I operate the Audio Jack?
• Uconnect® 200 pg. 41
• Uconnect® 8.4 & 8.4N pg. 55
• How do I set the clock on my radio?
• Uconnect® 200 pg. 39
• Uconnect® 8.4 & 8.4N pg. 48
• How do I set the presets on my radio?
• Uconnect® 200 pg. 39
• Uconnect® 8.4 & 8.4N pg. 50
• How do I connect my portable media player/iPod/MP3?
• Uconnect® 200 pg. 41
• Uconnect® 8.4 & 8.4N pg. 49
• How do I use my USB port to listen to audio through my radio?
• Uconnect® 200 pg. 41
• Uconnect® 8.4 & 8.4N pg. 54
• What features do I have on my SiriusXM™ Satellite Radio?
• Uconnect® 200 pg. 41
• Uconnect® 8.4 & 8.4N pg. 61
• How do I pair my cell phone via Bluetooth® with the Uconnect® Phone Hands-Free Voice Activation System?
• Uconnect® 200 pg. 42
• Uconnect® 8.4 & 8.4N pg. 63
• How do I use the Uconnect® Voice Command?
• Uconnect® 200 pg. 44
• Uconnect® 8.4 & 8.4N pg. 67
FAQ (How To?)
126