2013 DODGE CHALLENGER SRT suspension
[x] Cancel search: suspensionPage 315 of 520

When frequent transmission shifting occurs (such as
when operating the vehicle under heavy loading condi-
tions, in hilly terrain, traveling into strong head winds, or
while towing heavy trailers), use the “AutoStick®” shift
control (refer to “AutoStick®” in this section for further
information) to select a lower gear. Under these condi-
tions, using a lower gear will improve performance and
extend transmission life by reducing excessive shifting
and heat buildup.
SPORT
This mode will set suspension for maximum perfor-
mance handling and is intended for spirited driving. To
toggle between DRIVE and SPORT modes, press the
SPORT mode switch on the instrument panel.
Transmission Limp Home Mode
Transmission function is monitored electronically for
abnormal conditions. If a condition is detected that could
result in transmission damage, Transmission Limp Home
Mode is activated. In this mode, the transmission remains
in the current gear until the vehicle is brought to a stop.
After the vehicle has stopped, the transmission will
remain in second gear regardless of which forward gear
is selected. PARK, REVERSE, and NEUTRAL will con-
tinue to operate. The Malfunction Indicator Light (MIL)
may be illuminated. Limp Home Mode allows the vehicle
to be driven to an authorized dealer for service without
damaging the transmission.
5
STARTING AND OPERATING 313
Page 320 of 520
SPORT MODE
This vehicle is equipped with an electronic controlled
damping system. This system reduces body roll and pitch
in many driving situations including cornering, accelera-
tion and braking. In addition, the driver has the ability to
select a more aggressive shifting pattern. On the center
console, there is a “SPORT” button that when pressed
will cycle through three different driving modes. This is
the description of each mode of operation:•Off – This is the initial position. This mode will give a
sporty, but comfortable ride. Within this mode, the
suspension will adapt to the vehicle inputs, including
vehicle speed, steering inputs, braking and accelera-
tion. The transmission will be optimized for smooth,
SPORT Button
318 STARTING AND OPERATING
Page 321 of 520
less aggressive shifting. The system will return to OFF
when the ignition switch is cycled from RUN to OFF to
RUN, if this mode is selected.
• SPORT Mode – This mode is selected by the first press
of the “SPORT” button. A “SPORT” message will
display in the instrument cluster. The system will
return to SPORT mode when the ignition switch is
cycled from RUN to OFF to RUN, if this mode is
selected. This mode will set suspension for maximum
performance handling and is intended for spirited
driving.
• TRACK Mode – This includes SPORT mode and
affects automatic transmission shifting in either Auto
or Manual mode. Refer to “AutoStick” in “Starting
And Operating” for further information. In TRACK
mode, the transmission has a sportier, more aggressive
shift pattern. In Manual mode, the transmission will
hold gear at redline during manual shifting (console shifter or paddle shifters). A “TRACK” message will
display in the instrument cluster. The system will
return to SPORT mode when the ignition switch is
cycled from RUN to OFF to RUN, if this mode is
selected.
NOTE: For manual transmission vehicles, the available
driving modes are SPORT on or SPORT Off. TRACK is
not available.
LAUNCH MODE – IF EQUIPPED
This vehicle is equipped with a Launch Control system
that is designed to allow the driver to achieve maximum
vehicle acceleration in a straight line. Launch Control is a
form of traction control that manages tire slip while
launching the vehicle. This feature is intended for use
during race events on a closed course where consistent
quarter mile and zero to sixty times are desired. The
system is not intended to compensate for lack of driver
experience or familiarity with the race track. Use of this
5
STARTING AND OPERATING 319
Page 367 of 520

•Install on Rear Tires Only.
• Due to limited clearance, the Security Chain Company
(SCC) Super Z6 low profile traction device or equiva-
lent is recommended on P215/65R17, P225/60R18 or
P235/55R18 tires..
• For an All Wheel Drive vehicle, P235/55R19 tire with
the use of a traction device that meets the SAE type
“Class S” specification is recommended.
WARNING!
Using tires of different size and type (M+S, Snow)
between front and rear axles can cause unpredictable
handling. You could lose control and have a collision.
CAUTION!
To avoid damage to your vehicle or tires, observe the
following precautions:
• Because of restricted traction device clearance be-
tween tires and other suspension components, it is
important that only traction devices in good condi-
tion are used. Broken devices can cause serious
damage. Stop the vehicle immediately if noise
occurs that could indicate device breakage. Remove
the damaged parts of the device before further use.
• Install device as tightly as possible and then re-
tighten after driving about ½ mile (0.8 km).
• Do not exceed 30 mph (48 km/h).
• Drive cautiously and avoid severe turns and large
bumps, especially with a loaded vehicle.
• Do not drive for prolonged period on dry pave-
ment.
(Continued)
5
STARTING AND OPERATING 365
Page 386 of 520
Overloading
The load carrying components (axle, springs, tires,
wheels, etc.) of your vehicle will provide satisfactory
service as long as you do not exceed the GVWR and the
front and rear GAWR.
The best way to figure out the total weight of your
vehicle is to weigh it when it is fully loaded and ready for
operation. Weigh it on a commercial scale to ensure that
it is not over the GVWR.
Figure out the weight on the front and rear of the vehicle
separately. It is important that you distribute the load
evenly over the front and rear axles.
Overloading can cause potential safety hazards and
shorten useful service life. Heavier axles or suspension
components do not necessarily increase the vehicle’s
GVWR.
Loading
To load your vehicle properly, first figure out its empty
weight, axle-by-axle and side-by-side. Store heavier items
down low and be sure you distribute their weight as
evenly as possible. Stow all loose items securely before
driving. If weighing the loaded vehicle shows that you
have exceeded either GAWR, but the total load is within
the specified GVWR, you must redistribute the weight.
Improper weight distribution can have an adverse effect
on the way your vehicle steers and handles and the way
the brakes operate.
NOTE:Refer to the “Vehicle Certification Label” affixed
to the rear of the driver’s door for your vehicle’s GVWR
and GAWRs.
TRAILER TOWING
Trailer towing with this vehicle is not recommended.
384 STARTING AND OPERATING
Page 409 of 520
Proper towing or lifting equipment is required to prevent
damage to your vehicle. Use only tow bars and other
equipment designed for this purpose, following equip-
ment manufacturer ’s instructions. Use of safety chains is
mandatory. Attach a tow bar or other towing device to
main structural members of the vehicle, not to bumpers
or associated brackets. State and local laws regarding
vehicles under tow must be observed.
If you must use the accessories (wipers, defrosters, etc.)
while being towed, the ignition must be in the ON/RUN
position, not the ACC position.
If the key fob is unavailable, or the vehicle’s battery is
discharged, see “Shift Lever Override” in this section for
instructions on shifting the automatic transmission out of
PARK for towing.CAUTION!
•Do not use sling type equipment when towing.
When securing the vehicle to a flatbed truck, do not
attach to front or rear suspension components.
Damage to your vehicle may result from improper
towing.
• The manufacturer does not recommend towing this
vehicle using a tow dolly. Vehicle damage may
occur.
Automatic Transmission
The manufacturer recommends towing your vehicle with
all four wheels OFF the ground using a flatbed.
6
WHAT TO DO IN EMERGENCIES 407
Page 472 of 520
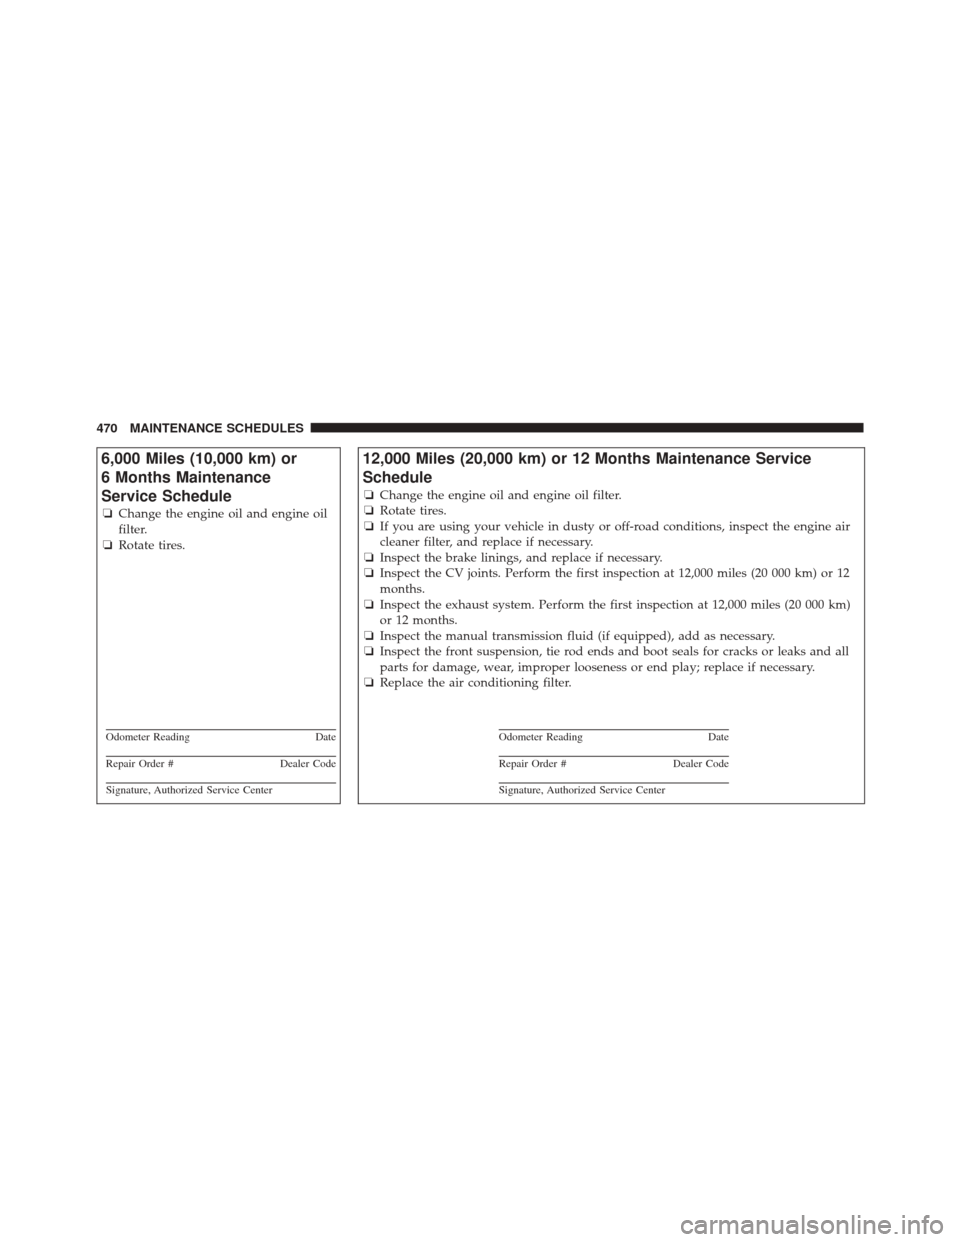
6,000 Miles (10,000 km) or
6 Months Maintenance
Service Schedule
❏Change the engine oil and engine oil
filter.
❏ Rotate tires.
Odometer Reading Date
Repair Order #Dealer Code
Signature, Authorized Service Center
12,000 Miles (20,000 km) or 12 Months Maintenance Service
Schedule
❏Change the engine oil and engine oil filter.
❏ Rotate tires.
❏ If you are using your vehicle in dusty or off-road conditions, inspect the engine air
cleaner filter, and replace if necessary.
❏ Inspect the brake linings, and replace if necessary.
❏ Inspect the CV joints. Perform the first inspection at 12,000 miles (20 000 km) or 12
months.
❏ Inspect the exhaust system. Perform the first inspection at 12,000 miles (20 000 km)
or 12 months.
❏ Inspect the manual transmission fluid (if equipped), add as necessary.
❏ Inspect the front suspension, tie rod ends and boot seals for cracks or leaks and all
parts for damage, wear, improper looseness or end play; replace if necessary.
❏ Replace the air conditioning filter.
Odometer Reading Date
Repair Order #Dealer Code
Signature, Authorized Service Center
470 MAINTENANCE SCHEDULES
Page 473 of 520
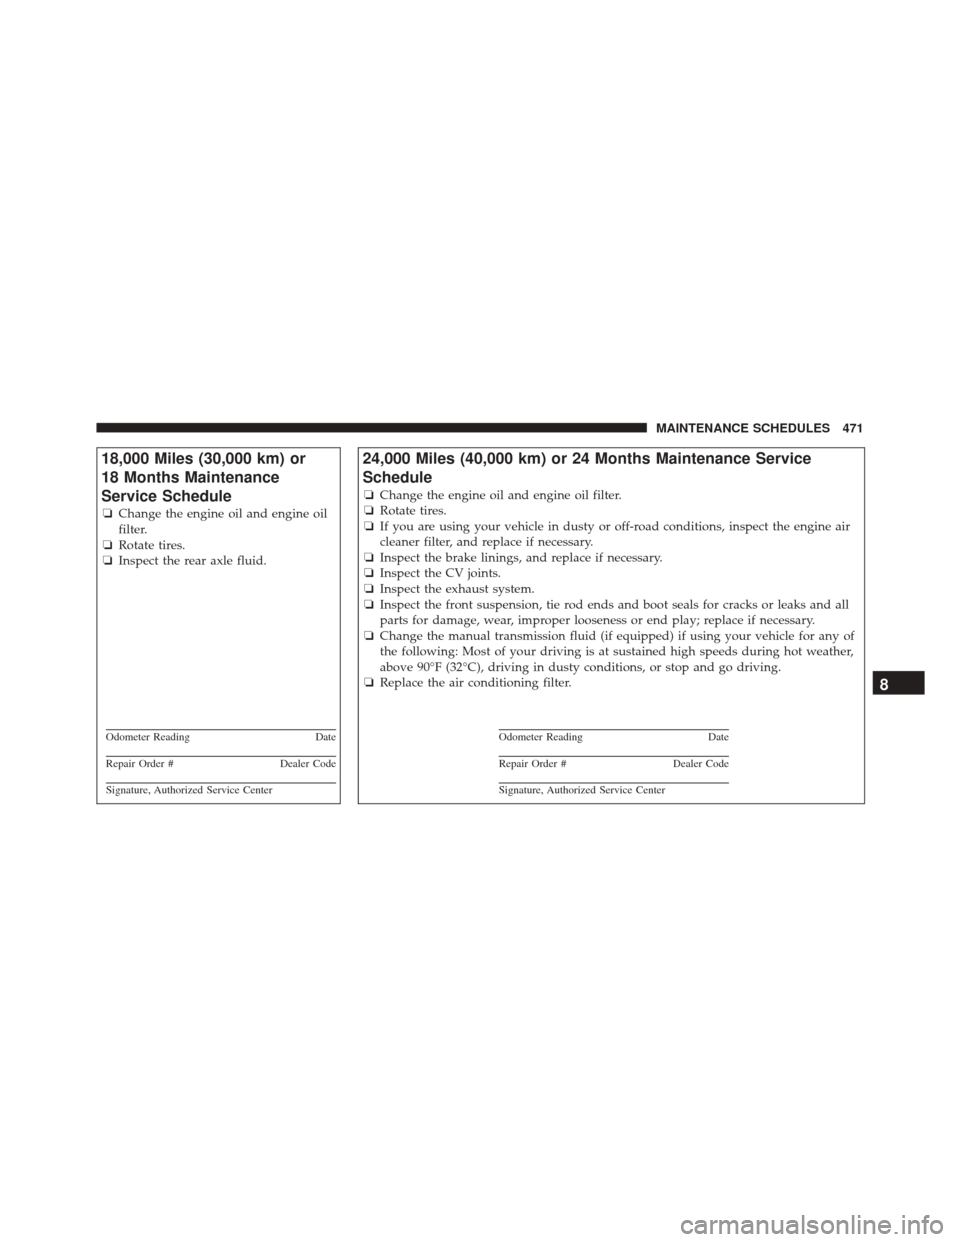
18,000 Miles (30,000 km) or
18 Months Maintenance
Service Schedule
❏Change the engine oil and engine oil
filter.
❏ Rotate tires.
❏ Inspect the rear axle fluid.
Odometer Reading Date
Repair Order #Dealer Code
Signature, Authorized Service Center
24,000 Miles (40,000 km) or 24 Months Maintenance Service
Schedule
❏Change the engine oil and engine oil filter.
❏ Rotate tires.
❏ If you are using your vehicle in dusty or off-road conditions, inspect the engine air
cleaner filter, and replace if necessary.
❏ Inspect the brake linings, and replace if necessary.
❏ Inspect the CV joints.
❏ Inspect the exhaust system.
❏ Inspect the front suspension, tie rod ends and boot seals for cracks or leaks and all
parts for damage, wear, improper looseness or end play; replace if necessary.
❏ Change the manual transmission fluid (if equipped) if using your vehicle for any of
the following: Most of your driving is at sustained high speeds during hot weather,
above 90°F (32°C), driving in dusty conditions, or stop and go driving.
❏ Replace the air conditioning filter.
Odometer Reading Date
Repair Order #Dealer Code
Signature, Authorized Service Center
8
MAINTENANCE SCHEDULES 471