Page 315 of 592
The system allows the driver to select information by
pressing the following buttons mounted on the steering
wheel:UP Button
Press and release the UP button to scroll up-
ward through the main menu and Vehicle Info
and Trip Info sub-menus (Fuel Economy, Ve-
hicle Info, Tire PSI, Cruise, Messages, Trip Info,
Vehicle Speed, and Turn Menu OFF) and sub-menus.
DOWN Button
Press and release the DOWN button to scroll
downward through the main menu and Vehicle
Info and Trip Info sub-menus (Fuel Economy,
Vehicle Info, Tire PSI, Cruise, Messages, Trip Info,
Vehicle Speed, and Turn Menu OFF) and sub-menus.
SELECT Button
Press and release the SELECT button to access
the information screens or sub-menu screens of
EVIC Steering Wheel Controls
4
UNDERSTANDING YOUR INSTRUMENT PANEL 313
Page 319 of 592
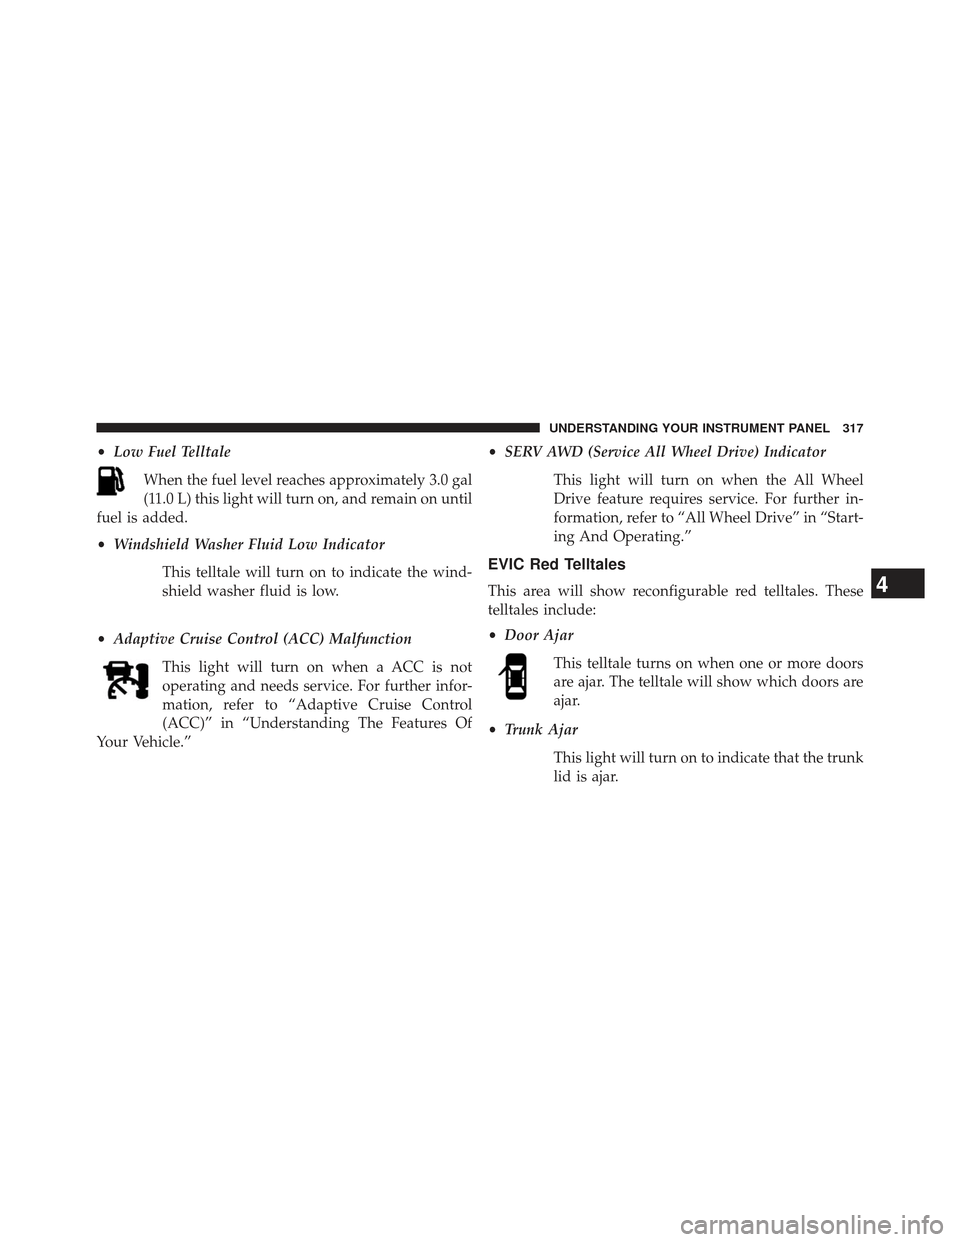
•Low Fuel Telltale
When the fuel level reaches approximately 3.0 gal
(11.0 L) this light will turn on, and remain on until
fuel is added.
• Windshield Washer Fluid Low Indicator
This telltale will turn on to indicate the wind-
shield washer fluid is low.
• Adaptive Cruise Control (ACC) Malfunction
This light will turn on when a ACC is not
operating and needs service. For further infor-
mation, refer to “Adaptive Cruise Control
(ACC)” in “Understanding The Features Of
Your Vehicle.” •
SERV AWD (Service All Wheel Drive) Indicator
This light will turn on when the All Wheel
Drive feature requires service. For further in-
formation, refer to “All Wheel Drive” in “Start-
ing And Operating.”
EVIC Red Telltales
This area will show reconfigurable red telltales. These
telltales include:
•Door Ajar
This telltale turns on when one or more doors
are ajar. The telltale will show which doors are
ajar.
• Trunk Ajar
This light will turn on to indicate that the trunk
lid is ajar.4
UNDERSTANDING YOUR INSTRUMENT PANEL 317
Page 327 of 592
Resetting A Trip Info Function
To Reset any of the three Trip Info functions, select the
function you want to reset using the UP or DOWN
buttons. Push the SELECT button until the feature dis-
plays zero.
Tire PSI
Press and release the UP or DOWN button until�Tire PSI�
is highlighted in the EVIC. Press and release the SELECT
button and one of the following will be displayed:
• If tire pressure is OK for all tires a vehicle ICON is
displayed with tire pressure values in each corner of
the ICON.
• If one or more tires have low pressure, �Tire Pressure
LOW� is displayed with the vehicle ICON and the tire
pressure values in each corner of the ICON.
• If the Tire Pressure system requires service, �Service
Tire Pressure System� is displayed. Tire PSI is an information only function and cannot be
reset. Press and release the BACK button to return to the
main menu.
Vehicle Info (Customer Information Features)
Press and release the UP or DOWN button until
�Vehicle
Info� is highlighted in the EVIC. Press and release the
SELECT button and Coolant Temp will be displayed.
Press the UP or DOWN button to scroll through the
following information displays.
• Coolant Temp
Displays the actual coolant temperature.
• AWD Status — If Equipped
Displays a vehicle ICON with four wheels highlighted
and �AW D �if All Wheel Drive is active. Displays a
vehicle ICON with two wheels highlighted and �RWD�if
All Wheel Drive is inactive.
4
UNDERSTANDING YOUR INSTRUMENT PANEL 325
Page 328 of 592
•Oil Temperature
Displays the actual oil temperature.
• Oil Pressure
Displays the actual oil pressure.
• Trans Temperature
Displays the actual transmission temperature.
• Engine Hours
Displays the number of hours of engine operation.
Messages #
Select from Main Menu using the UP or DOWN buttons.
This feature shows the number of stored warning mes-
sages (in the # place holder). Pressing the SELECT button
will allow you to see what the stored messages are.
Pressing the BACK button takes you back to the Main
Menu.
Turn Menu OFF
Select from Main Menu using the DOWN button. Press-
ing the SELECT button blanks the menu display. Pressing
any one of the four steering wheel buttons brings the
menu back.
Uconnect® SETTINGS
The Uconnect® system uses a combination of soft and
hard keys located on the center of the instrument panel
that allows you to access and change the customer
programmable features.
Hard-Keys
Hard-Keys are located below the Uconnect® system in
the center of the instrument panel. In addition, there is a
Scroll/Enter control knob located on the right side of the
Climate Controls in the center of the instrument panel.
Turn the control knob to scroll through menus and
326 UNDERSTANDING YOUR INSTRUMENT PANEL
Page 336 of 592
touch the + or - soft-key to select your desired time
interval. Touch the back arrow soft-key to return to the
previous menu.
•Headlights With Wipers — If Equipped
When this feature is selected, and the headlight switch is
in the AUTO position, the headlights will turn on ap-
proximately 10 seconds after the wipers are turned on.
The headlights will also turn off when the wipers are
turned off if they were turned on by this feature. To make
your selection, touch the Headlights With Wipers softkey,
until a check-mark appears next to setting, showing that
setting has been selected. Touch the back arrow soft-key
to return to the previous menu.
• Auto Dim High Beams “SmartBeam™” — If
Equipped
When this feature is selected, the high beam headlights
will deactivate automatically under certain conditions. To
make your selection, touch the Auto High Beams softkey, until a check-mark appears next to setting, showing that
setting has been selected. Touch the back arrow soft-key
to return to the previous menu. Refer to “Lights/ Smart-
Beam™ — If Equipped” in “Understanding The Features
Of Your Vehicle” for further information.
•
Daytime Running Lights – If Available
When this feature is selected, the headlights will turn on
whenever the engine is running. To make your selection,
touch the Daytime Running Lights soft-key, until a
check-mark appears next to setting, showing that setting
has been selected. Touch the back arrow soft-key to
return to the previous menu.
• Steering Directed Lights – If Equipped
When this feature is selected, the headlights turn relative
to a change in direction of the steering wheel. To make
your selection, touch the Steering Directed Lights softkey,
334 UNDERSTANDING YOUR INSTRUMENT PANEL
Page 340 of 592
•Auto-On Driver Heated/Ventilated Seat & Steering
Wheel With Vehicle Start — If Equipped
When this feature is selected the driver’s heated seat and
heated steering wheel will automatically turn on when
temperatures are below 40° F (4.4° C). When tempera-
tures are above 80° F (26.7° C) the driver vented seat will
turn on. To make your selection, touch the Auto Heated
Seats soft-key, until a check-mark appears next to setting,
showing that setting has been selected. Touch the back
arrow soft-key to return to the previous menu.
Engine Off Options
After pressing the Engine Off Options soft-key the fol-
lowing settings will be available.
• Easy Exit Seat
This feature provides automatic driver seat positioning to
enhance driver mobility when entering and exiting the
vehicle. To make your selection, touch the Easy Exit Seats soft-key, until a check-mark appears next to setting,
showing that setting has been selected. Touch the back
arrow soft-key to return to the previous menu.
•
Engine Off Power Delay
When this feature is selected, the power window
switches, radio, Uconnect® phone system (if equipped),
DVD video system (if equipped), power sunroof (if
equipped), and power outlets will remain active for up to
10 minutes after the ignition is cycled to OFF. Opening
either front door will cancel this feature. To change the
Engine Off Power Delay status touch the 0 seconds,
45 seconds, 5 minutes or 10 minutes soft-key. Then touch
the arrow back soft-key.
• Headlight Off Delay
When this feature is selected, the driver can choose to
have the headlights remain on for 0, 30, 60, or 90 seconds
when exiting the vehicle. To change the Headlight Off
338 UNDERSTANDING YOUR INSTRUMENT PANEL
Page 346 of 592
Logic7® multichannel surround-sound technology deliv-
ers an immersive, accurate sound-stage to every seating
position. This surround effect is available for audio from
any source - AM/FM/CD/ Satellite Radio or dashboard
AUX input; and is activated through the Uconnect®
System. Refer to “Surround Sound” under “Uconnect®
Settings” in “Understanding Your Instrument Panel”.
STEERING WHEEL AUDIO CONTROLS
The remote sound system controls are located on the rear
surface of the steering wheel at the three and nine o’clock
positions.The right-hand control is a rocker-type switch with a
pushbutton in the center and controls the volume and
mode of the sound system. Pressing the top of the rocker
switch will increase the volume, and pressing the bottom
of the rocker switch will decrease the volume.
Remote Sound System Controls (Back View Of SteeringWheel)
344 UNDERSTANDING YOUR INSTRUMENT PANEL
Page 353 of 592
operation if the blower control is left in the “O” (Off)po-
sition. Blower control should be left in the “ON” position
to allow the climate control to either warm or cool the
vehicle.
Hard-key
The blower speed increases as you turn the control
clockwise from the lowest blower setting. The blower
speed decreases as you turn the knob counter-clockwise.
Soft-key
Use the small blower icon to reduce the blower setting
and the large blower icon to increase the blower setting.
Blower can also be selected by pressing the blower bar
area between the icons.12. Modes
The airflow distribution mode can be adjusted so air
comes from the instrument panel outlets, floor outlets,
demist outlets and defrost outlets. The Mode settings are
as follows:
Panel Mode
Air comes from the outlets in the instrument
panel. Each of these outlets can be individually
adjusted to direct the flow of air. The air vanes of the
center outlets and outboard outlets can be moved up and
down or side to side to regulate airflow direction. There
is a shut off wheel located below the air vanes to shut off
or adjust the amount of airflow from these outlets.
4
UNDERSTANDING YOUR INSTRUMENT PANEL 351