2013 CHRYSLER 200 CONVERTIBLE change time
[x] Cancel search: change timePage 61 of 116

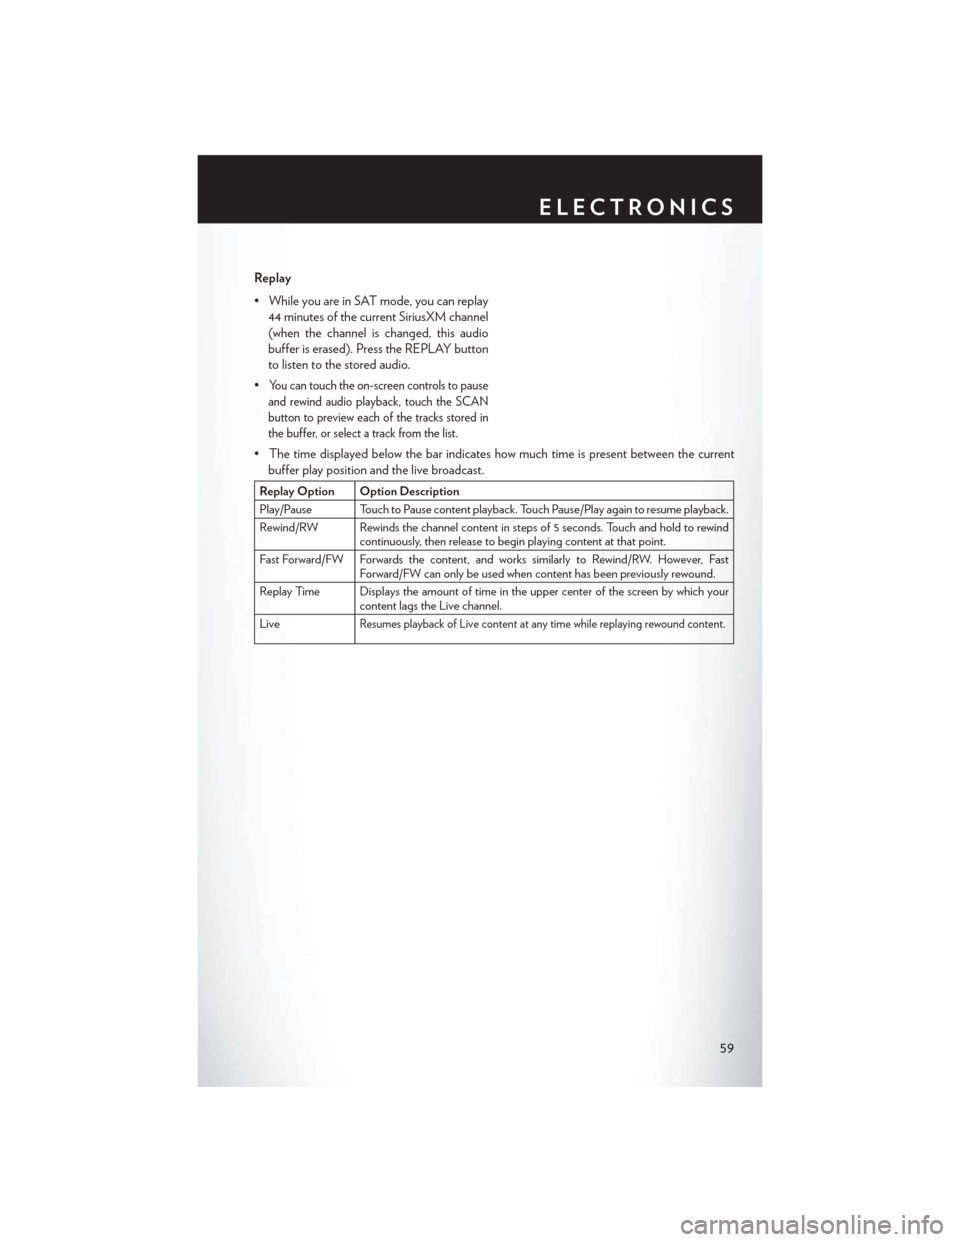
Replay
• While you are in SAT mode, you can replay44 minutes of the current SiriusXM channel
(when the channel is changed, this audio
buffer is erased). Press the REPLAY button
to listen to the stored audio.
•
You can touch the on-screen controls to pause
and rewind audio playback, touch the SCAN
button to preview each of the tracks stored in
the buffer, or select a track from the list.
• The time displayed below the bar indicates how much time is present between the current buffer play position and the live broadcast.
Replay Option Option Description
Play/Pause Touch to Pause content playback. Touch Pause/Play again to resume playback.
Rewind/RW Rewinds the channel content in steps of 5 seconds. Touch and hold to rewind continuously, then release to begin playing content at that point.
Fast Forward/FW Forwards the content, and works similarly to Rewind/RW. However, Fast Forward/FW can only be used when content has been previously rewound.
Replay Time Displays the amount of time in the upper center of the screen by which your content lags the Live channel.
Live
Resumes playback of Live content at any time while replaying rewound content.
ELECTRONICS
59
Page 66 of 116

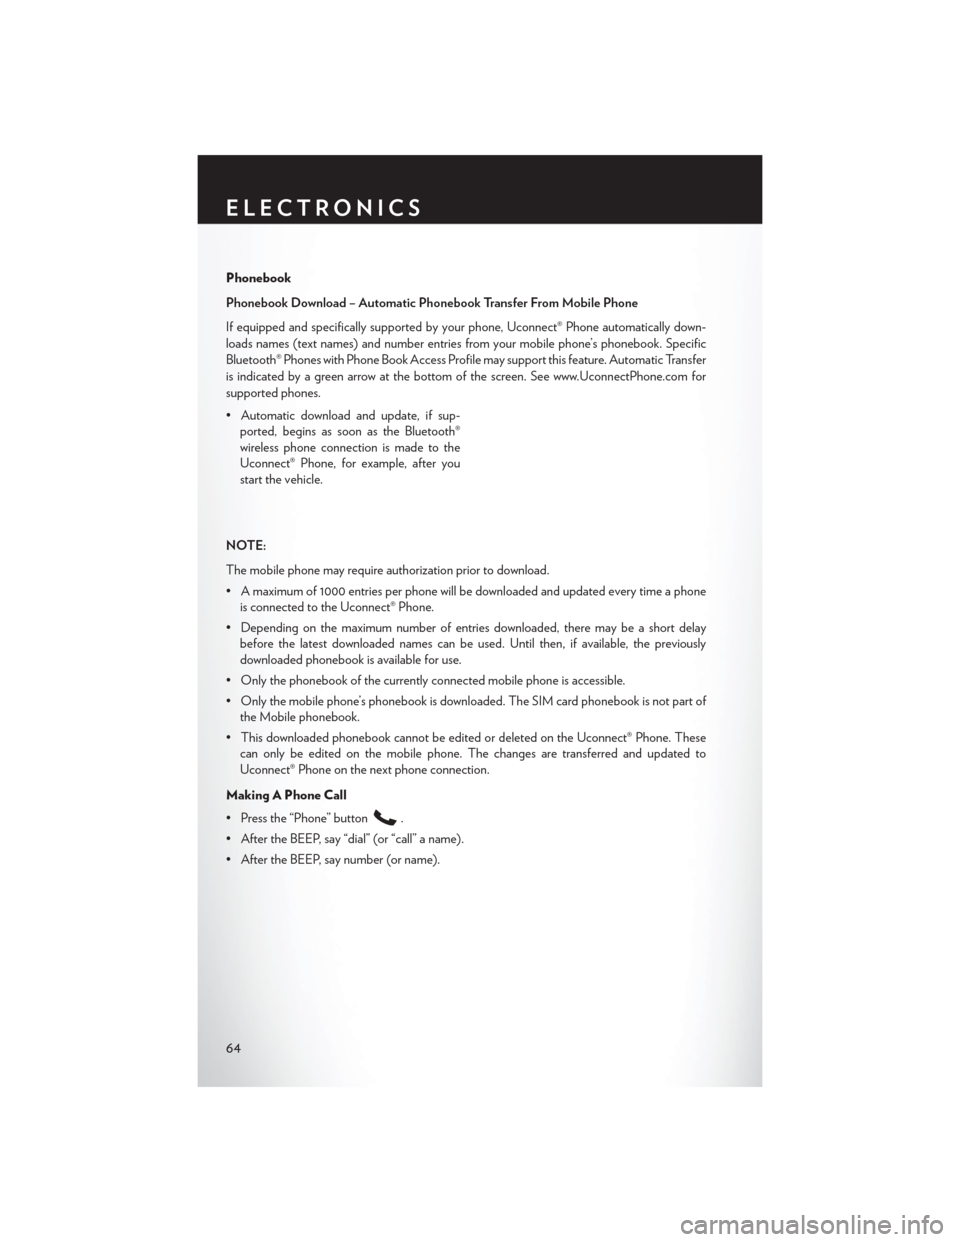
Phonebook
Phonebook Download – Automatic Phonebook Transfer From Mobile Phone
If equipped and specifically supported by your phone, Uconnect® Phone automatically down-
loads names (text names) and number entries from your mobile phone’s phonebook. Specific
Bluetooth® Phones with Phone Book Access Profile may support this feature. Automatic Transfer
is indicated by a green arrow at the bottom of the screen. See www.UconnectPhone.com for
supported phones.
• Automatic download and update, if sup-ported, begins as soon as the Bluetooth®
wireless phone connection is made to the
Uconnect® Phone, for example, after you
start the vehicle.
NOTE:
The mobile phone may require authorization prior to download.
• A maximum of 1000 entries per phone will be downloaded and updated every time a phone is connected to the Uconnect® Phone.
• Depending on the maximum number of entries downloaded, there may be a short delay before the latest downloaded names can be used. Until then, if available, the previously
downloaded phonebook is available for use.
• Only the phonebook of the currently connected mobile phone is accessible.
• Only the mobile phone’s phonebook is downloaded. The SIM card phonebook is not part of the Mobile phonebook.
• This downloaded phonebook cannot be edited or deleted on the Uconnect® Phone. These can only be edited on the mobile phone. The changes are transferred and updated to
Uconnect® Phone on the next phone connection.
Making A Phone Call
• Press the “Phone” button
.
• After the BEEP, say “dial” (or “call” a name).
• After the BEEP, say number (or name).
ELECTRONICS
64
Page 73 of 116

UNIVERSAL GARAGE DOOR OPENER (HomeLink®)
• HomeLink® replaces up to three hand-held transmitters that operate devices such as garagedoor openers, motorized gates, lighting or home security systems. The HomeLink® unit is
powered by your vehicles 12 Volt battery.
• The HomeLink® buttons that are located in the overhead console or sunvisor designate the three different HomeLink® channels.
• The HomeLink® indicator is located above the center button.
Before You Begin Programming
HomeLink®
• Be sure that your vehicle is parked outside of the garage before you begin programming.
• For more efficient programming and accu- rate transmission of the radio-frequency sig-
nal it is recommended that a new battery be
placed in the hand-held transmitter of the
device that is being programmed to the
HomeLink® system.
• Erase all channels before you begin programming. To erase the channels, place the ignition switch into the ON/RUN position, then press and hold the two outside HomeLink® buttons
(I and III) for up 20 seconds or until the red indicator flashes.
NOTE:
• Erasing all channels should only be performed when programming HomeLink® for the first time. Do not erase channels when programming additional buttons.
• If you have any problems, or require assistance, please call toll-free 1–800–355–3515 or, on the Internet at www.HomeLink.com for information or assistance.
Programming A Rolling Code
• For programming Garage Door Openers that were manufactured after 1995. These Garage Door Openers can be identified by the “LEARN” or “TRAIN” button located where the
hanging antenna is attached to the Garage Door Opener. It is NOT the button that is normally
used to open and close the door. The name and color of the button may vary by manufacturer.
• Place the ignition switch into the ON/RUN position.
• Place the hand-held transmitter 1 to 3 in (3 to 8 cm) away from the HomeLink® button you wish to program while keeping the HomeLink® indicator light in view.
• Simultaneously press and hold both the HomeLink® button you want to program and the hand-held transmitter button.
•
Continue to hold both buttons and observe the indicator light. The HomeLink® indicator will flash
slowly and then rapidly after HomeLink® has received the frequency signal from the hand-held
transmitter. Release both buttons after the indicator light changes from slow to rapid.
• At the garage door opener motor (in the garage), locate the “LEARN” or “TRAINING” button. This can usually be found where the hanging antenna wire is attached to the garage
door opener motor. Firmly press and release the “LEARN” or “TRAINING” button.
ELECTRONICS
71
Page 74 of 116

NOTE:
You have 30 seconds in which to initiate the next step after the LEARN button has been pressed.
•
Return to the vehicle and press the programmed HomeLink® button twice (holding the button for
two seconds each time). If the device is plugged in and activates, programming is complete.
NOTE:
If the device does not activate, press the button a third time (for two seconds) to complete the
training.
• To program the remaining two HomeLink® buttons, repeat each step for each remaining button. DO NOT erase the channels.
Programming A Non-Rolling Code
• For programming Garage Door Openers manufactured before 1995.
• Turn the ignition switch to the ON/RUN position.
• Place the hand-held transmitter 1 to 3 in (3 to 8 cm) away from the HomeLink® button you wish to program while keeping the HomeLink® indicator light in view.
• Simultaneously press and hold both the HomeLink® button you want to program and the hand-held transmitter button.
•
Continue to hold both buttons and observe the indicator light. The HomeLink® indicator will flash
slowly and then rapidly after HomeLink® has received the frequency signal from the hand-held
transmitter. Release both buttons after the indicator light changes from slow to rapid.
• Press and hold the programmed HomeLink® button and observe the indicator light.
NOTE:
• If the indicator light stays on constantly, programming is complete and the garage door(or device) should activate when the HomeLink® button is pressed.
• To program the two remaining HomeLink® buttons, repeat each step for each remaining button. DO NOT erase the channels.
Using HomeLink®
• To operate, press and release the programmed HomeLink® button. Activation will now occur for the programmed device (i.e., garage door opener, gate operator, security system, entry
door lock, home/office lighting, etc.,). The hand-held transmitter of the device may also be
used at any time.
WARNING!
•Your motorized door or gate will open and close while you are programming the universal
transceiver. Do not program the transceiver if people or pets are in the path of the door or gate.
• Do not run your vehicle in a closed garage or confined area while programming the
transceiver. Exhaust gas from your vehicle contains Carbon Monoxide (CO) which is
odorless and colorless. Carbon Monoxide is poisonous when inhaled and can cause you
and others to be severely injured or killed.
ELECTRONICS
72
Page 79 of 116

NOTE:
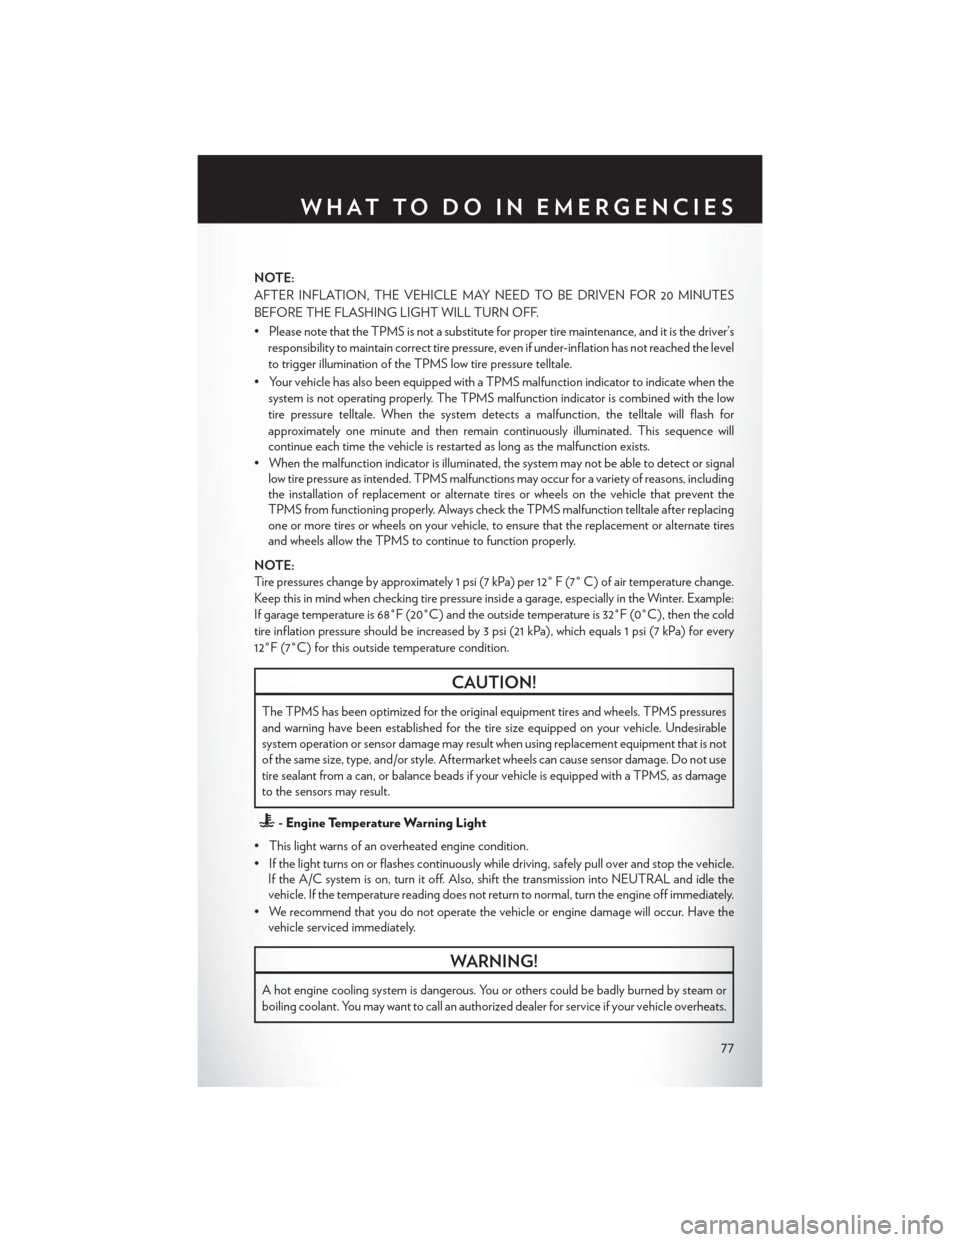
AFTER INFLATION, THE VEHICLE MAY NEED TO BE DRIVEN FOR 20 MINUTES
BEFORE THE FLASHING LIGHT WILL TURN OFF.
• Please note that the TPMS is not a substitute for proper tire maintenance, and it is the driver’sresponsibility to maintain correct tire pressure, even if under-inflation has not reached the level
to trigger illumination of the TPMS low tire pressure telltale.
• Your vehicle has also been equipped with a TPMS malfunction indicator to indicate when the system is not operating properly. The TPMS malfunction indicator is combined with the low
tire pressure telltale. When the system detects a malfunction, the telltale will flash for
approximately one minute and then remain continuously illuminated. This sequence will
continue each time the vehicle is restarted as long as the malfunction exists.
• When the malfunction indicator is illuminated, the system may not be able to detect or signal low tire pressure as intended. TPMS malfunctions may occur for a variety of reasons, including
the installation of replacement or alternate tires or wheels on the vehicle that prevent the
TPMS from functioning properly. Always check the TPMS malfunction telltale after replacing
one or more tires or wheels on your vehicle, to ensure that the replacement or alternate tires
and wheels allow the TPMS to continue to function properly.
NOTE:
Tire pressures change by approximately 1 psi (7 kPa) per 12° F (7° C) of air temperature change.
Keep this in mind when checking tire pressure inside a garage, especially in the Winter. Example:
If garage temperature is 68°F (20°C) and the outside temperature is 32°F (0°C), then the cold
tire inflation pressure should be increased by 3 psi (21 kPa), which equals 1 psi (7 kPa) for every
12°F (7°C) for this outside temperature condition.
CAUTION!
The TPMS has been optimized for the original equipment tires and wheels. TPMS pressures
and warning have been established for the tire size equipped on your vehicle. Undesirable
system operation or sensor damage may result when using replacement equipment that is not
of the same size, type, and/or style. Aftermarket wheels can cause sensor damage. Do not use
tire sealant from a can, or balance beads if your vehicle is equipped with a TPMS, as damage
to the sensors may result.
- Engine Temperature Warning Light
• This light warns of an overheated engine condition.
• If the light turns on or flashes continuously while driving, safely pull over and stop the vehicle. If the A/C system is on, turn it off. Also, shift the transmission into NEUTRAL and idle the
vehicle. If the temperature reading does not return to normal, turn the engine off immediately.
• We recommend that you do not operate the vehicle or engine damage will occur. Have the vehicle serviced immediately.
WARNING!
A hot engine cooling system is dangerous. You or others could be badly burned by steam or
boiling coolant. You may want to call an authorized dealer for service if your vehicle overheats.
WHAT TO DO IN EMERGENCIES
77
Page 81 of 116

- Electronic Throttle Control (ETC) Indicator Light
• This light informs you of a problem with the Electronic Throttle Control (ETC) system.
• If a problem is detected, the light will come on while the engine is running. Cycle the ignition when the vehicle has completely stopped and the shift lever is placed in the PARK position; the
light should turn off.
• If the light remains lit with the engine running, your vehicle will usually be drivable; however, see an authorized service center immediately. If the light is flashing when the engine is running,
immediate service is required and you may experience reduced performance, an elevated/
rough idle or engine stall and your vehicle may require towing.
Transmission Temperature Warning Light
• This light indicates that there is excessive transmission fluid temperature that might occur with severe usage such as trailer towing. If this light turns on, stop the vehicle and run the engine at
idle, with the transmission in NEUTRAL, until the light turns off. Once the light turns off, you
may continue to drive normally.
- Air Bag Warning Light
• If the light is not on during starting, stays on, or turns on while driving, have the vehicle serviced by an authorized service center immediately.
Fuel Cap/Loose Gas Cap Message
• If a “gas cap” message (shown as gASCAP) appears, tighten the gas cap until a “clicking” sound is heard.
• Press the odometer reset button to turn the message off.
• If the message continues to appear for more than three days after tightening the gas cap, see your authorized service center.
Oil Change Indicator
Message
• If an “oil change” message (shown as CHANgE OIL) appears and a single chime sounds, it is time for your next required oil change.
Resetting The Light After Servicing
• Turn the ignition switch to the ON/RUN position (do not start engine).
• Fully depress the accelerator pedal three times within 10 seconds.
• Turn the ignition switch to the OFF/LOCK position.
WHAT TO DO IN EMERGENCIES
79
Page 99 of 116

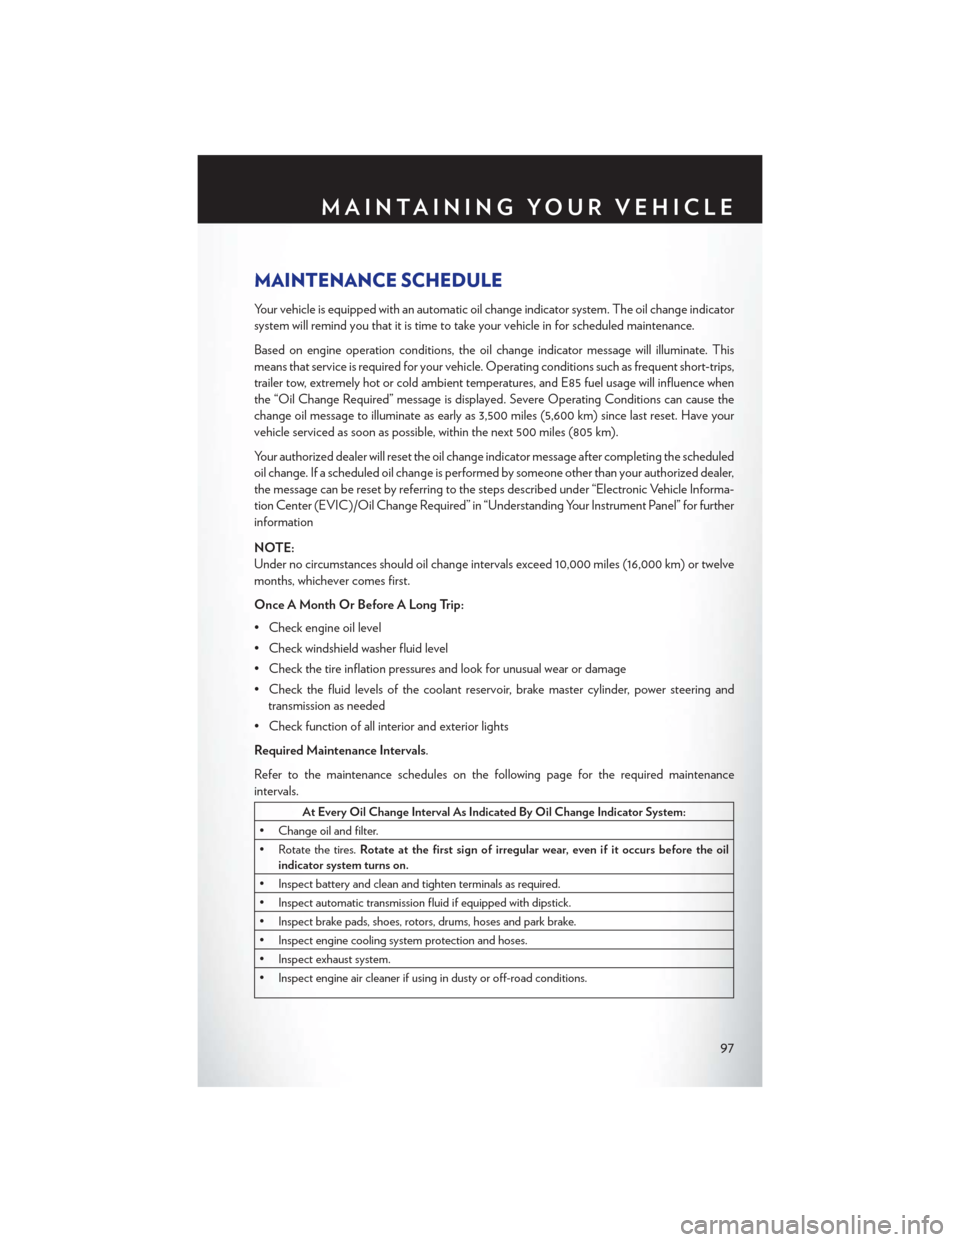
MAINTENANCE SCHEDULE
Your vehicle is equipped with an automatic oil change indicator system. The oil change indicator
system will remind you that it is time to take your vehicle in for scheduled maintenance.
Based on engine operation conditions, the oil change indicator message will illuminate. This
means that service is required for your vehicle. Operating conditions such as frequent short-trips,
trailer tow, extremely hot or cold ambient temperatures, and E85 fuel usage will influence when
the “Oil Change Required” message is displayed. Severe Operating Conditions can cause the
change oil message to illuminate as early as 3,500 miles (5,600 km) since last reset. Have your
vehicle serviced as soon as possible, within the next 500 miles (805 km).
Your authorized dealer will reset the oil change indicator message after completing the scheduled
oil change. If a scheduled oil change is performed by someone other than your authorized dealer,
the message can be reset by referring to the steps described under “Electronic Vehicle Informa-
tion Center (EVIC)/Oil Change Required” in “Understanding Your Instrument Panel” for further
information
NOTE:
Under no circumstances should oil change intervals exceed 10,000 miles (16,000 km) or twelve
months, whichever comes first.
Once A Month Or Before A Long Trip:
• Check engine oil level
• Check windshield washer fluid level
• Check the tire inflation pressures and look for unusual wear or damage
• Check the fluid levels of the coolant reservoir, brake master cylinder, power steering andtransmission as needed
• Check function of all interior and exterior lights
Required Maintenance Intervals.
Refer to the maintenance schedules on the following page for the required maintenance
intervals.
At Every Oil Change Interval As Indicated By Oil Change Indicator System:
• Change oil and filter.
• Rotate the tires. Rotate at the first sign of irregular wear, even if it occurs before the oil
indicator system turns on.
• Inspect battery and clean and tighten terminals as required.
• Inspect automatic transmission fluid if equipped with dipstick.
• Inspect brake pads, shoes, rotors, drums, hoses and park brake.
• Inspect engine cooling system protection and hoses.
• Inspect exhaust system.
• Inspect engine air cleaner if using in dusty or off-road conditions.
MAINTAINING YOUR VEHICLE
97
Page 101 of 116

Mileage or time passed
(whichever comes first)
20,000
30,000
40,000 50,000
60,000
70,000
80,000 90,000
100,000
110,000
120,000 130,000
140,000 150,000
Or Years: 2 3 4 5 6 7 8 9 10 11 12 13 14 15
Or Kilometers:
32,000
48,000
64,000
80,000
96,000
112,000
128,000
144,000
160,000
176,000
192,000
208,000 224,000
240,000
Change automatic transmission fluid and filter
if using your vehicle for any of the following:
police, taxi, fleet, or frequent trailer towing. X
Change automatic transmission fluid and filter. X
Inspect and replace PCV valve if necessary. X** The spark plug change interval is mileage based only, yearly intervals do not apply.
WARNING!
• You can be badly injured working on or around a motor vehicle. Do only service work for which you have the knowledge and the right equipment. If you have any doubt about your ability to perform a service job, take your vehicle to a competent mechanic.
• Failure to properly inspect and maintain your vehicle could result in a component malfunction and effect vehicle handling and performance.
This could cause an accident.
MAINTAINING YOUR VEHICLE
99