2013 CHEVROLET SONIC tow
[x] Cancel search: towPage 238 of 382
Black plate (4,1)Chevrolet Sonic Owner Manual - 2013 - 2nd PrintReady - 10/11/12
10-4 Vehicle Care
This vehicle has an airbag system.
Before attempting to do your own
service work, seeServicing the
Airbag-Equipped Vehicle on
page 3‑28.
Keep a record with all parts receipts
and list the mileage and the date of
any service work performed. See
Maintenance Records on
page 11‑15.
Notice: Even small amounts of
contamination can cause damage
to vehicle systems. Do not allow
contaminants to contact the
fluids, reservoir caps,
or dipsticks.Hood
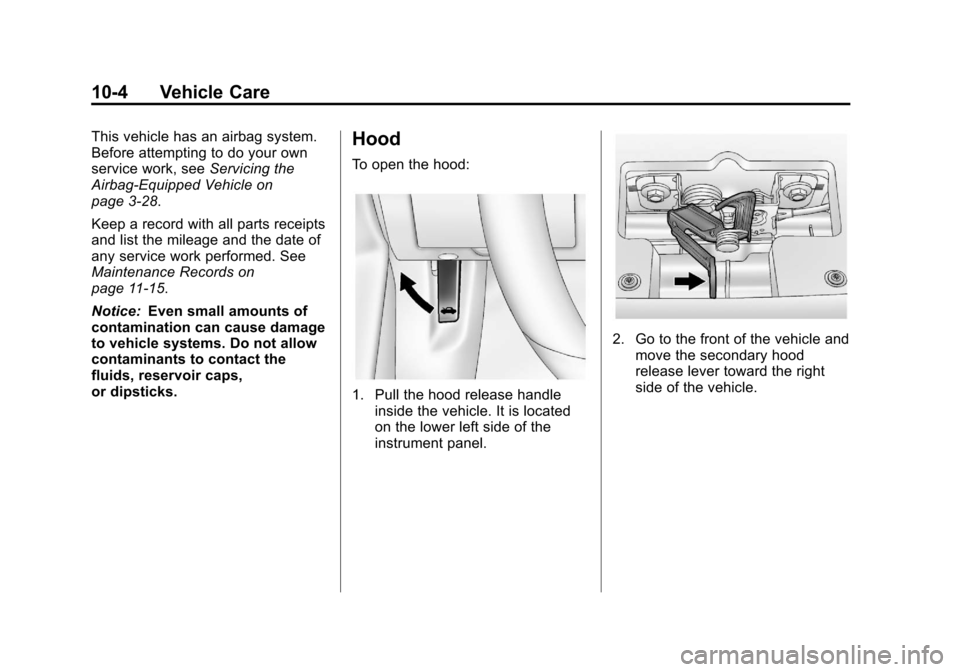
To open the hood:
1. Pull the hood release handle inside the vehicle. It is located
on the lower left side of the
instrument panel.
2. Go to the front of the vehicle andmove the secondary hood
release lever toward the right
side of the vehicle.
Page 244 of 382
Black plate (10,1)Chevrolet Sonic Owner Manual - 2013 - 2nd PrintReady - 10/11/12
10-10 Vehicle Care
to drain back into the oil pan.
Checking the oil level too soon
after engine shutoff will not
provide an accurate oil level
reading.
{WARNING
The engine oil dipstick handle
may be hot; it could burn you.
Use a towel or glove to touch the
dipstick handle.
2. Pull out the dipstick and clean it with a paper towel or cloth, then
push it back in all the way.
Remove it again, keeping the tip
down, and check the level.
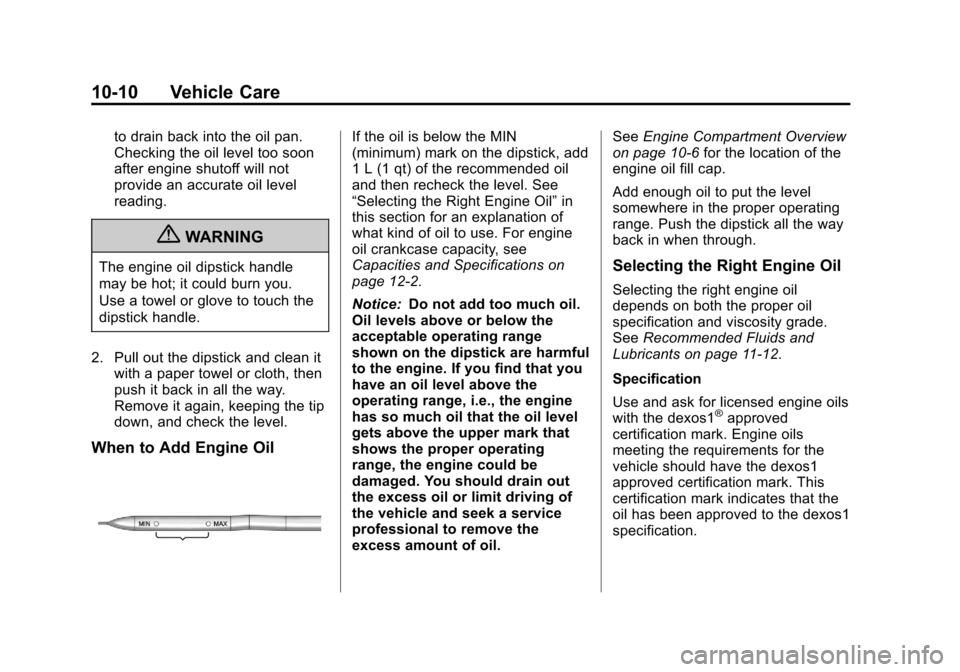
When to Add Engine Oil
If the oil is below the MIN
(minimum) mark on the dipstick, add
1 L (1 qt) of the recommended oil
and then recheck the level. See
“Selecting the Right Engine Oil” in
this section for an explanation of
what kind of oil to use. For engine
oil crankcase capacity, see
Capacities and Specifications on
page 12‑2.
Notice: Do not add too much oil.
Oil levels above or below the
acceptable operating range
shown on the dipstick are harmful
to the engine. If you find that you
have an oil level above the
operating range, i.e., the engine
has so much oil that the oil level
gets above the upper mark that
shows the proper operating
range, the engine could be
damaged. You should drain out
the excess oil or limit driving of
the vehicle and seek a service
professional to remove the
excess amount of oil. See
Engine Compartment Overview
on page 10‑6 for the location of the
engine oil fill cap.
Add enough oil to put the level
somewhere in the proper operating
range. Push the dipstick all the way
back in when through.
Selecting the Right Engine Oil
Selecting the right engine oil
depends on both the proper oil
specification and viscosity grade.
See Recommended Fluids and
Lubricants on page 11‑12.
Specification
Use and ask for licensed engine oils
with the dexos1
®approved
certification mark. Engine oils
meeting the requirements for the
vehicle should have the dexos1
approved certification mark. This
certification mark indicates that the
oil has been approved to the dexos1
specification.
Page 265 of 382
Black plate (31,1)Chevrolet Sonic Owner Manual - 2013 - 2nd PrintReady - 10/11/12
Vehicle Care 10-31
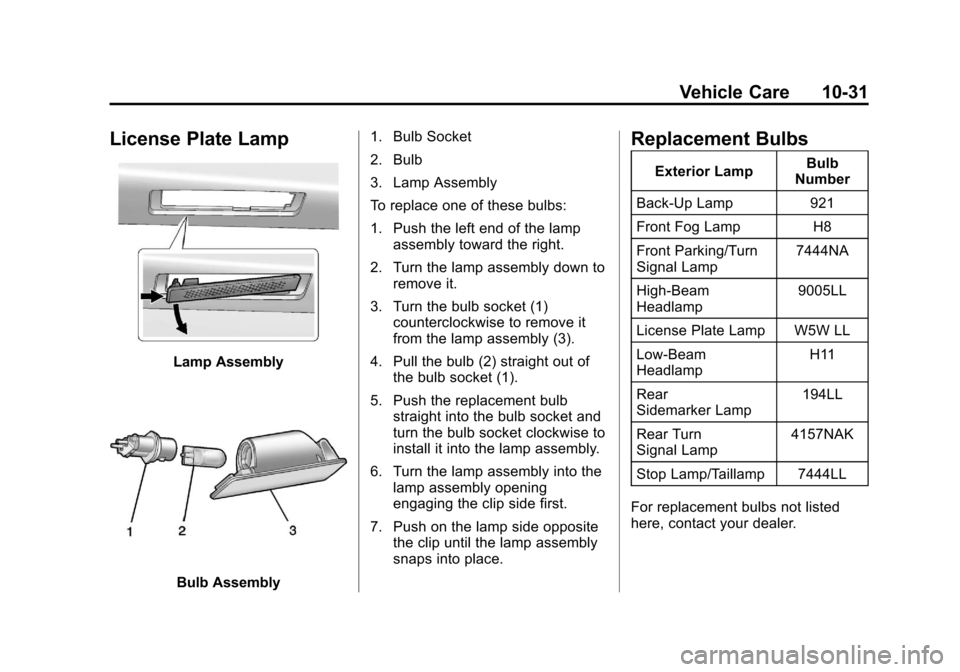
License Plate Lamp
Lamp Assembly
Bulb Assembly1. Bulb Socket
2. Bulb
3. Lamp Assembly
To replace one of these bulbs:
1. Push the left end of the lamp
assembly toward the right.
2. Turn the lamp assembly down to remove it.
3. Turn the bulb socket (1) counterclockwise to remove it
from the lamp assembly (3).
4. Pull the bulb (2) straight out of the bulb socket (1).
5. Push the replacement bulb straight into the bulb socket and
turn the bulb socket clockwise to
install it into the lamp assembly.
6. Turn the lamp assembly into the lamp assembly opening
engaging the clip side first.
7. Push on the lamp side opposite the clip until the lamp assembly
snaps into place.
Replacement Bulbs
Exterior Lamp Bulb
Number
Back-Up Lamp 921
Front Fog Lamp H8
Front Parking/Turn
Signal Lamp 7444NA
High-Beam
Headlamp 9005LL
License Plate Lamp W5W LL
Low-Beam
Headlamp H11
Rear
Sidemarker Lamp 194LL
Rear Turn
Signal Lamp 4157NAK
Stop Lamp/Taillamp 7444LL
For replacement bulbs not listed
here, contact your dealer.
Page 287 of 382
Black plate (53,1)Chevrolet Sonic Owner Manual - 2013 - 2nd PrintReady - 10/11/12
Vehicle Care 10-53
Do not include the compact
spare tire in the tire rotation.
Adjust the front and rear tires to
the recommended inflation
pressure on the Tire and
Loading Information label after
the tires have been rotated. See
Tire Pressure on page 10‑47
andVehicle Load Limits on
page 9‑9.
Reset the Tire Pressure Monitor
System. See Tire Pressure
Monitor Operation on
page 10‑49.
Check that all wheel nuts are
properly tightened. See “Wheel
Nut Torque” underCapacities
and Specifications on
page 12‑2.{WARNING
Rust or dirt on a wheel, or on the
parts to which it is fastened, can
make wheel nuts become loose
after time. The wheel could come
off and cause an accident. When
changing a wheel, remove any
rust or dirt from places where the
wheel attaches to the vehicle. In
an emergency, a cloth or a paper
towel can be used; however, use
a scraper or wire brush later to
remove all rust or dirt.
Lightly coat the center of the
wheel hub with wheel bearing
grease after a wheel change or
tire rotation to prevent corrosion
or rust build-up. Do not get
grease on the flat wheel
mounting surface or on the
wheel nuts or bolts.
When It Is Time for New
Tires
Factors such as maintenance,
temperatures, driving speeds,
vehicle loading, and road conditions
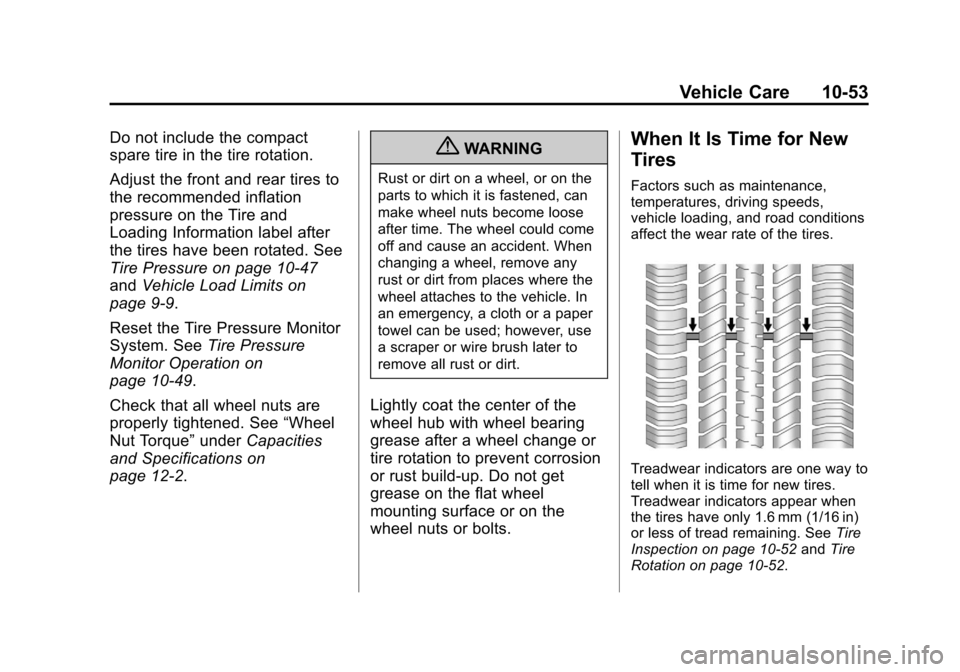
affect the wear rate of the tires.
Treadwear indicators are one way to
tell when it is time for new tires.
Treadwear indicators appear when
the tires have only 1.6 mm (1/16 in)
or less of tread remaining. See Tire
Inspection on page 10‑52 andTire
Rotation on page 10‑52.
Page 293 of 382
Black plate (59,1)Chevrolet Sonic Owner Manual - 2013 - 2nd PrintReady - 10/11/12
Vehicle Care 10-59
Used Replacement Wheels
{WARNING
Replacing a wheel with a used
one is dangerous. How it has
been used or how far it has been
driven may be unknown. It could
fail suddenly and cause a crash.
When replacing wheels, use a
new GM original equipment
wheel.
Tire Chains
{WARNING
Do not use tire chains. There is
not enough clearance. Tire chains
used on a vehicle without the
proper amount of clearance can
cause damage to the brakes,
suspension, or other vehicle(Continued)
WARNING (Continued)
parts. The area damaged by the
tire chains could cause loss of
control and a crash.
Use another type of traction
device only if its manufacturer
recommends it for the vehicle's
tire size combination and road
conditions. Follow that
manufacturer's instructions. To
avoid vehicle damage, drive slow
and readjust or remove the
traction device if it contacts the
vehicle. Do not spin the wheels.
If traction devices are used, install
them on the front tires.
If a Tire Goes Flat
It is unusual for a tire to blow out
while driving, especially if the tires
are maintained properly. See Tires
on page 10‑39. If air goes out of a
tire, it is much more likely to leak
out slowly. But if there is ever a
blowout, here are a few tips about
what to expect and what to do:
If a front tire fails, the flat tire
creates a drag that pulls the vehicle
toward that side. Take your foot off
the accelerator pedal and grip the
steering wheel firmly. Steer to
maintain lane position, and then
gently brake to a stop, well off the
road, if possible.
A rear blowout, particularly on a
curve, acts much like a skid and
may require the same correction as
used in a skid. Stop pressing the
accelerator pedal and steer to
straighten the vehicle. It may be
very bumpy and noisy. Gently brake
to a stop, well off the road,
if possible.
Page 305 of 382
Black plate (71,1)Chevrolet Sonic Owner Manual - 2013 - 2nd PrintReady - 10/11/12
Vehicle Care 10-71
WARNING (Continued)
off and cause an accident. When
changing a wheel, remove any
rust or dirt from places where the
wheel attaches to the vehicle. In
an emergency, a cloth or a paper
towel can be used; however, use
a scraper or wire brush later to
remove all rust or dirt.
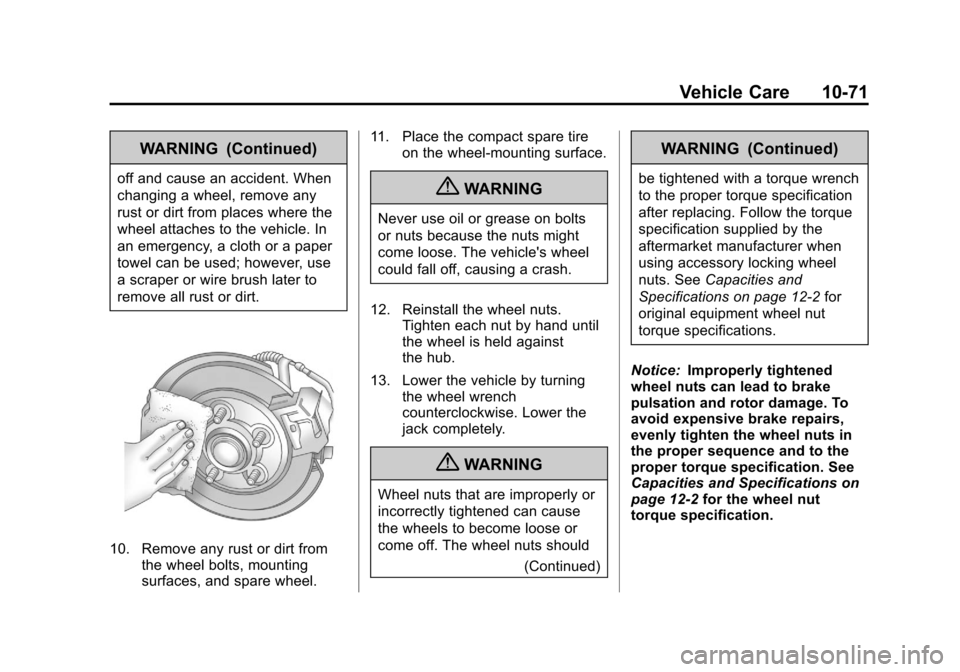
10. Remove any rust or dirt fromthe wheel bolts, mounting
surfaces, and spare wheel. 11. Place the compact spare tire
on the wheel-mounting surface.
{WARNING
Never use oil or grease on bolts
or nuts because the nuts might
come loose. The vehicle's wheel
could fall off, causing a crash.
12. Reinstall the wheel nuts. Tighten each nut by hand until
the wheel is held against
the hub.
13. Lower the vehicle by turning the wheel wrench
counterclockwise. Lower the
jack completely.
{WARNING
Wheel nuts that are improperly or
incorrectly tightened can cause
the wheels to become loose or
come off. The wheel nuts should
(Continued)
WARNING (Continued)
be tightened with a torque wrench
to the proper torque specification
after replacing. Follow the torque
specification supplied by the
aftermarket manufacturer when
using accessory locking wheel
nuts. SeeCapacities and
Specifications on page 12‑2 for
original equipment wheel nut
torque specifications.
Notice: Improperly tightened
wheel nuts can lead to brake
pulsation and rotor damage. To
avoid expensive brake repairs,
evenly tighten the wheel nuts in
the proper sequence and to the
proper torque specification. See
Capacities and Specifications on
page 12‑2 for the wheel nut
torque specification.
Page 311 of 382
Black plate (77,1)Chevrolet Sonic Owner Manual - 2013 - 2nd PrintReady - 10/11/12
Vehicle Care 10-77
Towing
Towing the Vehicle
Notice:Incorrectly towing a
disabled vehicle may cause
damage. The damage would not
be covered by the vehicle
warranty. Do not lash or hook to
the chassis components
including the front and rear
subframes, suspension control
arms and links during towing and
recovery of a disabled vehicle or
to secure the vehicle to a flatbed
car carrier. Use the proper nylon
strap harnesses around the tires
to secure the flatbed car carrier.
Have the vehicle towed on a flatbed
car carrier. A wheel lift tow truck
could damage the vehicle.
Consult your dealer or a
professional towing service if the
disabled vehicle must be towed. To tow the vehicle behind another
vehicle for recreational purposes,
such as behind a motor home, see
“Recreational Vehicle Towing”
in this
section.
Recreational Vehicle
Towing
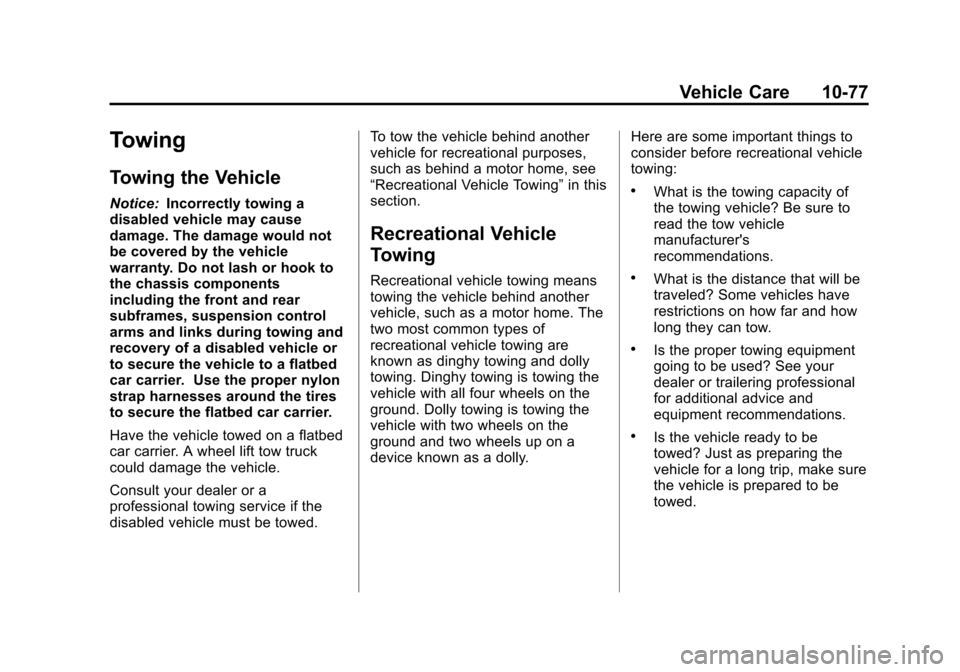
Recreational vehicle towing means
towing the vehicle behind another
vehicle, such as a motor home. The
two most common types of
recreational vehicle towing are
known as dinghy towing and dolly
towing. Dinghy towing is towing the
vehicle with all four wheels on the
ground. Dolly towing is towing the
vehicle with two wheels on the
ground and two wheels up on a
device known as a dolly. Here are some important things to
consider before recreational vehicle
towing:
.What is the towing capacity of
the towing vehicle? Be sure to
read the tow vehicle
manufacturer's
recommendations.
.What is the distance that will be
traveled? Some vehicles have
restrictions on how far and how
long they can tow.
.Is the proper towing equipment
going to be used? See your
dealer or trailering professional
for additional advice and
equipment recommendations.
.Is the vehicle ready to be
towed? Just as preparing the
vehicle for a long trip, make sure
the vehicle is prepared to be
towed.
Page 312 of 382
Black plate (78,1)Chevrolet Sonic Owner Manual - 2013 - 2nd PrintReady - 10/11/12
10-78 Vehicle Care
Dinghy Towing RS Model with
Automatic Transmission
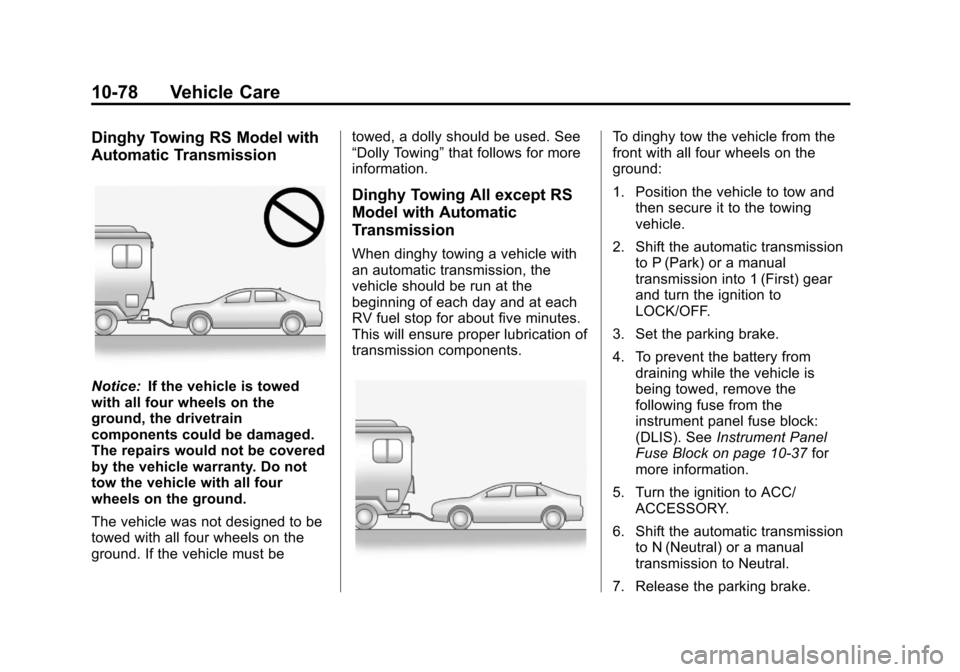
Notice:If the vehicle is towed
with all four wheels on the
ground, the drivetrain
components could be damaged.
The repairs would not be covered
by the vehicle warranty. Do not
tow the vehicle with all four
wheels on the ground.
The vehicle was not designed to be
towed with all four wheels on the
ground. If the vehicle must be towed, a dolly should be used. See
“Dolly Towing”
that follows for more
information.
Dinghy Towing All except RS
Model with Automatic
Transmission
When dinghy towing a vehicle with
an automatic transmission, the
vehicle should be run at the
beginning of each day and at each
RV fuel stop for about five minutes.
This will ensure proper lubrication of
transmission components.
To dinghy tow the vehicle from the
front with all four wheels on the
ground:
1. Position the vehicle to tow and then secure it to the towing
vehicle.
2. Shift the automatic transmission to P (Park) or a manual
transmission into 1 (First) gear
and turn the ignition to
LOCK/OFF.
3. Set the parking brake.
4. To prevent the battery from draining while the vehicle is
being towed, remove the
following fuse from the
instrument panel fuse block:
(DLIS). See Instrument Panel
Fuse Block on page 10‑37 for
more information.
5. Turn the ignition to ACC/ ACCESSORY.
6. Shift the automatic transmission to N (Neutral) or a manual
transmission to Neutral.
7. Release the parking brake.