2013 CHEVROLET SILVERADO ECO mode
[x] Cancel search: ECO modePage 3 of 542

Black plate (3,1)Chevrolet Silverado Owner Manual - 2013 - crc2 - 8/13/12
Introduction iii
The names, logos, emblems,
slogans, vehicle model names, and
vehicle body designs appearing in
this manual including, but not limited
to, GM, the GM logo, CHEVROLET,
the CHEVROLET Emblem,
SILVERADO, and Z71 are
trademarks and/or service marks of
General Motors LLC, its
subsidiaries, affiliates, or licensors.
This manual describes features that
may or may not be on your specific
vehicle either because they are
options that you did not purchase or
due to changes subsequent to the
printing of this owner manual.Please refer to the purchase
documentation relating to your
specific vehicle to confirm each of
the features found on your vehicle.
For vehicles first sold in Canada,
substitute the name
“General
Motors of Canada Limited” for
Chevrolet Motor Division wherever it
appears in this manual.
If the vehicle has the Duramax
®
diesel engine, see the Duramax
diesel supplement for additional and
specific information on this engine.
If the vehicle is a hybrid, see the
hybrid supplement for more
information.
Keep this manual in the vehicle for
quick reference.
Canadian Vehicle Owners
Propriétaires Canadiens
A French language copy of this
manual can be obtained from your
dealer or from:
On peut obtenir un exemplaire de
ce guide en français auprès du
concessionnaire ou à l'adresse
suivante:
Helm, Incorporated
Attention: Customer Service
47911 Halyard Drive
Plymouth, MI 48170
Using this Manual
To quickly locate information about
the vehicle, use the Index in the
back of the manual. It is an
alphabetical list of what is in the
manual and the page number where
it can be found.
Litho in U.S.A.
Part No. 22974446 B Second Printing©2012 General Motors LLC. All Rights Reserved.
Page 59 of 542

Black plate (19,1)Chevrolet Silverado Owner Manual - 2013 - crc2 - 8/13/12
Keys, Doors, and Windows 2-19
Crew Cab Premium Trim Shown,Other Models Similar
The driver door has a switch to
control all windows. Each
passenger door has a switch to
control that window. The power
windows only work when the ignition
is in ON/RUN or ACC/
ACCESSORY, or when Retained
Accessory Power (RAP) is active.
See Retained Accessory Power
(RAP) on page 9‑28. Push the switch down to lower the
window, and pull up the front of the
switch to raise the window.
Express-down Windows
The express-down feature allow the
driver and front passenger windows
to be lowered without holding the
switch. Push the switch down to the
second detent, then release, to
activate the express-down mode.
The express-down mode can be
canceled at any time by pulling up
on the front of the switch. To open
the window partway, push the switch
down to the first detent until the
window is at the desired position.
Window Lockout
Crew Cab Premium Trim Shown,
Other Models Similar
o(Window Lockout): The driver
door power window switch has a
lockout feature. This feature
prevents the rear windows from
operating, except from the driver
position. Press the switch to engage
or disengage the lockout feature. An
indicator light on the switch will
come on when the lockout feature is
engaged, and will go off when
disengaged.
Page 87 of 542
Black plate (25,1)Chevrolet Silverado Owner Manual - 2013 - crc2 - 8/13/12
Seats and Restraints 3-25
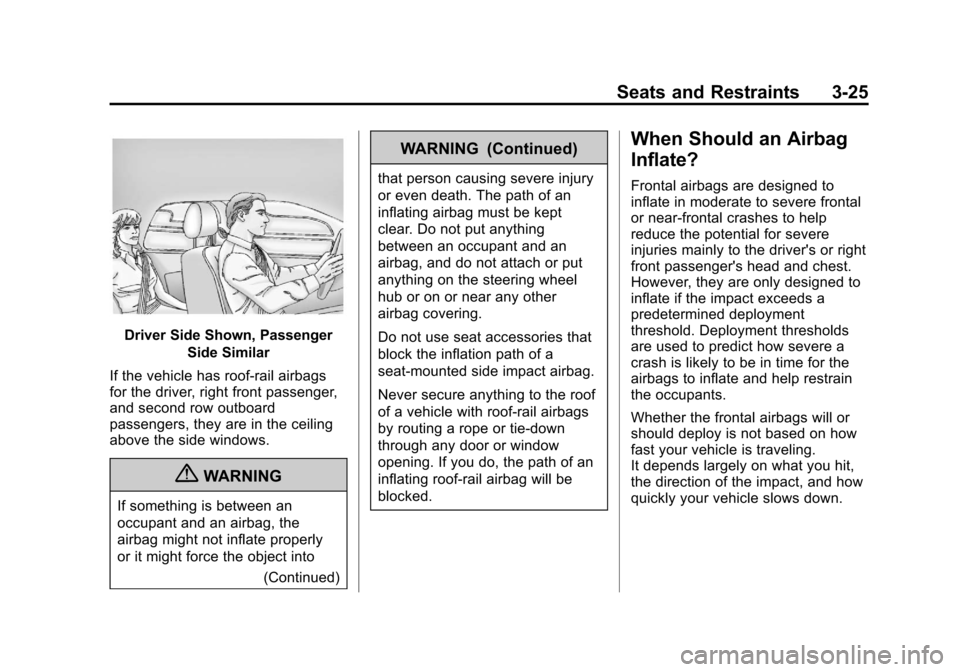
Driver Side Shown, PassengerSide Similar
If the vehicle has roof-rail airbags
for the driver, right front passenger,
and second row outboard
passengers, they are in the ceiling
above the side windows.
{WARNING
If something is between an
occupant and an airbag, the
airbag might not inflate properly
or it might force the object into (Continued)
WARNING (Continued)
that person causing severe injury
or even death. The path of an
inflating airbag must be kept
clear. Do not put anything
between an occupant and an
airbag, and do not attach or put
anything on the steering wheel
hub or on or near any other
airbag covering.
Do not use seat accessories that
block the inflation path of a
seat-mounted side impact airbag.
Never secure anything to the roof
of a vehicle with roof-rail airbags
by routing a rope or tie‐down
through any door or window
opening. If you do, the path of an
inflating roof-rail airbag will be
blocked.
When Should an Airbag
Inflate?
Frontal airbags are designed to
inflate in moderate to severe frontal
or near-frontal crashes to help
reduce the potential for severe
injuries mainly to the driver's or right
front passenger's head and chest.
However, they are only designed to
inflate if the impact exceeds a
predetermined deployment
threshold. Deployment thresholds
are used to predict how severe a
crash is likely to be in time for the
airbags to inflate and help restrain
the occupants.
Whether the frontal airbags will or
should deploy is not based on how
fast your vehicle is traveling.
It depends largely on what you hit,
the direction of the impact, and how
quickly your vehicle slows down.
Page 89 of 542
Black plate (27,1)Chevrolet Silverado Owner Manual - 2013 - crc2 - 8/13/12
Seats and Restraints 3-27
the system's designed threshold
level. The threshold level can vary
with specific vehicle design.
Roof-rail airbags are not intended to
inflate in rear impacts.
A seat-mounted side impact airbag
is intended to deploy on the side of
the vehicle that is struck. Both
roof-rail airbags will deploy when
either side of the vehicle is struck,
or if the sensing system predicts
that the vehicle is about to roll over
on its side, or in a severe frontal
impact.
In any particular crash, no one can
say whether an airbag should have
inflated simply because of the
damage to a vehicle or because of
what the repair costs were. For
frontal airbags, inflation is
determined by what the vehicle hits,
the angle of the impact, and how
quickly the vehicle slows down. For
seat-mounted side impact and
roof-rail airbags, deployment is
determined by the location and
severity of the side impact. In arollover event, roof-rail airbag
deployment is determined by the
direction of the roll.
What Makes an Airbag
Inflate?
In a deployment event, the sensing
system sends an electrical signal
triggering a release of gas from the
inflator. Gas from the inflator fills the
airbag causing the bag to break out
of the cover and deploy. The inflator,
the airbag, and related hardware are
all part of the airbag module.
Frontal airbag modules are located
inside the steering wheel and
instrument panel. For vehicles with
seat‐mounted side impact airbags,
there are airbags modules in the
side of the front seatbacks closest
to the door. For vehicles with
roof-rail airbags, there are airbag
modules in the ceiling of the vehicle,
near the side windows that have
occupant seating positions.
How Does an Airbag
Restrain?
In moderate to severe frontal or
near frontal collisions, even belted
occupants can contact the steering
wheel or the instrument panel. In
moderate to severe side collisions,
even belted occupants can contact
the inside of the vehicle.
Airbags supplement the protection
provided by safety belts. Frontal
airbags distribute the force of the
impact more evenly over the
occupant's upper body, stopping the
occupant more gradually. Seat‐
mounted side impact and roof-rail
airbags distribute the force of the
impact more evenly over the
occupant's upper body.
Rollover capable roof-rail airbags
are designed to help contain the
head and chest of occupants in the
outboard seating positions in the
first and second rows. The rollover
capable roof-rail airbags are
designed to help reduce the risk of
Page 91 of 542
Black plate (29,1)Chevrolet Silverado Owner Manual - 2013 - crc2 - 8/13/12
Seats and Restraints 3-29
WARNING (Continued)
moderate crash, there may be
concealed damage that could
make it difficult to safely operate
the vehicle.
Use caution if you should attempt
to restart the engine after a crash
has occurred.
In many crashes severe enough to
inflate the airbag, windshields are
broken by vehicle deformation.
Additional windshield breakage may
also occur from the right front
passenger airbag.
.Airbags are designed to inflate
only once. After an airbag
inflates, you will need some new
parts for the airbag system.
If you do not get them, the
airbag system will not be there
to help protect you in another
crash. A new system will include
airbag modules and possibly other parts. The service manual
for your vehicle covers the need
to replace other parts.
.The vehicle has a crash sensing
and diagnostic module which
records information after a
crash. See
Vehicle Data
Recording and Privacy on
page 13‑19 andEvent Data
Recorders on page 13‑19.
.Let only qualified technicians
work on the airbag systems.
Improper service can mean that
an airbag system will not work
properly. See your dealer for
service.
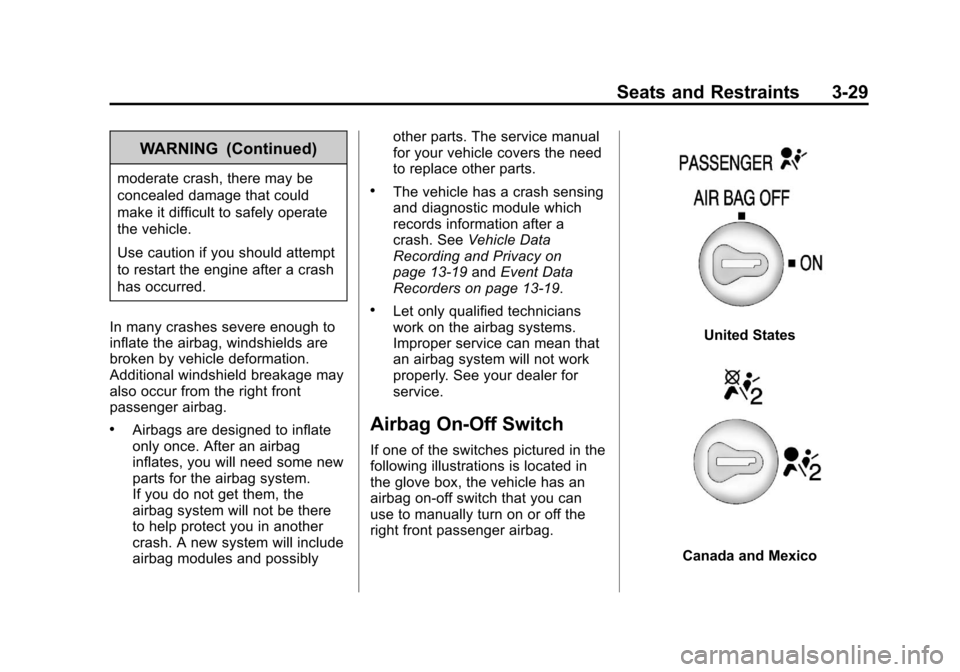
Airbag On-Off Switch
If one of the switches pictured in the
following illustrations is located in
the glove box, the vehicle has an
airbag on-off switch that you can
use to manually turn on or off the
right front passenger airbag.
United States
Canada and Mexico
Page 114 of 542
Black plate (52,1)Chevrolet Silverado Owner Manual - 2013 - crc2 - 8/13/12
3-52 Seats and Restraints
use the vehicle's safety belts.
Instead use the vehicle's anchors
and child restraint attachments to
secure the restraints. Some
restraints also use another vehicle
anchor to secure a top tether.
Regular Cab Models
1. If the child restraint manufacturerrecommends that the top tether
be attached, attach and tighten
the top tether to the top tether
anchor, if your vehicle has one.
Refer to the child restraint
instructions and the following
steps:
1.1. Pull the passenger seatback forward by pulling
the recliner handle upward
to access the top tether
anchor. See Reclining
Seatbacks on page 3‑6 for
additional information.
1.2. Find the top tether anchor.
1.3. Remove the cover to expose the anchor. 1.4. Route, attach, and tighten
the top tether according to
your child restraint
instructions and the
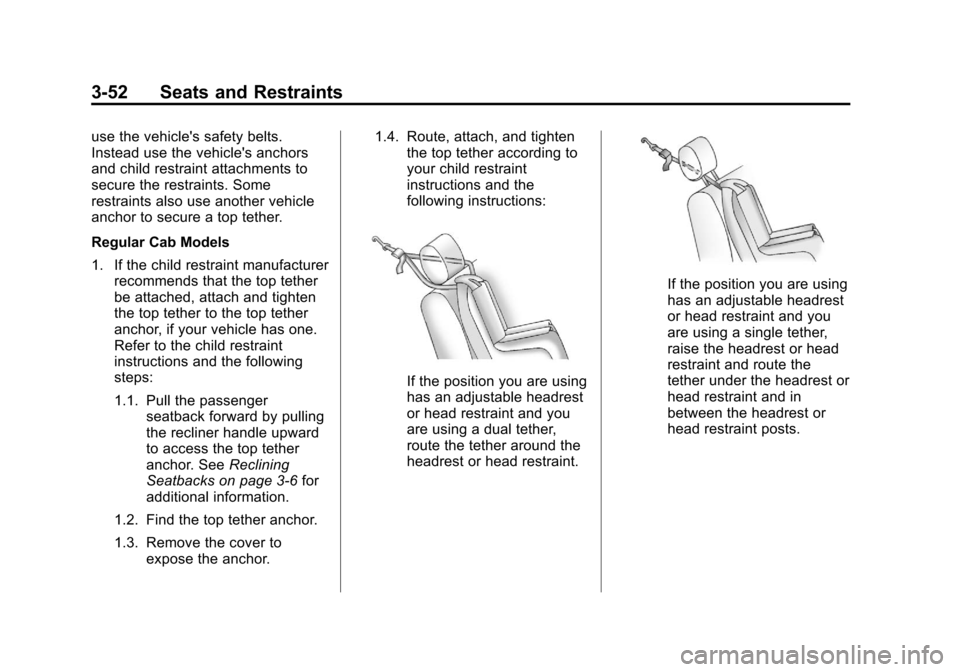
following instructions:
If the position you are using
has an adjustable headrest
or head restraint and you
are using a dual tether,
route the tether around the
headrest or head restraint.
If the position you are using
has an adjustable headrest
or head restraint and you
are using a single tether,
raise the headrest or head
restraint and route the
tether under the headrest or
head restraint and in
between the headrest or
head restraint posts.
Page 115 of 542
Black plate (53,1)Chevrolet Silverado Owner Manual - 2013 - crc2 - 8/13/12
Seats and Restraints 3-53
2. SeeSecuring Child Restraints
(Center Front Seat Position) on
page 3‑58 orSecuring Child
Restraints (Right Front Seat
Position) on page 3‑58 or
Securing Child Restraints (Rear
Seat Position) on page 3‑55 for
instructions on installing the
child restraint using the safety
belts.
3. Before placing a child in the child restraint, make sure it is
securely held in place. To check,
grasp the child restraint at the
LATCH path and attempt to
move it side-to-side and
back-and-forth. There should be
no more than 2.5 cm (1 in) of
movement for proper installation. Crew and Extended Cab Models
1. Attach and tighten the lower
attachments to the lower
anchors. If the child restraint
does not have lower
attachments or the desired
seating position does not have
lower anchors, secure the child
restraint with the top tether and
the safety belts. Refer to your
child restraint manufacturer
instructions and the instructions
in this manual.
1.1. Find the lower anchors for the desired seating
position.
1.2. Put the child restraint on the seat.
1.3. Attach and tighten the lower attachments on the child
restraint to the lower
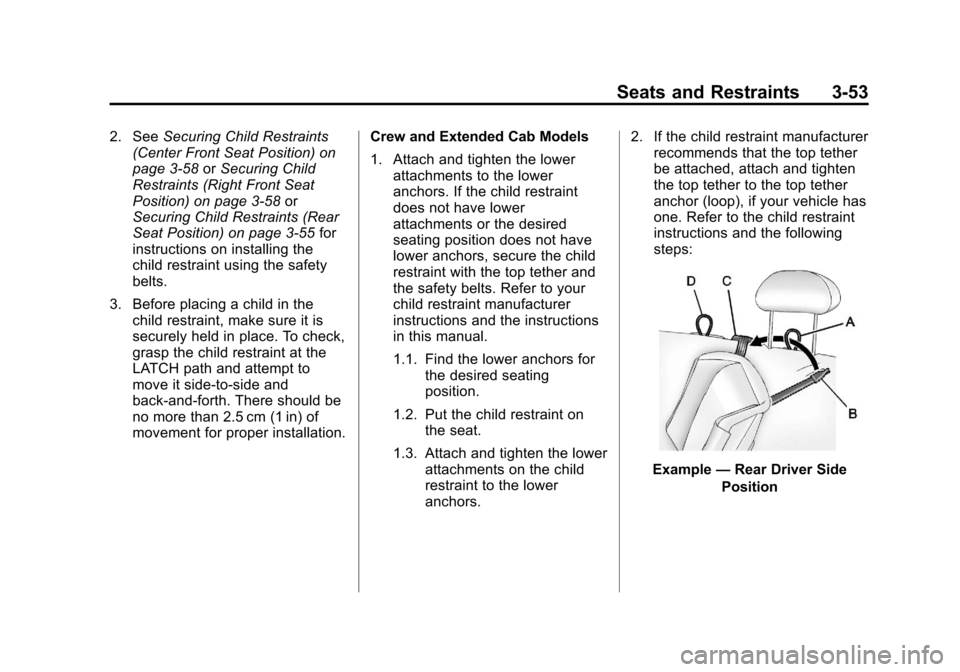
anchors. 2. If the child restraint manufacturer
recommends that the top tether
be attached, attach and tighten
the top tether to the top tether
anchor (loop), if your vehicle has
one. Refer to the child restraint
instructions and the following
steps:
Example —Rear Driver Side
Position
Page 134 of 542
Black plate (4,1)Chevrolet Silverado Owner Manual - 2013 - crc2 - 8/13/12
5-4 Instruments and Controls
3. Press and release¨to move up
one track within the selected
category.
b/g(Mute/Push to Talk): Press
to silence the vehicle speakers only.
Press again to turn the sound on.
For vehicles with Bluetooth or
OnStar systems, press and hold for
longer than two seconds to interact
with those systems. See Bluetooth
on page 7‑50 andOnStar Overview
on page 14‑1 for more information.
SRCE (Source/Voice
Recognition): Press to switch
between the radio and CD, and for
equipped vehicles, the DVD, front
auxiliary, and rear auxiliary.
For vehicles with the navigation
system, press and hold this button
for longer than one second to
initiate voice recognition. See “Voice
Recognition” in the Navigation
System manual for more
information.
¨(Seek): Press to go to the next
radio station while in AM, FM,
or SiriusXM
®.
For vehicles with or without a
navigation system:
Press
¨to go to the next track or
chapter while sourced to the CD or
DVD slot.
Press
¨to select a track or a folder
when navigating folders on an iPod
or USB device.
For vehicles with a navigation
system:
1. Press and hold
¨until a beep is
heard, to place the radio into
SCAN mode. A station will play
for five seconds before moving
to the next station.
2. To stop the SCAN function, press
¨again.
While listening to a CD/DVD, press
and hold
¨to quickly move forward
through the tracks. Release to stop
on the desired track. +
e:
Press to increase volume.
−
e: Press to decrease volume.
Horn
To sound the horn, press the center
pad on the steering wheel.
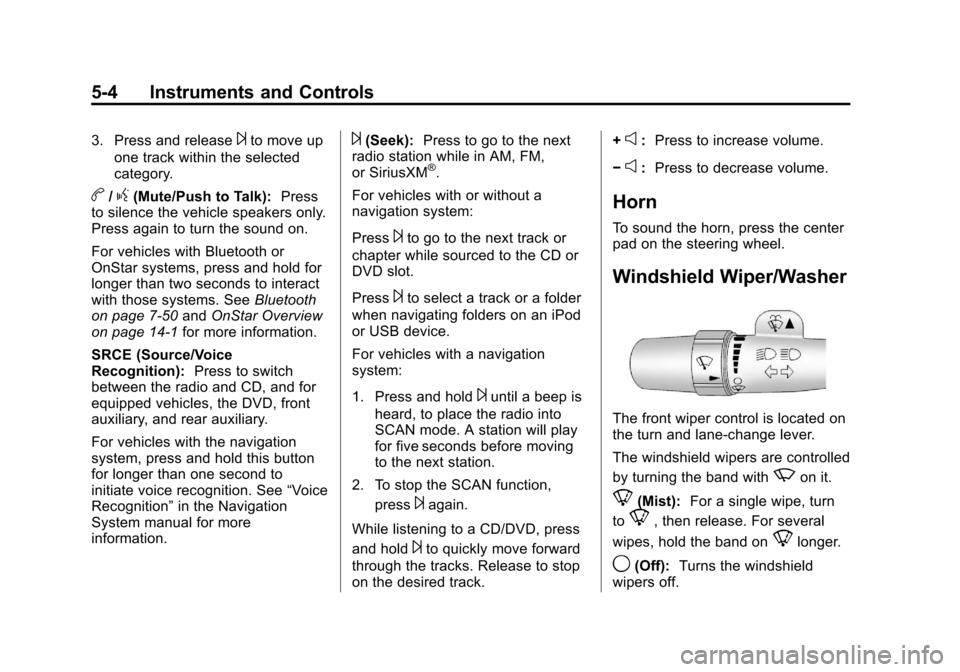
Windshield Wiper/Washer
The front wiper control is located on
the turn and lane-change lever.
The windshield wipers are controlled
by turning the band with
zon it.
8(Mist): For a single wipe, turn
to
8, then release. For several
wipes, hold the band on
8longer.
9(Off): Turns the windshield
wipers off.