2013 CHEVROLET SILVERADO fuel
[x] Cancel search: fuelPage 342 of 542
Black plate (74,1)Chevrolet Silverado Owner Manual - 2013 - crc2 - 8/13/12
9-74 Driving and Operating
Filling a Portable Fuel
Container
{WARNING
Filling a portable fuel container
while it is in the vehicle can cause
fuel vapors that can ignite either
by static electricity or other
means. You or others could be
badly burned and the vehicle
could be damaged. Always:
.Use approved fuel
containers.
.Remove container from
vehicle, trunk, or pickup bed
before filling.(Continued)
WARNING (Continued)
.Place container on the
ground.
.Place the nozzle inside the fill
opening of the container
before dispensing fuel, and
keep it in contact with the fill
opening until filling is
complete.
.Do not smoke while
pumping fuel.
Towing
General Towing
Information
Only use towing equipment that has
been designed for the vehicle.
Contact your dealer or trailering
dealer for assistance with preparing
the vehicle for towing a trailer. Read
the entire section before towing a
trailer.
For towing a disabled vehicle, see
Towing the Vehicle on page 10‑89.
For towing the vehicle behind
another vehicle such as a motor
home, seeRecreational Vehicle
Towing on page 10‑89.
Page 345 of 542
Black plate (77,1)Chevrolet Silverado Owner Manual - 2013 - crc2 - 8/13/12
Driving and Operating 9-77
WARNING (Continued)
wrong, the rig could start to move.
People can be injured, and both
the vehicle and the trailer can be
damaged. When possible, always
park the rig on a flat surface.
If parking the rig on a hill:
1. Press the brake pedal, but do not shift into P (Park) yet. Turn
the wheels into the curb if facing
downhill or into traffic if facing
uphill.
2. Have someone place chocks under the trailer wheels.
3. When the wheel chocks are in place, release the regular brakes
until the chocks absorb the load.
4. Reapply the brake pedal. Then apply the parking brake and shift
into P (Park).
5. Release the brake pedal.
Leaving After Parking on a Hill
1. Apply and hold the brake pedal.
2. Start the engine.
3. Shift into a gear.
4. Release the parking brake.
5. Let up on the brake pedal.
6. Drive slowly until the trailer is clear of the chocks.
7. Stop and have someone pick up and store the chocks.
Maintenance when Trailer
Towing
The vehicle needs service more
often when pulling a trailer. See
Maintenance Schedule on
page 11‑3. Things that are
especially important in trailer
operation are automatic
transmission fluid, engine oil, axle
lubricant, belts, cooling system, and
brake system. It is a good idea to
inspect these before and during
the trip. Check periodically to see that all
hitch nuts and bolts are tight.
Trailer Towing
If the vehicle has a diesel engine,
see the Duramax diesel supplement
for more information.
If the vehicle is a hybrid, see the
hybrid supplement for more
information.
If the vehicle is bi-fuel, see the
bi-fuel supplement for more
information.
Do not tow a trailer during break-in.
See
New Vehicle Break-In on
page 9‑23 for more information.
{WARNING
The driver can lose control when
pulling a trailer if the correct
equipment is not used or the
vehicle is not driven properly. For
example, if the trailer is too
heavy, the brakes may not work
(Continued)
Page 346 of 542
Black plate (78,1)Chevrolet Silverado Owner Manual - 2013 - crc2 - 8/13/12
9-78 Driving and Operating
WARNING (Continued)
well or even at all. The driver and
passengers could be seriously
injured. The vehicle may also be
damaged; the resulting repairs
would not be covered by the
vehicle warranty. Pull a trailer
only if all the steps in this section
have been followed. Ask your
dealer for advice and information
about towing a trailer with the
vehicle.
Notice: Pulling a trailer
improperly can damage the
vehicle and result in costly
repairs not covered by the vehicle
warranty. To pull a trailer
correctly, follow the advice in this
section and see your dealer for
important information about
towing a trailer with the vehicle.
To identify the trailering capacity of
the vehicle, read the information in
“Weight of the Trailer” later in this
section. Trailering is different than just
driving the vehicle by itself.
Trailering means changes in
handling, acceleration, braking,
durability, and fuel economy.
Successful, safe trailering takes
correct equipment, and it has to be
used properly.
The following information has many
time-tested, important trailering tips
and safety rules. Many of these are
important for your safety and that of
your passengers. So please read
this section carefully before pulling a
trailer.
Weight of the Trailer
How heavy can a trailer safely be?
It depends on how the rig is used.
Speed, altitude, road grades,
outside temperature, and how much
the vehicle is used to pull a trailer
are all important. It can depend on
any special equipment on the
vehicle, and the amount of tongue
weight the vehicle can carry. See
“Weight of the Trailer Tongue”
later
in this section for more information. Trailer weight rating (TWR) is
calculated assuming the tow vehicle
has only the driver but all required
trailering equipment. Weight of
additional optional equipment,
passengers, and cargo in the tow
vehicle must be subtracted from the
trailer weight rating.
For kingpin weight and trailer
tongue weight information, see
“Weight of the Trailer Tongue”
later
in this section.
Use the following chart to determine
how much the vehicle can weigh,
based upon the vehicle model and
options.
Weights listed apply for
conventional trailers and fifth-wheel
trailers unless otherwise noted.
Page 366 of 542
Black plate (98,1)Chevrolet Silverado Owner Manual - 2013 - crc2 - 8/13/12
9-98 Driving and Operating
ITBC must be disconnected. Do not
power both ITBC and aftermarket
controllers to control the trailer
brakes at the same time.
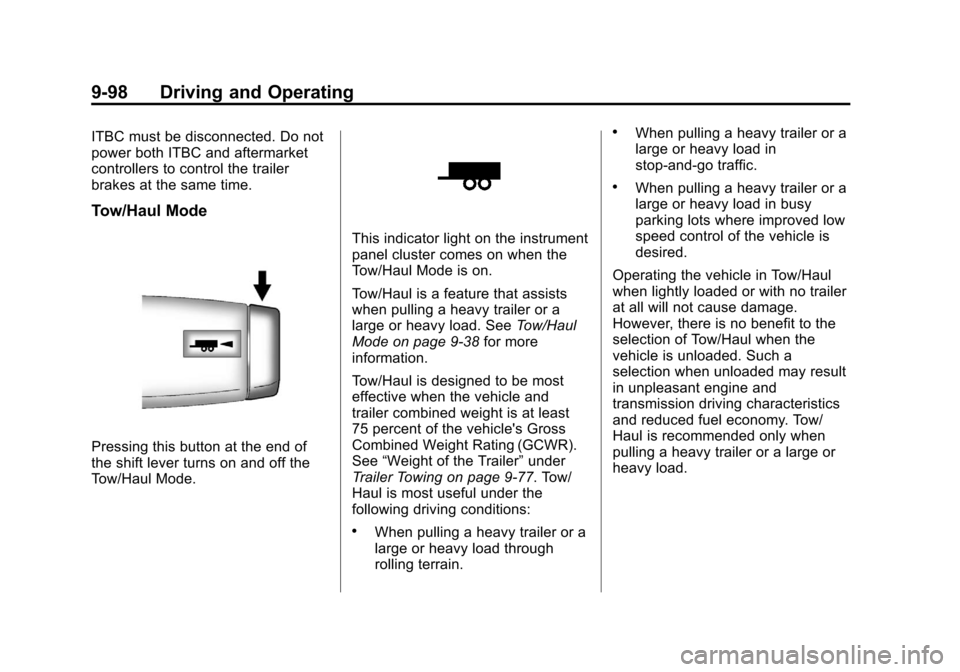
Tow/Haul Mode
Pressing this button at the end of
the shift lever turns on and off the
Tow/Haul Mode.
This indicator light on the instrument
panel cluster comes on when the
Tow/Haul Mode is on.
Tow/Haul is a feature that assists
when pulling a heavy trailer or a
large or heavy load. SeeTow/Haul
Mode on page 9‑38 for more
information.
Tow/Haul is designed to be most
effective when the vehicle and
trailer combined weight is at least
75 percent of the vehicle's Gross
Combined Weight Rating (GCWR).
See “Weight of the Trailer” under
Trailer Towing on page 9‑77. Tow/
Haul is most useful under the
following driving conditions:
.When pulling a heavy trailer or a
large or heavy load through
rolling terrain.
.When pulling a heavy trailer or a
large or heavy load in
stop-and-go traffic.
.When pulling a heavy trailer or a
large or heavy load in busy
parking lots where improved low
speed control of the vehicle is
desired.
Operating the vehicle in Tow/Haul
when lightly loaded or with no trailer
at all will not cause damage.
However, there is no benefit to the
selection of Tow/Haul when the
vehicle is unloaded. Such a
selection when unloaded may result
in unpleasant engine and
transmission driving characteristics
and reduced fuel economy. Tow/
Haul is recommended only when
pulling a heavy trailer or a large or
heavy load.
Page 374 of 542
Black plate (106,1)Chevrolet Silverado Owner Manual - 2013 - crc2 - 8/13/12
9-106 Driving and Operating
Here are some guidelines for safely
carrying a snow plow on the vehicle:
.Make sure the weight on the
front and rear axles does not
exceed the axle rating for each.
.For the front axle, if more cargo
or passengers must be carried,
appropriate counter ballast must
be installed rear of the rear axle.
Counter ballast must be properly
secured so it will not move
during driving.
.Follow the snow plow
manufacturer's
recommendations regarding rear
ballast. Rear ballast may be
required to ensure a proper front
and rear weight distribution ratio,
even though the actual weight at
the front axle may be less than
the front axle rating.
.The snow plow manufacturer or
installer can assist you in
determining the amount of rear
ballast required, to help make
sure the snowplow/vehicle
combination does not exceed
the GVW rating, the front and
rear axle ratings, and the front
and rear weight distribution ratio.
.The total vehicle must not
exceed the GVW rating.
Front axle reserve capacity is the
difference between the Gross Axle
Weight Rating (GAWR) and the front
axle weight of the vehicle with full
fuel and passengers. Basically, it is
the amount of weight that can be
added to the front axle before
reaching the front GAWR.
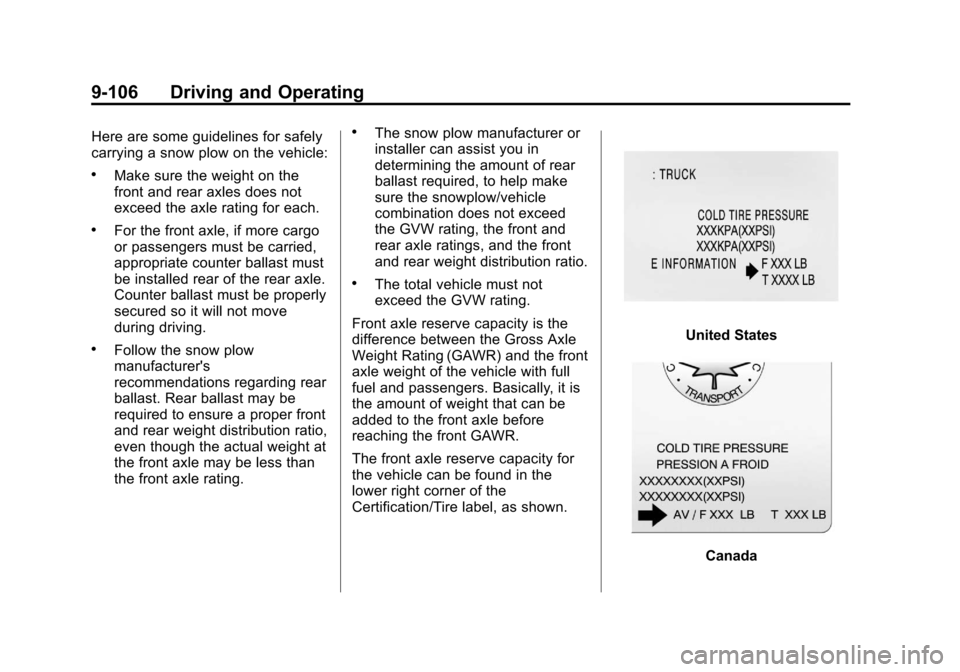
The front axle reserve capacity for
the vehicle can be found in the
lower right corner of the
Certification/Tire label, as shown.
United States
Canada
Page 376 of 542

Black plate (108,1)Chevrolet Silverado Owner Manual - 2013 - crc2 - 8/13/12
9-108 Driving and Operating
WARNING (Continued)
rear weight distribution ratio is
necessary to provide proper
braking performance.
Total vehicle reserve capacity is the
difference between the GVWR and
the weight of the truck with full fuel
and passengers. It is the amount of
weight that can be added to the
vehicle before reaching the GVWR.
Keep in mind that reserve capacity
numbers are intended as a guide
when selecting the amount of
equipment or cargo the truck can
carry. If unsure of the vehicle's front,
rear, or total weight, go to a weigh
station and weigh the vehicle. Your
dealer can also help with this. The total vehicle reserve capacity
for the vehicle can be found in the
lower right corner of the
Certification/Tire label as shown
previously.
See your dealer for additional
advice and information about using
a snow plow on the vehicle. Also,
see
Vehicle Load Limits on
page 9‑15.
Emergency Roof Lamp
Provisions
Vehicles with the RPO VYU snow
plow prep package also have an
emergency roof lamp provision
package, RPO TRW. Wiring for the
emergency roof lamp is provided
above the overhead console. See
Auxiliary Roof-Mounted Lamp on
page 6‑6 for switch location.
Pickup Conversion to
Chassis Cab
We are aware that some vehicle
owners might consider having the
pickup box removed and a
commercial or recreational body
installed. Owners should be aware
that, as manufactured, there are
differences between a chassis cab
and a pickup with the box removed
which could affect vehicle safety.
The components necessary to adapt
a pickup to permit its safe use with
a specialized body should be
installed by the body builder.
Page 383 of 542
Black plate (7,1)Chevrolet Silverado Owner Manual - 2013 - crc2 - 8/13/12
Vehicle Care 10-7
Checking Engine Oil
It is a good idea to check the engine
oil level at each fuel fill. In order to
get an accurate reading, the vehicle
must be on level ground. The
engine oil dipstick handle is a loop.
SeeEngine Compartment Overview
on page 10‑5 for the location of the
engine oil dipstick.
Obtaining an accurate oil level
reading is essential:
1. If the engine has been running recently, turn off the engine and
allow several minutes for the oil
to drain back into the oil pan.
Checking the oil level too soon
after engine shutoff will not
provide an accurate oil level
reading.
{WARNING
The engine oil dipstick handle
may be hot; it could burn you.
Use a towel or glove to touch the
dipstick handle. 2. Pull out the dipstick and clean it
with a paper towel or cloth, then
push it back in all the way.
Remove it again, keeping the tip
down, and check the level.
When to Add Engine Oil
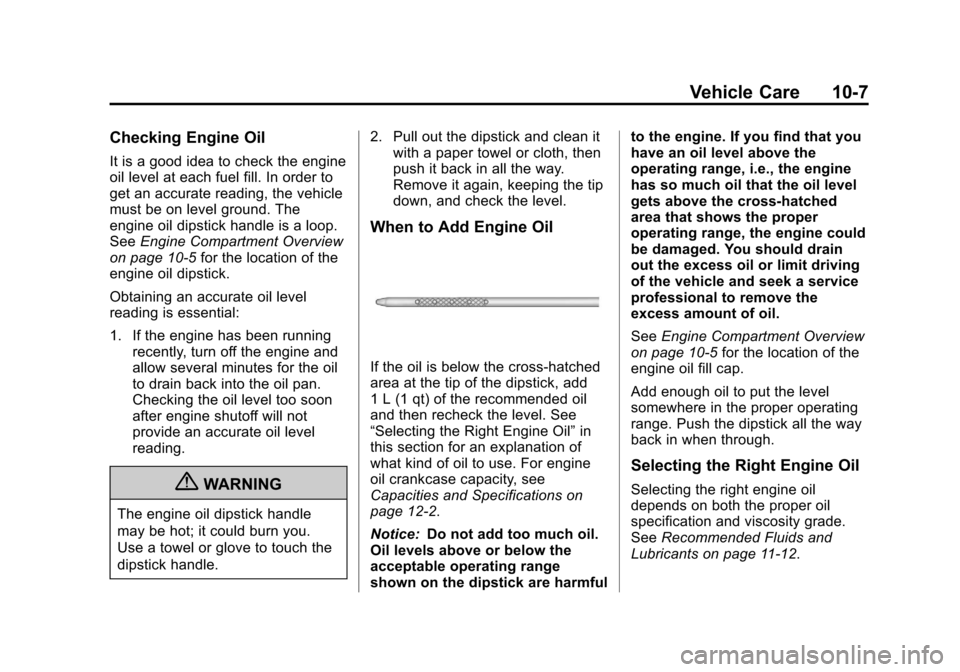
If the oil is below the cross-hatched
area at the tip of the dipstick, add
1 L (1 qt) of the recommended oil
and then recheck the level. See
“Selecting the Right Engine Oil” in
this section for an explanation of
what kind of oil to use. For engine
oil crankcase capacity, see
Capacities and Specifications on
page 12‑2.
Notice: Do not add too much oil.
Oil levels above or below the
acceptable operating range
shown on the dipstick are harmful to the engine. If you find that you
have an oil level above the
operating range, i.e., the engine
has so much oil that the oil level
gets above the cross-hatched
area that shows the proper
operating range, the engine could
be damaged. You should drain
out the excess oil or limit driving
of the vehicle and seek a service
professional to remove the
excess amount of oil.
See
Engine Compartment Overview
on page 10‑5 for the location of the
engine oil fill cap.
Add enough oil to put the level
somewhere in the proper operating
range. Push the dipstick all the way
back in when through.
Selecting the Right Engine Oil
Selecting the right engine oil
depends on both the proper oil
specification and viscosity grade.
See Recommended Fluids and
Lubricants on page 11‑12.
Page 389 of 542
Black plate (13,1)Chevrolet Silverado Owner Manual - 2013 - crc2 - 8/13/12
Vehicle Care 10-13
Change the fluid and filter at the
scheduled maintenance intervals
listed inMaintenance Schedule on
page 11‑3. Be sure to use the
transmission fluid listed in
Recommended Fluids and
Lubricants on page 11‑12.
How to Check Automatic
Transmission Fluid
Notice: Too much or too little
fluid can damage the
transmission. Too much can
mean that some of the fluid could
come out and fall on hot engine
parts or exhaust system parts,
starting a fire. Too little fluid
could cause the transmission to
overheat. Be sure to get an
accurate reading if checking the
transmission fluid. Before checking the fluid level,
prepare the vehicle as follows:
1. Start the engine and park the
vehicle on a level surface. Keep
the engine running.
2. Apply the parking brake and place the shift lever in P (Park).
3. With your foot on the brake pedal, move the shift lever
through each gear range,
pausing for about three seconds
in each range. Then, move the
shift lever back to P (Park).
4. Allow the engine to idle (500 –
800 rpm) for at least 1 minute.
Slowly release the brake pedal.
5. Keep the engine running and press the Trip/Fuel button or trip
odometer reset stem until
TRANS TEMP (Transmission
Temperature) displays on the
Driver Information Center (DIC). 6. Using the TRANS TEMP
reading, determine and perform
the appropriate check
procedure. If the TRANS TEMP
reading is not within the required
temperature ranges, allow the
vehicle to cool, or operate the
vehicle until the appropriate
transmission fluid temperature is
reached.
Cold Check Procedure
Use this procedure only as a
reference to determine if the
transmission has enough fluid to be
operated safely until a hot check
procedure can be made. The hot
check procedure is the most
accurate method to check the fluid
level. Perform the hot check
procedure at the first opportunity.
Use this cold check procedure to
check fluid level when the
transmission temperature is
between 27°C and 32°C (80°F
and 90°F).