2013 CHEVROLET SILVERADO manual radio set
[x] Cancel search: manual radio setPage 243 of 542

Black plate (43,1)Chevrolet Silverado Owner Manual - 2013 - crc2 - 8/13/12
Infotainment System 7-43
Remote Control
To use the remote control, aim it at
the transmitter window at the rear of
the RSE overhead console and
press the desired button. Direct
sunlight or very bright light could
affect the ability of the RSE
transmitter to receive signals from
the remote control. If the remote
control does not seem to be
working, the batteries might need to
be replaced. See“Battery
Replacement” later in this section. Objects blocking the line of sight
could also affect the function of the
remote control.
If a CD or DVD is in the Radio DVD
slot, the remote control
O(power)
button can be used to turn on the
video screen display and start the
disc. The radio can also turn on the
video screen display. See Operation
on page 7‑7 for more information.
Notice: Storing the remote
control in a hot area or in direct
sunlight can damage it, and the
repairs will not be covered by the
warranty. Storage in extreme cold
can weaken the batteries. Keep
the remote control stored in a
cool, dry place.
If the remote control becomes lost
or damaged, a new universal
remote control can be purchased.
If this happens, make sure the
universal remote control uses a
code set of Toshiba
®. Remote Control Buttons
O(Power):
Press this button to
turn the video screen on and off.
P(Illumination): Press this button
to turn the remote control backlight
on. The backlight automatically
times out after 7 to 10 seconds if no
other button is pressed while the
backlight is on.
v(Title): Press this button to
return the DVD to the main menu of
the DVD. This function could vary
for each disc.
y(Main Menu): Press this button
to access the DVD menu. The DVD
menu is different on every DVD.
Use the navigation arrows to move
the cursor around the DVD menu.
After making a selection press the
enter button. This button only
operates when using a DVD.
n,q,p,o(Menu Navigation
Arrows): Use the arrow buttons to
navigate through a menu.
Page 248 of 542

Black plate (48,1)Chevrolet Silverado Owner Manual - 2013 - crc2 - 8/13/12
7-48 Infotainment System
Cleaning the Video Screen
When cleaning the video screen,
use only a clean cloth dampened
with clean water. Use care when
directly touching or cleaning the
screen, as damage could result.
Rear Seat Audio (RSA)
System
Vehicles with this feature allow the
rear seat passengers to listen to
and control any of the music
sources: radio, CDs, DVDs, or other
auxiliary sources. However, the rear
seat passengers can only control
the music sources the front seat
passengers are not listening to
(except on some radios where dual
control is allowed). For example,
rear seat passengers can control
and listen to a CD through the
headphones, while the driver listens
to the radio through the front
speakers. The rear seat passengers
have control of the volume for each
set of headphones.The radio functionality is controlled
by both the RSA and the front radio.
Only one band can be tuned to at
one time. Changing the band on the
RSA or the front radio will change
the band on the other system,
if they are both sourced to the radio.
The RSA functions can be used
even while the main radio is off. The
front audio system will display the
headphone icon when the RSA is
on, and it will disappear from the
display when the RSA is off.
Audio can be heard through wired
headphones (not included) plugged
into the jacks on the RSA. If the
vehicle has this feature, audio can
also be heard on Channel 2 of the
wireless headphones.
Depending on the audio system, the
rear speakers may continue to play
when the RSA audio is active
through the headphones.
To listen to an iPod or portable
audio device through the RSA,
attach the iPod or portable audio
device to the front auxiliary input (if
available), located on the front audio
system. Turn the iPod on, then
choose the front auxiliary input with
the RSA SRCE button.
P(Power):
Press this button to
turn the RSA on or off.
Volume: To increase or decrease
headphone volume, turn the knobs
located next to the SRCE or PROG
buttons. The left knob controls the
left headphones and the right knob
controls the right headphones.
Page 249 of 542

Black plate (49,1)Chevrolet Silverado Owner Manual - 2013 - crc2 - 8/13/12
Infotainment System 7-49
SRCE (Source):Press this button
to switch between the radio (AM‐
FM), XM™ (if equipped), CD, and if
the vehicle has these features,
DVD, front auxiliary, and rear
auxiliary.
© ¨(Seek): When listening to FM,
AM, or XM™ (if equipped), press
the seek arrows to go to the
previous or to the next station or
channels and stay there. This
function is inactive, with some
radios, if the front seat passengers
are listening to the radio.
Press and hold either seek arrow
until the display flashes, to tune to
an individual station. The display
stops flashing after the buttons have
not been pushed for more than
two seconds. This function is
inactive, with some radios, if the
front seat passengers are listening
to the radio. While listening to a disc, press the
left seek arrow to go back to the
start of the current track or chapter
(if more than 10 seconds have
played). Press the right seek arrow
to go the next track or chapter on
the disc. This function is inactive,
with some radios, if the front seat
passengers are listening to the disc.
While a DVD video menu is being
displayed, press either seek arrow
to perform a cursor up or down on
the menu. Hold either seek arrow to
perform a cursor left or right on
the menu.
PROG (Program):
Press this
button to go to the next preset radio
station or channel set on the main
radio. This function is inactive, with
some radios, if the front seat
passengers are listening to the
radio. While a CD or DVD‐A disc is
playing, press this button to go to
the beginning of the CD or DVD‐A.
This function is inactive, with some
radios, if the front seat passengers
are listening to the CD or DVD‐A.
While a disc is playing in the CD or
DVD changer, press this button to
select the next disc, if multiple discs
are loaded. This function is inactive,
with some radios, if the front seat
passengers are listening to the disc.
While a DVD video menu is being
displayed, press the PROG button
to perform the menu function, Enter.
Page 270 of 542

Black plate (2,1)Chevrolet Silverado Owner Manual - 2013 - crc2 - 8/13/12
9-2 Driving and Operating
Fuel E85 (85% Ethanol) . . . . . 9-71
Filling the Tank . . . . . . . . . . . . . . 9-72
Filling a Portable FuelContainer . . . . . . . . . . . . . . . . . . . 9-74
Towing
General TowingInformation . . . . . . . . . . . . . . . . . 9-74
Driving Characteristics and Towing Tips . . . . . . . . . . . . . . . . 9-75
Trailer Towing . . . . . . . . . . . . . . . . 9-77
Towing Equipment . . . . . . . . . . . 9-93
Trailer Sway Control (TSC) . . . . . . . . . . . . . 9-104
Conversions and Add-Ons
Add-On ElectricalEquipment . . . . . . . . . . . . . . . . 9-105
Adding a Snow Plow or Similar Equipment . . . . . . . . 9-105
Pickup Conversion to Chassis Cab . . . . . . . . . . . . . . 9-108
Driving Information
Distracted Driving
Distraction comes in many forms
and can take your focus from the
task of driving. Exercise good
judgment and do not let other
activities divert your attention away
from the road. Many local
governments have enacted laws
regarding driver distraction. Become
familiar with the local laws in
your area.
To avoid distracted driving, always
keep your eyes on the road, hands
on the wheel, and mind on the drive.
.Do not use a phone in
demanding driving situations.
Use a hands-free method to
place or receive necessary
phone calls.
.Watch the road. Do not read,
take notes, or look up
information on phones or other
electronic devices.
.Designate a front seat
passenger to handle potential
distractions.
.Become familiar with vehicle
features before driving, such as
programming favorite radio
stations and adjusting climate
control and seat settings.
Program all trip information into
any navigation device prior to
driving.
.Wait until the vehicle is parked
to retrieve items that have fallen
to the floor.
.Stop or park the vehicle to tend
to children.
.Keep pets in an appropriate
carrier or restraint.
.Avoid stressful conversations
while driving, whether with a
passenger or on a cell phone.
Page 296 of 542

Black plate (28,1)Chevrolet Silverado Owner Manual - 2013 - crc2 - 8/13/12
9-28 Driving and Operating
Fast Idle System
If the vehicle has this feature it is
available only with cruise control.
The manual fast idle switch is
operated using the cruise control
buttons located on the left hand side
of the steering wheel.
This system can be used to
increase engine idle speed
whenever the following conditions
are met:
.The parking brake is set.
.The brake pedal is not pressed.
.The vehicle must not be moving
and the accelerator must not be
pressed.
To control the fast idle:
.To enable the Fast Idle System,
press and release the cruise
control on/off button and ensure
that the switch indicator light
is lit.
.Press and release the cruise
control SET-button. Engine
speed will be held at
approximately 1200 RPM.
When the fast idle is active the
Driver Information Center (DIC) will
display “FAST IDLE ON.”
One of the following actions will turn
off the fast idle:
.Pressing the brake.
.Selecting the cruise control
cancel button.
.Releasing the parking brake.
.The transmission shift lever is
moved out of P (Park) or
N (Neutral).
.Selecting the cruise control on/
off button when it was
previously on.
.Pressing the cruise control
SET-button a second time.
.Pressing the accelerator greater
than a quarter of the way down.
.Turning the ignition switch to the
LOCK/OFF position.
Retained Accessory
Power (RAP)
The following vehicle accessories
can be used for up to 10 minutes
after the engine is turned off:
.Audio System
.Power Windows
.OnStar System (if equipped)
.Sunroof (if equipped)
These features work when the key
is in ON/RUN or ACC/
ACCESSORY. Once the key is
turned from ON/RUN to LOCK/OFF,
the windows and sunroof continue
to work up to 10 minutes until any
door is opened. The radio continues
to work for up to 10 minutes or until
the driver door is opened.
Page 331 of 542

Black plate (63,1)Chevrolet Silverado Owner Manual - 2013 - crc2 - 8/13/12
Driving and Operating 9-63
the rear bumper. This distance may
be less during warmer or humid
weather.
Turning the System On and Off
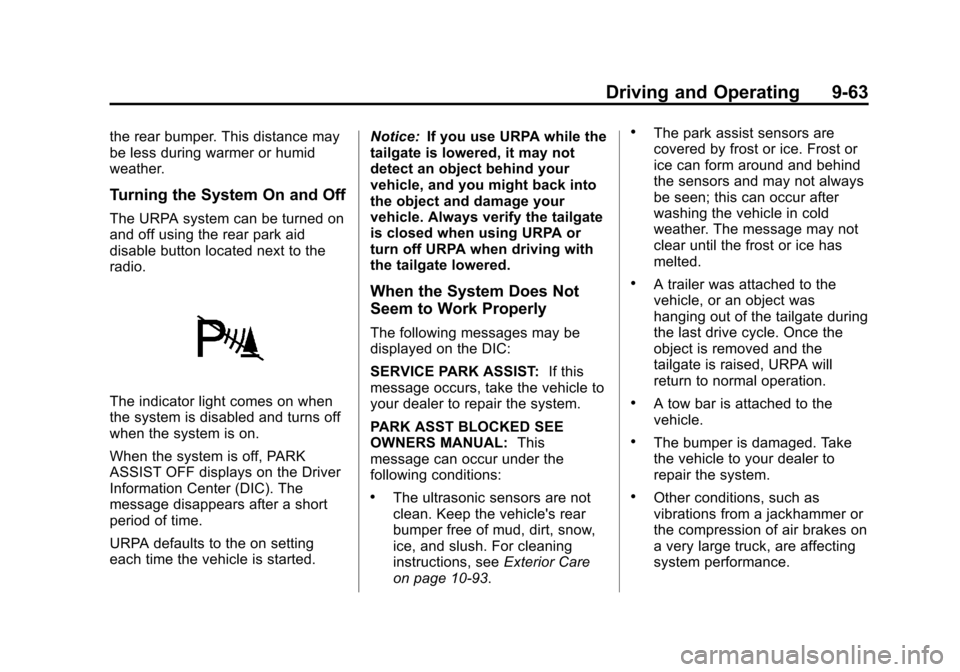
The URPA system can be turned on
and off using the rear park aid
disable button located next to the
radio.
The indicator light comes on when
the system is disabled and turns off
when the system is on.
When the system is off, PARK
ASSIST OFF displays on the Driver
Information Center (DIC). The
message disappears after a short
period of time.
URPA defaults to the on setting
each time the vehicle is started.Notice:
If you use URPA while the
tailgate is lowered, it may not
detect an object behind your
vehicle, and you might back into
the object and damage your
vehicle. Always verify the tailgate
is closed when using URPA or
turn off URPA when driving with
the tailgate lowered.
When the System Does Not
Seem to Work Properly
The following messages may be
displayed on the DIC:
SERVICE PARK ASSIST: If this
message occurs, take the vehicle to
your dealer to repair the system.
PARK ASST BLOCKED SEE
OWNERS MANUAL: This
message can occur under the
following conditions:
.The ultrasonic sensors are not
clean. Keep the vehicle's rear
bumper free of mud, dirt, snow,
ice, and slush. For cleaning
instructions, see Exterior Care
on page 10‑93.
.The park assist sensors are
covered by frost or ice. Frost or
ice can form around and behind
the sensors and may not always
be seen; this can occur after
washing the vehicle in cold
weather. The message may not
clear until the frost or ice has
melted.
.A trailer was attached to the
vehicle, or an object was
hanging out of the tailgate during
the last drive cycle. Once the
object is removed and the
tailgate is raised, URPA will
return to normal operation.
.A tow bar is attached to the
vehicle.
.The bumper is damaged. Take
the vehicle to your dealer to
repair the system.
.Other conditions, such as
vibrations from a jackhammer or
the compression of air brakes on
a very large truck, are affecting
system performance.
Page 434 of 542

Black plate (58,1)Chevrolet Silverado Owner Manual - 2013 - crc2 - 8/13/12
10-58 Vehicle Care
Tire Pressure for
High-Speed Operation
{WARNING
Driving at high speeds, 160 km/h
(100 mph) or higher, puts an
additional strain on tires.
Sustained high-speed driving
causes excessive heat buildup
and can cause sudden tire failure.
You could have a crash and you
or others could be killed. Some
high-speed rated tires require
inflation pressure adjustment for
high-speed operation. When
speed limits and road conditions
are such that a vehicle can be
driven at high speeds, make sure
the tires are rated for high-speed
operation, in excellent condition,
and set to the correct cold tire
inflation pressure for the
vehicle load.Vehicles with P265/70R17 or P275/
55R20 size tires require inflation
pressure adjustment when driving
the vehicle at speeds of 160 km/h
(100 mph) or higher. Set the cold tire
inflation pressure to 20 kPa (3 psi)
above the recommended cold tire
pressure shown on the Tire and
Loading Information label.
Return the tires to the
recommended cold tire inflation
pressure when high-speed driving
has ended. See
Vehicle Load Limits
on page 9‑15 andTire Pressure on
page 10‑56.
Tire Pressure Monitor
System
The Tire Pressure Monitor System
(TPMS) uses radio and sensor
technology to check tire pressure
levels. The TPMS sensors monitor
the air pressure in your tires and
transmit tire pressure readings to a
receiver located in the vehicle. Each tire, including the spare (if
provided), should be checked
monthly when cold and inflated to
the inflation pressure recommended
by the vehicle manufacturer on the
vehicle placard or tire inflation
pressure label. (If your vehicle has
tires of a different size than the size
indicated on the vehicle placard or
tire inflation pressure label, you
should determine the proper tire
inflation pressure for those tires.)
As an added safety feature, your
vehicle has been equipped with a
tire pressure monitoring system
(TPMS) that illuminates a low tire
pressure telltale when one or more
of your tires is significantly
under-inflated.
Accordingly, when the low tire
pressure telltale illuminates, you
should stop and check your tires as
soon as possible, and inflate them
to the proper pressure. Driving on a
significantly under-inflated tire
causes the tire to overheat and can
lead to tire failure. Under-inflation
also reduces fuel efficiency and tire
Page 437 of 542

Black plate (61,1)Chevrolet Silverado Owner Manual - 2013 - crc2 - 8/13/12
Vehicle Care 10-61
.The TPMS sensor matching
process was not done or not
completed successfully after
rotating the tires. The
malfunction light and the DIC
message should go off after
successfully completing the
sensor matching process. See
"TPMS Sensor Matching
Process" later in this section.
.One or more TPMS sensors are
missing or damaged. The
malfunction light and the DIC
message should go off when the
TPMS sensors are installed and
the sensor matching process is
performed successfully. See
your dealer for service.
.Replacement tires or wheels do
not match the original equipment
tires or wheels. Tires and wheels
other than those recommended
could prevent the TPMS from
functioning properly. SeeBuying
New Tires on page 10‑66.
.Operating electronic devices or
being near facilities using radio
wave frequencies similar to the
TPMS could cause the TPMS
sensors to malfunction.
If the TPMS is not functioning
properly, it cannot detect or signal a
low tire condition. See your dealer
for service if the TPMS malfunction
light and DIC message come on
and stay on.
TPMS Sensor Matching
Process
Each TPMS sensor has a unique
identification code. The identification
code needs to be matched to a new
tire/wheel position after rotating the
vehicle’s tires or replacing one or
more of the TPMS sensors. Also,
the TPMS sensor matching process
should be performed after replacing
a spare tire with a road tire
containing the TPMS sensor. The
malfunction light and the DIC
message should go off at the next
ignition cycle. The sensors are
matched to the tire/wheel positions, using a TPMS relearn tool, in the
following order: driver side front tire,
passenger side front tire, passenger
side rear tire, and driver side rear.
See your dealer for service or to
purchase a relearn tool.
There are two minutes to match the
first tire/wheel position, and
five minutes overall to match all four
tire/wheel positions. If it takes
longer, the matching process stops
and must be restarted.
The TPMS sensor matching
process is:
1. Set the parking brake.
2. Turn the ignition to ON/RUN with
the engine off.